- Published on
Advanced Guide: Build A Meetings - Table With Tailwind CSS
- What is Tailwind CSS?
- The description of Meetings - Table UI component
- Why use Tailwind CSS to create a Meetings - Table UI component?
- The preview of Meetings - Table UI component
- The source code of Meetings - Table UI component
- How to create a Meetings - Table with Tailwind CSS?
- Step 1: Set up the HTML structure
- Step 2: Add Tailwind CSS classes
- Step 3: Add dynamic data
- Conclusion
In today's world, where remote work and virtual meetings are becoming more and more common, having a well-designed meetings table is essential for any web application. In this article, we will guide you through the process of building a Meetings - Table UI component using Tailwind CSS.
What is Tailwind CSS?
Tailwind CSS is a utility-first CSS framework that provides a set of pre-defined CSS classes that can be used to style HTML elements. It allows developers to quickly build responsive and customizable user interfaces without writing any custom CSS code.
The description of Meetings - Table UI component
The Meetings - Table UI component is a table that displays information about meetings, such as the meeting name, date, time, and attendees. It is a common UI component used in web applications that manage meetings and schedules.
Why use Tailwind CSS to create a Meetings - Table UI component?
Tailwind CSS provides a set of pre-defined CSS classes that can be used to style HTML elements. This makes it easy to create a consistent and responsive UI without writing any custom CSS code. Additionally, Tailwind CSS provides a large number of utility classes that can be used to customize the appearance of the Meetings - Table UI component.
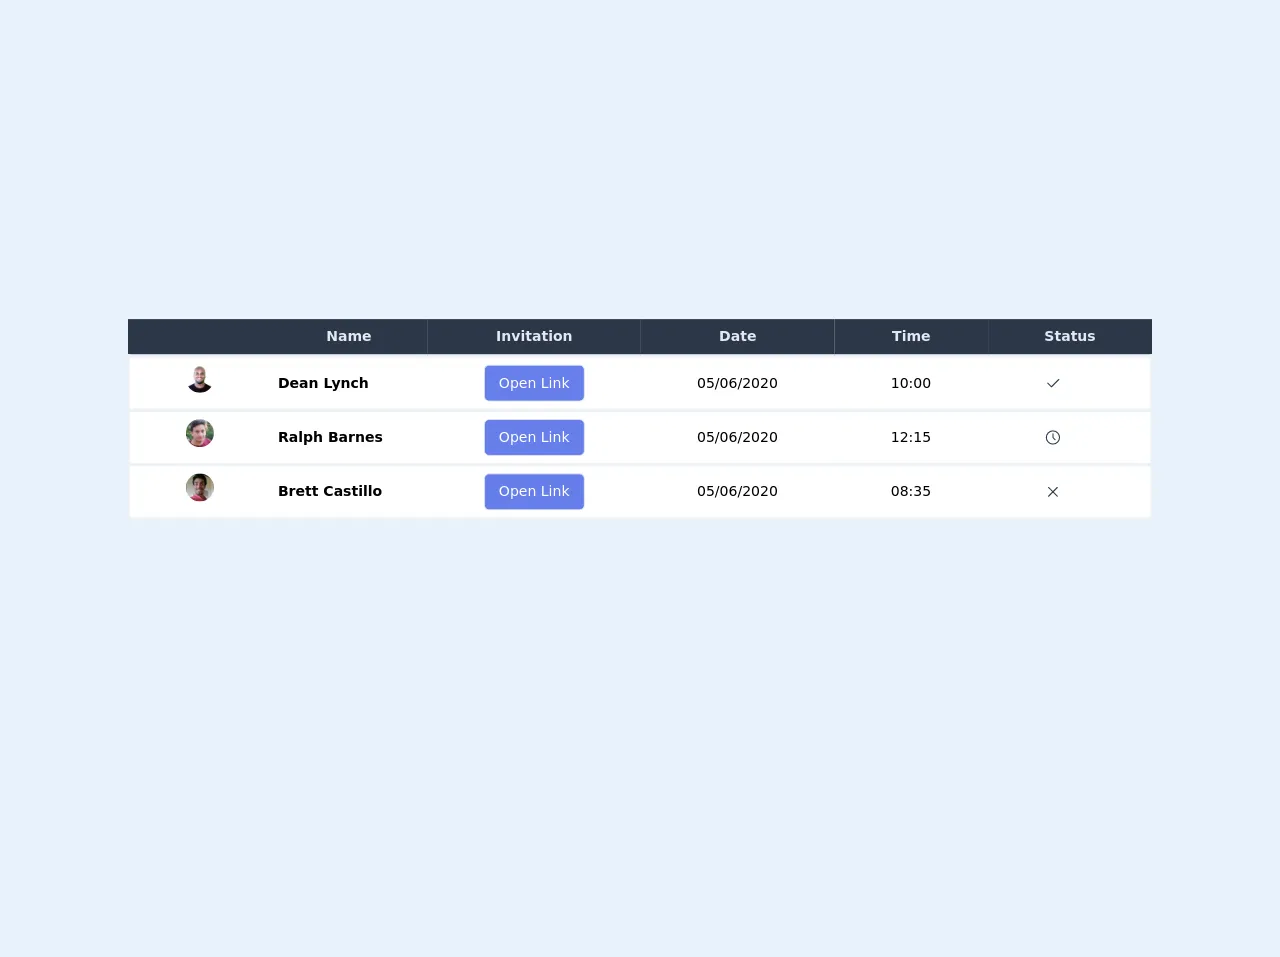
The preview of Meetings - Table UI component
To give you an idea of what the Meetings - Table UI component will look like, here is a preview:
Free download of the Meetings - Table's source code
The source code of Meetings - Table UI component
To create the Meetings - Table UI component, we will use HTML and Tailwind CSS classes. Here is the source code:
<div>
      <table class="min-w-full table-auto">
        <thead class="justify-between">
          <tr class="bg-gray-800">
            <th class="px-16 py-2">
              <span class="text-gray-300"></span>
            </th>
            <th class="px-16 py-2">
              <span class="text-gray-300">Name</span>
            </th>
            <th class="px-16 py-2">
              <span class="text-gray-300">Invitation</span>
            </th>
            <th class="px-16 py-2">
              <span class="text-gray-300">Date</span>
            </th>

            <th class="px-16 py-2">
              <span class="text-gray-300">Time</span>
            </th>

            <th class="px-16 py-2">
              <span class="text-gray-300">Status</span>
            </th>
          </tr>
        </thead>
        <tbody class="bg-gray-200">
          <tr class="bg-white border-4 border-gray-200">
            <td class="px-16 py-2 flex flex-row items-center">
              <img
                class="h-8 w-8 rounded-full object-cover "
                src="https://randomuser.me/api/portraits/men/30.jpg"
                alt=""
              />
            </td>
            <td>
              <span class="text-center ml-2 font-semibold">Dean Lynch</span>
            </td>
            <td class="px-16 py-2">
              <button class="bg-indigo-500 text-white px-4 py-2 border rounded-md hover:bg-white hover:border-indigo-500 hover:text-black ">
                Open Link
              </button>
            </td>
            <td class="px-16 py-2">
              <span>05/06/2020</span>
            </td>
            <td class="px-16 py-2">
              <span>10:00</span>
            </td>

            <td class="px-16 py-2">
              <span class="text-green-500">
                <svg
                  xmlns="http://www.w3.org/2000/svg"
                  class="w-5 h5 "
                  viewBox="0 0 24 24"
                  stroke-width="1.5"
                  stroke="#2c3e50"
                  fill="none"
                  stroke-linecap="round"
                  stroke-linejoin="round"
                >
                  <path stroke="none" d="M0 0h24v24H0z" />
                  <path d="M5 12l5 5l10 -10" />
                </svg>
              </span>
            </td>
          </tr>
          <tr class="bg-white border-4 border-gray-200">
            <td class="px-16 py-2 flex flex-row items-center">
            <img
                  class="h-8 w-8 rounded-full object-cover "
                  src="https://randomuser.me/api/portraits/men/76.jpg"
                  alt=""
                />
            </td>
            <td>
              <span class="text-center ml-2 font-semibold">Ralph Barnes</span>
            </td>
            <td class="px-16 py-2">
              <button class="bg-indigo-500 text-white px-4 py-2 border rounded-md hover:bg-white hover:border-indigo-500 hover:text-black ">
                Open Link
              </button>
            </td>
            <td class="px-16 py-2">
              <span>05/06/2020</span>
            </td>
            <td class="px-16 py-2">
              <span>12:15</span>
            </td>

            <td class="px-16 py-2">
              <span class="text-yellow-500">
                <svg
                  xmlns="http://www.w3.org/2000/svg"
                  class="w-5 h-5"
                  viewBox="0 0 24 24"
                  stroke-width="1.5"
                  stroke="#2c3e50"
                  fill="none"
                  stroke-linecap="round"
                  stroke-linejoin="round"
                >
                  <path stroke="none" d="M0 0h24v24H0z" />
                  <circle cx="12" cy="12" r="9" />
                  <polyline points="12 7 12 12 15 15" />
                </svg>
              </span>
            </td>
          </tr>
          <tr class="bg-white border-4 border-gray-200">
            <td class="px-16 py-2 flex flex-row items-center">
            <img
                  class="h-8 w-8 rounded-full object-cover "
                  src="https://randomuser.me/api/portraits/men/38.jpg"
                  alt=""
                />
            </td>
            <td>
              <span class="text-center ml-2 font-semibold">Brett Castillo</span>
            </td>
            <td class="px-16 py-2">
              <button class="bg-indigo-500 text-white px-4 py-2 border rounded-md hover:bg-white hover:border-indigo-500 hover:text-black ">
                Open Link
              </button>
            </td>
            <td class="px-16 py-2">
              <span>05/06/2020</span>
            </td>
            <td class="px-16 py-2">
              <span>08:35</span>
            </td>

            <td class="px-16 py-2">
              <span class="text-yellow-500">
                <svg
                  xmlns="http://www.w3.org/2000/svg"
                  class="w-5 h-5"
                  viewBox="0 0 24 24"
                  stroke-width="1.5"
                  stroke="#2c3e50"
                  fill="none"
                  stroke-linecap="round"
                  stroke-linejoin="round"
                >
                  <path stroke="none" d="M0 0h24v24H0z" />
                  <line x1="18" y1="6" x2="6" y2="18" />
                  <line x1="6" y1="6" x2="18" y2="18" />
                </svg>
              </span>
            </td>
          </tr>
        </tbody>
      </table>
    </div>
How to create a Meetings - Table with Tailwind CSS?
To create the Meetings - Table UI component, follow these steps:
Step 1: Set up the HTML structure
First, we need to set up the HTML structure for the Meetings - Table UI component. We will use a <table> element to create the table and <thead>, <tbody>, and <tfoot> elements to create the table sections.
<table class="min-w-full divide-y divide-gray-200">
  <thead>
    <tr>
      <th class="px-6 py-3 bg-gray-50 text-left text-xs font-medium text-gray-500 uppercase tracking-wider">Meeting Name</th>
      <th class="px-6 py-3 bg-gray-50 text-left text-xs font-medium text-gray-500 uppercase tracking-wider">Date</th>
      <th class="px-6 py-3 bg-gray-50 text-left text-xs font-medium text-gray-500 uppercase tracking-wider">Time</th>
      <th class="px-6 py-3 bg-gray-50 text-left text-xs font-medium text-gray-500 uppercase tracking-wider">Attendees</th>
    </tr>
  </thead>
  <tbody class="bg-white divide-y divide-gray-200">
    <!-- Meeting rows will be added here -->
  </tbody>
  <tfoot>
    <tr>
      <td colspan="4" class="px-6 py-3 bg-gray-50 text-left text-xs font-medium text-gray-500 uppercase tracking-wider">Total Meetings: {{totalMeetings}}</td>
    </tr>
  </tfoot>
</table>
Step 2: Add Tailwind CSS classes
Next, we need to add Tailwind CSS classes to style the Meetings - Table UI component. We will use the following classes:
min-w-fullto set the table width to 100%divide-yanddivide-gray-200to add horizontal dividing lines between table rowsbg-gray-50to set the background color of the table header and footertext-left,text-xs,font-medium,text-gray-500,uppercase, andtracking-widerto style the table header cellsbg-whiteto set the background color of the table bodypx-6andpy-3to add padding to table cellscolspan="4"to span the total meetings cell across all four columns
<table class="min-w-full divide-y divide-gray-200">
  <thead>
    <tr>
      <th class="px-6 py-3 bg-gray-50 text-left text-xs font-medium text-gray-500 uppercase tracking-wider">Meeting Name</th>
      <th class="px-6 py-3 bg-gray-50 text-left text-xs font-medium text-gray-500 uppercase tracking-wider">Date</th>
      <th class="px-6 py-3 bg-gray-50 text-left text-xs font-medium text-gray-500 uppercase tracking-wider">Time</th>
      <th class="px-6 py-3 bg-gray-50 text-left text-xs font-medium text-gray-500 uppercase tracking-wider">Attendees</th>
    </tr>
  </thead>
  <tbody class="bg-white divide-y divide-gray-200">
    <tr>
      <td class="px-6 py-4 whitespace-nowrap">Meeting 1</td>
      <td class="px-6 py-4 whitespace-nowrap">10/01/2021</td>
      <td class="px-6 py-4 whitespace-nowrap">10:00 AM</td>
      <td class="px-6 py-4 whitespace-nowrap">John Doe, Jane Doe</td>
    </tr>
    <tr>
      <td class="px-6 py-4 whitespace-nowrap">Meeting 2</td>
      <td class="px-6 py-4 whitespace-nowrap">10/02/2021</td>
      <td class="px-6 py-4 whitespace-nowrap">2:00 PM</td>
      <td class="px-6 py-4 whitespace-nowrap">John Smith, Jane Smith</td>
    </tr>
  </tbody>
  <tfoot>
    <tr>
      <td colspan="4" class="px-6 py-3 bg-gray-50 text-left text-xs font-medium text-gray-500 uppercase tracking-wider">Total Meetings: 2</td>
    </tr>
  </tfoot>
</table>
Step 3: Add dynamic data
Finally, we need to add dynamic data to the Meetings - Table UI component. We will use a template engine like Handlebars.js to render the table rows and total meetings count.
<table class="min-w-full divide-y divide-gray-200">
  <thead>
    <tr>
      <th class="px-6 py-3 bg-gray-50 text-left text-xs font-medium text-gray-500 uppercase tracking-wider">Meeting Name</th>
      <th class="px-6 py-3 bg-gray-50 text-left text-xs font-medium text-gray-500 uppercase tracking-wider">Date</th>
      <th class="px-6 py-3 bg-gray-50 text-left text-xs font-medium text-gray-500 uppercase tracking-wider">Time</th>
      <th class="px-6 py-3 bg-gray-50 text-left text-xs font-medium text-gray-500 uppercase tracking-wider">Attendees</th>
    </tr>
  </thead>
  <tbody class="bg-white divide-y divide-gray-200">
    {{#each meetings}}
    <tr>
      <td class="px-6 py-4 whitespace-nowrap">{{this.name}}</td>
      <td class="px-6 py-4 whitespace-nowrap">{{this.date}}</td>
      <td class="px-6 py-4 whitespace-nowrap">{{this.time}}</td>
      <td class="px-6 py-4 whitespace-nowrap">{{this.attendees}}</td>
    </tr>
    {{/each}}
  </tbody>
  <tfoot>
    <tr>
      <td colspan="4" class="px-6 py-3 bg-gray-50 text-left text-xs font-medium text-gray-500 uppercase tracking-wider">Total Meetings: {{totalMeetings}}</td>
    </tr>
  </tfoot>
</table>
Conclusion
In this article, we have shown you how to create a Meetings - Table UI component using Tailwind CSS. With Tailwind CSS, you can easily create responsive and customizable user interfaces without writing any custom CSS code. We hope this guide has been helpful and inspires you to create more UI components using Tailwind CSS.