- Published on
6 Critical Skills To Make A Testimonial With Tailwind CSS Remarkably Well
- What is Tailwind CSS?
- The description of Testimonial ui component
- Why use Tailwind CSS to create a Testimonial ui component?
- The preview of Testimonial ui component
- The source code of Testimonial ui component
- How to create a Testimonial with Tailwind CSS?
- Step 1: Create the HTML structure for the Testimonial UI component
- Step 2: Add the pre-defined Tailwind CSS classes to style the Testimonial UI component
- Step 3: Customize the design by adding your own CSS classes or modifying the existing ones
- Conclusion
As a FrontEnd technology blogger, you may have heard of Tailwind CSS, a utility-first CSS framework that allows you to quickly build custom designs. One of the components that you can create with Tailwind CSS is a Testimonial, which is a great way to showcase your customer's feedback. In this article, we will discuss 6 critical skills to make a Testimonial with Tailwind CSS remarkably well.
What is Tailwind CSS?
Tailwind CSS is a utility-first CSS framework that provides you with a set of pre-defined CSS classes that you can use to style your HTML elements. It allows you to quickly build custom designs without writing any CSS code. Tailwind CSS is highly customizable and can be configured to match your design needs.
The description of Testimonial ui component
A Testimonial is a UI component that displays feedback from your customers. It typically includes a photo of the customer, their name, and their feedback. Testimonials are a great way to build trust with your potential customers and showcase your product's benefits.
Why use Tailwind CSS to create a Testimonial ui component?
Tailwind CSS provides you with a set of pre-defined CSS classes that you can use to style your Testimonial UI component. This makes it easy to create a custom design without writing any CSS code. Tailwind CSS also allows you to customize your design by adding your own CSS classes or modifying the existing ones.
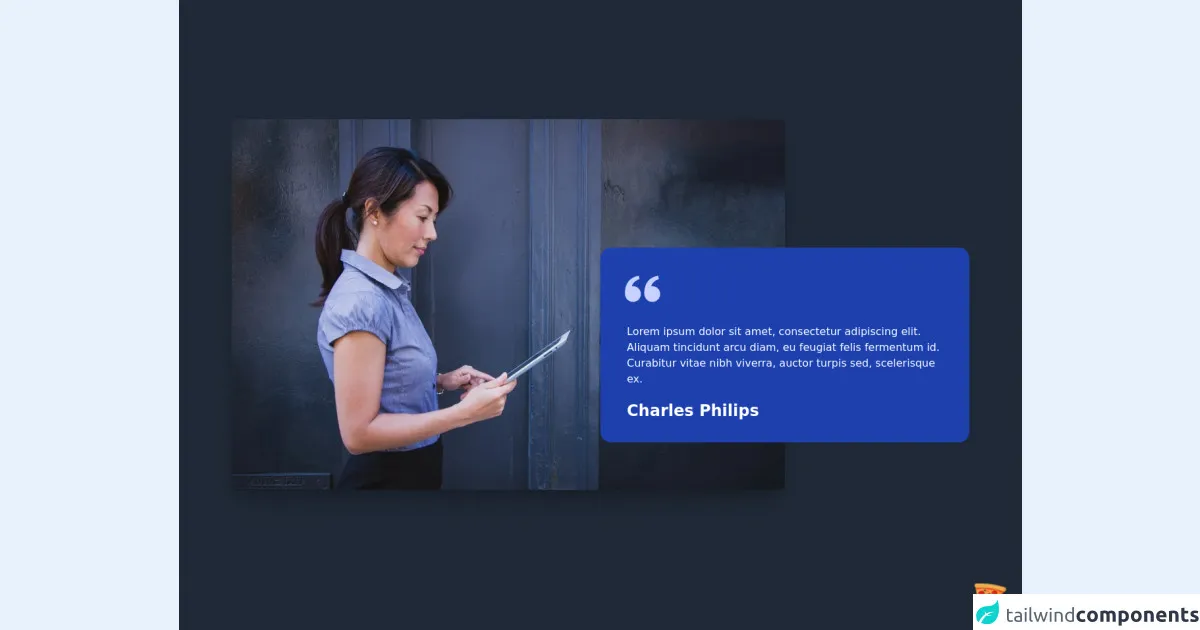
The preview of Testimonial ui component
To create a Testimonial with Tailwind CSS, you can use the following HTML structure:
<div class="testimonial">
  <div class="testimonial__content">
    <p class="testimonial__quote">{{__placeholder1__}}</p>
    <img class="testimonial__image" src="customer-photo.jpg" alt="Customer Photo">
    <p class="testimonial__name">John Doe</p>
  </div>
</div>
Free download of the Testimonial's source code
The source code of Testimonial ui component
To style the Testimonial UI component, you can use the following CSS code:
.testimonial {
  background-color: #f7f7f7;
  border-radius: 10px;
  padding: 20px;
}

.testimonial__content {
  display: flex;
  flex-direction: column;
  align-items: center;
}

.testimonial__quote {
  font-size: 24px;
  font-weight: bold;
  text-align: center;
  margin-bottom: 20px;
}

.testimonial__image {
  width: 100px;
  height: 100px;
  border-radius: 50%;
  margin-bottom: 10px;
}

.testimonial__name {
  font-size: 18px;
  font-weight: bold;
  text-align: center;
}
<div class="flex justify-center items-center w-screen h-screen bg-gray-800">
	<!-- COMPONENT CODE -->
	<div class="container mx-auto mt-10 mb-10 lg:mb-40 lg:px-20">
		<div class="relative w-full my-4 lg:w-9/12 mr-auto rounded-2xl shadow-2xl">
			<img alt="Card" src="https://cdn.pixabay.com/photo/2015/06/08/15/06/woman-801872_960_720.jpg" class="max-w-full rounded-lg shadow-lg"/>
        </div>
		<div class="relative w-full lg:-mt-96 lg:w-3/6 p-8 ml-auto bg-blue-800 rounded-2xl z-50">
		    <div class="flex flex-col text-white">
				<div>
					<svg xmlns="http://www.w3.org/2000/svg" class="text-indigo-200 fill-current w-12 h-12 md:w-16 md:h-16" viewBox="0 0 24 24"><path d="M6.5 10c-.223 0-.437.034-.65.065.069-.232.14-.468.254-.68.114-.308.292-.575.469-.844.148-.291.409-.488.601-.737.201-.242.475-.403.692-.604.213-.21.492-.315.714-.463.232-.133.434-.28.65-.35.208-.086.39-.16.539-.222.302-.125.474-.197.474-.197L9.758 4.03c0 0-.218.052-.597.144C8.97 4.222 8.737 4.278 8.472 4.345c-.271.05-.56.187-.882.312C7.272 4.799 6.904 4.895 6.562 5.123c-.344.218-.741.4-1.091.692C5.132 6.116 4.723 6.377 4.421 6.76c-.33.358-.656.734-.909 1.162C3.219 8.33 3.02 8.778 2.81 9.221c-.19.443-.343.896-.468 1.336-.237.882-.343 1.72-.384 2.437-.034.718-.014 1.315.028 1.747.015.204.043.402.063.539.017.109.025.168.025.168l.026-.006C2.535 17.474 4.338 19 6.5 19c2.485 0 4.5-2.015 4.5-4.5S8.985 10 6.5 10zM17.5 10c-.223 0-.437.034-.65.065.069-.232.14-.468.254-.68.114-.308.292-.575.469-.844.148-.291.409-.488.601-.737.201-.242.475-.403.692-.604.213-.21.492-.315.714-.463.232-.133.434-.28.65-.35.208-.086.39-.16.539-.222.302-.125.474-.197.474-.197L20.758 4.03c0 0-.218.052-.597.144-.191.048-.424.104-.689.171-.271.05-.56.187-.882.312-.317.143-.686.238-1.028.467-.344.218-.741.4-1.091.692-.339.301-.748.562-1.05.944-.33.358-.656.734-.909 1.162C14.219 8.33 14.02 8.778 13.81 9.221c-.19.443-.343.896-.468 1.336-.237.882-.343 1.72-.384 2.437-.034.718-.014 1.315.028 1.747.015.204.043.402.063.539.017.109.025.168.025.168l.026-.006C13.535 17.474 15.338 19 17.5 19c2.485 0 4.5-2.015 4.5-4.5S19.985 10 17.5 10z"/></svg>
                </div>
                <p class="text-white my-5 px-2">
                    Lorem ipsum dolor sit amet, consectetur adipiscing elit. Aliquam tincidunt arcu diam,
                    eu feugiat felis fermentum id. Curabitur vitae nibh viverra, auctor turpis sed, scelerisque ex.
                </p>
                <div class="flex justify-between pl-2">
                    <h3 class="font-bold text-2xl">Charles Philips</h3>
                    <i class="fas fa-quote-right text-2xl" />
                </div>
            </div>
        </div>
    </div>
    <!-- COMPONENT CODE -->
</div>

<!-- BUY ME A PIZZA AND HELP SUPPORT OPEN-SOURCE RESOURCES -->
<div class="flex items-end justify-end fixed bottom-0 right-0 mb-4 mr-4 z-10">
	<div>
		<a title="Buy me a pizza" href="https://www.buymeacoffee.com/Dekartmc" target="_blank"
			class="block w-16 h-16 rounded-full transition-all shadow hover:shadow-lg transform hover:scale-110 hover:rotate-12">
			<img class="object-cover object-center w-full h-full rounded-full" src="https://img.icons8.com/emoji/48/000000/pizza-emoji.png"/>
    </a>
	</div>
</div>
How to create a Testimonial with Tailwind CSS?
To create a Testimonial with Tailwind CSS, you can follow these steps:
- Create the HTML structure for the Testimonial UI component.
- Add the pre-defined Tailwind CSS classes to style the Testimonial UI component.
- Customize the design by adding your own CSS classes or modifying the existing ones.
Let's go through each step in detail.
Step 1: Create the HTML structure for the Testimonial UI component
As we mentioned earlier, the Testimonial UI component typically includes a photo of the customer, their name, and their feedback. To create the HTML structure for the Testimonial UI component, you can use the following code:
<div class="testimonial">
  <div class="testimonial__content">
    <p class="testimonial__quote">Lorem ipsum dolor sit amet, consectetur adipiscing elit. Sed auctor, sapien vel ultricies lacinia, mi felis congue nunc, vel commodo quam arcu vel odio.</p>
    <img class="testimonial__image" src="customer-photo.jpg" alt="Customer Photo">
    <p class="testimonial__name">John Doe</p>
  </div>
</div>
In this code, we have created a div element with a class of testimonial. Inside the div element, we have created another div element with a class of testimonial__content. Inside the testimonial__content element, we have added a p element with a class of testimonial__quote, an img element with a class of testimonial__image, and a p element with a class of testimonial__name.
Step 2: Add the pre-defined Tailwind CSS classes to style the Testimonial UI component
To style the Testimonial UI component, we can use the pre-defined Tailwind CSS classes. Here's how we can modify the HTML code to use the Tailwind CSS classes:
<div class="bg-gray-200 rounded-lg p-4">
  <div class="flex flex-col items-center">
    <p class="text-2xl font-bold text-center mb-4">Lorem ipsum dolor sit amet, consectetur adipiscing elit. Sed auctor, sapien vel ultricies lacinia, mi felis congue nunc, vel commodo quam arcu vel odio.</p>
    <img class="w-24 h-24 rounded-full mb-2" src="customer-photo.jpg" alt="Customer Photo">
    <p class="text-lg font-bold text-center">John Doe</p>
  </div>
</div>
In this code, we have added the following Tailwind CSS classes:
bg-gray-200: sets the background color to gray.rounded-lg: sets the border radius to 10px.p-4: sets the padding to 20px.flex: sets the display property to flex.flex-col: sets the flex-direction property to column.items-center: centers the elements horizontally and vertically.text-2xl: sets the font size to 24px.font-bold: sets the font weight to bold.text-center: centers the text horizontally.w-24: sets the width to 100px.h-24: sets the height to 100px.rounded-full: sets the border radius to 50%.text-lg: sets the font size to 18px.
Step 3: Customize the design by adding your own CSS classes or modifying the existing ones
If you want to customize the design further, you can add your own CSS classes or modify the existing ones. For example, you can change the background color to match your brand colors, or you can add a border to the Testimonial UI component. Here's an example of how you can modify the code:
<div class="testimonial border-2 border-blue-500 rounded-lg p-4">
  <div class="testimonial__content">
    <p class="testimonial__quote text-lg font-bold text-center mb-4">Lorem ipsum dolor sit amet, consectetur adipiscing elit. Sed auctor, sapien vel ultricies lacinia, mi felis congue nunc, vel commodo quam arcu vel odio.</p>
    <img class="testimonial__image w-24 h-24 rounded-full mb-2" src="customer-photo.jpg" alt="Customer Photo">
    <p class="testimonial__name text-base font-bold text-center text-blue-500">John Doe</p>
  </div>
</div>
In this code, we have added the following CSS classes:
border-2: adds a 2px border to the Testimonial UI component.border-blue-500: sets the border color to blue.text-base: sets the font size to 16px.text-blue-500: sets the text color to blue.
Conclusion
In this article, we discussed 6 critical skills to make a Testimonial with Tailwind CSS remarkably well. We learned that Tailwind CSS is a utility-first CSS framework that provides you with a set of pre-defined CSS classes that you can use to style your Testimonial UI component. We also learned that Testimonials are a great way to build trust with your potential customers and showcase your product's benefits. By following the steps outlined in this article, you can create a custom Testimonial UI component that matches your design needs.