- Published on
6 Steps To Create A Tela de login With Tailwind CSS Like A Pro In Under An Hour
- What is Tailwind CSS?
- The description of Tela de login UI component
- Why use Tailwind CSS to create a Tela de login UI component?
- The preview of Tela de login UI component
- The source code of Tela de login UI component
- How to create a Tela de login with Tailwind CSS?
- Step 1: Set up the HTML structure
- Step 2: Add Tailwind CSS classes
- Step 3: Style the background
- Step 4: Style the form container
- Step 5: Style the form elements
- Step 6: Preview and test the login form
- Conclusion
In today's world, where everything is online, login pages are an essential part of any website or application. A well-designed login page can make a significant impact on the user experience. In this article, we will learn how to create a Tela de login UI component using Tailwind CSS.
What is Tailwind CSS?
Tailwind CSS is a utility-first CSS framework that provides a set of pre-defined classes to style HTML elements. It allows developers to create custom designs without writing any CSS code from scratch. Tailwind CSS is gaining popularity due to its simplicity and flexibility.
The description of Tela de login UI component
Tela de login is a Portuguese term that translates to "login screen" in English. A Tela de login UI component is a user interface element that allows users to log in to a website or application. It usually consists of a form with input fields for username and password and a submit button.
Why use Tailwind CSS to create a Tela de login UI component?
Tailwind CSS provides a set of pre-defined classes that can be used to create a Tela de login UI component quickly. It saves developers time and effort, and the end result is a well-designed login page that is responsive and easy to use.
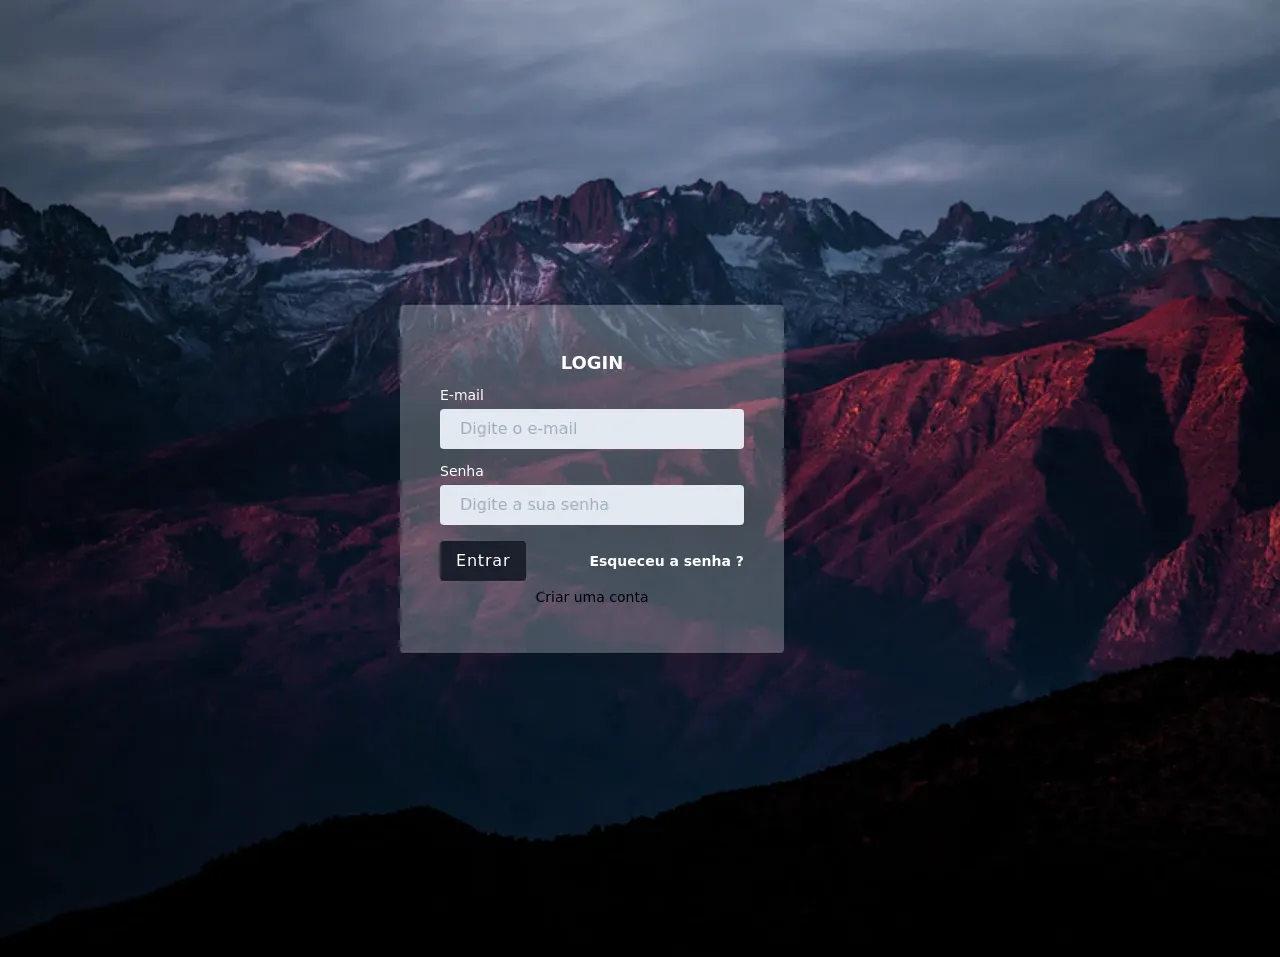
The preview of Tela de login UI component
To create a Tela de login UI component, we will use Tailwind CSS classes to style the HTML elements. The end result will be a login page that looks like this:
Free download of the Tela de login's source code
The source code of Tela de login UI component
To create the Tela de login UI component, we will use HTML and Tailwind CSS classes. The HTML code will define the structure of the login form, and the Tailwind CSS classes will style the elements. The source code for the Tela de login UI component is as follows:
<!-- This is an example component -->
<div class="h-screen font-sans login bg-cover">
<div class="container mx-auto h-full flex flex-1 justify-center items-center">
    <div class="w-full max-w-lg">
      <div class="leading-loose">
        <form class="max-w-sm m-4 p-10 bg-white bg-opacity-25 rounded shadow-xl">
            <p class="text-white font-medium text-center text-lg font-bold">LOGIN</p>
              <div class="">
                <label class="block text-sm text-white" for="email">E-mail</label>
                <input class="w-full px-5 py-1 text-gray-700 bg-gray-300 rounded focus:outline-none focus:bg-white" type="email" id="email"  placeholder="Digite o e-mail" aria-label="email" required>
              </div>
              <div class="mt-2">
                <label class="block  text-sm text-white">Senha</label>
                 <input class="w-full px-5 py-1 text-gray-700 bg-gray-300 rounded focus:outline-none focus:bg-white"
                  type="password" id="password" placeholder="Digite a sua senha" arial-label="password" required>
              </div>

              <div class="mt-4 items-center flex justify-between">
                <button class="px-4 py-1 text-white font-light tracking-wider bg-gray-900 hover:bg-gray-800 rounded"
                  type="submit">Entrar</button>
                <a class="inline-block right-0 align-baseline font-bold text-sm text-500 text-white hover:text-red-400"
                  href="#">Esqueceu a senha ?</a>
              </div>
              <div class="text-center">
                <a class="inline-block right-0 align-baseline font-light text-sm text-500 hover:text-red-400">
                    Criar uma conta
                </a>
              </div>

        </form>

      </div>
    </div>
  </div>
</div>
<style>
  .login{
  /*
    background: url('https://tailwindadmin.netlify.app/dist/images/login-new.jpeg');
  */
  background: url('http://bit.ly/2gPLxZ4');
  background-repeat: no-repeat;
  background-size: cover;
}
</style>
How to create a Tela de login with Tailwind CSS?
Now that we have an idea of what a Tela de login UI component is and why we should use Tailwind CSS to create it, let's dive into the steps to create one.
Step 1: Set up the HTML structure
The first step is to set up the HTML structure for the login form. We will use the form element to wrap the input fields and the submit button. The HTML code for the login form is as follows:
<div class="min-h-screen flex items-center justify-center bg-gray-200">
  <div class="bg-white p-16 rounded shadow-md">
    <h2 class="text-2xl font-bold mb-8">Login</h2>
    <form>
      <div class="mb-4">
        <label class="block text-gray-700 font-bold mb-2" for="username">
          Username
        </label>
        <input
          class="appearance-none border rounded w-full py-2 px-3 text-gray-700 leading-tight focus:outline-none focus:shadow-outline"
          id="username"
          type="text"
          placeholder="Username"
        />
      </div>
      <div class="mb-4">
        <label class="block text-gray-700 font-bold mb-2" for="password">
          Password
        </label>
        <input
          class="appearance-none border rounded w-full py-2 px-3 text-gray-700 leading-tight focus:outline-none focus:shadow-outline"
          id="password"
          type="password"
          placeholder="Password"
        />
      </div>
      <div class="flex items-center justify-between">
        <button
          class="bg-blue-500 hover:bg-blue-700 text-white font-bold py-2 px-4 rounded focus:outline-none focus:shadow-outline"
          type="button"
        >
          Sign In
        </button>
      </div>
    </form>
  </div>
</div>
In the HTML code, we have defined the structure of the login form using div elements. We have also added labels and input fields for the username and password.
Step 2: Add Tailwind CSS classes
After setting up the HTML structure, we will add Tailwind CSS classes to style the login form. We will use classes such as bg-gray-200, bg-white, p-16, rounded, shadow-md, text-2xl, font-bold, mb-8, mb-4, block, text-gray-700, border, w-full, py-2, px-3, leading-tight, focus:outline-none, focus:shadow-outline, flex, items-center, justify-between, bg-blue-500, hover:bg-blue-700, text-white, font-bold, py-2, px-4, and rounded to style the login form.
Step 3: Style the background
We will use the bg-gray-200 class to style the background of the login form.
Step 4: Style the form container
We will use the bg-white, p-16, rounded, and shadow-md classes to style the form container.
Step 5: Style the form elements
We will use the text-2xl, font-bold, and mb-8 classes to style the login form title. We will use the mb-4 class to add margin to the input fields. We will use the block, text-gray-700, border, w-full, py-2, px-3, leading-tight, focus:outline-none, and focus:shadow-outline classes to style the input fields. We will use the flex, items-center, and justify-between classes to style the submit button container. We will use the bg-blue-500, hover:bg-blue-700, text-white, font-bold, py-2, px-4, and rounded classes to style the submit button.
Step 6: Preview and test the login form
After adding the Tailwind CSS classes, we can preview and test the login form. The login form should be responsive and easy to use.
Conclusion
In this article, we learned how to create a Tela de login UI component using Tailwind CSS. We discussed the benefits of using Tailwind CSS to create a login form and went through the steps to create one. With Tailwind CSS, developers can create custom designs quickly and efficiently, saving time and effort.