- Published on
What You Need To Make A Tailwind CSS Table With Tailwind CSS
- What is Tailwind CSS?
- The description of Tailwind CSS Table UI component
- Why use Tailwind CSS to create a Tailwind CSS Table UI component?
- The preview of Tailwind CSS Table UI component
- The source code of Tailwind CSS Table UI component
- How to create a Tailwind CSS Table with Tailwind CSS?
- Conclusion
What is Tailwind CSS?
Tailwind CSS is a utility-first CSS framework that provides a set of pre-defined classes to help developers quickly build custom user interfaces. It is designed to be highly customizable and easy to use, making it an ideal choice for front-end developers who want to streamline their workflow.
The description of Tailwind CSS Table UI component
A table is a common UI component that is used to display data in a structured format. With Tailwind CSS, you can easily create a table that is both functional and visually appealing. The table component includes a variety of pre-defined styles that can be customized to fit your specific needs.
Why use Tailwind CSS to create a Tailwind CSS Table UI component?
Tailwind CSS is a great choice for creating a table UI component because it provides a set of pre-defined classes that make it easy to style and customize the table. Additionally, Tailwind CSS is designed to be highly modular, which means that you can easily add or remove styles as needed without affecting the rest of your code.
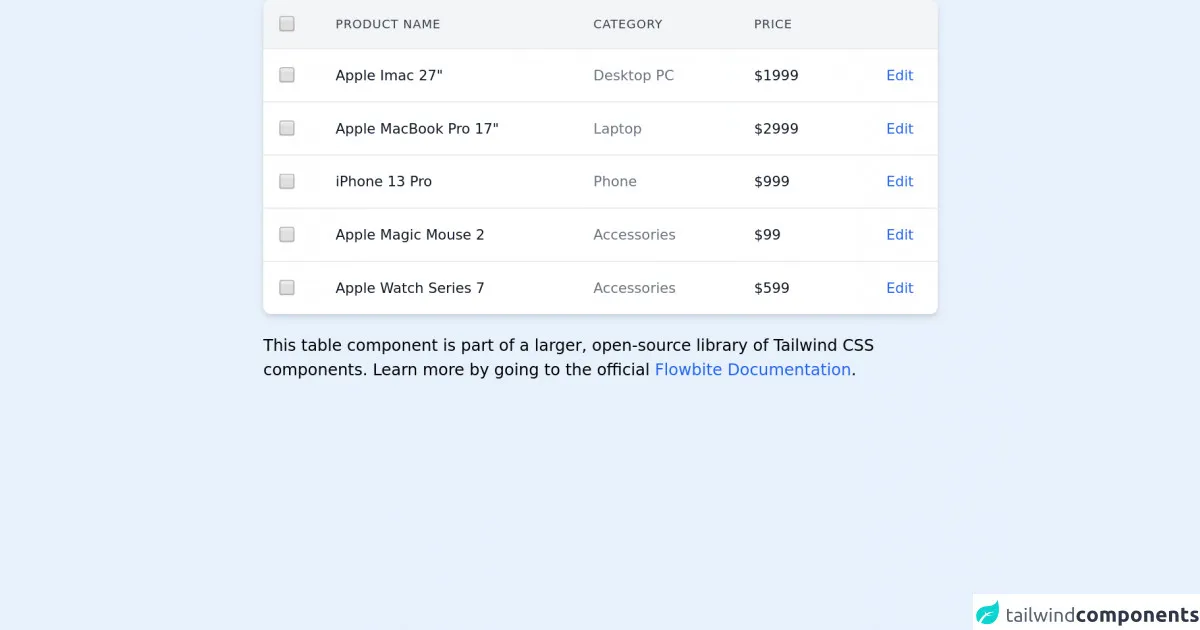
The preview of Tailwind CSS Table UI component
To create a Tailwind CSS table, you can use a combination of pre-defined classes and custom styles. Here is a preview of what the table might look like:
Free download of the Tailwind CSS Table's source code
The source code of Tailwind CSS Table UI component
To create a Tailwind CSS table, you will need to use a combination of HTML and CSS. Here is an example of what the code might look like:
<!-- This is an example component -->
<div class="max-w-2xl mx-auto">

	<div class="flex flex-col">
    <div class="overflow-x-auto shadow-md sm:rounded-lg">
        <div class="inline-block min-w-full align-middle">
            <div class="overflow-hidden ">
                <table class="min-w-full divide-y divide-gray-200 table-fixed dark:divide-gray-700">
                    <thead class="bg-gray-100 dark:bg-gray-700">
                        <tr>
                            <th scope="col" class="p-4">
                                <div class="flex items-center">
                                    <input id="checkbox-all" type="checkbox" class="w-4 h-4 text-blue-600 bg-gray-100 rounded border-gray-300 focus:ring-blue-500 dark:focus:ring-blue-600 dark:ring-offset-gray-800 focus:ring-2 dark:bg-gray-700 dark:border-gray-600">
                                    <label for="checkbox-all" class="sr-only">checkbox</label>
                                </div>
                            </th>
                            <th scope="col" class="py-3 px-6 text-xs font-medium tracking-wider text-left text-gray-700 uppercase dark:text-gray-400">
                                Product Name
                            </th>
                            <th scope="col" class="py-3 px-6 text-xs font-medium tracking-wider text-left text-gray-700 uppercase dark:text-gray-400">
                                Category
                            </th>
                            <th scope="col" class="py-3 px-6 text-xs font-medium tracking-wider text-left text-gray-700 uppercase dark:text-gray-400">
                                Price
                            </th>
                            <th scope="col" class="p-4">
                                <span class="sr-only">Edit</span>
                            </th>
                        </tr>
                    </thead>
                    <tbody class="bg-white divide-y divide-gray-200 dark:bg-gray-800 dark:divide-gray-700">
                        <tr class="hover:bg-gray-100 dark:hover:bg-gray-700">
                            <td class="p-4 w-4">
                                <div class="flex items-center">
                                    <input id="checkbox-table-1" type="checkbox" class="w-4 h-4 text-blue-600 bg-gray-100 rounded border-gray-300 focus:ring-blue-500 dark:focus:ring-blue-600 dark:ring-offset-gray-800 focus:ring-2 dark:bg-gray-700 dark:border-gray-600">
                                    <label for="checkbox-table-1" class="sr-only">checkbox</label>
                                </div>
                            </td>
                            <td class="py-4 px-6 text-sm font-medium text-gray-900 whitespace-nowrap dark:text-white">Apple Imac 27"</td>
                            <td class="py-4 px-6 text-sm font-medium text-gray-500 whitespace-nowrap dark:text-white">Desktop PC</td>
                            <td class="py-4 px-6 text-sm font-medium text-gray-900 whitespace-nowrap dark:text-white">$1999</td>
                            <td class="py-4 px-6 text-sm font-medium text-right whitespace-nowrap">
                                <a href="#" class="text-blue-600 dark:text-blue-500 hover:underline">Edit</a>
                            </td>
                        </tr>
                        <tr class="hover:bg-gray-100 dark:hover:bg-gray-700">
                            <td class="p-4 w-4">
                                <div class="flex items-center">
                                    <input id="checkbox-table-2" type="checkbox" class="w-4 h-4 text-blue-600 bg-gray-100 rounded border-gray-300 focus:ring-blue-500 dark:focus:ring-blue-600 dark:ring-offset-gray-800 focus:ring-2 dark:bg-gray-700 dark:border-gray-600">
                                    <label for="checkbox-table-2" class="sr-only">checkbox</label>
                                </div>
                            </td>
                            <td class="py-4 px-6 text-sm font-medium text-gray-900 whitespace-nowrap dark:text-white">Apple MacBook Pro 17"</td>
                            <td class="py-4 px-6 text-sm font-medium text-gray-500 whitespace-nowrap dark:text-white">Laptop</td>
                            <td class="py-4 px-6 text-sm font-medium text-gray-900 whitespace-nowrap dark:text-white">$2999</td>
                            <td class="py-4 px-6 text-sm font-medium text-right whitespace-nowrap">
                                <a href="#" class="text-blue-600 dark:text-blue-500 hover:underline">Edit</a>
                            </td>
                        </tr>
                        <tr class="hover:bg-gray-100 dark:hover:bg-gray-700">
                            <td class="p-4 w-4">
                                <div class="flex items-center">
                                    <input id="checkbox-table-3" type="checkbox" class="w-4 h-4 text-blue-600 bg-gray-100 rounded border-gray-300 focus:ring-blue-500 dark:focus:ring-blue-600 dark:ring-offset-gray-800 focus:ring-2 dark:bg-gray-700 dark:border-gray-600">
                                    <label for="checkbox-table-3" class="sr-only">checkbox</label>
                                </div>
                            </td>
                            <td class="py-4 px-6 text-sm font-medium text-gray-900 whitespace-nowrap dark:text-white">iPhone 13 Pro</td>
                            <td class="py-4 px-6 text-sm font-medium text-gray-500 whitespace-nowrap dark:text-white">Phone</td>
                            <td class="py-4 px-6 text-sm font-medium text-gray-900 whitespace-nowrap dark:text-white">$999</td>
                            <td class="py-4 px-6 text-sm font-medium text-right whitespace-nowrap">
                                <a href="#" class="text-blue-600 dark:text-blue-500 hover:underline">Edit</a>
                            </td>
                        </tr>
                        <tr class="hover:bg-gray-100 dark:hover:bg-gray-700">
                            <td class="p-4 w-4">
                                <div class="flex items-center">
                                    <input id="checkbox-table-4" type="checkbox" class="w-4 h-4 text-blue-600 bg-gray-100 rounded border-gray-300 focus:ring-blue-500 dark:focus:ring-blue-600 dark:ring-offset-gray-800 focus:ring-2 dark:bg-gray-700 dark:border-gray-600">
                                    <label for="checkbox-table-4" class="sr-only">checkbox</label>
                                </div>
                            </td>
                            <td class="py-4 px-6 text-sm font-medium text-gray-900 whitespace-nowrap dark:text-white">Apple Magic Mouse 2</td>
                            <td class="py-4 px-6 text-sm font-medium text-gray-500 whitespace-nowrap dark:text-white">Accessories</td>
                            <td class="py-4 px-6 text-sm font-medium text-gray-900 whitespace-nowrap dark:text-white">$99</td>
                            <td class="py-4 px-6 text-sm font-medium text-right whitespace-nowrap">
                                <a href="#" class="text-blue-600 dark:text-blue-500 hover:underline">Edit</a>
                            </td>
                        </tr>
                        <tr class="hover:bg-gray-100 dark:hover:bg-gray-700">
                            <td class="p-4 w-4">
                                <div class="flex items-center">
                                    <input id="checkbox-table-5" type="checkbox" class="w-4 h-4 text-blue-600 bg-gray-100 rounded border-gray-300 focus:ring-blue-500 dark:focus:ring-blue-600 dark:ring-offset-gray-800 focus:ring-2 dark:bg-gray-700 dark:border-gray-600">
                                    <label for="checkbox-table-5" class="sr-only">checkbox</label>
                                </div>
                            </td>
                            <td class="py-4 px-6 text-sm font-medium text-gray-900 whitespace-nowrap dark:text-white">Apple Watch Series 7</td>
                            <td class="py-4 px-6 text-sm font-medium text-gray-500 whitespace-nowrap dark:text-white">Accessories</td>
                            <td class="py-4 px-6 text-sm font-medium text-gray-900 whitespace-nowrap dark:text-white">$599</td>
                            <td class="py-4 px-6 text-sm font-medium text-right whitespace-nowrap">
                                <a href="#" class="text-blue-600 dark:text-blue-500 hover:underline">Edit</a>
                            </td>
                        </tr>
                    </tbody>
                </table>
            </div>
        </div>
    </div>
</div>

	<p class="mt-5">This table component is part of a larger, open-source library of Tailwind CSS components. Learn
		more
		by going to the official <a class="text-blue-600 hover:underline"
			href="https://flowbite.com/docs/getting-started/introduction/" target="_blank">Flowbite Documentation</a>.
	</p>
</div>
How to create a Tailwind CSS Table with Tailwind CSS?
To create a Tailwind CSS table, follow these steps:
- Start by creating a new HTML file and adding a table element to the page.
- Add the necessary table headers and data cells to the table.
- Apply the appropriate Tailwind CSS classes to the table, headers, and cells to style the table as desired.
- Customize the table further using custom CSS styles as needed.
Here is an example of what the code might look like:
<table class="table-auto border-collapse border border-gray-400">
  <thead>
    <tr>
      <th class="px-4 py-2 bg-gray-200 text-gray-800 border border-gray-400">Name</th>
      <th class="px-4 py-2 bg-gray-200 text-gray-800 border border-gray-400">Age</th>
      <th class="px-4 py-2 bg-gray-200 text-gray-800 border border-gray-400">Email</th>
    </tr>
  </thead>
  <tbody>
    <tr>
      <td class="px-4 py-2 border border-gray-400">John Doe</td>
      <td class="px-4 py-2 border border-gray-400">35</td>
      <td class="px-4 py-2 border border-gray-400">[email protected]</td>
    </tr>
    <tr>
      <td class="px-4 py-2 border border-gray-400">Jane Smith</td>
      <td class="px-4 py-2 border border-gray-400">28</td>
      <td class="px-4 py-2 border border-gray-400">[email protected]</td>
    </tr>
    <tr>
      <td class="px-4 py-2 border border-gray-400">Bob Johnson</td>
      <td class="px-4 py-2 border border-gray-400">42</td>
      <td class="px-4 py-2 border border-gray-400">[email protected]</td>
    </tr>
  </tbody>
</table>
In this example, we have created a basic table with three columns: Name, Age, and Email. We have applied the table-auto class to the table element to allow the table to automatically adjust its width based on the content. We have also applied various border and background color classes to style the table headers and cells.
Conclusion
In conclusion, Tailwind CSS is a powerful tool for creating custom UI components such as tables. By using pre-defined classes and custom styles, you can easily create a table that is both functional and visually appealing. Whether you are a beginner or an experienced front-end developer, Tailwind CSS can help streamline your workflow and make your code more modular and maintainable.