- Published on
6 Ideas To Help You Build A Simple server status table With Tailwind CSS Like A Pro

- What is Tailwind CSS?
- The description of Simple server status table ui component
- Why use Tailwind CSS to create a Simple server status table ui component?
- The preview of Simple server status table ui component.
- The source code of Simple server status table ui component.
- How to create a Simple server status table with Tailwind CSS?
- Step 1: Set up your HTML
- Step 2: Style your HTML with Tailwind CSS
- Step 3: Add interactivity with JavaScript
- Conclusion
In the world of web development, creating user interfaces that are both visually appealing and functional is a must. One of the most important aspects of any web application is the ability to display data in a clear and concise manner. One way to do this is by using a server status table. In this article, we will explore how to create a simple server status table using Tailwind CSS.
What is Tailwind CSS?
Tailwind CSS is a utility-first CSS framework that provides a set of pre-defined classes that you can use to style your HTML elements. It allows you to create complex layouts and designs with minimal effort by providing a large number of pre-defined classes that you can use to style your elements.
The description of Simple server status table ui component
A server status table is a user interface component that displays the status of various servers in a network. It typically displays information such as the server name, IP address, status (up or down), and other relevant information.
Why use Tailwind CSS to create a Simple server status table ui component?
Tailwind CSS provides a large number of pre-defined classes that you can use to style your HTML elements. This makes it easy to create complex layouts and designs with minimal effort. Additionally, Tailwind CSS is highly customizable, which means that you can easily customize the look and feel of your server status table to match your application's branding.
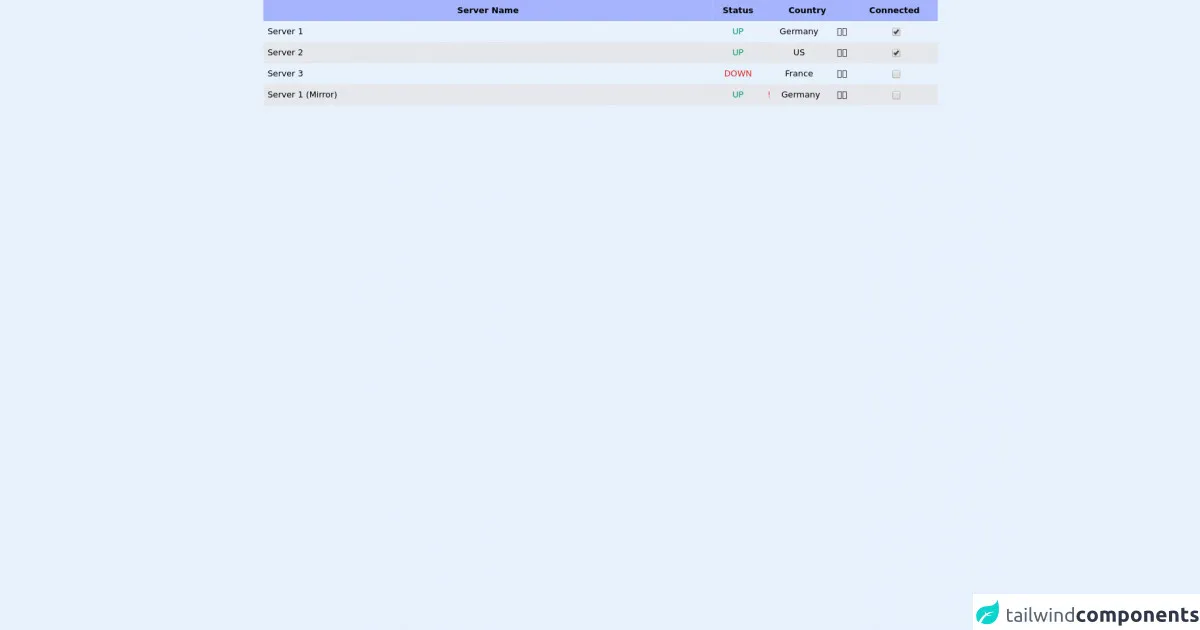
The preview of Simple server status table ui component.
To give you an idea of what a simple server status table created with Tailwind CSS might look like, here is a preview:
Free download of the Simple server status table's source code
The source code of Simple server status table ui component.
Here is the source code for a simple server status table created with Tailwind CSS:
<table class="w-full">
    <tr class="w-1/2 bg-indigo-300">
        <th class="p-2 w-2/3">Server Name</th>
        <th class="p-2 text-center">Status</th>
        <th class="p-2 text-center pr-4">Country</th>
        <th class="p-2 text-center pr-4">Connected</th>
    </tr>
    <tr class="">
        <td class="p-2">Server 1</td>
        <td class="p-2 text-center text-green-600">UP</td>
        <td class="p-2 pr-4 flex justify-between"><span class="incident text-red-500"></span><span class="text-center">Germany</span><span class="pl-3">🇩🇪</span></td>
        <td class="text-center">
            <input class="my-auto" checked type="checkbox"/>
        </td>
    </tr>
    <tr class="bg-gray-200">
        <td class="p-2">Server 2</td>
        <td class="p-2 text-center text-green-600">UP</td>
        <td class="p-2 pr-4 flex justify-between"><span class="incident text-red-500"></span><span class="text-center">US</span><span class="pl-3">🇺🇸</span></td>
        <td class="text-center">
            <input class="my-auto" checked type="checkbox"/>
        </td>
    </tr>
    <tr class="">
        <td class="p-2">Server 3</td>
        <td class="p-2 text-center text-red-600">DOWN</td>
                <td class="p-2 pr-4 flex justify-between"><span class="incident text-red-500"></span><span class="text-center">France</span><span class="pl-3">🇫🇷</span></td>
        <td class="text-center">
            <input class="my-auto" type="checkbox"/>
        </td>
    </tr>
    <tr class="bg-gray-200">
        <td class="p-2">Server 1 (Mirror)</td>
        <td class="p-2 text-center text-green-600">UP</td>
        <td class="p-2 pr-4 flex justify-between"><span class="incident text-red-500">!</span><span class="text-center">Germany</span><span class="pl-3">🇩🇪</span></td>
        <td class="text-center">
            <input class="my-auto" type="checkbox"/>
        </td>
    </tr>
</table>
How to create a Simple server status table with Tailwind CSS?
Now that you have an idea of what a simple server status table created with Tailwind CSS might look like, let's take a look at how you can create one yourself.
Step 1: Set up your HTML
The first step in creating a server status table is to set up your HTML. Here is an example of what your HTML might look like:
<div class="container mx-auto">
  <table class="table-auto">
    <thead>
      <tr>
        <th class="px-4 py-2">Server Name</th>
        <th class="px-4 py-2">IP Address</th>
        <th class="px-4 py-2">Status</th>
        <th class="px-4 py-2">Last Checked</th>
      </tr>
    </thead>
    <tbody>
      <tr>
        <td class="border px-4 py-2">Server 1</td>
        <td class="border px-4 py-2">192.168.1.1</td>
        <td class="border px-4 py-2 text-green-600">Up</td>
        <td class="border px-4 py-2">2021-01-01 12:00:00</td>
      </tr>
      <tr>
        <td class="border px-4 py-2">Server 2</td>
        <td class="border px-4 py-2">192.168.1.2</td>
        <td class="border px-4 py-2 text-red-600">Down</td>
        <td class="border px-4 py-2">2021-01-01 12:00:00</td>
      </tr>
      <tr>
        <td class="border px-4 py-2">Server 3</td>
        <td class="border px-4 py-2">192.168.1.3</td>
        <td class="border px-4 py-2 text-green-600">Up</td>
        <td class="border px-4 py-2">2021-01-01 12:00:00</td>
      </tr>
    </tbody>
  </table>
</div>
Step 2: Style your HTML with Tailwind CSS
Once you have your HTML set up, you can start styling it with Tailwind CSS. Here is an example of what your CSS might look like:
.container {
  max-width: 1200px;
}

.table-auto {
  width: 100%;
}

th,
td {
  text-align: left;
}

th {
  background-color: #f2f2f2;
}

tr:nth-child(even) {
  background-color: #f2f2f2;
}

.text-green-600 {
  color: #10b981;
}

.text-red-600 {
  color: #ef4444;
}
Step 3: Add interactivity with JavaScript
Finally, you can add interactivity to your server status table using JavaScript. For example, you might want to periodically check the status of your servers and update the table accordingly. Here is an example of what your JavaScript might look like:
function updateServerStatus() {
  // TODO: Implement server status update logic
}

setInterval(updateServerStatus, 5000);
Conclusion
In conclusion, creating a simple server status table with Tailwind CSS is a great way to display data in a clear and concise manner. By using pre-defined classes provided by Tailwind CSS, you can create complex layouts and designs with minimal effort. Additionally, Tailwind CSS is highly customizable, which means that you can easily customize the look and feel of your server status table to match your application's branding.