- Published on
Create A Simple Open Graph Image Generator with AlpineJS and Tailwind CSS With Tailwind CSS Like A Pro With The Help Of These 6 Tips
- What is Tailwind CSS?
- The description of Simple Open Graph Image Generator with AlpineJS and Tailwind CSS ui component
- Why use Tailwind CSS to create a Simple Open Graph Image Generator with AlpineJS and Tailwind CSS ui component?
- The preview of Simple Open Graph Image Generator with AlpineJS and Tailwind CSS ui component
- The source code of Simple Open Graph Image Generator with AlpineJS and Tailwind CSS ui component
- How to create a Simple Open Graph Image Generator with AlpineJS and Tailwind CSS with Tailwind CSS?
- Conclusion
As a FrontEnd technology blogger, I am always looking for ways to make my work more efficient and visually appealing. One tool that has helped me achieve both of these goals is Tailwind CSS. In this article, I will show you how to create a Simple Open Graph Image Generator with AlpineJS and Tailwind CSS ui component using Tailwind CSS. I will also share 6 tips to help you use Tailwind CSS like a pro.
What is Tailwind CSS?
Tailwind CSS is a utility-first CSS framework that allows you to create custom designs quickly and easily. Instead of writing CSS from scratch, you can use pre-defined classes to style your HTML elements. This approach allows you to focus on the design of your application rather than the details of CSS.
The description of Simple Open Graph Image Generator with AlpineJS and Tailwind CSS ui component
The Simple Open Graph Image Generator with AlpineJS and Tailwind CSS ui component is a tool that allows you to create images that are optimized for social media sharing. The component is built using AlpineJS and Tailwind CSS and is designed to be easy to use and customize.
Why use Tailwind CSS to create a Simple Open Graph Image Generator with AlpineJS and Tailwind CSS ui component?
Tailwind CSS is an excellent choice for creating the Simple Open Graph Image Generator with AlpineJS and Tailwind CSS ui component for several reasons:
- Tailwind CSS provides a comprehensive set of pre-defined classes that can be used to style your components quickly and easily.
- Tailwind CSS allows you to create custom designs without having to write CSS from scratch.
- Tailwind CSS is easy to learn and use, making it an excellent choice for developers of all skill levels.
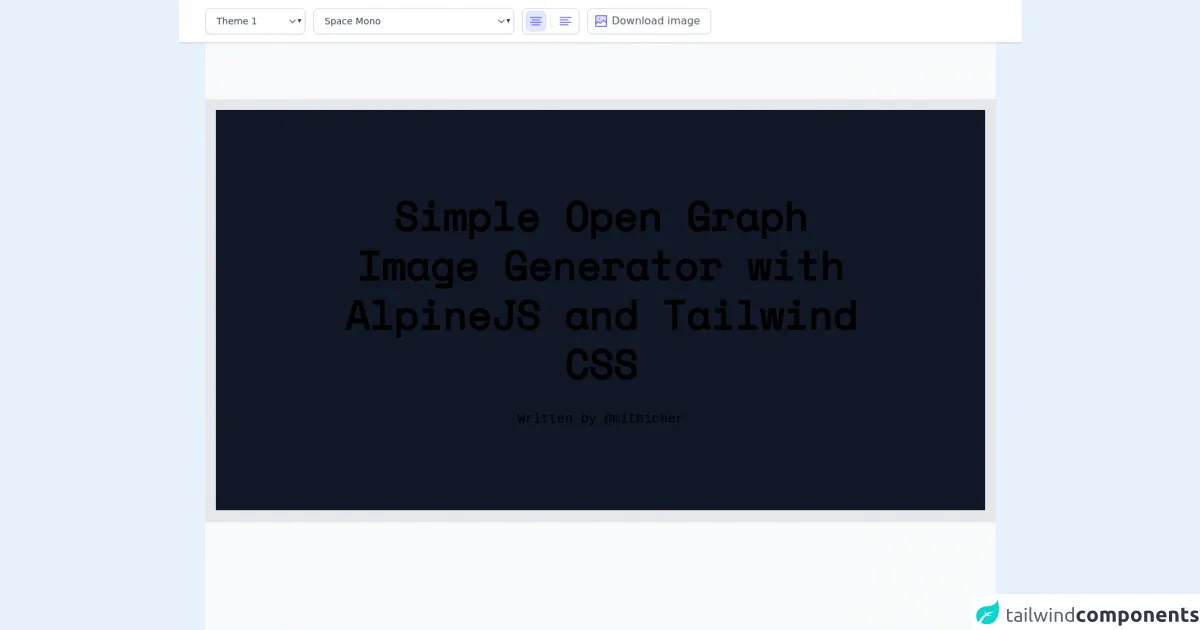
The preview of Simple Open Graph Image Generator with AlpineJS and Tailwind CSS ui component
The Simple Open Graph Image Generator with AlpineJS and Tailwind CSS ui component is designed to be easy to use and customize. With this component, you can create images that are optimized for social media sharing.
Free download of the Simple Open Graph Image Generator with AlpineJS and Tailwind CSS's source code
The source code of Simple Open Graph Image Generator with AlpineJS and Tailwind CSS ui component
To create the Simple Open Graph Image Generator with AlpineJS and Tailwind CSS ui component, you will need to use HTML, CSS, and JavaScript. The source code for this component is available below.
<!-- This is an example component -->
<div>
    <!doctype html>
<html lang="en">

<head>
	<meta charset="UTF-8">
	<meta name="viewport" content="width=device-width, initial-scale=1.0">
	<script src="https://cdn.tailwindcss.com"></script>
	<script defer src="https://unpkg.com/[email protected]/dist/cdn.min.js"></script>

	<style>
		.pattern-grid {
			background-image: linear-gradient(currentColor 1px, transparent 1px), linear-gradient(to right, currentColor 1px, transparent 1px);
			background-size: 40px 40px;
		}
		.pattern-grid-lg {
			background-image: linear-gradient(currentColor 1px, transparent 1px), linear-gradient(to right, currentColor 1px, transparent 1px);
			background-size: 80px 80px;
		}
		[x-cloak] { display: none; }
	</style>
</head>

<body class="bg-slate-100">
	<div class="relative flex flex-col justify-center h-screen bg-gray-50 dark:bg-gray-900 sm:items-center py-4 sm:pt-0 overflow-y-auto"
		x-data="{
		endpoint: 'https://www.googleapis.com/webfonts/v1/webfonts?key=AIzaSyBTZIBr5YQccTE1nPuWvBVIEbdExyzdCrY',
		fonts: [],
		fontName: 'Space Mono',
		alignment: 'center',
		theme: 'theme1',
		title: 'Simple Open Graph Image Generator with AlpineJS and Tailwind CSS',
		author: 'Written by @mithicher',
		getFontsLists() {
			fetch(this.endpoint)
				.then(response => response.json())
				.then(response => {
					this.fonts = response.items.map((item) => item.family)
				})
		},
		generateFontUrl() {
			return `https://fonts.googleapis.com/css2?family=${this.fontName.replace(' ', '+')}&display=swap`;
		},
		generateImage() {
			htmlToImage.toPng(document.getElementById('banner'))
				.then(function (dataUrl) {
					const link = document.createElement('a')
					link.download = 'og-banner.png'
					link.href = dataUrl
					link.click()
				})
				.catch(function (error) {
					console.error('oops, something went wrong!', error);
				});
		},
		alignText(value) {
			this.alignment = value
		}
	}" x-init="getFontsLists" x-cloak>
		<link :href="generateFontUrl" rel="stylesheet" crossorigin="anonymous">

		<!-- Settings Toolbar -->
		<div class="fixed top-0 left-0 w-full bg-white flex items-center h-16 shadow z-40 px-2">
			<div class="max-w-[75rem] mx-auto flex-1">
				<div class="flex space-x-3">
					<select x-model="theme" class="transition duration-150 ease-in-out px-3 h-10 py-2 block text-gray-700 font-sans rounded-lg text-left focus:outline-none focus:border-indigo-500 focus:ring-indigo-500 shadow-sm border sm:text-sm placeholder-gray-400 bg-white disabled:bg-gray-100 border-gray-300">
						<option value="" disabled>Select a theme</option>
						<option value="theme1" :selected="theme === 'theme1'" x-text="'Theme 1'"></option>
						<option value="theme2" :selected="theme === 'theme2'" x-text="'Theme 2'"></option>
						<option value="theme3" :selected="theme === 'theme3'" x-text="'Theme 3'"></option>
						<option value="theme4" :selected="theme === 'theme4'" x-text="'Theme 4'"></option>
					</select>
					<select x-model="fontName" class="transition duration-150 ease-in-out px-3 h-10 py-2 block text-gray-700 font-sans rounded-lg text-left focus:outline-none focus:border-indigo-500 focus:ring-indigo-500 shadow-sm border sm:text-sm placeholder-gray-400 bg-white disabled:bg-gray-100 border-gray-300">
						<option value="" disabled>Select a font</option>
						<template x-for="(font, fontIndex) in fonts" :key="fontIndex">
							<option :value="font" :selected="fontName === font" x-text="font"></option>
						</template>
					</select>
					<div class="flex items-center shadow-sm border border-gray-300 bg-white rounded-lg px-1 space-x-1.5">
						<button class="block w-8 h-8 hover:bg-indigo-100 rounded-lg" :class="{'bg-indigo-100': alignment === 'center'}" type="button" x-on:click="alignText('center')"><svg
								xmlns="http://www.w3.org/2000/svg" class="w-6 h-6 mx-auto" fill="#6366f1" viewBox="0 0 256 256">
								<rect width="256" height="256" fill="none"></rect>
								<line x1="40" y1="68" x2="216" y2="68" fill="none" stroke="#6366f1" stroke-linecap="round"
									stroke-linejoin="round" stroke-width="16"></line>
								<line x1="64" y1="108" x2="192" y2="108" fill="none" stroke="#6366f1" stroke-linecap="round"
									stroke-linejoin="round" stroke-width="16"></line>
								<line x1="40" y1="148" x2="216" y2="148" fill="none" stroke="#6366f1" stroke-linecap="round"
									stroke-linejoin="round" stroke-width="16"></line>
								<line x1="64" y1="188" x2="192" y2="188" fill="none" stroke="#6366f1" stroke-linecap="round"
									stroke-linejoin="round" stroke-width="16"></line>
							</svg></button>
						<div class="h-6 border-l"></div>
						<button class="block w-8 h-8 hover:bg-indigo-100 rounded-lg" :class="{'bg-indigo-100': alignment === 'left'}" type="button" x-on:click="alignText('left')"><svg
								xmlns="http://www.w3.org/2000/svg" class="w-6 h-6 mx-auto" fill="#6366f1" viewBox="0 0 256 256">
								<rect width="256" height="256" fill="none"></rect>
								<line x1="40" y1="68" x2="216" y2="68" fill="none" stroke="#6366f1" stroke-linecap="round"
									stroke-linejoin="round" stroke-width="16"></line>
								<line x1="40" y1="108" x2="168" y2="108" fill="none" stroke="#6366f1" stroke-linecap="round"
									stroke-linejoin="round" stroke-width="16"></line>
								<line x1="40" y1="148" x2="216" y2="148" fill="none" stroke="#6366f1" stroke-linecap="round"
									stroke-linejoin="round" stroke-width="16"></line>
								<line x1="40" y1="188" x2="168" y2="188" fill="none" stroke="#6366f1" stroke-linecap="round"
									stroke-linejoin="round" stroke-width="16"></line>
							</svg></button>
					</div>
					<div class="flex items-center shadow-sm border border-gray-300 bg-white rounded-lg px-2 space-x-2">
						<button class="flex text-gray-600 pr-2" type="button" x-on:click="generateImage()">
							<svg xmlns="http://www.w3.org/2000/svg" class="w-6 h-6 mr-1" fill="#6366f1" viewBox="0 0 256 256">
								<rect width="256" height="256" fill="none"></rect>
								<path
									d="M40,176V48a8,8,0,0,1,8-8H208a8,8,0,0,1,8,8V160h0l-42.3-42.3a8,8,0,0,0-11.4,0l-44.6,44.6a8,8,0,0,1-11.4,0L85.7,141.7a8,8,0,0,0-11.4,0Z"
									opacity="0.2"></path>
								<rect x="40" y="40" width="176" height="176" rx="8" fill="none" stroke="#6366f1"
									stroke-linecap="round" stroke-linejoin="round" stroke-width="16"></rect>
								<path
									d="M216,160l-42.3-42.3a8,8,0,0,0-11.4,0l-44.6,44.6a8,8,0,0,1-11.4,0L85.7,141.7a8,8,0,0,0-11.4,0L40,176"
									fill="none" stroke="#6366f1" stroke-linecap="round" stroke-linejoin="round"
									stroke-width="16"></path>
								<circle cx="100" cy="92" r="12"></circle>
							</svg>Download image
						</button>
					</div>
				</div>
			</div>
		</div>
		<!-- ./Settings Toolbar -->

		<div class="max-w-[75rem] mx-auto flex-1 flex items-center">
			<div
				:style="`font-family: ${fontName}, san-serif`"
				class="overflow-hidden shadow"
				:class="{ 'text-center': `${alignment}` === 'center', 'text-left': `${alignment}` === 'left'}">


				<div id="banner" style="height: 640px" class="relative flex flex-col shadow bg-white max-w-full">

					<!-- Banner Style with Tailwind CSS: Theme 1 -->
					<div x-show="theme === 'theme1'" class="flex-1 flex items-center border-[1em] border-cyan-600 bg-gray-900">
						<div class="relative z-10 px-40 py-6 flex-1">
							<h2 class="font-semibold text-slate-200 text-6xl leading-tight" contenteditable="true" spellcheck="false" x-text="title"></h2>
							<p class="text-slate-400 font-mono text-xl mt-8" contenteditable="true" x-text="author"></p>
						</div>

						<div class="w-64 absolute right-3 top-3">
							<div class="grid grid-cols-6">
								<div class="h-10 bg-cyan-600"></div>
								<div class="h-10"></div>
								<div class="h-10 bg-cyan-600"></div>
								<div class="h-10"></div>
								<div class="h-10 bg-cyan-600"></div>
								<div class="h-10"></div>
								<div class="h-10"></div>
								<div class="h-10 bg-cyan-600"></div>
								<div class="h-10"></div>
								<div class="h-10 bg-cyan-600"></div>
								<div class="h-10"></div>
								<div class="h-10 bg-cyan-600"></div>
								<div class="h-10"></div>
								<div class="h-10"></div>
								<div class="h-10 bg-cyan-600"></div>
								<div class="h-10"></div>
								<div class="h-10 bg-cyan-600"></div>
								<div class="h-10"></div>
								<div class="h-10"></div>
								<div class="h-10"></div>
								<div class="h-10"></div>
								<div class="h-10 bg-cyan-600"></div>
								<div class="h-10"></div>
								<div class="h-10 bg-cyan-600"></div>
								<div class="h-10"></div>
								<div class="h-10"></div>
								<div class="h-10"></div>
								<div class="h-10"></div>
								<div class="h-10 bg-cyan-600"></div>
								<div class="h-10"></div>
								<div class="h-10"></div>
								<div class="h-10"></div>
								<div class="h-10"></div>
								<div class="h-10"></div>
								<div class="h-10"></div>
								<div class="h-10 bg-cyan-600"></div>
							</div>
						</div>

						<div class="w-64 transform -rotate-180 absolute left-3 bottom-3">
							<div class="grid grid-cols-6">
								<div class="h-10 bg-cyan-600"></div>
								<div class="h-10"></div>
								<div class="h-10 bg-cyan-600"></div>
								<div class="h-10"></div>
								<div class="h-10 bg-cyan-600"></div>
								<div class="h-10"></div>
								<div class="h-10"></div>
								<div class="h-10 bg-cyan-600"></div>
								<div class="h-10"></div>
								<div class="h-10 bg-cyan-600"></div>
								<div class="h-10"></div>
								<div class="h-10 bg-cyan-600"></div>
								<div class="h-10"></div>
								<div class="h-10"></div>
								<div class="h-10 bg-cyan-600"></div>
								<div class="h-10"></div>
								<div class="h-10 bg-cyan-600"></div>
								<div class="h-10"></div>
								<div class="h-10"></div>
								<div class="h-10"></div>
								<div class="h-10"></div>
								<div class="h-10 bg-cyan-600"></div>
								<div class="h-10"></div>
								<div class="h-10 bg-cyan-600"></div>
								<div class="h-10"></div>
								<div class="h-10"></div>
								<div class="h-10"></div>
								<div class="h-10"></div>
								<div class="h-10 bg-cyan-600"></div>
								<div class="h-10"></div>
								<div class="h-10"></div>
								<div class="h-10"></div>
								<div class="h-10"></div>
								<div class="h-10"></div>
								<div class="h-10"></div>
								<div class="h-10 bg-cyan-600"></div>
							</div>
						</div>
					</div>
					<!-- ./Banner Style with Tailwind CSS: Theme 1 -->

					<!-- Banner Style with Tailwind CSS: Theme 2 -->
					<div x-show="theme === 'theme2'" class="relative flex-1 flex items-center bg-slate-50">
						<div class="-skew-y-12 w-full -mt-12 absolute top-0">
							<div class="grid grid-cols-6">
								<div class="h-12 col-span-1 bg-slate-200"></div>
								<div class="h-12 col-span-5 bg-white"></div>
							</div>
							<div class="grid grid-cols-4">
								<div class="h-12 col-span-1 bg-slate-100"></div>
								<div class="h-12 col-span-2 bg-white"></div>
								<div class="h-12 col-span-1 bg-gray-100"></div>
							</div>
							<div class="grid grid-cols-12">
								<div class="h-12 col-span-1 bg-indigo-600"></div>
								<div class="h-12 col-span-3 bg-indigo-300"></div>
								<div class="h-12 col-span-8 bg-white"></div>
							</div>
							<div class="grid grid-cols-8">
								<div class="h-12 col-span-6 bg-white"></div>
								<div class="h-12 col-span-2 bg-indigo-600"></div>
							</div>
							<div class="grid grid-cols-8">
								<div class="h-12 col-span-7 bg-white"></div>
								<div class="h-12 col-span-1 bg-indigo-300"></div>
							</div>
						</div>

						<div class="relative z-40 px-40 py-6">
							<h2 class="font-semibold text-slate-800 text-6xl leading-tight" contenteditable="true" spellcheck="false" x-text="title"></h2>
							<p class="text-slate-600 font-mono text-xl mt-8" contenteditable="true" x-text="author"></p>
						</div>

						<div class="-skew-y-12 w-full -mb-20 absolute bottom-0">
							<div class="grid grid-cols-5">
								<div class="h-12 col-span-1 bg-indigo-600"></div>
								<div class="h-12 col-span-4 bg-white"></div>
							</div>
							<div class="grid grid-cols-4">
								<div class="h-12 col-span-1 bg-slate-100"></div>
								<div class="h-12 col-span-2 bg-white"></div>
								<div class="h-12 col-span-1 bg-slate-100"></div>
							</div>
							<div class="grid grid-cols-6">
								<div class="h-12 col-span-1 bg-indigo-600"></div>
								<div class="h-12 col-span-1 bg-indigo-300"></div>
								<div class="h-12 col-span-4 bg-white"></div>
							</div>
							<div class="grid grid-cols-8">
								<div class="h-12 col-span-6 bg-white"></div>
								<div class="h-12 col-span-2 bg-indigo-600"></div>
							</div>
							<div class="grid grid-cols-8">
								<div class="h-12 col-span-7 bg-white"></div>
								<div class="h-12 col-span-1 bg-indigo-300"></div>
							</div>
						</div>
					</div>
					<!-- ./Banner Style with Tailwind CSS: Theme 2 -->

					<!-- Banner Style with Tailwind CSS: Theme 3 -->
					<div x-show="theme === 'theme3'" class="flex-1 flex items-center pattern-grid text-pink-100">
						<div class="h-96 bg-gradient-to-b from-pink-100 via-purple-50 absolute top-0 left-0 right-0"></div>
						<div class="h-96 bg-gradient-to-t from-white absolute bottom-0 left-0 right-0"></div>

						<div class="relative z-10 px-40 py-6">
							<h2 class="font-semibold text-pink-800 text-6xl leading-tight" contenteditable="true" spellcheck="false" x-text="title"></h2>
							<p class="text-slate-600 font-mono text-xl mt-16" contenteditable="true" x-text="author"></p>
						</div>
					</div>
					<!-- ./Banner Style with Tailwind CSS: Theme 3 -->

					<!-- Banner Style with Tailwind CSS: Theme 4 -->
					<div x-show="theme === 'theme4'" class="flex-1 flex items-center pattern-grid-lg text-slate-200">
						<div class="h-80 bg-gradient-to-t from-white absolute bottom-0 left-0 right-0"></div>

						<div class="relative z-20 px-40 py-6 w-full flex-1">
							<div class="w-40 h-40 rounded-full bg-pink-200 absolute -left-10 -top-10"></div>
							<div class="w-10 h-10 rounded-full bg-pink-200 absolute right-10 bottom-10"></div>
							<div class="w-10 h-10 rounded-full bg-purple-600 absolute left-10 bottom-0"></div>
							<div class="bg-purple-700 flex items-center h-80 px-4">
								<h2 class="font-semibold text-purple-50 text-6xl leading-tight" contenteditable="true" spellcheck="false" x-text="title"></h2>
							</div>
							<p class="text-slate-600 font-mono text-2xl mt-10" contenteditable="true" x-text="author"></p>
						</div>
					</div>
					<!-- ./Banner Style with Tailwind CSS: Theme 4 -->
				</div>

			</div>
		</div>
	</div>

	<script src="https://cdn.jsdelivr.net/npm/[email protected]/dist/html-to-image.js" crossorigin="anonymous"></script>
</body>

</html>
</div>
How to create a Simple Open Graph Image Generator with AlpineJS and Tailwind CSS with Tailwind CSS?
To create a Simple Open Graph Image Generator with AlpineJS and Tailwind CSS using Tailwind CSS, follow these steps:
- Create a new HTML file and add the necessary HTML elements.
- Add the Tailwind CSS stylesheet to your HTML file.
- Use Tailwind CSS classes to style your HTML elements.
- Add AlpineJS to your HTML file to add interactivity to your component.
- Write JavaScript code to generate the image.
Here is an example of how to create a Simple Open Graph Image Generator with AlpineJS and Tailwind CSS using Tailwind CSS:
<!DOCTYPE html>
<html>
  <head>
    <title>Simple Open Graph Image Generator with AlpineJS and Tailwind CSS</title>
    <link rel="stylesheet" href="https://cdn.jsdelivr.net/npm/[email protected]/dist/tailwind.min.css">
    <script src="https://cdn.jsdelivr.net/npm/[email protected]/dist/alpine.min.js"></script>
  </head>
  <body class="bg-gray-100">
    <div class="container mx-auto px-4 py-8">
      <h1 class="text-4xl font-bold mb-4">Simple Open Graph Image Generator</h1>
      <div x-data="{ title: '', description: '', image: '' }">
        <div class="mb-4">
          <label class="block text-gray-700 font-bold mb-2" for="title">
            Title
          </label>
          <input x-model="title" class="shadow appearance-none border rounded w-full py-2 px-3 text-gray-700 leading-tight focus:outline-none focus:shadow-outline" id="title" type="text" placeholder="Enter title">
        </div>
        <div class="mb-4">
          <label class="block text-gray-700 font-bold mb-2" for="description">
            Description
          </label>
          <input x-model="description" class="shadow appearance-none border rounded w-full py-2 px-3 text-gray-700 leading-tight focus:outline-none focus:shadow-outline" id="description" type="text" placeholder="Enter description">
        </div>
        <div class="mb-4">
          <label class="block text-gray-700 font-bold mb-2" for="image">
            Image URL
          </label>
          <input x-model="image" class="shadow appearance-none border rounded w-full py-2 px-3 text-gray-700 leading-tight focus:outline-none focus:shadow-outline" id="image" type="text" placeholder="Enter image URL">
        </div>
        <div class="mb-4">
          <button class="bg-blue-500 hover:bg-blue-700 text-white font-bold py-2 px-4 rounded" x-on:click="generateImage()">
            Generate Image
          </button>
        </div>
        <div x-show="generatedImage" class="border border-gray-300 rounded p-4">
          <img :src="generatedImage" alt="Generated Image">
        </div>
      </div>
    </div>
    <script>
      function generateImage() {
        const title = document.getElementById('title').value;
        const description = document.getElementById('description').value;
        const image = document.getElementById('image').value;
        const canvas = document.createElement('canvas');
        canvas.width = 1200;
        canvas.height = 630;
        const context = canvas.getContext('2d');
        const imageObj = new Image();
        imageObj.onload = function() {
          context.drawImage(imageObj, 0, 0, canvas.width, canvas.height);
          context.fillStyle = 'rgba(0, 0, 0, 0.5)';
          context.fillRect(0, 0, canvas.width, canvas.height);
          context.font = 'bold 48px Arial';
          context.fillStyle = 'white';
          context.fillText(title, 100, 100);
          context.font = '24px Arial';
          context.fillText(description, 100, 200);
          const generatedImage = canvas.toDataURL();
          document.getElementById('generated-image').setAttribute('src', generatedImage);
        };
        imageObj.src = image;
      }
    </script>
  </body>
</html>
Conclusion
Tailwind CSS is an excellent tool for creating custom designs quickly and easily. By using Tailwind CSS, you can create a Simple Open Graph Image Generator with AlpineJS and Tailwind CSS ui component that is easy to use and customize. By following the tips in this article, you can use Tailwind CSS like a pro and create beautiful designs in no time.