- Published on
How To Create A Form With Tailwind CSS From Scratch
- What is Tailwind CSS?
- The description of form ui component
- Why use Tailwind CSS to create a form ui component?
- The preview of form ui component.
- The source code of form ui component.
- How to create a form with Tailwind CSS?
- Step 1: Create a new HTML file
- Step 2: Add Tailwind CSS
- Step 3: Style the form elements
- Step 4: Preview the form
- Conclusion
What is Tailwind CSS?
Tailwind CSS is a utility-first CSS framework that allows developers to create custom and responsive user interfaces with ease. With Tailwind CSS, you can build complex layouts and UI components quickly and efficiently.
The description of form ui component
A form is a crucial UI component that allows users to input data into an application. Forms are used in various applications, including registration forms, contact forms, and login forms. A well-designed form can improve the user experience and increase user engagement.
Why use Tailwind CSS to create a form ui component?
Tailwind CSS provides a wide range of utility classes that make it easy to create custom and responsive forms. With Tailwind CSS, you can easily style form elements such as inputs, labels, buttons, and checkboxes.
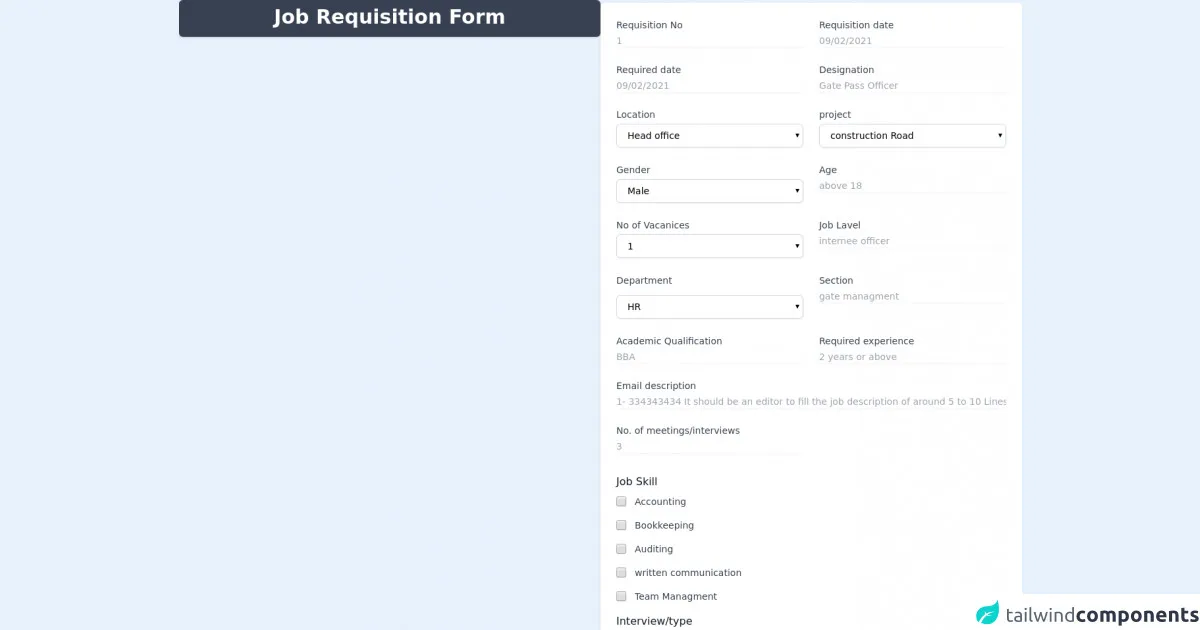
The preview of form ui component.
To create a form with Tailwind CSS, we will use various utility classes such as bg-gray-100, p-6, rounded-lg, shadow-md, w-full, border-gray-300, focus:border-indigo-500, focus:ring-1, and focus:ring-indigo-500.
Free download of the form's source code
The source code of form ui component.
To create a form with Tailwind CSS, we will use HTML and CSS. In the HTML code, we will use various form elements such as input, label, textarea, select, and button. In the CSS code, we will use various utility classes to style these form elements.
<!-- This is an example component -->
<div
class="w-full h-14 pt-2 text-center bg-gray-700 shadow overflow-hidden sm:rounded-md font-bold text-3xl text-white ">
Job Requisition Form
</div>
<section class="text-gray-600 body-font m-0 p-0 relative"></section>
<div class="container mx-auto">
<div class="flex flex-col text-center w-full mb-1">
</div>
<div class="mt-10 md:mt-0 md:col-span-2">
<form action="#" method="POST">
<div class="shadow overflow-hidden sm:rounded-md">
<div class="px-2 py-8 bg-white sm:p-6">
<div class="grid grid-cols-6 gap-6">
<div class="col-span-6 sm:col-span-3">
<label for="first-name" class="block text-sm font-medium text-gray-700">Requisition
No</label>
<input type="text" name="first-name" placeholder="1" id="first-name"
autocomplete="given-name"
class="mt-1 focus:ring-indigo-500 focus:border-indigo-500 block w-full shadow-sm sm:text-sm border-gray-300 rounded-md">
</div>
<div class="col-span-6 sm:col-span-3">
<label for="last-name" class="block text-sm font-medium text-gray-700">Requisition
date</label>
<input type="text" name="last-name" placeholder="09/02/2021" id="last-name"
autocomplete="family-name"
class="mt-1 focus:ring-indigo-500 text-gray-300 focus:border-indigo-500 block w-full shadow-sm sm:text-sm border-gray-300 rounded-md" />
</div>
<div class="col-span-6 sm:col-span-3">
<label for="last-name" class="block text-sm font-medium text-gray-700">Required
date</label>
<input type="text" name="last-name" placeholder="09/02/2021" id="last-name"
autocomplete="family-name"
class="mt-1 focus:ring-indigo-500 focus:border-indigo-500 block w-full shadow-sm sm:text-sm border-gray-300 rounded-md">
</div>
<div class="col-span-6 sm:col-span-3">
<label for="last-name" class="block text-sm font-medium text-gray-700">
Designation</label>
<input type="text" name="last-name" placeholder="Gate Pass Officer" id="last-name"
autocomplete="family-name"
class="mt-1 focus:ring-indigo-500 focus:border-indigo-500 block w-full shadow-sm sm:text-sm border-gray-300 rounded-md">
</div>
<div class="col-span-6 sm:col-span-3">
<label for="country" class="block text-sm font-medium text-gray-700">
Location</label>
<select id="country" name="country" autocomplete="country"
class="mt-1 block w-full py-2 px-3 border border-gray-300 bg-white rounded-md shadow-sm focus:outline-none focus:ring-indigo-500 focus:border-indigo-500 sm:text-sm">
<option>Head office</option>
<option>Canada</option>
<option>Mexico</option>
</select>
</div>
<div class="col-span-6 sm:col-span-3">
<label for="country" class="block text-sm font-medium text-gray-700">
project</label>
<select id="country" name="country" autocomplete="country"
class="mt-1 block w-full py-2 px-3 border border-gray-300 bg-white rounded-md shadow-sm focus:outline-none focus:ring-indigo-500 focus:border-indigo-500 sm:text-sm">
<option>construction Road</option>
<option>Canada</option>
<option>Mexico</option>
</select>
</div>
<div class="col-span-6 sm:col-span-3">
<label for="country" class="block text-sm font-medium text-gray-700">
Gender</label>
<select id="country" name="country" autocomplete="country"
class="mt-1 block w-full py-2 px-3 border border-gray-300 bg-white rounded-md shadow-sm focus:outline-none focus:ring-indigo-500 focus:border-indigo-500 sm:text-sm">
<option>Male</option>
<option>female</option>
<option>other</option>
</select>
</div>
<div class="col-span-6 sm:col-span-3">
<label for="last-name" class="block text-sm font-medium text-gray-700">
Age</label>
<input type="text" name="last-name" placeholder="above 18" id="last-name"
autocomplete="family-name"
class="mt-1 focus:ring-indigo-500 focus:border-indigo-500 block w-full shadow-sm sm:text-sm border-gray-300 rounded-md">
</div>
<div class="col-span-6 sm:col-span-3">
<label for="country" class="block text-sm font-medium text-gray-700">
No of Vacanices</label>
<select id="country" name="country" autocomplete="country"
class="mt-1 block w-full py-2 px-3 border border-gray-300 bg-white rounded-md shadow-sm focus:outline-none focus:ring-indigo-500 focus:border-indigo-500 sm:text-sm">
<option>1</option>
<option>2</option>
<option>3</option>
</select>
</div>
<div class="col-span-6 sm:col-span-3">
<label for="last-name" class="block text-sm font-medium text-gray-700">
Job Lavel</label>
<input type="text" name="last-name" id="last-name" placeholder="internee officer"
autocomplete="family-name"
class="mt-1 focus:ring-indigo-500 focus:border-indigo-500 block w-full shadow-sm sm:text-sm border-gray-300 rounded-md">
</div>
<div class="col-span-6 sm:col-span-3">
<label for="country" class="block text-sm font-medium text-gray-700">
Department</label>
<select id="country" name="country" autocomplete="country"
class="mt-3 block w-full py-2 px-3 border border-gray-300 bg-white rounded-md shadow-sm focus:outline-none focus:ring-indigo-500 focus:border-indigo-500 sm:text-sm">
<option class="mt-2">HR</option>
<option>Canada</option>
<option>Mexico</option>
</select>
</div>
<div class="col-span-6 sm:col-span-3">
<label for="last-name" class="block text-sm font-medium text-gray-700">
Section</label>
<input type="text" name="last-name" placeholder="gate managment" id="last-name"
autocomplete="family-name"
class="mt-1 focus:ring-indigo-500 focus:border-indigo-500 block w-full shadow-sm sm:text-sm border-gray-300 rounded-md">
</div>
<div class="col-span-6 sm:col-span-3">
<label for="last-name" class="block text-sm font-medium text-gray-700">
Academic Qualification</label>
<input type="text" name="last-name" placeholder="BBA" id="last-name"
autocomplete="family-name"
class="mt-1 focus:ring-indigo-500 focus:border-indigo-500 block w-full shadow-sm sm:text-sm border-gray-300 rounded-md">
</div>
<div class="col-span-6 sm:col-span-3">
<label for="last-name" class="block text-sm font-medium text-gray-700">
Required experience</label>
<input type="text" name="last-name" placeholder="2 years or above" id="last-name"
autocomplete="family-name"
class="mt-1 focus:ring-indigo-500 focus:border-indigo-500 block w-full shadow-sm sm:text-sm border-gray-300 rounded-md">
</div>
<div class="col-span-6 sm:col-span-6">
<label for="email-address" class="block text-sm font-medium text-gray-700">Email
description</label>
<input type="text" name="email-address"
placeholder="1- 334343434 It should be an editor to fill the job description of around 5 to 10 Lines ."
id="email-address" autocomplete="email"
class="mt-1 focus:ring-indigo-500 focus:border-indigo-500 block w-full shadow-sm sm:text-sm border-gray-300 rounded-md">
</div>
<div class="col-span-6 sm:col-span-3">
<label for="last-name" class="block text-sm font-medium text-gray-700">
No. of meetings/interviews</label>
<input type="text" name="last-name" placeholder="3" id="last-name"
autocomplete="family-name"
class="mt-1 focus:ring-indigo-500 focus:border-indigo-500 block w-full shadow-sm sm:text-sm border-gray-300 rounded-md">
</div>
</div>
<fieldset class="mt-8 ">
<legend class=" text-base text-1.5xl font-medium text-gray-900">Job Skill</legend>
<div class="mt-2 space-y-4">
<div class="flex place-items-center">
<div class="flex items-center h-5">
<input id="comments" name="comments" type="checkbox"
class="focus:ring-indigo-500 h-4 w-4 text-indigo-600 border-gray-300 rounded">
</div>
<div class="ml-3 text-sm">
<label for="comments" class="font-regular text-gray-700">Accounting</label>
</div>
</div>
<div class="flex items-start">
<div class="flex items-center h-5">
<input id="comments" name="comments" type="checkbox"
class="focus:ring-indigo-500 h-4 w-4 text-indigo-600 border-gray-300 rounded">
</div>
<div class="ml-3 text-sm">
<label for="comments" class="font-regular text-gray-700">Bookkeeping</label>
</div>
</div>
<div class="flex items-start">
<div class="flex items-center h-5">
<input id="comments" name="comments" type="checkbox"
class="focus:ring-indigo-500 h-4 w-4 text-indigo-600 border-gray-300 rounded">
</div>
<div class="ml-3 text-sm">
<label for="comments" class="font-regular text-gray-700">Auditing</label>
</div>
</div>
<div class="flex items-start">
<div class="flex items-center h-5">
<input id="comments" name="comments" type="checkbox"
class="focus:ring-indigo-500 h-4 w-4 text-indigo-600 border-gray-300 rounded">
</div>
<div class="ml-3 text-sm">
<label for="comments" class="font-regular text-gray-700">written
communication</label>
</div>
</div>
<div class="flex items-start">
<div class="flex items-center h-5">
<input id="comments" name="comments" type="checkbox"
class="focus:ring-indigo-500 h-4 w-4 text-indigo-600 border-gray-300 rounded">
</div>
<div class="ml-3 text-sm">
<label for="comments" class="font-regular text-gray-700">Team
Managment</label>
</div>
</div>
<legend class=" text-base text-1.5xl font-medium text-gray-900">
Interview/type
</legend>
<div class="mt-2 space-y-4">
<div class="flex items-start">
<div class="flex items-center h-5">
<input id="comments" name="comments" type="checkbox"
class="focus:ring-indigo-500 h-4 w-4 text-indigo-600 border-gray-300 rounded">
</div>
<div class="ml-3 text-sm">
<label for="comments"
class="font-mediuregular text-gray-700">Technical</label>
</div>
</div>
<div class="flex items-start">
<div class="flex items-center h-5">
<input id="comments" name="comments" type="checkbox"
class="focus:ring-indigo-500 h-4 w-4 text-indigo-600 border-gray-300 rounded">
</div>
<div class="ml-3 text-sm">
<label for="comments" class="font-mediuregular text-gray-700">HR</label>
</div>
</div>
<div class="flex items-start">
<div class="flex items-center h-5">
<input id="comments" name="comments" type="checkbox"
class="focus:ring-indigo-500 h-4 w-4 text-indigo-600 border-gray-300 rounded">
</div>
<div class="ml-3 text-sm">
<label for="comments" class="font-mediuregular text-gray-700">Final</label>
</div>
</div>
<legend class=" text-base text-1.5xl font-medium text-gray-900">
Competencies
</legend>
<div class=" space-y-4">
<div class="flex items-start">
<div class="flex items-center h-5">
<input id="comments" name="comments" type="checkbox"
class="focus:ring-indigo-500 h-4 w-4 text-indigo-600 border-gray-300 rounded">
</div>
<div class=" text-sm">
<label for="comments"
class=" ml-3 font-mediuregular text-gray-700">Analysis</label>
</div>
</div>
<div class="flex items-start">
<div class="flex items-center h-5">
<input id="comments" name="comments" type="checkbox"
class="focus:ring-indigo-500 h-4 w-4 text-indigo-600 border-gray-300 rounded">
</div>
<div class="ml-3 text-sm">
<label for="comments" class="font-mediuregular text-gray-700">R &
D</label>
</div>
</div>
<div class="flex items-start">
<div class="flex items-center h-5">
<input id="comments" name="comments" type="checkbox"
class="focus:ring-indigo-500 h-4 w-4 text-indigo-600 border-gray-300 rounded">
</div>
<div class="ml-3 text-sm">
<label for="comments"
class="font-mediuregular text-gray-700">Bookkeeping</label>
</div>
</div>
<div class="flex items-start">
<div class="flex items-center h-5">
<input id="comments" name="comments" type="checkbox"
class="focus:ring-indigo-500 h-4 w-4 text-indigo-600 border-gray-300 rounded">
</div>
<div class="ml-3 text-sm">
<label for="comments" class="font-mediuregular text-gray-700">Quick
Larner</label>
</div>
</div>
<div class="flex items-start">
<div class="flex items-center h-5">
<input id="comments" name="comments" type="checkbox"
class="focus:ring-indigo-500 h-4 w-4 text-indigo-600 border-gray-300 rounded">
</div>
<div class="ml-3 text-sm">
<label for="comments" class="font-mediuregular text-gray-700">Team
Managment</label>
</div>
</div>
</div>
</fieldset>
</div>
<div class="px-4 py-3 bg-white text-right sm:px-6">
<button type="submit"
class="mr-4 inline-flex justify-center w-24 py-2 px-4 border border-transparent shadow-sm text-sm font-medium rounded-md ring ring-gray-500 ring-offset-4 text-white bg-gray-600 hover:bg-gray-700 focus:outline-none focus:ring-2 focus:ring-indigo-500">
New
</button>
<button type="submit"
class="inline-flex justify-center w-24 py-2 px-4 border border-transparent shadow-sm text-sm font-medium rounded-md ring ring-indigo-500 ring-offset-4 bg-indigo-600 hover:bg-indigo-700 text-whitefocus:outline-none focus:ring-2 focus:ring-indigo-500">
Save
</button>
</div>
</div>
</div>
</form>
</div>
</section>
<div class="hidden sm:block" aria-hidden="true">
<div class="py-5">
<div class=""></div>
</div>
</div>
How to create a form with Tailwind CSS?
To create a form with Tailwind CSS, follow these steps:
Step 1: Create a new HTML file
Create a new HTML file and add the following code:
<!DOCTYPE html>
<html lang="en">
  <head>
    <meta charset="UTF-8" />
    <meta name="viewport" content="width=device-width, initial-scale=1.0" />
    <meta http-equiv="X-UA-Compatible" content="ie=edge" />
    <title>Tailwind CSS Form</title>
    <link rel="stylesheet" href="https://cdn.jsdelivr.net/npm/tailwindcss/dist/tailwind.min.css" />
  </head>
  <body>
    <div class="bg-gray-100 min-h-screen flex flex-col justify-center py-12 sm:px-6 lg:px-8">
      <div class="mt-8 sm:mx-auto sm:w-full sm:max-w-md">
        <div class="bg-white py-8 px-4 shadow-md sm:rounded-lg sm:px-10">
          <form>
            <div>
              <label for="name" class="block text-sm font-medium text-gray-700">Name</label>
              <div class="mt-1">
                <input type="text" name="name" id="name" autocomplete="given-name" required class="shadow-sm focus:ring-indigo-500 focus:border-indigo-500 block w-full sm:text-sm border-gray-300 rounded-md">
              </div>
            </div>
            <div class="mt-6">
              <label for="email" class="block text-sm font-medium text-gray-700">Email</label>
              <div class="mt-1">
                <input type="email" name="email" id="email" autocomplete="email" required class="shadow-sm focus:ring-indigo-500 focus:border-indigo-500 block w-full sm:text-sm border-gray-300 rounded-md">
              </div>
            </div>
            <div class="mt-6">
              <label for="message" class="block text-sm font-medium text-gray-700">Message</label>
              <div class="mt-1">
                <textarea id="message" name="message" rows="4" class="shadow-sm focus:ring-indigo-500 focus:border-indigo-500 block w-full sm:text-sm border-gray-300 rounded-md"></textarea>
              </div>
            </div>
            <div class="mt-6">
              <label for="country" class="block text-sm font-medium text-gray-700">Country</label>
              <div class="mt-1">
                <select id="country" name="country" autocomplete="country" class="shadow-sm focus:ring-indigo-500 focus:border-indigo-500 block w-full sm:text-sm border-gray-300 rounded-md">
                  <option>United States</option>
                  <option>Canada</option>
                  <option>Mexico</option>
                </select>
              </div>
            </div>
            <div class="mt-6">
              <button type="submit" class="w-full flex justify-center py-2 px-4 border border-transparent rounded-md shadow-sm text-sm font-medium text-white bg-indigo-600 hover:bg-indigo-700 focus:outline-none focus:ring-2 focus:ring-offset-2 focus:ring-indigo-500">
                Submit
              </button>
            </div>
          </form>
        </div>
      </div>
    </div>
  </body>
</html>
Step 2: Add Tailwind CSS
Add the Tailwind CSS stylesheet to the HTML file by adding the following code to the <head> section:
<link rel="stylesheet" href="https://cdn.jsdelivr.net/npm/tailwindcss/dist/tailwind.min.css" />
Step 3: Style the form elements
Use various utility classes to style the form elements. For example, to style the input element, use the following code:
<input type="text" name="name" id="name" autocomplete="given-name" required class="shadow-sm focus:ring-indigo-500 focus:border-indigo-500 block w-full sm:text-sm border-gray-300 rounded-md">
Step 4: Preview the form
Preview the form in a web browser to see how it looks. Make any necessary adjustments to the form elements or styles.
Conclusion
Creating a form with Tailwind CSS is easy and efficient. With Tailwind CSS, you can easily style form elements and create custom and responsive forms. Use the steps outlined in this article to create your own forms with Tailwind CSS.