- Published on
6 Easy Ways To Create A Weather UI component. With Tailwind CSS

- What is Tailwind CSS?
- The description of Weather UI component.
- Why use Tailwind CSS to create a Weather UI component?
- The preview of Weather UI component.
- The source code of Weather UI component.
- How to create a Weather UI component with Tailwind CSS?
- 1. Create the HTML structure
- 2. Add Tailwind CSS classes
- 3. Set the background color
- 4. Add the weather icon
- 5. Set the font size and color
- 6. Add rounded corners
- Conclusion
As a FrontEnd technology blogger, you must have heard of Tailwind CSS. Tailwind CSS is a utility-first CSS framework that allows you to create custom designs quickly. It is a popular choice for FrontEnd developers because it provides a lot of pre-built CSS classes that can be used to style your HTML elements.
In this article, we will discuss how to create a Weather UI component with Tailwind CSS. We will cover the description of the Weather UI component, why use Tailwind CSS to create it, the preview of the component, the source code, and how to create it.
What is Tailwind CSS?
Tailwind CSS is a utility-first CSS framework that allows you to create custom designs quickly. It provides a lot of pre-built CSS classes that can be used to style your HTML elements. With Tailwind CSS, you can create complex designs without writing custom CSS code.
The description of Weather UI component.
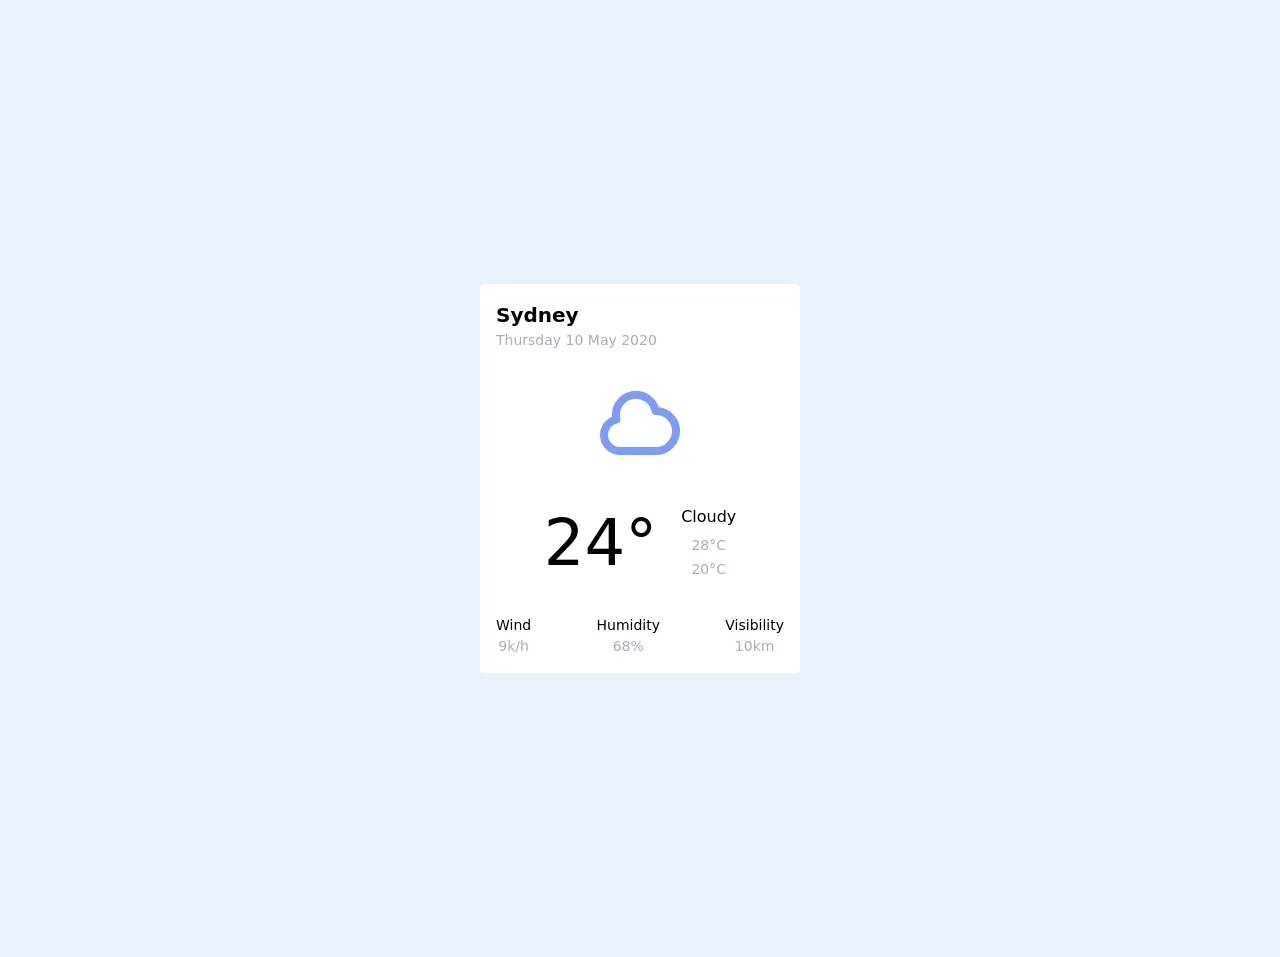
A Weather UI component is a component that displays the weather information of a particular location. It usually includes the temperature, weather condition, and an icon that represents the weather condition. The component can be used on a weather app or a website that displays weather information.
Why use Tailwind CSS to create a Weather UI component?
Tailwind CSS provides a lot of pre-built CSS classes that can be used to style your HTML elements. It makes it easy to create complex designs without writing custom CSS code. With Tailwind CSS, you can create a Weather UI component quickly and easily.
The preview of Weather UI component.
Free download of the Weather UI component.'s source code
The source code of Weather UI component.
<div class="min-h-screen flex items-center justify-center">
<div class="flex flex-col bg-white rounded p-4 w-full max-w-xs">
						<div class="font-bold text-xl">Sydney</div>
						<div class="text-sm text-gray-500">Thursday 10 May 2020</div>
						<div class="mt-6 text-6xl self-center inline-flex items-center justify-center rounded-lg text-indigo-400 h-24 w-24">
<svg class="w-32 h-32" fill="none" stroke="currentColor" viewBox="0 0 24 24" xmlns="http://www.w3.org/2000/svg"><path stroke-linecap="round" stroke-linejoin="round" stroke-width="2" d="M3 15a4 4 0 004 4h9a5 5 0 10-.1-9.999 5.002 5.002 0 10-9.78 2.096A4.001 4.001 0 003 15z"></path></svg>
						</div>
						<div class="flex flex-row items-center justify-center mt-6">
							<div class="font-medium text-6xl">24°</div>
							<div class="flex flex-col items-center ml-6">
								<div>Cloudy</div>
								<div class="mt-1">
									<span class="text-sm"><i class="far fa-long-arrow-up"></i></span>
									<span class="text-sm font-light text-gray-500">28°C</span>
								</div>
								<div>
									<span class="text-sm"><i class="far fa-long-arrow-down"></i></span>
									<span class="text-sm font-light text-gray-500">20°C</span>
								</div>
							</div>
						</div>
						<div class="flex flex-row justify-between mt-6">
							<div class="flex flex-col items-center">
								<div class="font-medium text-sm">Wind</div>
								<div class="text-sm text-gray-500">9k/h</div>
							</div>
							<div class="flex flex-col items-center">
								<div class="font-medium text-sm">Humidity</div>
								<div class="text-sm text-gray-500">68%</div>
							</div>
							<div class="flex flex-col items-center">
								<div class="font-medium text-sm">Visibility</div>
								<div class="text-sm text-gray-500">10km</div>
							</div>
						</div>
					</div>
</div>
How to create a Weather UI component with Tailwind CSS?
Here are the six easy ways to create a Weather UI component with Tailwind CSS:
1. Create the HTML structure
The first step is to create the HTML structure of the Weather UI component. You can use the following HTML code:
<div class="weather">
<div class="weather-icon">
<i class="wi wi-day-sunny"></i>
</div>
<div class="weather-info">
<div class="weather-temp">25°C</div>
<div class="weather-condition">Sunny</div>
</div>
</div>
2. Add Tailwind CSS classes
Next, you need to add Tailwind CSS classes to the HTML elements. You can use the following classes:
<div class="weather bg-blue-500 rounded-lg p-4">
<div class="weather-icon text-white">
<i class="wi wi-day-sunny text-4xl"></i>
</div>
<div class="weather-info">
<div class="weather-temp text-4xl text-white font-bold">25°C</div>
<div class="weather-condition text-white">Sunny</div>
</div>
</div>
3. Set the background color
Set the background color of the Weather UI component using the bg-blue-500 class.
4. Add the weather icon
Add the weather icon using the wi wi-day-sunny class. You can change the icon based on the weather condition.
5. Set the font size and color
Set the font size and color of the temperature and weather condition using the text-4xl, text-white, and font-bold classes.
6. Add rounded corners
Add rounded corners to the Weather UI component using the rounded-lg class.
Conclusion
In this article, we discussed how to create a Weather UI component with Tailwind CSS. We covered the description of the component, why use Tailwind CSS to create it, the preview of the component, the source code, and how to create it. With Tailwind CSS, you can create complex designs quickly and easily.