- Published on
6 Easy Ways To Build A Vue Notification message With Tailwind CSS Without Even Thinking About It
- What is Tailwind CSS?
- The description of Vue Notification message ui component
- Why use Tailwind CSS to create a Vue Notification message ui component?
- The preview of Vue Notification message ui component.
- The source code of Vue Notification message ui component.
- How to create a Vue Notification message with Tailwind CSS?
- 1. Install Tailwind CSS
- 2. Create a new Vue component
- 3. Import Tailwind CSS
- 4. Create your notification message
- 5. Customize your notification message
- 6. Add your notification message to your website
- Conclusion
As a FrontEnd technology blogger, you are always looking for ways to make your website look better and more user-friendly. One way to do this is by using Vue Notification message with Tailwind CSS. In this article, we will discuss the benefits of using Tailwind CSS to create a Vue Notification message ui component and provide you with six easy ways to do it.
What is Tailwind CSS?
Tailwind CSS is a utility-first CSS framework that allows you to quickly and easily create custom user interfaces. It provides a set of pre-defined CSS classes that you can use to style your HTML elements. With Tailwind CSS, you can create complex layouts and designs without writing any custom CSS.
The description of Vue Notification message ui component
Vue Notification message is a popular UI component that allows you to display notifications to your users. It is a simple and effective way to communicate with your users and keep them informed of important events.
Why use Tailwind CSS to create a Vue Notification message ui component?
Tailwind CSS provides a set of pre-defined CSS classes that you can use to style your Vue Notification message ui component. This makes it easy to create a custom design that matches your website's style and branding. Additionally, Tailwind CSS is highly customizable, which means you can easily modify the styles to fit your specific needs.
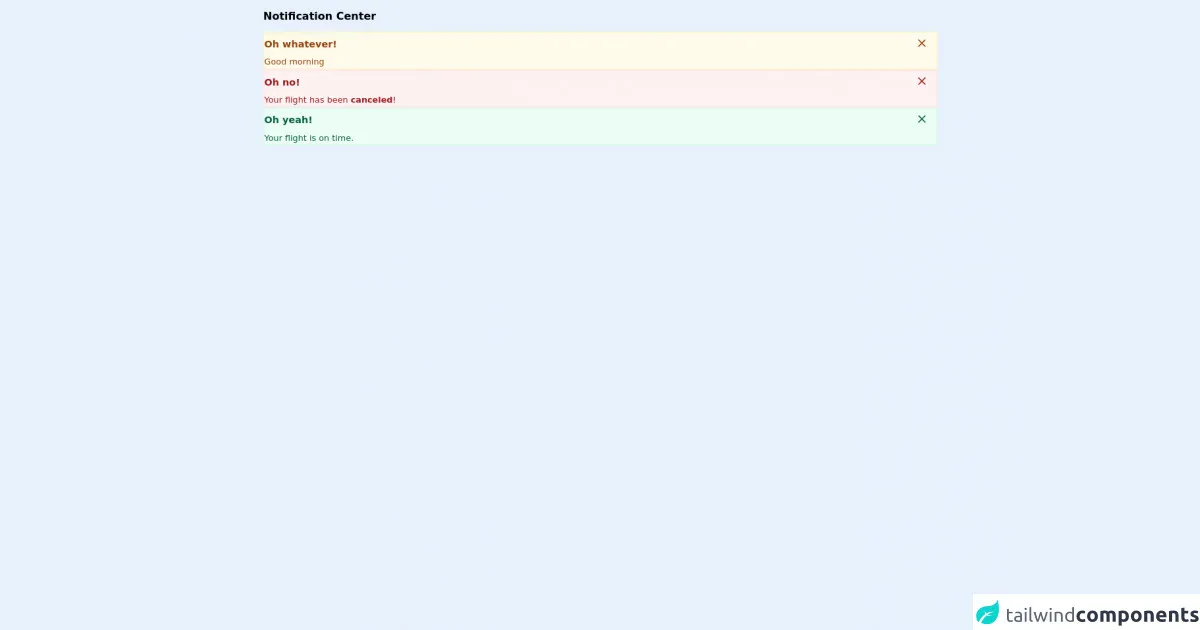
The preview of Vue Notification message ui component.
Vue Notification message ui component is a great way to display notifications to your users. It is simple and effective, and can be easily customized to match your website's style and branding.
Free download of the Vue Notification message's source code
The source code of Vue Notification message ui component.
Creating a Vue Notification message ui component with Tailwind CSS is easy. You can start by creating a new Vue component and importing the necessary libraries.
<html>

<head>
  <meta charset="UTF-8" />
  <meta name="viewport" content="width=device-width, initial-scale=1.0" />
  <link href="https://unpkg.com/tailwindcss@^2/dist/tailwind.min.css" rel="stylesheet">
</head>

<body>
  <div id="app">
    <div class="font-bold text-xl py-4">Notification Center</div>
    <notification-message>Good morning</notification-message>
    <notification-message type="error" header="Oh no!">
      <p>Your flight has been <b>canceled</b>!</p>
    </notification-message>

    <notification-message type="success" header="Oh yeah!">
      <p>Your flight is on time.</p>
    </notification-message>
  </div>
</body>

<script src="https://unpkg.com/vue"></script>

<script type="text/x-template" id="notification-message-template">
  <div v-if="hidden === false">
    <!-- Switch based on type -->
    <div class="container border-2" :class="renderByType">

      <div class="flex items-stretch py-2">
        <span class="flex-auto font-bold text-lg">{{ this.header }}</span>
        <svg xmlns="http://www.w3.org/2000/svg" class="flex-end mr-4 h-6 w-6" fill="none" viewBox="0 0 24 24"
          stroke="currentColor" @click="hide">
          <path stroke-linecap="round" stroke-linejoin="round" stroke-width="2" d="M6 18L18 6M6 6l12 12" />
        </svg>
      </div>
      <p>
        <slot></slot>
      </p>
    </div>
  </div>
</script>

<script>
  Vue.component("notification-message", {
    template: '#notification-message-template',
    props: {
      type: {
        type: String,
        default: "warning"
      },
      header: {
        type: String,
        default: "Oh whatever!"
      },
    },
    computed: {
      renderByType: function () {
        let r = this.type === 'error' ? 'border-red-100 bg-red-50 text-red-800' :
          this.type === 'warning' ? 'border-yellow-100 bg-yellow-50 text-yellow-800' :
            'border-green-100 bg-green-50 text-green-800';
        //console.log(r);
        return r;
      }
    },
    data() {
      return {
        hidden: false
      };
    },
    methods: {
      hide() {
        this.hidden = true;
      }
    }
  })
  new Vue({
      el: '#app',
      data: {

      }
    })
</script>

</html>
How to create a Vue Notification message with Tailwind CSS?
Here are six easy ways to create a Vue Notification message with Tailwind CSS:
1. Install Tailwind CSS
The first step is to install Tailwind CSS. You can do this by running the following command in your terminal:
npm install tailwindcss
2. Create a new Vue component
Next, create a new Vue component for your notification message. You can do this by running the following command in your terminal:
vue create notification-message
3. Import Tailwind CSS
Once you have created your Vue component, you need to import Tailwind CSS. You can do this by adding the following code to your main.js file:
import 'tailwindcss/dist/tailwind.css'
4. Create your notification message
Now you can create your notification message. You can do this by adding the following HTML code to your Vue component:
<div class="bg-green-500 text-white font-bold rounded-t px-4 py-2">
  Success
</div>
5. Customize your notification message
You can customize your notification message by modifying the CSS classes. For example, you can change the background color by changing the bg-green-500 class to bg-red-500.
<div class="bg-red-500 text-white font-bold rounded-t px-4 py-2">
  Error
</div>
6. Add your notification message to your website
Finally, you can add your notification message to your website by including it in your HTML code. You can do this by adding the following code to your HTML file:
<notification-message></notification-message>
Conclusion
In conclusion, creating a Vue Notification message with Tailwind CSS is easy and can be done in just a few steps. By using Tailwind CSS, you can create a custom design that matches your website's style and branding. Additionally, Tailwind CSS is highly customizable, which means you can easily modify the styles to fit your specific needs. We hope this article has been helpful in showing you how to create a Vue Notification message with Tailwind CSS.