- Published on
6 Steps To Make A Todo List With Tailwind CSS Like A Pro In Under An Hour
- What is Tailwind CSS?
- The description of Todo List UI component
- Why use Tailwind CSS to create a Todo List UI component?
- The preview of Todo List UI component
- The source code of Todo List UI component
- How to create a Todo List with Tailwind CSS?
- Step 1: Set up your HTML structure
- Step 2: Add a new task input field
- Step 3: Add a new task button
- Step 4: Style the Todo List
- Step 5: Add functionality to the Todo List
- Step 6: Add responsiveness to the Todo List
- Conclusion
What is Tailwind CSS?
Tailwind CSS is a utility-first CSS framework that provides a set of pre-defined classes to style your HTML elements. It allows you to create custom designs without writing any CSS code. With Tailwind CSS, you can easily create responsive and modern UI components for your web applications.
The description of Todo List UI component
A Todo List is a simple UI component that allows users to keep track of their tasks. It consists of a list of items, each with a checkbox and a label. When a user completes a task, they can check the checkbox to mark it as done.
Why use Tailwind CSS to create a Todo List UI component?
Tailwind CSS provides a set of pre-defined classes that make it easy to create a Todo List UI component. With Tailwind CSS, you can quickly style the checkboxes, labels, and list items without writing any CSS code. This saves you time and allows you to focus on the functionality of your Todo List.
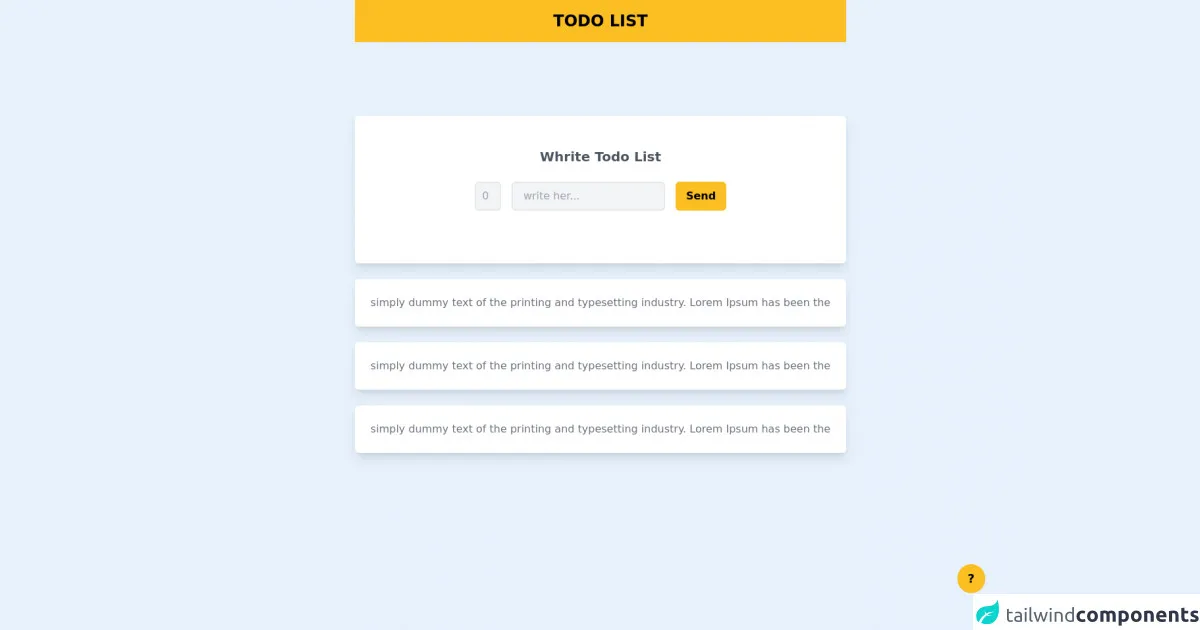
The preview of Todo List UI component
To create a Todo List UI component with Tailwind CSS, you can use the following HTML structure:
<div class="flex items-center">
  <input type="checkbox" class="form-checkbox h-5 w-5 text-blue-600">
  <span class="ml-2 text-gray-700">{{__placeholder1__}}</span>
</div>
Free download of the Todo List's source code
The source code of Todo List UI component
To create a Todo List UI component with Tailwind CSS, you can use the following HTML and CSS code:
<div class="flex items-center">
  <input type="checkbox" class="form-checkbox h-5 w-5 text-blue-600">
  <span class="ml-2 text-gray-700">Task 1</span>
</div>
.form-checkbox:checked {
  background-color: #4299e1;
  border-color: #4299e1;
}
<div class="bg-slate-100 h-screen">
	<nav class="w-full bg-yellow-400 py-4">
		<h1 class="text-center text-2xl font-bold">TODO LIST</h1>
	</nav>
	<div class="flex flex-col w-full pt-28 items-center justify-center">
		<div>
			<form class="bg-white rounded-md py-10 px-12 shadow-lg">
				<h1 class="text-xl mt-2 text-center font-semibold text-gray-600">Whrite Todo List</h1>
				<div class="mt-6 flex space-x-4 m-10 justify-center">
					<input type="number" placeholder="0" min="0" class="cursor-pointer bg-gray-100 w-10 text-center rounded-md pl-2 outline-none py-2 border-2" />
					<input placeholder="write her..." class="bg-gray-100 rounded-md py-2 px-4 border-2 outline-none"/>
					<button class="bg-yellow-400 px-4 rounded-md font-semibold">Send</button>
				</div>
				</p>
		</form>
				<p class="mt-6 bg-white p-6 rounded-md text-gray-500 shadow-lg"> simply dummy text of the printing and typesetting industry. Lorem Ipsum has been the
				<p class="mt-6 bg-white p-6 rounded-md text-gray-500 shadow-lg"> simply dummy text of the printing and typesetting industry. Lorem Ipsum has been the
				<p class="mt-6 bg-white p-6 rounded-md text-gray-500 shadow-lg"> simply dummy text of the printing and typesetting industry. Lorem Ipsum has been the
		</div>
		</section>
		<p class="absolute bottom-14 right-14 bg-yellow-400 py-2 px-4 rounded-full text-lg font-bold">?</p>
	</div>
</div>
How to create a Todo List with Tailwind CSS?
Here are the 6 steps to create a Todo List with Tailwind CSS:
Step 1: Set up your HTML structure
Create a new HTML file and add the following HTML code:
<!DOCTYPE html>
<html lang="en">
  <head>
    <meta charset="UTF-8">
    <title>Todo List</title>
    <link rel="stylesheet" href="https://cdn.jsdelivr.net/npm/[email protected]/dist/tailwind.min.css">
  </head>
  <body>
    <div class="container mx-auto mt-10">
      <h1 class="text-2xl font-bold mb-5">Todo List</h1>
      <form>
        <div class="flex items-center mb-5">
          <input type="checkbox" class="form-checkbox h-5 w-5 text-blue-600">
          <input type="text" class="ml-2 px-2 py-1 border border-gray-400 rounded-md w-full" placeholder="Add a new task...">
        </div>
        <div class="flex items-center mb-5">
          <input type="checkbox" class="form-checkbox h-5 w-5 text-blue-600">
          <span class="ml-2 text-gray-700">Task 1</span>
        </div>
        <div class="flex items-center mb-5">
          <input type="checkbox" class="form-checkbox h-5 w-5 text-blue-600">
          <span class="ml-2 text-gray-700">Task 2</span>
        </div>
      </form>
    </div>
  </body>
</html>
In this code, we have added the necessary HTML tags to create a basic Todo List UI component. We have also added the Tailwind CSS CDN link to include the Tailwind CSS framework in our project.
Step 2: Add a new task input field
To allow users to add new tasks to the Todo List, we need to add an input field. We can use the following HTML code to add a new task input field:
<div class="flex items-center mb-5">
  <input type="checkbox" class="form-checkbox h-5 w-5 text-blue-600">
  <input type="text" class="ml-2 px-2 py-1 border border-gray-400 rounded-md w-full" placeholder="Add a new task...">
</div>
This code adds a new input field with a placeholder text "Add a new task...". We have also added some styles to this input field using Tailwind CSS classes.
Step 3: Add a new task button
To allow users to add new tasks to the Todo List, we need to add a button. We can use the following HTML code to add a new task button:
<button class="bg-blue-500 hover:bg-blue-700 text-white font-bold py-2 px-4 rounded">
  Add Task
</button>
This code adds a new button with the text "Add Task". We have also added some styles to this button using Tailwind CSS classes.
Step 4: Style the Todo List
To style the Todo List, we can use the following CSS code:
.form-checkbox:checked {
  background-color: #4299e1;
  border-color: #4299e1;
}
This code changes the background color and border color of the checkbox when it is checked.
Step 5: Add functionality to the Todo List
To add functionality to the Todo List, we need to use JavaScript. We can use the following JavaScript code to add functionality to the Todo List:
const form = document.querySelector('form');
const input = document.querySelector('input[type="text"]');
const button = document.querySelector('button');
const list = document.querySelector('form ul');

button.addEventListener('click', (e) => {
  e.preventDefault();
  const text = input.value.trim();
  if (text !== '') {
    const li = document.createElement('li');
    const checkbox = document.createElement('input');
    checkbox.type = 'checkbox';
    checkbox.classList.add('form-checkbox', 'h-5', 'w-5', 'text-blue-600');
    const span = document.createElement('span');
    span.classList.add('ml-2', 'text-gray-700');
    span.textContent = text;
    li.appendChild(checkbox);
    li.appendChild(span);
    list.appendChild(li);
    input.value = '';
  }
});
This code adds an event listener to the button that creates a new list item when the button is clicked. It also clears the input field after a new task is added.
Step 6: Add responsiveness to the Todo List
To make the Todo List responsive, we can use the following Tailwind CSS classes:
<div class="container mx-auto mt-10">
  <h1 class="text-2xl font-bold mb-5">Todo List</h1>
  <form class="max-w-md mx-auto">
    <div class="flex items-center mb-5">
      <input type="checkbox" class="form-checkbox h-5 w-5 text-blue-600">
      <input type="text" class="ml-2 px-2 py-1 border border-gray-400 rounded-md w-full" placeholder="Add a new task...">
    </div>
    <button class="bg-blue-500 hover:bg-blue-700 text-white font-bold py-2 px-4 rounded">
      Add Task
    </button>
    <ul class="mt-5">
      <li class="flex items-center mb-3">
        <input type="checkbox" class="form-checkbox h-5 w-5 text-blue-600">
        <span class="ml-2 text-gray-700">Task 1</span>
      </li>
      <li class="flex items-center mb-3">
        <input type="checkbox" class="form-checkbox h-5 w-5 text-blue-600">
        <span class="ml-2 text-gray-700">Task 2</span>
      </li>
    </ul>
  </form>
</div>
This code adds some responsive classes to the Todo List UI component, such as max-w-md to limit the width of the form, and mx-auto to center the form horizontally.
Conclusion
In this article, we have learned how to create a Todo List UI component with Tailwind CSS. We have covered the benefits of using Tailwind CSS, the HTML and CSS code for the Todo List UI component, and the 6 steps to create a Todo List with Tailwind CSS. With these skills, you can create modern and responsive UI components for your web applications in no time.