- Published on
Learn How To Build A Todo application With Tailwind CSS from the Pros
- What is Tailwind CSS?
- The Description of Todo Application UI Component
- Why Use Tailwind CSS to Create a Todo Application UI Component?
- The Preview of Todo Application UI Component
- The Source Code of Todo Application UI Component
- How to Create a Todo Application with Tailwind CSS?
- Step 1: Create HTML Markup
- Step 2: Add JavaScript Functionality
- Step 3: Add Tailwind CSS Classes
- Conclusion
Are you tired of using the same old CSS frameworks for your projects? Do you want to learn a new framework that will make your life easier? Look no further than Tailwind CSS! In this article, we will walk you through the process of building a Todo application using Tailwind CSS.
What is Tailwind CSS?
Tailwind CSS is a utility-first CSS framework that allows you to quickly design and build responsive websites. It provides a set of pre-defined classes that you can use to style your HTML elements. Tailwind CSS is highly customizable and allows you to create unique designs without writing any custom CSS.
The Description of Todo Application UI Component
A Todo application is a simple application that allows you to create, read, update, and delete tasks. It usually consists of a list of tasks with checkboxes, input fields to add new tasks, and buttons to delete or edit tasks. The UI of a Todo application is simple and straightforward, making it a perfect candidate for learning Tailwind CSS.
Why Use Tailwind CSS to Create a Todo Application UI Component?
Tailwind CSS provides a set of pre-defined classes that you can use to style your HTML elements. This means that you don't have to write any custom CSS, which saves you a lot of time. Tailwind CSS also provides responsive classes that allow you to create responsive designs without writing any media queries.
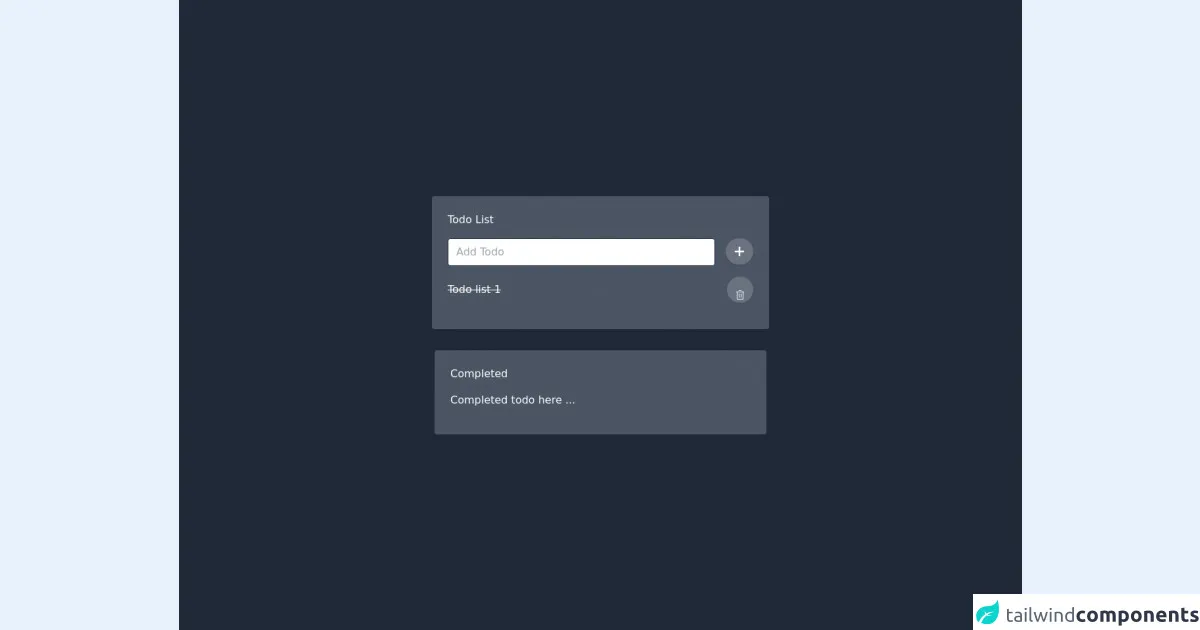
The Preview of Todo Application UI Component
To give you an idea of what the Todo application UI component will look like, here is a preview:
Free download of the Todo application's source code
The Source Code of Todo Application UI Component
To create the Todo application UI component, we will use HTML and Tailwind CSS. Here is the source code:
<!-- This is a simple todo app design using tailwind css -->
<div
    class="flex-col bg-gray-800 h-screen w-screen flex items-center justify-center font-sans "
  >
    <div class="bg-gray-600 rounded shadow p-6 m-4 w-full lg:w-3/4 lg:max-w-lg md:max-w-2xl">
      <div class="mb-4">
        <h1 class="text-white">Todo List</h1>
        <div class="flex mt-4">
          <input
            class="border border-gray-800 focus:border-blue-500 rounded w-full py-2 px-3 mr-4 text-black"
            placeholder="Add Todo"
            v-model="msg"
          />
          <!-- Add button -->
          <button
            class="p-0 w-12 h-10 bg-gray-500 rounded-full hover:bg-gray-400 active:shadow-lg mouse shadow transition ease-in duration-200 focus:outline-none"
          >
            <svg
              viewBox="0 0 20 20"
              enable-background="new 0 0 20 20"
              class="w-6 h-6 inline-block"
            >
              <path
                fill="#FFFFFF"
                d="M16,10c0,0.553-0.048,1-0.601,1H11v4.399C11,15.951,10.553,16,10,16c-0.553,0-1-0.049-1-0.601V11H4.601
                                    C4.049,11,4,10.553,4,10c0-0.553,0.049-1,0.601-1H9V4.601C9,4.048,9.447,4,10,4c0.553,0,1,0.048,1,0.601V9h4.399
                                    C15.952,9,16,9.447,16,10z"
              />
            </svg>
          </button>
        </div>
      </div>
      <!-- delete button -->
      <div>
        <div class="flex mb-4 items-center">
          <p class="line-through w-full text-white">
            Todo list 1
          </p>
          <button
            class="uppercase p-3 flex items-center bg-gray-500 hover:bg-gray-400 text-blue-50 max-w-max shadow-sm hover:shadow-lg rounded-full w-10 h-10 "
          >
            <svg
              width="32"
              height="32"
              preserveAspectRatio="xMidYMid meet"
              viewBox="0 0 32 32"
              style="transform: rotate(360deg);"
            >
              <path d="M12 12h2v12h-2z" fill="currentColor"></path>
              <path d="M18 12h2v12h-2z" fill="currentColor"></path>
              <path
                d="M4 6v2h2v20a2 2 0 0 0 2 2h16a2 2 0 0 0 2-2V8h2V6zm4 22V8h16v20z"
                fill="currentColor"
              ></path>
              <path d="M12 2h8v2h-8z" fill="currentColor"></path>
            </svg>
          </button>
        </div>
      </div>
      <!-- Completed -->
    </div>
    <div class="w-full bg-gray-800 flex items-center justify-center font-sans md:max-w-2xl">
      <div
        class="bg-gray-600 rounded shadow p-6 m-4 w-full lg:w-3/4 lg:max-w-lg"
      >
        <div class="mb-4">
          <h1 class="text-white">Completed</h1>
          <div class="flex mt-4 text-white">
            Completed todo here ...
          </div>
        </div>
      </div>
    </div>
    <!-- End of file -->
  </div>
How to Create a Todo Application with Tailwind CSS?
Now that we have the UI component, let's build the Todo application. We will use JavaScript to add functionality to the UI component.
Step 1: Create HTML Markup
The first step is to create the HTML markup for the Todo application. We will use the UI component that we created earlier. Here is the HTML markup:
<div class="max-w-md mx-auto bg-white rounded-xl shadow-md overflow-hidden md:max-w-2xl">
  <div class="md:flex">
    <div class="w-full p-4">
      <h1 class="text-2xl font-bold text-gray-900">Todo List</h1>
      <form class="mt-4">
        <div class="flex items-center">
          <input type="text" placeholder="Add a task" class="w-full px-4 py-2 mr-4 text-gray-700 bg-gray-200 rounded-lg focus:outline-none focus:bg-white focus:ring-2 focus:ring-blue-600">
          <button type="submit" class="px-4 py-2 text-white bg-blue-600 rounded-lg hover:bg-blue-700 focus:outline-none focus:bg-blue-700">Add Task</button>
        </div>
      </form>
      <ul class="mt-4">
        <li class="flex items-center justify-between py-2">
          <div class="flex items-center">
            <input type="checkbox" class="mr-2 form-checkbox h-5 w-5 text-blue-600">
            <span class="text-gray-900">Task 1</span>
          </div>
          <div class="flex items-center">
            <button class="mr-2 text-gray-600 hover:text-gray-900 focus:outline-none">
              <svg class="h-5 w-5 fill-current" viewBox="0 0 24 24">
                <path d="M0 0h24v24H0z" fill="none"/>
                <path d="M5 3h14a2 2 0 0 1 2 2v14a2 2 0 0 1-2 2H5a2 2 0 0 1-2-2V5a2 2 0 0 1 2-2zm4 8v2h6v-2H9zm0 4v2h6v-2H9z"/>
              </svg>
            </button>
            <button class="text-gray-600 hover:text-gray-900 focus:outline-none">
              <svg class="h-5 w-5 fill-current" viewBox="0 0 24 24">
                <path d="M0 0h24v24H0z" fill="none"/>
                <path d="M19 7.6L17.4 6 12 11.4 6.6 6 5 7.6l5.4 5.4L5 18.6 6.6 20l5.4-5.4 5.4 5.4 1.6-1.6-5.4-5.4L19 7.6z"/>
              </svg>
            </button>
          </div>
        </li>
      </ul>
    </div>
  </div>
</div>
Step 2: Add JavaScript Functionality
The next step is to add JavaScript functionality to the Todo application. We will use the following JavaScript code to add functionality:
const form = document.querySelector('form');
const input = document.querySelector('input[type="text"]');
const ul = document.querySelector('ul');

form.addEventListener('submit', (e) => {
  e.preventDefault();
  const li = document.createElement('li');
  const div = document.createElement('div');
  const checkbox = document.createElement('input');
  const span = document.createElement('span');
  const editButton = document.createElement('button');
  const deleteButton = document.createElement('button');

  checkbox.type = 'checkbox';
  checkbox.classList.add('mr-2', 'form-checkbox', 'h-5', 'w-5', 'text-blue-600');

  span.textContent = input.value;
  span.classList.add('text-gray-900');

  editButton.innerHTML = '<svg class="h-5 w-5 fill-current" viewBox="0 0 24 24"><path d="M0 0h24v24H0z" fill="none"/><path d="M5 3h14a2 2 0 0 1 2 2v14a2 2 0 0 1-2 2H5a2 2 0 0 1-2-2V5a2 2 0 0 1 2-2zm4 8v2h6v-2H9zm0 4v2h6v-2H9z"/></svg>';
  editButton.classList.add('mr-2', 'text-gray-600', 'hover:text-gray-900', 'focus:outline-none');

  deleteButton.innerHTML = '<svg class="h-5 w-5 fill-current" viewBox="0 0 24 24"><path d="M0 0h24v24H0z" fill="none"/><path d="M19 7.6L17.4 6 12 11.4 6.6 6 5 7.6l5.4 5.4L5 18.6 6.6 20l5.4-5.4 5.4 5.4 1.6-1.6-5.4-5.4L19 7.6z"/></svg>';
  deleteButton.classList.add('text-gray-600', 'hover:text-gray-900', 'focus:outline-none');

  div.classList.add('flex', 'items-center', 'justify-between', 'py-2');
  div.appendChild(checkbox);
  div.appendChild(span);
  div.appendChild(editButton);
  div.appendChild(deleteButton);

  li.appendChild(div);
  ul.appendChild(li);

  input.value = '';
});

ul.addEventListener('click', (e) => {
  if (e.target.tagName === 'BUTTON') {
    const li = e.target.parentNode.parentNode;
    if (e.target.innerHTML.includes('edit')) {
      const span = li.querySelector('span');
      const input = document.createElement('input');
      input.type = 'text';
      input.value = span.textContent;
      input.classList.add('w-full', 'px-4', 'py-2', 'mr-4', 'text-gray-700', 'bg-gray-200', 'rounded-lg', 'focus:outline-none', 'focus:bg-white', 'focus:ring-2', 'focus:ring-blue-600');
      span.replaceWith(input);
      e.target.innerHTML = '<svg class="h-5 w-5 fill-current" viewBox="0 0 24 24"><path d="M0 0h24v24H0z" fill="none"/><path d="M16.59 8.59L15.17 7.17 12 10.34 8.83 7.17 7.41 8.59 10.58 11.76 7.41 14.93 8.83 16.34 12 13.17 15.17 16.34 16.59 14.93 13.42 11.76z"/></svg>';
    } else {
      li.remove();
    }
  }
});
Step 3: Add Tailwind CSS Classes
The final step is to add Tailwind CSS classes to the HTML elements. We have already added some classes to the HTML markup, but we need to add more classes to make the Todo application look better. Here is the final HTML markup with Tailwind CSS classes:
<div class="max-w-md mx-auto bg-white rounded-xl shadow-md overflow-hidden md:max-w-2xl">
  <div class="md:flex">
    <div class="w-full p-4">
      <h1 class="text-2xl font-bold text-gray-900">Todo List</h1>
      <form class="mt-4">
        <div class="flex items-center">
          <input type="text" placeholder="Add a task" class="w-full px-4 py-2 mr-4 text-gray-700 bg-gray-200 rounded-lg focus:outline-none focus:bg-white focus:ring-2 focus:ring-blue-600">
          <button type="submit" class="px-4 py-2 text-white bg-blue-600 rounded-lg hover:bg-blue-700 focus:outline-none focus:bg-blue-700">Add Task</button>
        </div>
      </form>
      <ul class="mt-4">
        <li class="flex items-center justify-between py-2 border-b border-gray-200">
          <div class="flex items-center">
            <input type="checkbox" class="mr-2 form-checkbox h-5 w-5 text-blue-600">
            <span class="text-gray-900">Task 1</span>
          </div>
          <div class="flex items-center">
            <button class="mr-2 text-gray-600 hover:text-gray-900 focus:outline-none">
              <svg class="h-5 w-5 fill-current" viewBox="0 0 24 24">
                <path d="M0 0h24v24H0z" fill="none"/>
                <path d="M5 3h14a2 2 0 0 1 2 2v14a2 2 0 0 1-2 2H5a2 2 0 0 1-2-2V5a2 2 0 0 1 2-2zm4 8v2h6v-2H9zm0 4v2h6v-2H9z"/>
              </svg>
            </button>
            <button class="text-gray-600 hover:text-gray-900 focus:outline-none">
              <svg class="h-5 w-5 fill-current" viewBox="0 0 24 24">
                <path d="M0 0h24v24H0z" fill="none"/>
                <path d="M19 7.6L17.4 6 12 11.4 6.6 6 5 7.6l5.4 5.4L5 18.6 6.6 20l5.4-5.4 5.4 5.4 1.6-1.6-5.4-5.4L19 7.6z"/>
              </svg>
            </button>
          </div>
        </li>
      </ul>
    </div>
  </div>
</div>
And that's it! You have successfully created a Todo application using Tailwind CSS.
Conclusion
In this article, we have learned how to build a Todo application using Tailwind CSS. We have seen how Tailwind CSS can make our lives easier by providing pre-defined classes that we can use to style our HTML elements. We have also seen how easy it is to create responsive designs using Tailwind CSS. We hope that this article has helped you learn something new and that you will consider using Tailwind CSS for your next project. Happy coding!