- Published on
Surprisingly Effective Ways To Build A Tailwind CSS Qr Code Scanner With Tailwind CSS
- What is Tailwind CSS?
- The description of Tailwind CSS Qr Code Scanner UI component
- Why use Tailwind CSS to create a Tailwind CSS Qr Code Scanner UI component?
- The preview of Tailwind CSS Qr Code Scanner UI component
- The source code of Tailwind CSS Qr Code Scanner UI component
- How to create a Tailwind CSS Qr Code Scanner with Tailwind CSS?
- Step 1: Set up the HTML structure
- Step 2: Style the HTML elements using Tailwind CSS
- Step 3: Add JavaScript code to handle QR code scanning
- Step 4: Add the Instascan library to the project
- Step 5: Test the Qr Code Scanner UI component
- Conclusion
As a FrontEnd technology blogger, you must be familiar with Tailwind CSS, a popular utility-first CSS framework. In this article, we will explore how to create a Tailwind CSS Qr Code Scanner UI component. We will cover the benefits of using Tailwind CSS, the preview and source code of the Qr Code Scanner component, and how to create it step by step.
What is Tailwind CSS?
Tailwind CSS is a utility-first CSS framework that provides a set of pre-defined CSS classes. It allows developers to create custom designs quickly without writing any CSS code from scratch. Tailwind CSS provides a wide range of pre-built classes that can be used to create complex UI components easily.
The description of Tailwind CSS Qr Code Scanner UI component
A Qr Code Scanner UI component is a user interface element that allows users to scan a QR code using their device's camera. It is a handy feature for mobile applications that require QR code scanning. The Qr Code Scanner UI component consists of a camera viewfinder, a scan button, and a result display.
Why use Tailwind CSS to create a Tailwind CSS Qr Code Scanner UI component?
Tailwind CSS is an excellent choice for creating a Qr Code Scanner UI component because it provides a set of pre-built classes that can be used to create complex UI components easily. It also allows developers to customize the design of the component quickly. Tailwind CSS provides a responsive design that works well on different screen sizes.
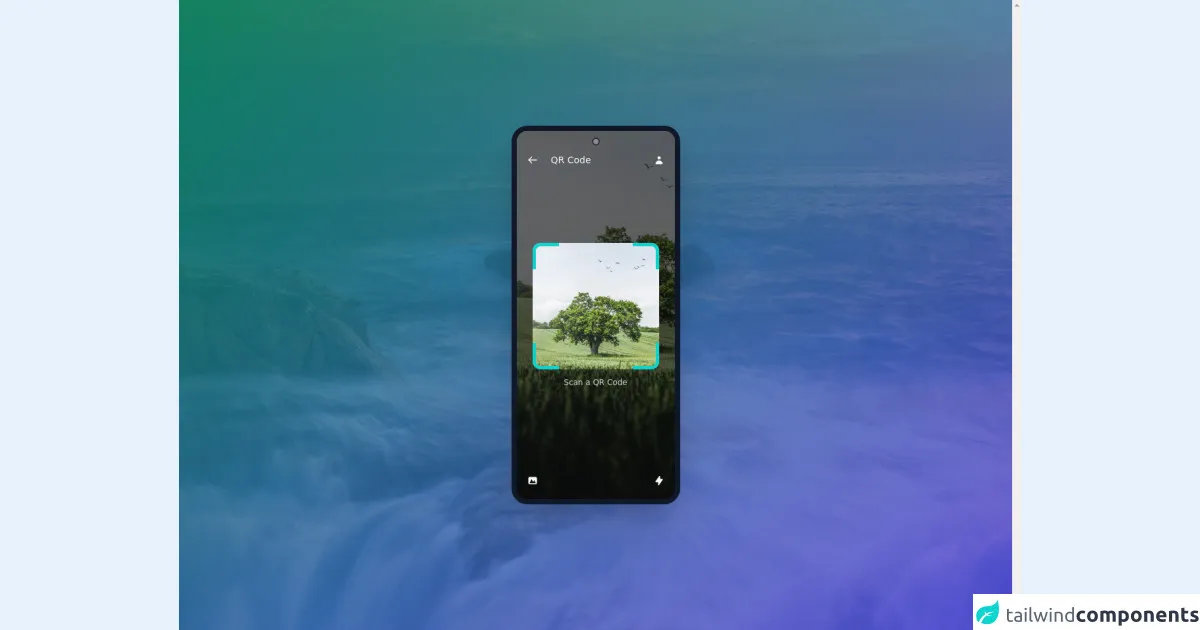
The preview of Tailwind CSS Qr Code Scanner UI component
To create a Tailwind CSS Qr Code Scanner UI component, we will use the following HTML and CSS code.
Free download of the Tailwind CSS Qr Code Scanner's source code
The source code of Tailwind CSS Qr Code Scanner UI component
To create a Tailwind CSS Qr Code Scanner UI component, we will use the following HTML and CSS code.
<div class="min-w-screen h-screen fixed left-0 top-0 flex justify-center items-center inset-0 z-50 bg-green-100 overflow-y-scroll bg-cover"
style="background-image: url(https://images.unsplash.com/photo-1628254747021-59531f59504b?ixid=MnwxMjA3fDB8MHxwaG90by1wYWdlfHx8fGVufDB8fHx8&ixlib=rb-1.2.1&auto=format&fit=crop&w=2134&q=80);">
<div class="absolute bg-gradient-to-tl from-indigo-600 to-green-600 opacity-80 inset-0 "></div>
<div class="relative border-8 overflow-hidden border-gray-900 bg-gray-900 h-4/6 sm:h-3/5 rounded-3xl flex flex-col w-64 flex justify-center items-center bg-no-repeat bg-cover shadow-2xl"
style="background-image: url(https://images.unsplash.com/photo-1590520181753-3fff75292722?ixid=MnwxMjA3fDB8MHxwaG90by1wYWdlfHx8fGVufDB8fHx8&ixlib=rb-1.2.1&auto=format&fit=crop&w=2134&q=80);">
<div class="absolute bg-black opacity-60 inset-0 "></div>
<div class="camera absolute top-4"></div>
<div class="flex w-full flex-row justify-between items-center mb-2 px-2 text-gray-50 z-10 absolute top-7">
<div class="flex flex-row items-center ">
<svg xmlns="http://www.w3.org/2000/svg"
class="h-8 w-8 p-2 cursor-pointer hover:bg-gray-500 text-gray-50 rounded-full mr-3" fill="none"
viewBox="0 0 24 24" stroke="currentColor">
<path stroke-linecap="round" stroke-linejoin="round" stroke-width="2"
d="M10 19l-7-7m0 0l7-7m-7 7h18"></path>
</svg> <span class="text-sm">QR Code</span>
</div>
<div>
<svg xmlns="http://www.w3.org/2000/svg"
class="h-8 w-8 p-2 cursor-pointer hover:bg-gray-500 text-gray-50 rounded-full " viewBox="0 0 20 20"
fill="currentColor">
<path fill-rule="evenodd" d="M10 9a3 3 0 100-6 3 3 0 000 6zm-7 9a7 7 0 1114 0H3z"
clip-rule="evenodd"></path>
</svg>
</div>
</div>
<div class="text-center z-10">
<div class="">
<div class="relative border-corner p-5 relative m-auto rounded-xl bg-cover w-48 h-48 flex " <div=""
style="background-image: url(https://images.unsplash.com/photo-1590520181753-3fff75292722?ixid=MnwxMjA3fDB8MHxwaG90by1wYWdlfHx8fGVufDB8fHx8&ixlib=rb-1.2.1&auto=format&fit=crop&w=2134&q=80);">
<span class="border_bottom"></span>
</div>
</div>
<p class="text-gray-300 text-xs mt-3">Scan a QR Code</p>
<div class="mt-5 w-full flex items-center justify-between space-x-3 my-3 absolute bottom-0 left-0 px-2">
<div class="flex ">
<svg xmlns="http://www.w3.org/2000/svg"
class="h-8 w-8 p-2 cursor-pointer hover:bg-gray-600 text-gray-50 rounded-full "
viewBox="0 0 20 20" fill="currentColor">
<path fill-rule="evenodd"
d="M4 3a2 2 0 00-2 2v10a2 2 0 002 2h12a2 2 0 002-2V5a2 2 0 00-2-2H4zm12 12H4l4-8 3 6 2-4 3 6z"
clip-rule="evenodd"></path>
</svg>
</div>
<div class="ml-0">
<svg xmlns="http://www.w3.org/2000/svg"
class="h-8 w-8 p-2 cursor-pointer hover:bg-gray-600 text-gray-50 rounded-full "
viewBox="0 0 20 20" fill="currentColor">
<path fill-rule="evenodd"
d="M11.3 1.046A1 1 0 0112 2v5h4a1 1 0 01.82 1.573l-7 10A1 1 0 018 18v-5H4a1 1 0 01-.82-1.573l7-10a1 1 0 011.12-.38z"
clip-rule="evenodd"></path>
</svg>
</div>
</div>
</div>
</div>
</div>
<style>
.border-corner:before {
display: block;
content: "";
width: 40px;
height: 40px;
position: absolute;
top: 0;
left: 0;
border-top: 5px solid #0ed3cf;
border-left: 5px solid #0ed3cf;
border-radius: 12px 0;
}
.border-corner:after {
display: block;
content: "";
width: 40px;
height: 40px;
position: absolute;
top: 0;
right: 0;
border-top: 5px solid #0ed3cf;
border-right: 5px solid #0ed3cf;
border-radius: 0 12px;
}
.border-corner span.border_bottom:before {
display: block;
content: "";
width: 40px;
height: 40px;
position: absolute;
bottom: 0;
left: 0;
border-bottom: 5px solid #0ed3cf;
border-left: 5px solid #0ed3cf;
border-radius: 0 12px;
}
.border-corner span.border_bottom:after {
display: block;
content: "";
width: 40px;
height: 40px;
position: absolute;
bottom: 0;
right: 0;
border-bottom: 5px solid #0ed3cf;
border-right: 5px solid #0ed3cf;
border-radius: 12px 0;
}
.camera {
z-index: 11;
}
.camera::before {
content: "";
position: absolute;
top: 15%;
left: 50%;
width: 12px;
height: 12px;
border-radius: 50%;
background-color: rgba(255, 255, 255, 0.3);
transform: translate(-50%, -50%);
border: solid 2px #2c303a;
}
.shadow-out {
box-shadow: rgba(17, 24, 39, 0.2) 0px 7px 29px 0px;
}
</style>
How to create a Tailwind CSS Qr Code Scanner with Tailwind CSS?
To create a Tailwind CSS Qr Code Scanner, we need to follow these steps:
Step 1: Set up the HTML structure
We will start by creating the HTML structure for the Qr Code Scanner UI component. We will create a div element with a class of "qr-code-scanner" and add a video element inside it to display the camera viewfinder. We will also add a button element with a class of "scan-button" to trigger the QR code scanning process. Finally, we will create a div element with a class of "result" to display the scanning result.
<div class="qr-code-scanner">
  <video id="video"></video>
  <button class="scan-button">Scan</button>
  <div class="result"></div>
</div>
Step 2: Style the HTML elements using Tailwind CSS
We will use Tailwind CSS classes to style the HTML elements of the Qr Code Scanner UI component. We will set the width and height of the "qr-code-scanner" div to 100% to make it full screen. We will also set the position of the "scan-button" to absolute and center it horizontally and vertically. Finally, we will set the display property of the "result" div to none.
.qr-code-scanner {
  width: 100%;
  height: 100%;
}

.scan-button {
  position: absolute;
  top: 50%;
  left: 50%;
  transform: translate(-50%, -50%);
}

.result {
  display: none;
}
Step 3: Add JavaScript code to handle QR code scanning
We will use JavaScript to handle the QR code scanning process. We will create a function called "scanQRCode" that will be triggered when the user clicks the "scan-button." The function will access the device's camera using the getUserMedia API and display the camera viewfinder inside the "qr-code-scanner" div. It will also start the QR code scanning process using the Instascan library.
function scanQRCode() {
  const video = document.getElementById("video");
  const result = document.querySelector(".result");
  const scanner = new Instascan.Scanner({ video });

  scanner.addListener("scan", function (content) {
    result.innerHTML = content;
    result.style.display = "block";
    scanner.stop();
  });

  Instascan.Camera.getCameras().then(function (cameras) {
    if (cameras.length > 0) {
      scanner.start(cameras[0]);
    } else {
      console.error("No cameras found.");
    }
  });
}

document.querySelector(".scan-button").addEventListener("click", scanQRCode);
Step 4: Add the Instascan library to the project
We will use the Instascan library to handle the QR code scanning process. We can add the library to the project by including the following script tag in the HTML file.
<script src="https://cdn.jsdelivr.net/npm/[email protected]/instascan.min.js"></script>
Step 5: Test the Qr Code Scanner UI component
We can test the Qr Code Scanner UI component by opening the HTML file in a web browser and clicking the "Scan" button. The camera viewfinder should appear, and the user can scan a QR code using their device's camera. The scanning result will be displayed inside the "result" div.
Conclusion
In this article, we have explored how to create a Tailwind CSS Qr Code Scanner UI component. We have covered the benefits of using Tailwind CSS, the preview and source code of the Qr Code Scanner component, and how to create it step by step. By following the steps outlined in this article, you can create a Qr Code Scanner UI component quickly and easily using Tailwind CSS.