- Published on
Imagine You Build A Tailwind CSS Footer With Tailwind CSS Like An Expert. Follow These 6 Steps To Get There
- What is Tailwind CSS?
- The description of Tailwind CSS Footer ui component
- Why use Tailwind CSS to create a Tailwind CSS Footer ui component?
- The preview of Tailwind CSS Footer ui component.
- The source code of Tailwind CSS Footer ui component.
- How to create a Tailwind CSS Footer with Tailwind CSS?
- Step 1: Set up your project
- Step 2: Create your HTML markup
- Step 3: Customize the styles
- Step 4: Add JavaScript functionality
- Step 5: Test your Tailwind CSS Footer ui component
- Step 6: Deploy your Tailwind CSS Footer ui component
- Conclusion
As a FrontEnd technology blogger, you must have heard of Tailwind CSS. It is a utility-first CSS framework that helps you build custom designs quickly. In this article, we will discuss how to create a Tailwind CSS Footer ui component using Tailwind CSS.
What is Tailwind CSS?
Tailwind CSS is a utility-first CSS framework that provides a set of pre-defined classes to help you build custom designs quickly. It is designed to be highly customizable, so you can easily tweak the styles to match your brand's look and feel.
The description of Tailwind CSS Footer ui component
A footer is an essential part of any website. It contains important information such as copyright, contact details, and links to other pages. The Tailwind CSS Footer ui component is a pre-designed footer that you can easily customize to fit your website's look and feel.
Why use Tailwind CSS to create a Tailwind CSS Footer ui component?
Tailwind CSS provides a set of pre-defined classes that you can use to create a Tailwind CSS Footer ui component quickly. It also allows you to customize the styles easily, so you can match your brand's look and feel. Using Tailwind CSS saves you time and effort, and it ensures that your footer looks great on all devices.
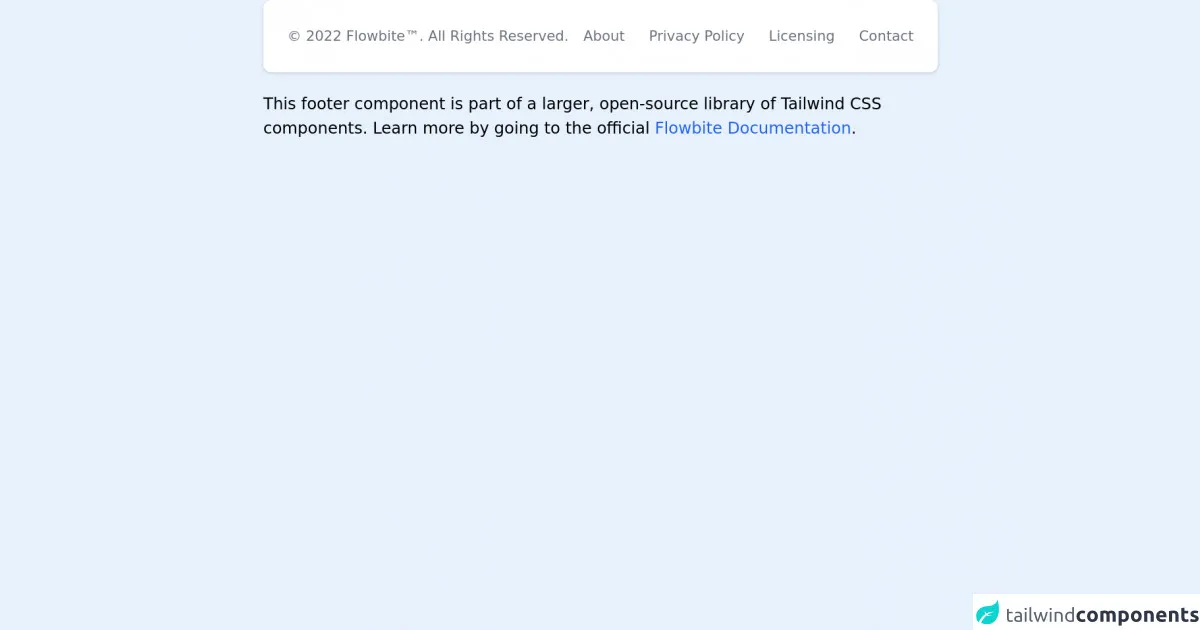
The preview of Tailwind CSS Footer ui component.
To give you an idea of what the Tailwind CSS Footer ui component looks like, here is a preview:
Free download of the Tailwind CSS Footer's source code
The source code of Tailwind CSS Footer ui component.
Here is the source code for the Tailwind CSS Footer ui component:
<!-- This is an example component -->
<div class="max-w-2xl mx-auto">

	<footer class="p-4 bg-white rounded-lg shadow md:flex md:items-center md:justify-between md:p-6 dark:bg-gray-800">
		<span class="text-sm text-gray-500 sm:text-center dark:text-gray-400">© 2022 <a href="https://flowbite.com" class="hover:underline" target="_blank">Flowbite™</a>. All Rights Reserved.
    </span>
		<ul class="flex flex-wrap items-center mt-3 sm:mt-0">
			<li>
				<a href="#" class="mr-4 text-sm text-gray-500 hover:underline md:mr-6 dark:text-gray-400">About</a>
			</li>
			<li>
				<a href="#" class="mr-4 text-sm text-gray-500 hover:underline md:mr-6 dark:text-gray-400">Privacy
					Policy</a>
			</li>
			<li>
				<a href="#" class="mr-4 text-sm text-gray-500 hover:underline md:mr-6 dark:text-gray-400">Licensing</a>
			</li>
			<li>
				<a href="#" class="text-sm text-gray-500 hover:underline dark:text-gray-400">Contact</a>
			</li>
		</ul>
	</footer>

	<p class="mt-5">This footer component is part of a larger, open-source library of Tailwind CSS components. Learn
		more
		by going to the official <a class="text-blue-600 hover:underline"
			href="https://flowbite.com/docs/getting-started/introduction/" target="_blank">Flowbite Documentation</a>.
	</p>
</div>
How to create a Tailwind CSS Footer with Tailwind CSS?
Now that you know what the Tailwind CSS Footer ui component is and why you should use it, let's discuss how to create it using Tailwind CSS.
Step 1: Set up your project
To create a Tailwind CSS Footer ui component, you need to have Tailwind CSS installed in your project. You can either use a CDN or install it using npm. For this tutorial, we will assume that you have installed Tailwind CSS using npm.
Step 2: Create your HTML markup
The first step in creating a Tailwind CSS Footer ui component is to create your HTML markup. Here is an example:
<footer class="bg-gray-900 text-white">
  <div class="container mx-auto py-8 px-4">
    <div class="flex flex-wrap -mx-4">
      <div class="w-full lg:w-1/4 px-4 mb-8">
        <h2 class="text-lg font-bold mb-4">About Us</h2>
        <p class="mb-4">Lorem ipsum dolor sit amet, consectetur adipiscing elit. Sed ut perspiciatis unde omnis iste natus error sit voluptatem accusantium doloremque laudantium.</p>
      </div>
      <div class="w-full lg:w-1/4 px-4 mb-8">
        <h2 class="text-lg font-bold mb-4">Contact Us</h2>
        <p class="mb-4">1234 Main St<br>Anytown, USA 12345<br>Phone: (555) 555-5555<br>Email: [email protected]</p>
      </div>
      <div class="w-full lg:w-1/4 px-4 mb-8">
        <h2 class="text-lg font-bold mb-4">Follow Us</h2>
        <ul class="list-none">
          <li class="mb-2">
            <a href="#" class="text-white hover:text-gray-400">Facebook</a>
          </li>
          <li class="mb-2">
            <a href="#" class="text-white hover:text-gray-400">Twitter</a>
          </li>
          <li class="mb-2">
            <a href="#" class="text-white hover:text-gray-400">Instagram</a>
          </li>
        </ul>
      </div>
      <div class="w-full lg:w-1/4 px-4 mb-8">
        <h2 class="text-lg font-bold mb-4">Newsletter</h2>
        <form>
          <input type="email" placeholder="Enter your email" class="bg-gray-800 rounded-full py-2 px-4 w-full mb-4">
          <button type="submit" class="bg-gray-700 hover:bg-gray-600 rounded-full py-2 px-4 w-full">Subscribe</button>
        </form>
      </div>
    </div>
  </div>
</footer>
In this example, we have used the pre-defined Tailwind CSS classes to create the footer layout.
Step 3: Customize the styles
Once you have your HTML markup, you can customize the styles using Tailwind CSS classes. For example, you can change the background color, font size, and spacing. Here is an example:
<footer class="bg-gray-900 text-white">
<div class="container mx-auto py-8 px-4">
<div class="flex flex-wrap -mx-4">
<div class="w-full lg:w-1/4 px-4 mb-8">
<h2 class="text-lg font-bold mb-4">About Us</h2>
<p class="mb-4">Lorem ipsum dolor sit amet, consectetur adipiscing elit. Sed ut perspiciatis unde omnis iste natus error sit voluptatem accusantium doloremque laudantium.</p>
</div>
<div class="w-full lg:w-1/4 px-4 mb-8">
<h2 class="text-lg font-bold mb-4">Contact Us</h2>
<p class="mb-4">1234 Main St<br>Anytown, USA 12345<br>Phone: (555) 555-5555<br>Email: [email protected]</p>
</div>
<div class="w-full lg:w-1/4 px-4 mb-8">
<h2 class="text-lg font-bold mb-4">Follow Us</h2>
<ul class="list-none">
<li class="mb-2">
<a href="#" class="text-white hover:text-gray-400">Facebook</a>
</li>
<li class="mb-2">
<a href="#" class="text-white hover:text-gray-400">Twitter</a>
</li>
<li class="mb-2">
<a href="#" class="text-white hover:text-gray-400">Instagram</a>
</li>
</ul>
</div>
<div class="w-full lg:w-1/4 px-4 mb-8">
<h2 class="text-lg font-bold mb-4">Newsletter</h2>
<form>
<input type="email" placeholder="Enter your email" class="bg-gray-800 rounded-full py-2 px-4 w-full mb-4">
<button type="submit" class="bg-gray-700 hover:bg-gray-600 rounded-full py-2 px-4 w-full">Subscribe</button>
</form>
</div>
</div>
<div class="text-center mt-8">
<p>© 2021 My Website. All rights reserved.</p>
</div>
</div>
</footer>
In this example, we have added a copyright notice and customized the spacing.
Step 4: Add JavaScript functionality
If you want to add JavaScript functionality to your Tailwind CSS Footer ui component, you can do so using vanilla JavaScript or a JavaScript framework such as jQuery. For example, you can add a click event to the subscribe button to submit the form data to a server. Here is an example:
document.querySelector('button[type="submit"]').addEventListener('click', function(event) {
  event.preventDefault();
  var email = document.querySelector('input[type="email"]').value;
  // send email to server
});
In this example, we have added a click event to the subscribe button and retrieved the email input value.
Step 5: Test your Tailwind CSS Footer ui component
Once you have customized your Tailwind CSS Footer ui component and added any necessary JavaScript functionality, you should test it to ensure that it works as expected. Test it on different devices and browsers to ensure that it looks great and functions properly.
Step 6: Deploy your Tailwind CSS Footer ui component
Once you have tested your Tailwind CSS Footer ui component, you can deploy it to your website. You can either copy and paste the HTML and CSS into your website's code or include it as a separate file.
Conclusion
In this article, we have discussed how to create a Tailwind CSS Footer ui component using Tailwind CSS. We have covered the benefits of using Tailwind CSS, the HTML markup and CSS classes required to create the footer, and how to customize the styles and add JavaScript functionality. By following these steps, you can create a professional-looking footer for your website quickly and easily.