- Published on
Learn How To Make A Table Visits With Tailwind CSS Like an Expert
- What is Tailwind CSS?
- The description of Table Visits ui component
- Why use Tailwind CSS to create a Table Visits ui component?
- The preview of Table Visits ui component
- The source code of Table Visits ui component
- How to create a Table Visits with Tailwind CSS?
- Conclusion
What is Tailwind CSS?
Tailwind CSS is a utility-first CSS framework that helps developers create responsive and customizable designs quickly. It provides a set of pre-defined classes that can be used to style HTML elements. With Tailwind CSS, developers can create complex layouts and designs without writing custom CSS.
The description of Table Visits ui component
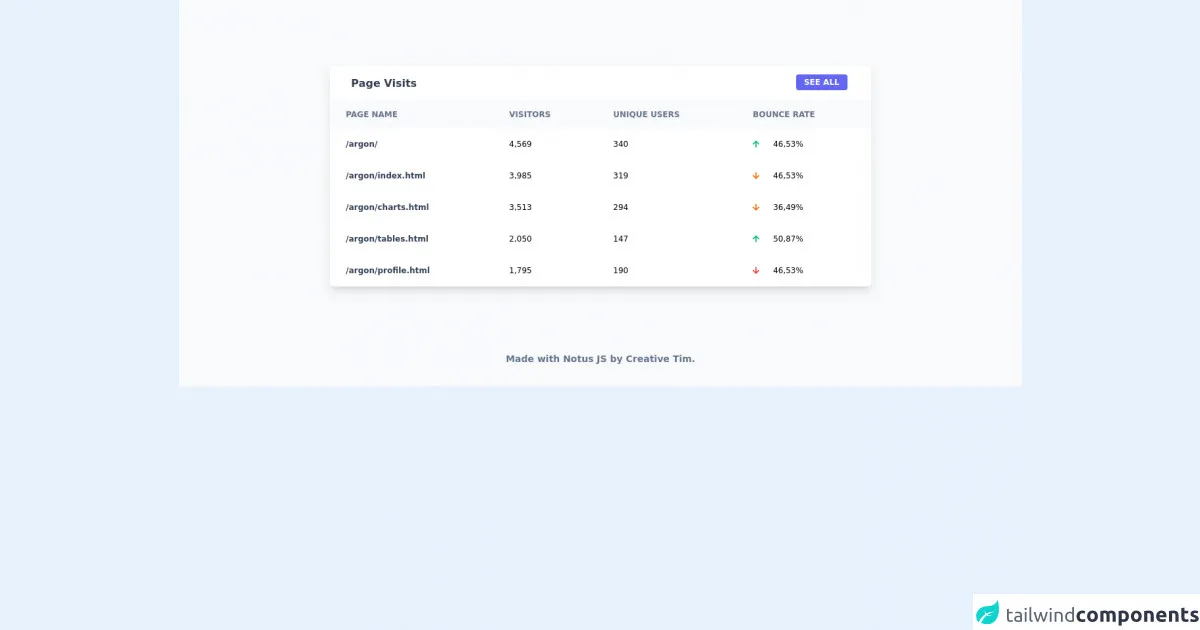
A Table Visits UI component is a table that displays the number of visits to a website or web page. It typically includes columns for the date, number of visits, and any other relevant information. This component is commonly used in web analytics dashboards to help users track website traffic.
Why use Tailwind CSS to create a Table Visits ui component?
Tailwind CSS makes it easy to create a Table Visits UI component with minimal CSS code. It provides pre-defined classes for styling tables, including border, padding, and text alignment. With Tailwind CSS, developers can create a responsive and customizable table quickly.
The preview of Table Visits ui component
To create a Table Visits UI component with Tailwind CSS, we can use the following HTML code:
<div class="bg-white shadow-md rounded my-6">
  <table class="w-full table-auto">
    <thead>
      <tr class="bg-gray-200 text-gray-600 uppercase text-sm leading-normal">
        <th class="py-3 px-6 text-left">Date</th>
        <th class="py-3 px-6 text-left">Visits</th>
        <th class="py-3 px-6 text-center">Actions</th>
      </tr>
    </thead>
    <tbody class="text-gray-600 text-sm font-light">
      <tr class="border-b border-gray-200 hover:bg-gray-100">
        <td class="py-3 px-6 text-left whitespace-nowrap">2021-01-01</td>
        <td class="py-3 px-6 text-left">100</td>
        <td class="py-3 px-6 text-center">
          <div class="flex item-center justify-center">
            <div class="w-4 mr-2 transform hover:text-purple-500 hover:scale-110">
              <a href="#">
                <svg fill="currentColor" viewBox="0 0 20 20" class="w-4 h-4">
                  <path
                    fill-rule="evenodd"
                    d="M3 5a2 2 0 012-2h4a2 2 0 012 2v1h4a2 2 0 012 2v9a2 2 0 01-2 2H5a2 2 0 01-2-2V7a2 2 0 012-2zm2 2v9h8V7H5zm2-2v1h4V5H7z"
                    clip-rule="evenodd"
                  ></path>
                </svg>
              </a>
            </div>
            <div class="w-4 mr-2 transform hover:text-purple-500 hover:scale-110">
              <a href="#">
                <svg fill="currentColor" viewBox="0 0 20 20" class="w-4 h-4">
                  <path
                    fill-rule="evenodd"
                    d="M5 5a1 1 0 011-1h8a1 1 0 011 1v1h2a1 1 0 011 1v10a1 1 0 01-1 1H6a1 1 0 01-1-1V7a1 1 0 011-1h2V5zm5 6a1 1 0 011 1v3a1 1 0 11-2 0v-3a1 1 0 011-1zm-3 0a1 1 0 011 1v3a1 1 0 11-2 0v-3a1 1 0 011-1z"
                    clip-rule="evenodd"
                  ></path>
                </svg>
              </a>
            </div>
            <div class="w-4 mr-2 transform hover:text-purple-500 hover:scale-110">
              <a href="#">
                <svg fill="currentColor" viewBox="0 0 20 20" class="w-4 h-4">
                  <path
                    fill-rule="evenodd"
                    d="M10 18a8 8 0 100-16 8 8 0 000 16zm0-2a6 6 0 100-12 6 6 0 000 12z"
                    clip-rule="evenodd"
                  ></path>
                  <path
                    fill-rule="evenodd"
                    d="M9 6a1 1 0 112 0v6a1 1 0 11-2 0V6zm2-2a3 3 0 11-6 0 3 3 0 016 0z"
                    clip-rule="evenodd"
                  ></path>
                </svg>
              </a>
            </div>
          </div>
        </td>
      </tr>
      {{__placeholder1__}}
    </tbody>
  </table>
</div>
Free download of the Table Visits's source code
The source code of Table Visits ui component
To create a Table Visits UI component with Tailwind CSS, we can use the following CSS code:
/* Table Visits */
.table-auto {
  width: auto;
  margin: 0 auto;
  border-collapse: collapse;
  border-spacing: 0;
}

.table-auto td,
.table-auto th {
  padding: 0.75rem;
  vertical-align: top;
  border-top: 1px solid #e2e8f0;
}

.table-auto thead th {
  vertical-align: bottom;
  border-bottom: 2px solid #e2e8f0;
}

.bg-gray-200 {
  background-color: #edf2f7;
}

.text-gray-600 {
  color: #4a5568;
}

.uppercase {
  text-transform: uppercase;
}

.leading-normal {
  line-height: 1.5;
}

.border-b {
  border-bottom-width: 1px;
}

.hover\:bg-gray-100:hover {
  background-color: #f7fafc;
}

.whitespace-nowrap {
  white-space: nowrap;
}

.hover\:text-purple-500:hover {
  color: #805ad5;
}

.hover\:scale-110:hover {
  transform: scale(1.1);
}

/* End Table Visits */
<link rel="stylesheet" href="https://demos.creative-tim.com/notus-js/assets/styles/tailwind.css">
<link rel="stylesheet" href="https://demos.creative-tim.com/notus-js/assets/vendor/@fortawesome/fontawesome-free/css/all.min.css">


<section class="py-1 bg-blueGray-50">
<div class="w-full xl:w-8/12 mb-12 xl:mb-0 px-4 mx-auto mt-24">
  <div class="relative flex flex-col min-w-0 break-words bg-white w-full mb-6 shadow-lg rounded ">
    <div class="rounded-t mb-0 px-4 py-3 border-0">
      <div class="flex flex-wrap items-center">
        <div class="relative w-full px-4 max-w-full flex-grow flex-1">
          <h3 class="font-semibold text-base text-blueGray-700">Page Visits</h3>
        </div>
        <div class="relative w-full px-4 max-w-full flex-grow flex-1 text-right">
          <button class="bg-indigo-500 text-white active:bg-indigo-600 text-xs font-bold uppercase px-3 py-1 rounded outline-none focus:outline-none mr-1 mb-1 ease-linear transition-all duration-150" type="button">See all</button>
        </div>
      </div>
    </div>

    <div class="block w-full overflow-x-auto">
      <table class="items-center bg-transparent w-full border-collapse ">
        <thead>
          <tr>
            <th class="px-6 bg-blueGray-50 text-blueGray-500 align-middle border border-solid border-blueGray-100 py-3 text-xs uppercase border-l-0 border-r-0 whitespace-nowrap font-semibold text-left">
                          Page name
                        </th>
          <th class="px-6 bg-blueGray-50 text-blueGray-500 align-middle border border-solid border-blueGray-100 py-3 text-xs uppercase border-l-0 border-r-0 whitespace-nowrap font-semibold text-left">
                          Visitors
                        </th>
           <th class="px-6 bg-blueGray-50 text-blueGray-500 align-middle border border-solid border-blueGray-100 py-3 text-xs uppercase border-l-0 border-r-0 whitespace-nowrap font-semibold text-left">
                          Unique users
                        </th>
          <th class="px-6 bg-blueGray-50 text-blueGray-500 align-middle border border-solid border-blueGray-100 py-3 text-xs uppercase border-l-0 border-r-0 whitespace-nowrap font-semibold text-left">
                          Bounce rate
                        </th>
          </tr>
        </thead>

        <tbody>
          <tr>
            <th class="border-t-0 px-6 align-middle border-l-0 border-r-0 text-xs whitespace-nowrap p-4 text-left text-blueGray-700 ">
              /argon/
            </th>
            <td class="border-t-0 px-6 align-middle border-l-0 border-r-0 text-xs whitespace-nowrap p-4 ">
              4,569
            </td>
            <td class="border-t-0 px-6 align-center border-l-0 border-r-0 text-xs whitespace-nowrap p-4">
              340
            </td>
            <td class="border-t-0 px-6 align-middle border-l-0 border-r-0 text-xs whitespace-nowrap p-4">
              <i class="fas fa-arrow-up text-emerald-500 mr-4"></i>
              46,53%
            </td>
          </tr>
          <tr>
            <th class="border-t-0 px-6 align-middle border-l-0 border-r-0 text-xs whitespace-nowrap p-4 text-left text-blueGray-700">
              /argon/index.html
            </th>
            <td class="border-t-0 px-6 align-middle border-l-0 border-r-0 text-xs whitespace-nowrap p-4">
              3,985
            </td>
            <td class="border-t-0 px-6 align-middle border-l-0 border-r-0 text-xs whitespace-nowrap p-4">
              319
            </td>
            <td class="border-t-0 px-6 align-middle border-l-0 border-r-0 text-xs whitespace-nowrap p-4">
              <i class="fas fa-arrow-down text-orange-500 mr-4"></i>
              46,53%
            </td>
          </tr>
          <tr>
            <th class="border-t-0 px-6 align-middle border-l-0 border-r-0 text-xs whitespace-nowrap p-4 text-left text-blueGray-700">
              /argon/charts.html
            </th>
            <td class="border-t-0 px-6 align-middle border-l-0 border-r-0 text-xs whitespace-nowrap p-4">
              3,513
            </td>
            <td class="border-t-0 px-6 align-middle border-l-0 border-r-0 text-xs whitespace-nowrap p-4">
              294
            </td>
            <td class="border-t-0 px-6 align-middle border-l-0 border-r-0 text-xs whitespace-nowrap p-4">
              <i class="fas fa-arrow-down text-orange-500 mr-4"></i>
              36,49%
            </td>
          </tr>
          <tr>
            <th class="border-t-0 px-6 align-middle border-l-0 border-r-0 text-xs whitespace-nowrap p-4 text-left text-blueGray-700">
              /argon/tables.html
            </th>
            <td class="border-t-0 px-6 align-middle border-l-0 border-r-0 text-xs whitespace-nowrap p-4">
              2,050
            </td>
            <td class="border-t-0 px-6 align-middle border-l-0 border-r-0 text-xs whitespace-nowrap p-4">
              147
            </td>
            <td class="border-t-0 px-6 align-middle border-l-0 border-r-0 text-xs whitespace-nowrap p-4">
              <i class="fas fa-arrow-up text-emerald-500 mr-4"></i>
              50,87%
            </td>
          </tr>
          <tr>
            <th class="border-t-0 px-6 align-middle border-l-0 border-r-0 text-xs whitespace-nowrap p-4 text-left text-blueGray-700">
              /argon/profile.html
            </th>
            <td class="border-t-0 px-6 align-middle border-l-0 border-r-0 text-xs whitespace-nowrap p-4">
              1,795
            </td>
            <td class="border-t-0 px-6 align-middle border-l-0 border-r-0 text-xs whitespace-nowrap p-4">
              190
            </td>
            <td class="border-t-0 px-6 align-middle border-l-0 border-r-0 text-xs whitespace-nowrap p-4">
              <i class="fas fa-arrow-down text-red-500 mr-4"></i>
              46,53%
            </td>
          </tr>
        </tbody>

      </table>
    </div>
  </div>
</div>
<footer class="relative pt-8 pb-6 mt-16">
  <div class="container mx-auto px-4">
    <div class="flex flex-wrap items-center md:justify-between justify-center">
      <div class="w-full md:w-6/12 px-4 mx-auto text-center">
        <div class="text-sm text-blueGray-500 font-semibold py-1">
          Made with <a href="https://www.creative-tim.com/product/notus-js" class="text-blueGray-500 hover:text-gray-800" target="_blank">Notus JS</a> by <a href="https://www.creative-tim.com" class="text-blueGray-500 hover:text-blueGray-800" target="_blank"> Creative Tim</a>.
        </div>
      </div>
    </div>
  </div>
</footer>
</section>
How to create a Table Visits with Tailwind CSS?
To create a Table Visits UI component with Tailwind CSS, follow these steps:
- Create a new HTML file and add the HTML code for the Table Visits UI component.
- Add the Tailwind CSS CDN to the head section of the HTML file.
- Add the CSS code for the Table Visits UI component to the style section of the HTML file.
- Customize the Table Visits UI component by adding or modifying the pre-defined classes.
Conclusion
In conclusion, Tailwind CSS is a powerful CSS framework that can help developers create complex designs quickly. With its pre-defined classes, developers can create a Table Visits UI component with minimal CSS code. By following the steps outlined in this article, you can create a responsive and customizable Table Visits UI component like an expert.