- Published on
Imagine You Build A Table UI with TailwindCSS and AlpineJS With Tailwind CSS Like An Expert. Follow These 6 Steps To Get There
- What is Tailwind CSS?
- The description of Table UI with TailwindCSS and AlpineJS ui component
- Why use Tailwind CSS to create a Table UI with TailwindCSS and AlpineJS ui component?
- The preview of Table UI with TailwindCSS and AlpineJS ui component
- The source code of Table UI with TailwindCSS and AlpineJS ui component
- How to create a Table UI with TailwindCSS and AlpineJS with Tailwind CSS?
- Step 1: Install Tailwind CSS
- Step 2: Install AlpineJS
- Step 3: Create the HTML Markup
- Step 4: Create the JavaScript
- Step 5: Style the Table UI with TailwindCSS
- Step 6: Preview and Test
- Conclusion
Are you looking to create a stunning Table UI with TailwindCSS and AlpineJS? Look no further! In this article, we will guide you through the process of building a Table UI with TailwindCSS and AlpineJS. We will cover the basics of TailwindCSS, the description of Table UI with TailwindCSS and AlpineJS ui component, why use Tailwind CSS to create a Table UI with TailwindCSS and AlpineJS ui component, the preview of Table UI with TailwindCSS and AlpineJS ui component, the source code of Table UI with TailwindCSS and AlpineJS ui component, and how to create a Table UI with TailwindCSS and AlpineJS with Tailwind CSS.
What is Tailwind CSS?
Tailwind CSS is a utility-first CSS framework that allows you to quickly build custom designs without writing any CSS. It provides a set of pre-defined CSS classes that you can use to style your HTML elements. Tailwind CSS is designed to be highly customizable, so you can easily modify the default styles to fit your specific needs.
The description of Table UI with TailwindCSS and AlpineJS ui component
A Table UI with TailwindCSS and AlpineJS ui component is a user interface component that displays data in a table format. It is a popular UI component used in web applications to display data in a structured and organized way. The Table UI with TailwindCSS and AlpineJS ui component is designed to be highly customizable, so you can easily modify the default styles to fit your specific needs.
Why use Tailwind CSS to create a Table UI with TailwindCSS and AlpineJS ui component?
Tailwind CSS provides a set of pre-defined CSS classes that you can use to style your HTML elements. This makes it easy to create a Table UI with TailwindCSS and AlpineJS ui component without writing any CSS code. Additionally, Tailwind CSS is highly customizable, so you can easily modify the default styles to fit your specific needs.
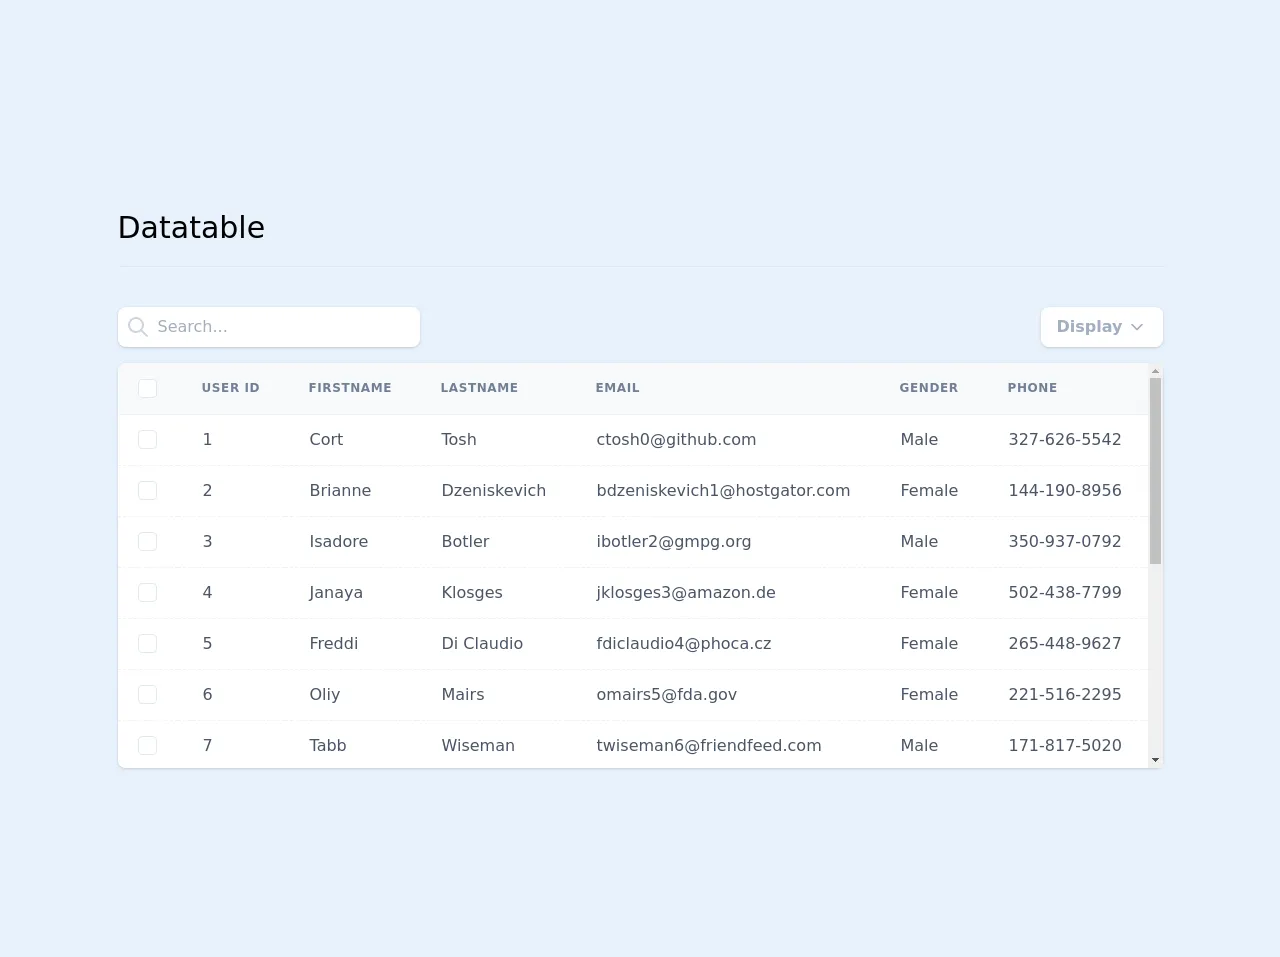
The preview of Table UI with TailwindCSS and AlpineJS ui component
Free download of the Table UI with TailwindCSS and AlpineJS's source code
The source code of Table UI with TailwindCSS and AlpineJS ui component
<div class="antialiased sans-serif bg-gray-200 h-screen">


	<link rel="stylesheet" href="https://unpkg.com/tailwindcss@^1.0/dist/tailwind.min.css">
	<script src="https://cdn.jsdelivr.net/gh/alpinejs/[email protected]/dist/alpine.js" defer></script>
	<style>
		[x-cloak] {
			display: none;
		}

		[type="checkbox"] {
			box-sizing: border-box;
			padding: 0;
		}

		.form-checkbox {
			-webkit-appearance: none;
			-moz-appearance: none;
			appearance: none;
			-webkit-print-color-adjust: exact;
			color-adjust: exact;
			display: inline-block;
			vertical-align: middle;
			background-origin: border-box;
			-webkit-user-select: none;
			-moz-user-select: none;
			-ms-user-select: none;
			user-select: none;
			flex-shrink: 0;
			color: currentColor;
			background-color: #fff;
			border-color: #e2e8f0;
			border-width: 1px;
			border-radius: 0.25rem;
			height: 1.2em;
    		width: 1.2em;
		}

		.form-checkbox:checked {
			background-image: url("data:image/svg+xml,%3csvg viewBox='0 0 16 16' fill='white' xmlns='http://www.w3.org/2000/svg'%3e%3cpath d='M5.707 7.293a1 1 0 0 0-1.414 1.414l2 2a1 1 0 0 0 1.414 0l4-4a1 1 0 0 0-1.414-1.414L7 8.586 5.707 7.293z'/%3e%3c/svg%3e");
			border-color: transparent;
			background-color: currentColor;
			background-size: 100% 100%;
			background-position: center;
			background-repeat: no-repeat;
		}
	</style>

	<div class="container mx-auto py-6 px-4" x-data="datatables()" x-cloak>
		<h1 class="text-3xl py-4 border-b mb-10">Datatable</h1>

		<div x-show="selectedRows.length" class="bg-teal-200 fixed top-0 left-0 right-0 z-40 w-full shadow">
			<div class="container mx-auto px-4 py-4">
				<div class="flex md:items-center">
					<div class="mr-4 flex-shrink-0">
						<svg class="h-8 w-8 text-teal-600"  viewBox="0 0 20 20" fill="currentColor">  <path fill-rule="evenodd" d="M18 10a8 8 0 11-16 0 8 8 0 0116 0zm-7-4a1 1 0 11-2 0 1 1 0 012 0zM9 9a1 1 0 000 2v3a1 1 0 001 1h1a1 1 0 100-2v-3a1 1 0 00-1-1H9z" clip-rule="evenodd"/></svg>
					</div>
					<div x-html="selectedRows.length + ' rows are selected'" class="text-teal-800 text-lg"></div>
				</div>
			</div>
		</div>

		<div class="mb-4 flex justify-between items-center">
			<div class="flex-1 pr-4">
				<div class="relative md:w-1/3">
					<input type="search"
						class="w-full pl-10 pr-4 py-2 rounded-lg shadow focus:outline-none focus:shadow-outline text-gray-600 font-medium"
						placeholder="Search...">
					<div class="absolute top-0 left-0 inline-flex items-center p-2">
						<svg xmlns="http://www.w3.org/2000/svg" class="w-6 h-6 text-gray-400" viewBox="0 0 24 24"
							stroke-width="2" stroke="currentColor" fill="none" stroke-linecap="round"
							stroke-linejoin="round">
							<rect x="0" y="0" width="24" height="24" stroke="none"></rect>
							<circle cx="10" cy="10" r="7" />
							<line x1="21" y1="21" x2="15" y2="15" />
						</svg>
					</div>
				</div>
			</div>
			<div>
				<div class="shadow rounded-lg flex">
					<div class="relative">
						<button @click.prevent="open = !open"
							class="rounded-lg inline-flex items-center bg-white hover:text-blue-500 focus:outline-none focus:shadow-outline text-gray-500 font-semibold py-2 px-2 md:px-4">
							<svg xmlns="http://www.w3.org/2000/svg" class="w-6 h-6 md:hidden" viewBox="0 0 24 24"
								stroke-width="2" stroke="currentColor" fill="none" stroke-linecap="round"
								stroke-linejoin="round">
								<rect x="0" y="0" width="24" height="24" stroke="none"></rect>
								<path
									d="M5.5 5h13a1 1 0 0 1 0.5 1.5L14 12L14 19L10 16L10 12L5 6.5a1 1 0 0 1 0.5 -1.5" />
							</svg>
							<span class="hidden md:block">Display</span>
							<svg xmlns="http://www.w3.org/2000/svg" class="w-5 h-5 ml-1" width="24" height="24"
								viewBox="0 0 24 24" stroke-width="2" stroke="currentColor" fill="none"
								stroke-linecap="round" stroke-linejoin="round">
								<rect x="0" y="0" width="24" height="24" stroke="none"></rect>
								<polyline points="6 9 12 15 18 9" />
							</svg>
						</button>

						<div x-show="open" @click.away="open = false"
							class="z-40 absolute top-0 right-0 w-40 bg-white rounded-lg shadow-lg mt-12 -mr-1 block py-1 overflow-hidden">
							<template x-for="heading in headings">
								<label
									class="flex justify-start items-center text-truncate hover:bg-gray-100 px-4 py-2">
									<div class="text-teal-600 mr-3">
										<input type="checkbox" class="form-checkbox focus:outline-none focus:shadow-outline" checked @click="toggleColumn(heading.key)">
									</div>
									<div class="select-none text-gray-700" x-text="heading.value"></div>
								</label>
							</template>
						</div>
					</div>
				</div>
			</div>
		</div>

		<div class="overflow-x-auto bg-white rounded-lg shadow overflow-y-auto relative"
			style="height: 405px;">
			<table class="border-collapse table-auto w-full whitespace-no-wrap bg-white table-striped relative">
				<thead>
					<tr class="text-left">
						<th class="py-2 px-3 sticky top-0 border-b border-gray-200 bg-gray-100">
							<label
								class="text-teal-500 inline-flex justify-between items-center hover:bg-gray-200 px-2 py-2 rounded-lg cursor-pointer">
								<input type="checkbox" class="form-checkbox focus:outline-none focus:shadow-outline" @click="selectAllCheckbox($event);">
							</label>
						</th>
						<template x-for="heading in headings">
							<th class="bg-gray-100 sticky top-0 border-b border-gray-200 px-6 py-2 text-gray-600 font-bold tracking-wider uppercase text-xs"
								x-text="heading.value" :x-ref="heading.key" :class="{ [heading.key]: true }"></th>
						</template>
					</tr>
				</thead>
				<tbody>
					<template x-for="user in users" :key="user.userId">
						<tr>
							<td class="border-dashed border-t border-gray-200 px-3">
								<label
									class="text-teal-500 inline-flex justify-between items-center hover:bg-gray-200 px-2 py-2 rounded-lg cursor-pointer">
									<input type="checkbox" class="form-checkbox rowCheckbox focus:outline-none focus:shadow-outline" :name="user.userId"
											@click="getRowDetail($event, user.userId)">
								</label>
							</td>
							<td class="border-dashed border-t border-gray-200 userId">
								<span class="text-gray-700 px-6 py-3 flex items-center" x-text="user.userId"></span>
							</td>
							<td class="border-dashed border-t border-gray-200 firstName">
								<span class="text-gray-700 px-6 py-3 flex items-center" x-text="user.firstName"></span>
							</td>
							<td class="border-dashed border-t border-gray-200 lastName">
								<span class="text-gray-700 px-6 py-3 flex items-center" x-text="user.lastName"></span>
							</td>
							<td class="border-dashed border-t border-gray-200 emailAddress">
								<span class="text-gray-700 px-6 py-3 flex items-center"
									x-text="user.emailAddress"></span>
							</td>
							<td class="border-dashed border-t border-gray-200 gender">
								<span class="text-gray-700 px-6 py-3 flex items-center"
									x-text="user.gender"></span>
							</td>
							<td class="border-dashed border-t border-gray-200 phoneNumber">
								<span class="text-gray-700 px-6 py-3 flex items-center"
									x-text="user.phoneNumber"></span>
							</td>
						</tr>
					</template>
				</tbody>
			</table>
		</div>
	</div>

	<script>
		function datatables() {
			return {
				headings: [
					{
						'key': 'userId',
						'value': 'User ID'
					},
					{
						'key': 'firstName',
						'value': 'Firstname'
					},
					{
						'key': 'lastName',
						'value': 'Lastname'
					},
					{
						'key': 'emailAddress',
						'value': 'Email'
					},
					{
						'key': 'gender',
						'value': 'Gender'
					},
					{
						'key': 'phoneNumber',
						'value': 'Phone'
					}
				],
				users: [{
					"userId": 1,
					"firstName": "Cort",
					"lastName": "Tosh",
					"emailAddress": "[email protected]",
					"gender": "Male",
					"phoneNumber": "327-626-5542"
				}, {
					"userId": 2,
					"firstName": "Brianne",
					"lastName": "Dzeniskevich",
					"emailAddress": "[email protected]",
					"gender": "Female",
					"phoneNumber": "144-190-8956"
				}, {
					"userId": 3,
					"firstName": "Isadore",
					"lastName": "Botler",
					"emailAddress": "[email protected]",
					"gender": "Male",
					"phoneNumber": "350-937-0792"
				}, {
					"userId": 4,
					"firstName": "Janaya",
					"lastName": "Klosges",
					"emailAddress": "[email protected]",
					"gender": "Female",
					"phoneNumber": "502-438-7799"
				}, {
					"userId": 5,
					"firstName": "Freddi",
					"lastName": "Di Claudio",
					"emailAddress": "[email protected]",
					"gender": "Female",
					"phoneNumber": "265-448-9627"
				}, {
					"userId": 6,
					"firstName": "Oliy",
					"lastName": "Mairs",
					"emailAddress": "[email protected]",
					"gender": "Female",
					"phoneNumber": "221-516-2295"
				}, {
					"userId": 7,
					"firstName": "Tabb",
					"lastName": "Wiseman",
					"emailAddress": "[email protected]",
					"gender": "Male",
					"phoneNumber": "171-817-5020"
				}, {
					"userId": 8,
					"firstName": "Joela",
					"lastName": "Betteriss",
					"emailAddress": "[email protected]",
					"gender": "Female",
					"phoneNumber": "481-100-9345"
				}, {
					"userId": 9,
					"firstName": "Alistair",
					"lastName": "Vasyagin",
					"emailAddress": "[email protected]",
					"gender": "Male",
					"phoneNumber": "520-669-8364"
				}, {
					"userId": 10,
					"firstName": "Nealon",
					"lastName": "Ratray",
					"emailAddress": "[email protected]",
					"gender": "Male",
					"phoneNumber": "993-654-9793"
				}, {
					"userId": 11,
					"firstName": "Annissa",
					"lastName": "Kissick",
					"emailAddress": "[email protected]",
					"gender": "Female",
					"phoneNumber": "283-425-2705"
				}, {
					"userId": 12,
					"firstName": "Nissie",
					"lastName": "Sidnell",
					"emailAddress": "[email protected]",
					"gender": "Female",
					"phoneNumber": "754-391-3116"
				}, {
					"userId": 13,
					"firstName": "Madalena",
					"lastName": "Fouch",
					"emailAddress": "[email protected]",
					"gender": "Female",
					"phoneNumber": "584-300-9004"
				}, {
					"userId": 14,
					"firstName": "Rozina",
					"lastName": "Atkins",
					"emailAddress": "[email protected]",
					"gender": "Female",
					"phoneNumber": "792-856-0845"
				}, {
					"userId": 15,
					"firstName": "Lorelle",
					"lastName": "Sandcroft",
					"emailAddress": "[email protected]",
					"gender": "Female",
					"phoneNumber": "882-911-7241"
				}],
				selectedRows: [],

				open: false,

				toggleColumn(key) {
					// Note: All td must have the same class name as the headings key!
					let columns = document.querySelectorAll('.' + key);

					if (this.$refs[key].classList.contains('hidden') && this.$refs[key].classList.contains(key)) {
						columns.forEach(column => {
							column.classList.remove('hidden');
						});
					} else {
						columns.forEach(column => {
							column.classList.add('hidden');
						});
					}
				},

				getRowDetail($event, id) {
					let rows = this.selectedRows;

					if (rows.includes(id)) {
						let index = rows.indexOf(id);
						rows.splice(index, 1);
					} else {
						rows.push(id);
					}
				},

				selectAllCheckbox($event) {
					let columns = document.querySelectorAll('.rowCheckbox');

					this.selectedRows = [];

					if ($event.target.checked == true) {
						columns.forEach(column => {
							column.checked = true
							this.selectedRows.push(parseInt(column.name))
						});
					} else {
						columns.forEach(column => {
							column.checked = false
						});
						this.selectedRows = [];
					}
				}
			}
		}
	</script>
</div>
How to create a Table UI with TailwindCSS and AlpineJS with Tailwind CSS?
Step 1: Install Tailwind CSS
The first step is to install Tailwind CSS. You can do this by adding the following code to your HTML file:
<link rel="stylesheet" href="https://cdn.jsdelivr.net/npm/tailwindcss@latest/dist/tailwind.min.css">
Step 2: Install AlpineJS
The next step is to install AlpineJS. You can do this by adding the following code to your HTML file:
<script src="https://cdn.jsdelivr.net/npm/alpinejs@latest"></script>
Step 3: Create the HTML Markup
The next step is to create the HTML markup for the Table UI with TailwindCSS and AlpineJS ui component. Here is an example of the HTML markup:
<div x-data="{ sortColumn: '', sortDirection: 'asc' }">
  <table class="table-auto">
    <thead>
      <tr>
        <th class="px-4 py-2" @click="sortColumn = 'name'; sortDirection = sortDirection === 'asc' ? 'desc' : 'asc'">Name</th>
        <th class="px-4 py-2" @click="sortColumn = 'age'; sortDirection = sortDirection === 'asc' ? 'desc' : 'asc'">Age</th>
        <th class="px-4 py-2" @click="sortColumn = 'email'; sortDirection = sortDirection === 'asc' ? 'desc' : 'asc'">Email</th>
      </tr>
    </thead>
    <tbody>
      <tr x-for="person in people" :key="person.email" x-show="!sortColumn || person.name.toLowerCase().includes(sortColumn.toLowerCase()) || person.age.toString().includes(sortColumn) || person.email.toLowerCase().includes(sortColumn.toLowerCase())" :class="{ 'bg-gray-100': $index % 2 === 0 }">
        <td class="border px-4 py-2">{{ person.name }}</td>
        <td class="border px-4 py-2">{{ person.age }}</td>
        <td class="border px-4 py-2">{{ person.email }}</td>
      </tr>
    </tbody>
  </table>
</div>
Step 4: Create the JavaScript
The next step is to create the JavaScript code for the Table UI with TailwindCSS and AlpineJS ui component. Here is an example of the JavaScript code:
<script>
  window.onload = function() {
    const app = Alpine.data('table', () => ({
      people: [
        { name: 'John Doe', age: 30, email: '[email protected]' },
        { name: 'Jane Doe', age: 25, email: '[email protected]' },
        { name: 'Bob Smith', age: 40, email: '[email protected]' },
        { name: 'Alice Johnson', age: 35, email: '[email protected]' },
        { name: 'Tom Jones', age: 50, email: '[email protected]' }
      ]
    }));
  }
</script>
Step 5: Style the Table UI with TailwindCSS
The next step is to style the Table UI with TailwindCSS. Here is an example of the CSS code:
.table {
  width: 100%;
  border-collapse: collapse;
}

.table th,
.table td {
  border: 1px solid #ddd;
  padding: 8px;
  text-align: left;
}

.table th {
  cursor: pointer;
}

.table th:hover {
  background-color: #f2f2f2;
}

.bg-gray-100 {
  background-color: #f2f2f2;
}
Step 6: Preview and Test
The final step is to preview and test the Table UI with TailwindCSS and AlpineJS ui component. Open your HTML file in a web browser to see the Table UI with TailwindCSS and AlpineJS ui component in action. You can test the sorting functionality by clicking on the column headers.
Conclusion
In this article, we have covered the basics of TailwindCSS, the description of Table UI with TailwindCSS and AlpineJS ui component, why use Tailwind CSS to create a Table UI with TailwindCSS and AlpineJS ui component, the preview of Table UI with TailwindCSS and AlpineJS ui component, the source code of Table UI with TailwindCSS and AlpineJS ui component, and how to create a Table UI with TailwindCSS and AlpineJS with Tailwind CSS. By following these 6 steps, you can create a stunning Table UI with TailwindCSS and AlpineJS like an expert. Happy coding!