- Published on
Advanced Guide: Create A Student Form With Tailwind CSS
- What is Tailwind CSS?
- The description of Student Form UI component
- Why use Tailwind CSS to create a Student Form UI component?
- The preview of Student Form UI component
- The source code of Student Form UI component
- How to create a Student Form with Tailwind CSS?
- Step 1: Set up the HTML structure
- Step 2: Add Tailwind CSS classes
- Step 3: Customize the design
- Conclusion
As a FrontEnd technology blogger, it is important to stay up-to-date with the latest trends and tools in the industry. One such tool that has gained popularity in recent years is Tailwind CSS. In this article, we will explore how to create a Student Form UI component using Tailwind CSS.
What is Tailwind CSS?
Tailwind CSS is a utility-first CSS framework that allows developers to quickly create custom designs without writing any CSS. It provides a set of pre-defined CSS classes that can be used to style HTML elements. Tailwind CSS is highly customizable and can be configured to fit any project’s needs.
The description of Student Form UI component
A Student Form UI component is a form that allows students to enter their personal information such as name, email, and address. It can be used in various applications such as student registration systems, online learning platforms, and more.
Why use Tailwind CSS to create a Student Form UI component?
Tailwind CSS provides a set of pre-defined CSS classes that can be used to style HTML elements. This makes it easy to create a custom design without writing any CSS. Additionally, Tailwind CSS is highly customizable and can be configured to fit any project’s needs. This makes it an ideal choice for creating a Student Form UI component.
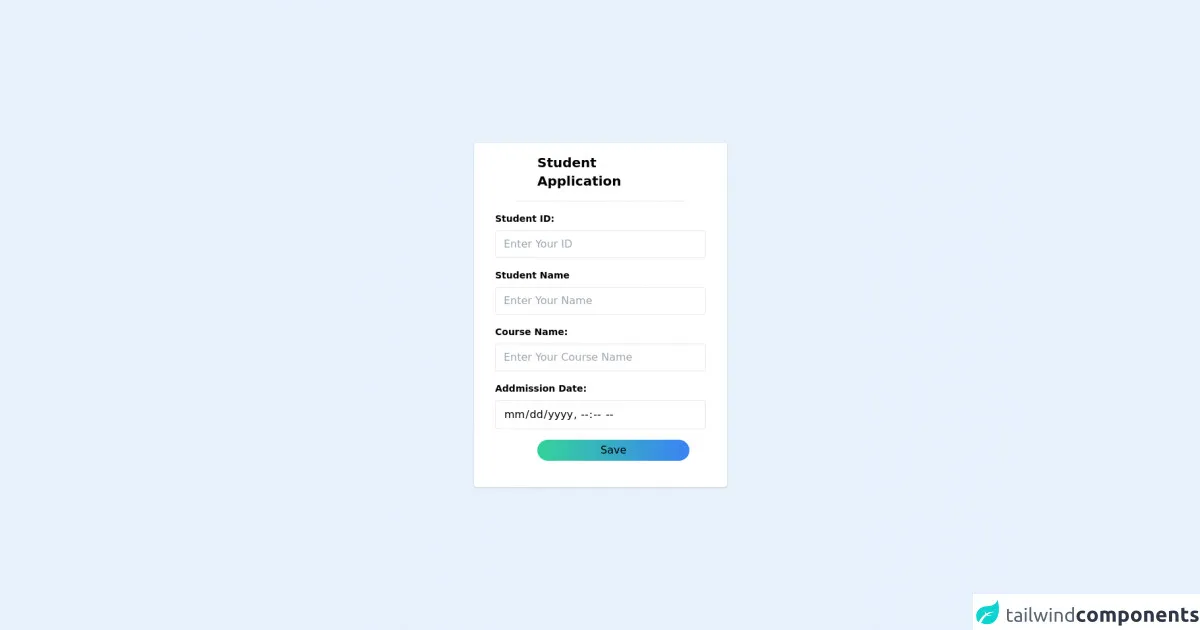
The preview of Student Form UI component
To create a Student Form UI component using Tailwind CSS, we will use a combination of HTML and CSS. The following is a preview of what the Student Form UI component will look like:
Free download of the Student Form's source code
The source code of Student Form UI component
The source code for the Student Form UI component using Tailwind CSS is as follows:
<!DOCTYPE html>
<html lang="en">

<head>
    <meta charset="UTF-8">
    <meta name="viewport" content="width=device-width, initial-scale=1.0">
    <title>Student Form</title>
    <link href="https://unpkg.com/tailwindcss@^2/dist/tailwind.min.css" rel="stylesheet">
</head>

<body>
    <!--  Application Details Start -->
    <div class="w-full bg-grey-500">
        <div class="container mx-auto py-8">
            <div class="w-96 mx-auto bg-white rounded shadow">

                <div class="mx-16 py-4 px-8 text-black text-xl font-bold border-b border-grey-500">Student Application
                </div>

                <form name="student_application" id="student_application" action="">
                    <div class="py-4 px-8">

                        <div class="mb-4">
                            <label class="block text-grey-darker text-sm font-bold mb-2">Student ID:</label>
                            <input class=" border rounded w-full py-2 px-3 text-grey-darker" type="text"
                                name="student_id" id="student_id" value="" placeholder="Enter Your ID">

                        </div>


                        <div class="mb-4">
                            <label class="block text-grey-darker text-sm font-bold mb-2">Student Name</label>
                            <input class=" border rounded w-full py-2 px-3 text-grey-darker" type="text"
                                name="student_name" id="student_name" value="" placeholder="Enter Your Name">

                        </div>

                        <div class="mb-4">
                            <label class="block text-grey-darker text-sm font-bold mb-2">Course Name:</label>
                            <input class=" border rounded w-full py-2 px-3 text-grey-darker" type="text"
                                name="course_name" id="course_name" value="" placeholder="Enter Your Course Name">
                            <p id=error_creater_id></p>
                        </div>


                             <div class="mb-4">
                            <label class="block text-grey-darker text-sm font-bold mb-2">Addmission Date:</label>
                            <input class=" border rounded w-full py-2 px-3 text-grey-darker" type="datetime-local"
                                name="addmission_date" id="addmission_date" value="">
                            <p id=error_intake_year></p>
                        </div>
                        <div class="mb-4">
                            <button
                                class="mb-2 mx-16 rounded-full py-1 px-24 bg-gradient-to-r from-green-400 to-blue-500 ">
                                Save
                            </button>
                        </div>
                    </div>
                </form>

            </div>

        </div>
    </div>
    <!--  Application Details End -->


                    </div>
                </form>

            </div>

        </div>
    </div>
    <!-- Student Visa End -->


</body>

</html>
How to create a Student Form with Tailwind CSS?
To create a Student Form UI component using Tailwind CSS, follow these steps:
Step 1: Set up the HTML structure
The first step is to set up the HTML structure for the Student Form UI component. This involves creating a form element and adding input fields for the student’s personal information. Here is an example of what the HTML structure should look like:
<form class="max-w-md mx-auto">
  <div class="mb-4">
    <label class="block text-gray-700 font-bold mb-2" for="name">
      Name
    </label>
    <input
      class="shadow appearance-none border rounded w-full py-2 px-3 text-gray-700 leading-tight focus:outline-none focus:shadow-outline"
      id="name"
      type="text"
      placeholder="John Doe"
    />
  </div>
  <div class="mb-4">
    <label class="block text-gray-700 font-bold mb-2" for="email">
      Email
    </label>
    <input
      class="shadow appearance-none border rounded w-full py-2 px-3 text-gray-700 leading-tight focus:outline-none focus:shadow-outline"
      id="email"
      type="email"
      placeholder="[email protected]"
    />
  </div>
  <div class="mb-4">
    <label class="block text-gray-700 font-bold mb-2" for="address">
      Address
    </label>
    <textarea
      class="shadow appearance-none border rounded w-full py-2 px-3 text-gray-700 leading-tight focus:outline-none focus:shadow-outline"
      id="address"
      placeholder="123 Main St, Anytown USA"
    ></textarea>
  </div>
  <div class="flex items-center justify-between">
    <button
      class="bg-blue-500 hover:bg-blue-700 text-white font-bold py-2 px-4 rounded focus:outline-none focus:shadow-outline"
      type="button"
    >
      Submit
    </button>
  </div>
</form>
Step 2: Add Tailwind CSS classes
The next step is to add Tailwind CSS classes to the HTML elements to style them. For example, we can add the max-w-md class to the form element to set the maximum width to 28rem. We can also add the mb-4 class to the input fields to add a margin-bottom of 1rem. Here is an example of what the HTML structure should look like with Tailwind CSS classes:
<form class="max-w-md mx-auto">
  <div class="mb-4">
    <label class="block text-gray-700 font-bold mb-2" for="name">
      Name
    </label>
    <input
      class="shadow appearance-none border rounded w-full py-2 px-3 text-gray-700 leading-tight focus:outline-none focus:shadow-outline mb-4"
      id="name"
      type="text"
      placeholder="John Doe"
    />
  </div>
  <div class="mb-4">
    <label class="block text-gray-700 font-bold mb-2" for="email">
      Email
    </label>
    <input
      class="shadow appearance-none border rounded w-full py-2 px-3 text-gray-700 leading-tight focus:outline-none focus:shadow-outline mb-4"
      id="email"
      type="email"
      placeholder="[email protected]"
    />
  </div>
  <div class="mb-4">
    <label class="block text-gray-700 font-bold mb-2" for="address">
      Address
    </label>
    <textarea
      class="shadow appearance-none border rounded w-full py-2 px-3 text-gray-700 leading-tight focus:outline-none focus:shadow-outline mb-4"
      id="address"
      placeholder="123 Main St, Anytown USA"
    ></textarea>
  </div>
  <div class="flex items-center justify-between">
    <button
      class="bg-blue-500 hover:bg-blue-700 text-white font-bold py-2 px-4 rounded focus:outline-none focus:shadow-outline"
      type="button"
    >
      Submit
    </button>
  </div>
</form>
Step 3: Customize the design
The final step is to customize the design of the Student Form UI component. This can be done by modifying the Tailwind CSS classes or adding custom CSS. For example, we can change the background color of the form by adding the bg-gray-100 class to the form element. We can also change the font size of the input fields by adding the text-lg class to the input elements. Here is an example of what the final HTML structure should look like:
<form class="max-w-md mx-auto bg-gray-100 p-6 rounded-lg">
  <div class="mb-4">
    <label class="block text-gray-700 font-bold mb-2" for="name">
      Name
    </label>
    <input
      class="shadow appearance-none border rounded w-full py-2 px-3 text-gray-700 leading-tight focus:outline-none focus:shadow-outline mb-4 text-lg"
      id="name"
      type="text"
      placeholder="John Doe"
    />
  </div>
  <div class="mb-4">
    <label class="block text-gray-700 font-bold mb-2" for="email">
      Email
    </label>
    <input
      class="shadow appearance-none border rounded w-full py-2 px-3 text-gray-700 leading-tight focus:outline-none focus:shadow-outline mb-4 text-lg"
      id="email"
      type="email"
      placeholder="[email protected]"
    />
  </div>
  <div class="mb-4">
    <label class="block text-gray-700 font-bold mb-2" for="address">
      Address
    </label>
    <textarea
      class="shadow appearance-none border rounded w-full py-2 px-3 text-gray-700 leading-tight focus:outline-none focus:shadow-outline mb-4 text-lg"
      id="address"
      placeholder="123 Main St, Anytown USA"
    ></textarea>
  </div>
  <div class="flex items-center justify-between">
    <button
      class="bg-blue-500 hover:bg-blue-700 text-white font-bold py-2 px-4 rounded focus:outline-none focus:shadow-outline"
      type="button"
    >
      Submit
    </button>
  </div>
</form>
Conclusion
In this article, we explored how to create a Student Form UI component using Tailwind CSS. We learned about the benefits of using Tailwind CSS and how to customize the design of the form. By following these steps, you can create a custom Student Form UI component for your project.