- Published on
How to Make A Stripe Pricing With Tailwind CSS?
- What is Tailwind CSS?
- The description of Stripe Pricing ui component
- Why use Tailwind CSS to create a Stripe Pricing ui component?
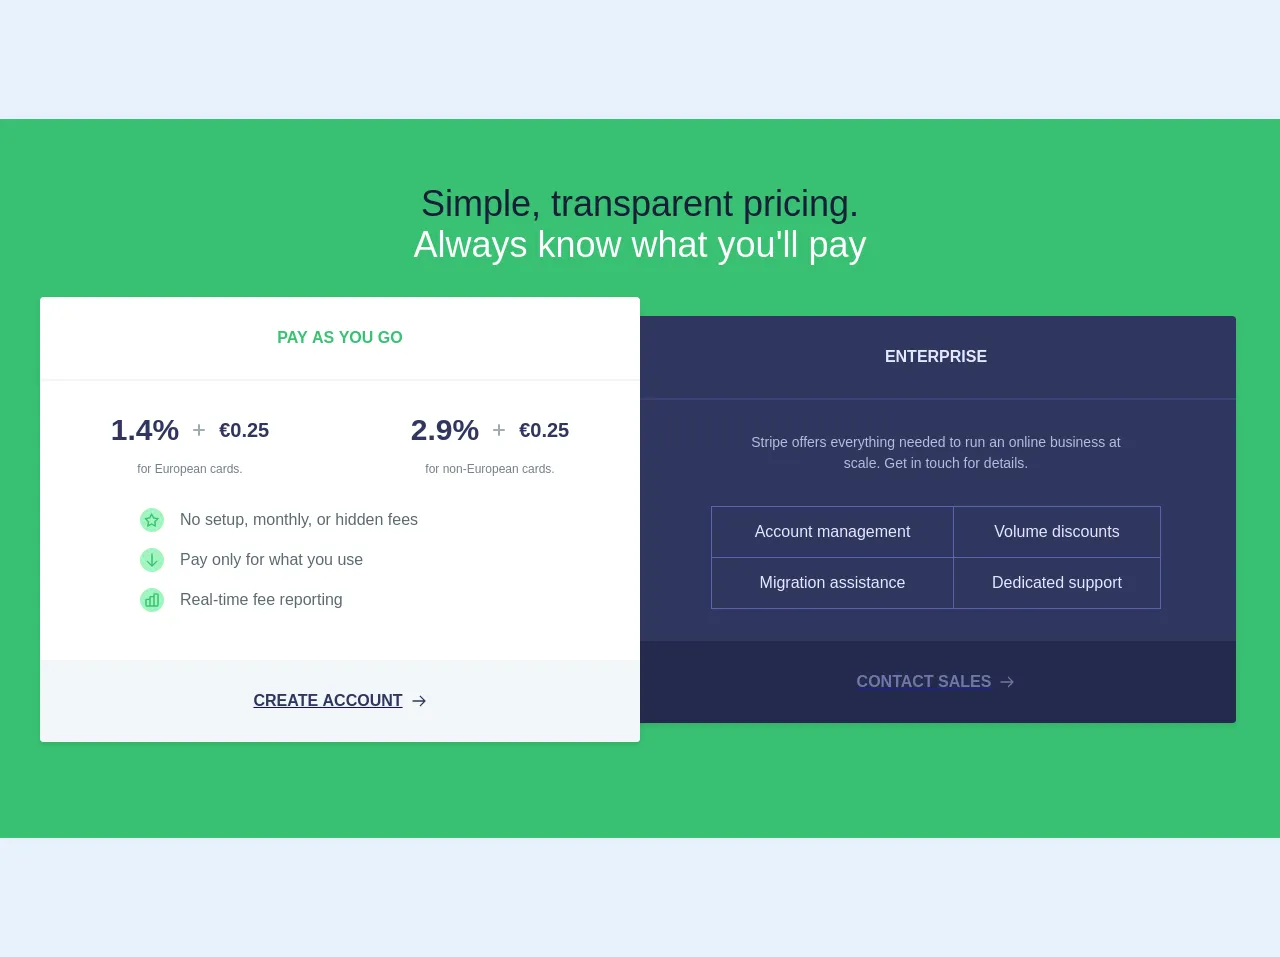
- The preview of Stripe Pricing ui component
- The source code of Stripe Pricing ui component
- How to create a Stripe Pricing with Tailwind CSS?
- Conclusion
What is Tailwind CSS?
Tailwind CSS is a utility-first CSS framework that provides a set of pre-defined CSS classes to help you quickly build custom user interfaces. Unlike other CSS frameworks, Tailwind CSS is not opinionated and does not impose any design decisions on you. Instead, it provides a set of low-level utility classes that you can use to build your own custom styles.
The description of Stripe Pricing ui component
Stripe is a popular payment processing platform that offers a wide range of features to help businesses accept payments online. One of the key features of Stripe is its pricing page, which displays the different pricing plans that businesses can choose from. The Stripe pricing page is a great example of a well-designed pricing UI component that is both visually appealing and easy to use.
The Stripe pricing UI component typically consists of three pricing plans, each with its own set of features and pricing details. The pricing plans are usually displayed in a grid layout, with each plan occupying a separate column. The pricing details for each plan are displayed in a separate row, with each row containing a different pricing detail.
Why use Tailwind CSS to create a Stripe Pricing ui component?
Tailwind CSS is a great choice for creating a Stripe pricing UI component because it provides a set of pre-defined utility classes that can help you quickly build custom styles. With Tailwind CSS, you can easily create a grid layout for the pricing plans and use pre-defined classes to style the different pricing details.
Tailwind CSS also provides a set of responsive utility classes that can help you create a responsive pricing UI component that looks great on all screen sizes. With Tailwind CSS, you can easily adjust the layout and styling of the pricing UI component based on the screen size, without having to write custom CSS.
The preview of Stripe Pricing ui component
To create a Stripe pricing UI component with Tailwind CSS, we will use a grid layout to display the different pricing plans. Each pricing plan will occupy a separate column, and the pricing details for each plan will be displayed in a separate row.
Free download of the Stripe Pricing's source code
The source code of Stripe Pricing ui component
To create a Stripe pricing UI component with Tailwind CSS, we will use a combination of HTML and Tailwind CSS classes. The HTML will define the structure of the pricing UI component, and the Tailwind CSS classes will be used to style the different elements.
<section class="font-sans antialiased w-full bg-green py-8">
<div class="container mx-auto">
<div class="py-8 w-full mx-auto">
<h1 class="text-indigo-darkest text-4xl text-center font-normal">Simple, transparent pricing.</h1>
<h2 class="text-white text-4xl text-center font-normal">Always know what you'll pay</h2>
<div class="my-8 flex flex-wrap md:items-center w-full">
<div class="bg-white shadow rounded w-full md:w-1/2 z-10">
<div class="py-8 text-center text-green font-semibold uppercase">Pay as you go</div>
<hr class="py-0 my-0 border border-grey-lighter">
<div class="py-8">
<div class="flex items-top">
<div class="w-1/2 flex justify-center items-center"><span class="text-3xl font-semibold text-indigo-darker">1.4%</span>
<svg xmlns="http://www.w3.org/2000/svg" viewBox="0 0 24 24" width="24" height="24" class="icon fill-current text-grey mx-2 h-6 w-6">
<path d="M17 11a1 1 0 0 1 0 2h-4v4a1 1 0 0 1-2 0v-4H7a1 1 0 0 1 0-2h4V7a1 1 0 0 1 2 0v4h4z" class="heroicon-ui"></path>
</svg> <span class="text-xl font-semibold text-indigo-darker">€0.25</span>
</div>
<div class="w-1/2 flex justify-center items-center"><span class="text-3xl font-semibold text-indigo-darker">2.9%</span>
<svg xmlns="http://www.w3.org/2000/svg" viewBox="0 0 24 24" width="24" height="24" class="icon fill-current text-grey mx-2 h-6 w-6">
<path d="M17 11a1 1 0 0 1 0 2h-4v4a1 1 0 0 1-2 0v-4H7a1 1 0 0 1 0-2h4V7a1 1 0 0 1 2 0v4h4z" class="heroicon-ui"></path>
</svg> <span class="text-xl font-semibold text-indigo-darker">€0.25</span>
</div>
</div>
<div class="flex items-top mt-4">
<div class="w-1/2 text-center text-xs text-grey-dark">for European cards.</div>
<div class="w-1/2 text-center text-xs text-grey-dark">for non-European cards.</div>
</div>
<div class="mt-8 mx-auto w-2/3">
<div class="flex items-center mb-4"><span class="inline-flex bg-green-lighter rounded-full mr-4 p-1"><svg xmlns="http://www.w3.org/2000/svg" viewBox="0 0 24 24" width="24" height="24" class="icon fill-current text-green h-4 w-4"><path d="M6.1 21.98a1 1 0 0 1-1.45-1.06l1.03-6.03-4.38-4.26a1 1 0 0 1 .56-1.71l6.05-.88 2.7-5.48a1 1 0 0 1 1.8 0l2.7 5.48 6.06.88a1 1 0 0 1 .55 1.7l-4.38 4.27 1.04 6.03a1 1 0 0 1-1.46 1.06l-5.4-2.85-5.42 2.85zm4.95-4.87a1 1 0 0 1 .93 0l4.08 2.15-.78-4.55a1 1 0 0 1 .29-.88l3.3-3.22-4.56-.67a1 1 0 0 1-.76-.54l-2.04-4.14L9.47 9.4a1 1 0 0 1-.75.54l-4.57.67 3.3 3.22a1 1 0 0 1 .3.88l-.79 4.55 4.09-2.15z" class="heroicon-ui"></path></svg></span> <span class="text-grey-darker">No setup, monthly, or hidden fees</span>
</div>
<div class="flex items-center mb-4"><span class="inline-flex bg-green-lighter rounded-full mr-4 p-1"><svg xmlns="http://www.w3.org/2000/svg" viewBox="0 0 24 24" width="24" height="24" class="icon fill-current text-green h-4 w-4"><path d="M11 18.59V3a1 1 0 0 1 2 0v15.59l5.3-5.3a1 1 0 0 1 1.4 1.42l-7 7a1 1 0 0 1-1.4 0l-7-7a1 1 0 0 1 1.4-1.42l5.3 5.3z" class="heroicon-ui"></path></svg></span> <span class="text-grey-darker">Pay only for what you use</span>
</div>
<div class="flex items-center mb-4"><span class="inline-flex bg-green-lighter rounded-full mr-4 p-1"><svg xmlns="http://www.w3.org/2000/svg" viewBox="0 0 24 24" width="24" height="24" class="icon fill-current text-green h-4 w-4"><path d="M20 22H4a2 2 0 0 1-2-2v-8c0-1.1.9-2 2-2h4V8c0-1.1.9-2 2-2h4V4c0-1.1.9-2 2-2h4a2 2 0 0 1 2 2v16a2 2 0 0 1-2 2zM14 8h-4v12h4V8zm-6 4H4v8h4v-8zm8-8v16h4V4h-4z" class="heroicon-ui"></path></svg></span> <span class="text-grey-darker">Real-time fee reporting</span>
</div>
</div>
</div>
<a href="#">
<div class="py-8 bg-grey-lighter hover:bg-grey-light text-indigo-darker rounded rounded-t-none text-center uppercase font-bold flex items-center justify-center"><span>Create account</span>
<svg xmlns="http://www.w3.org/2000/svg" viewBox="0 0 24 24" width="24" height="24" class="icon fill-current w-4 h-4 ml-2">
<path d="M18.59 13H3a1 1 0 0 1 0-2h15.59l-5.3-5.3a1 1 0 1 1 1.42-1.4l7 7a1 1 0 0 1 0 1.4l-7 7a1 1 0 0 1-1.42-1.4l5.3-5.3z" class="heroicon-ui"></path>
</svg>
</div>
</a>
</div>
<div class="bg-indigo-darker rounded shadow w-5/6 md:w-1/2 z-0 mx-auto -mt-1 md:-mt-0 md:-ml-1">
<div class="py-8 text-center text-indigo-lightest font-semibold uppercase">Enterprise</div>
<hr class="mb-8 my-0 border border-indigo-dark opacity-25">
<div class="w-2/3 mx-auto">
<p class="text-center text-sm text-indigo-lightest opacity-75 leading-normal">Stripe offers everything needed to run an online business at scale. Get in touch for details.</p>
</div>
<div class="py-8">
<table class="w-3/4 mx-auto text-indigo-lightest text-center" style="border-collapse: collapse;">
<tbody>
<tr>
<td class="px-2 py-4 border border-indigo-dark">Account management</td>
<td class="px-2 py-4 border border-indigo-dark">Volume discounts</td>
</tr>
<tr>
<td class="px-2 py-4 border border-indigo-dark">Migration assistance</td>
<td class="px-2 py-4 border border-indigo-dark">Dedicated support</td>
</tr>
</tbody>
</table>
</div>
<a href="#">
<div class="py-8 opacity-50 bg-indigo-darkest hover:bg-indigo-dark text-indigo-lighter rounded rounded-t-none text-center uppercase font-bold flex items-center justify-center"><span>Contact sales</span>
<svg xmlns="http://www.w3.org/2000/svg" viewBox="0 0 24 24" width="24" height="24" class="icon fill-current w-4 h-4 ml-2">
<path d="M18.59 13H3a1 1 0 0 1 0-2h15.59l-5.3-5.3a1 1 0 1 1 1.42-1.4l7 7a1 1 0 0 1 0 1.4l-7 7a1 1 0 0 1-1.42-1.4l5.3-5.3z" class="heroicon-ui"></path>
</svg>
</div>
</a>
</div>
</div>
</div>
</div>
</section>
How to create a Stripe Pricing with Tailwind CSS?
To create a Stripe pricing UI component with Tailwind CSS, follow these steps:
Create a new HTML file and add the necessary HTML structure for the pricing UI component. The pricing plans should be displayed in a grid layout, with each plan occupying a separate column.
Add the necessary Tailwind CSS classes to style the different elements of the pricing UI component. Use the pre-defined utility classes to style the different pricing details, such as the price, features, and button.
Use responsive utility classes to adjust the layout and styling of the pricing UI component based on the screen size. For example, you can use the
sm:prefix to apply styles only on small screens.Test the pricing UI component on different screen sizes to ensure that it looks great and is easy to use on all devices.
Conclusion
Tailwind CSS is a great choice for creating a Stripe pricing UI component because it provides a set of pre-defined utility classes that can help you quickly build custom styles. With Tailwind CSS, you can easily create a responsive pricing UI component that looks great on all screen sizes. By following the steps outlined in this article, you can create a beautiful and functional Stripe pricing UI component with Tailwind CSS.