- Published on
Build A Stackblitz-ish landing page With Tailwind CSS Like A Pro With The Help Of These 6 Tips
- What is Tailwind CSS?
- The description of Stackblitz-ish landing page UI component
- Why use Tailwind CSS to create a Stackblitz-ish landing page UI component?
- The preview of Stackblitz-ish landing page UI component
- The source code of Stackblitz-ish landing page UI component
- How to create a Stackblitz-ish landing page with Tailwind CSS?
- Step 1: Set up your project
- Step 2: Create the hero section
- Step 3: Create the features section
- Step 4: Create the pricing section
- Step 5: Create the footer section
- Step 6: Add custom styles
- Conclusion
As a FrontEnd technology blogger, I am always on the lookout for ways to improve my web development skills. One tool that I have found to be particularly useful is Tailwind CSS. In this article, I will show you how to use Tailwind CSS to build a Stackblitz-ish landing page UI component.
What is Tailwind CSS?
Tailwind CSS is a utility-first CSS framework that allows you to quickly build custom user interfaces. It provides a set of pre-defined CSS classes that you can use to style your HTML elements. With Tailwind CSS, you can create complex layouts and designs without writing any custom CSS.
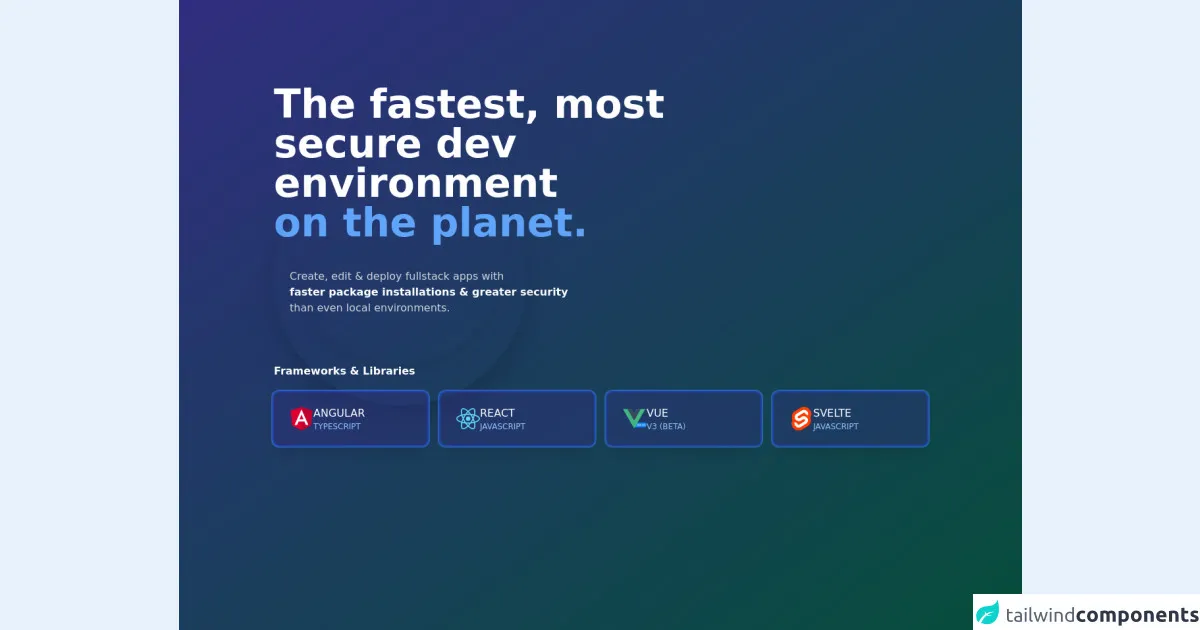
The description of Stackblitz-ish landing page UI component
The Stackblitz-ish landing page UI component is a simple landing page that is similar in design to the Stackblitz website. It features a hero section with a call-to-action button, a features section with icons and descriptions, a pricing section with pricing plans, and a footer section with links and social media icons.
Why use Tailwind CSS to create a Stackblitz-ish landing page UI component?
Tailwind CSS is the perfect tool for creating a Stackblitz-ish landing page UI component. It provides a set of pre-defined CSS classes that you can use to quickly style your HTML elements. This means that you can focus on building your UI component, rather than spending time writing custom CSS.
The preview of Stackblitz-ish landing page UI component
Free download of the Stackblitz-ish landing page's source code
The source code of Stackblitz-ish landing page UI component
<link rel="stylesheet" href="https://cdnjs.cloudflare.com/ajax/libs/font-awesome/5.15.3/css/all.min.css" integrity="sha512-iBBXm8fW90+nuLcSKlbmrPcLa0OT92xO1BIsZ+ywDWZCvqsWgccV3gFoRBv0z+8dLJgyAHIhR35VZc2oM/gI1w==" crossorigin="anonymous" />

<div class="bg-gradient-to-br from-indigo-900 to-green-900 min-h-screen overflow-auto">
  <div class="container max-w-5xl mx-auto px-4">
    <div class="w-4/5">
      <h1 class="mt-32 text-white text-6xl font-bold">The fastest, most secure dev environment <br /><span class="text-blue-400">on the planet.</span></h1>
    </div>
    <div class="w-5/6 my-10 ml-6">
      <h3 class="text-gray-300">
        Create, edit & deploy fullstack apps with <br />
        <strong class="text-white">faster package installations & greater security</strong>
        <br />than even local environments.
      </h3>
    </div>
    <div class="hidden sm:block opacity-50 z-0">
      <div class="shadow-2xl w-96 h-96 rounded-full -mt-72"></div>
      <div class="shadow-2xl w-96 h-96 rounded-full -mt-96"></div>
      <div class="shadow-xl w-80 h-80 rounded-full ml-8 -mt-96"></div>
    </div>
    <div class="text-white relative">
      <h3 class="text-uppercase font-semibold">Frameworks & Libraries</h3>
      <div class="grid sm:grid-cols-2 md:grid-cols-3 lg:grid-cols-4 gap-1 sm:gap-5 uppercase">
        <div class="group flex items-center bg-indigo-900 bg-opacity-40 shadow-xl gap-5 px-6 py-5 rounded-lg ring-2 ring-offset-2 ring-offset-blue-800 ring-cyan-700 mt-5 cursor-pointer hover:bg-blue-900 hover:bg-opacity-100 transition">
          <img class="w-9" src="data:image/svg+xml,%3C?xml version='1.0' encoding='utf-8'?%3E %3C!-- Generator: Adobe Illustrator 22.1.0, SVG Export Plug-In . SVG Version: 6.00 Build 0) --%3E %3Csvg version='1.1' id='Layer_1' xmlns='http://www.w3.org/2000/svg' xmlns:xlink='http://www.w3.org/1999/xlink' x='0px' y='0px' viewBox='0 0 80 80' style='enable-background:new 0 0 80 80;' xml:space='preserve'%3E %3Cstyle type='text/css'%3E .st0%7Bfill:%23DD0031;%7D .st1%7Bfill:%23C3002F;%7D .st2%7Bfill:%23FFFFFF;%7D %3C/style%3E %3Cg%3E %3Cpolygon class='st0' points='40,0 40,0 40,0 2.8,13.3 8.4,62.5 40,80 40,80 40,80 71.6,62.5 77.2,13.3 '/%3E %3Cpolygon class='st1' points='40,0 40,8.9 40,8.8 40,49.4 40,49.4 40,80 40,80 71.6,62.5 77.2,13.3 '/%3E %3Cpath class='st2' d='M40,8.8L16.7,61l0,0h8.7l0,0l4.7-11.7h19.8L54.5,61l0,0h8.7l0,0L40,8.8L40,8.8L40,8.8L40,8.8L40,8.8z M46.8,42.2H33.2L40,25.8L46.8,42.2z'/%3E %3C/g%3E %3C/svg%3E" alt="" />
          <div>
            <span>Angular</span>
            <span class="text-xs text-blue-300 block">Typescript</span>
          </div>
          <div>
            <i class="fa fa-chevron-right opacity-0 group-hover:opacity-100 transform -translate-x-1 group-hover:translate-x-0 block transition"></i>
          </div>
        </div>

        <div class="group flex items-center bg-indigo-900 bg-opacity-40 shadow-xl gap-5 px-6 py-5 rounded-lg ring-2 ring-offset-2 ring-offset-blue-800 ring-cyan-700 mt-5 cursor-pointer hover:bg-blue-900 hover:bg-opacity-100 transition">
          <img class="w-9" src="data:image/svg+xml,%3C?xml version='1.0' encoding='utf-8'?%3E %3C!-- Generator: Adobe Illustrator 22.1.0, SVG Export Plug-In . SVG Version: 6.00 Build 0) --%3E %3Csvg version='1.1' id='Layer_2_1_' xmlns='http://www.w3.org/2000/svg' xmlns:xlink='http://www.w3.org/1999/xlink' x='0px' y='0px' viewBox='0 0 80 80' style='enable-background:new 0 0 80 80;' xml:space='preserve'%3E %3Cstyle type='text/css'%3E .st0%7Bfill:%2361DAFB;%7D %3C/style%3E %3Cg%3E %3Cpath class='st0' d='M80,40c0-5.3-6.6-10.3-16.8-13.4c2.3-10.4,1.3-18.6-3.3-21.3c-1.1-0.6-2.3-0.9-3.7-0.9V8 c0.8,0,1.4,0.1,1.9,0.4c2.2,1.3,3.2,6.1,2.4,12.3c-0.2,1.5-0.5,3.1-0.8,4.8c-3.2-0.8-6.7-1.4-10.4-1.8c-2.2-3-4.5-5.8-6.8-8.2 C47.9,10.7,52.9,8,56.3,8V4.4l0,0c-4.5,0-10.4,3.2-16.3,8.7C34,7.6,28.2,4.4,23.7,4.4v3.6c3.4,0,8.4,2.7,13.7,7.6 c-2.3,2.4-4.6,5.1-6.7,8.1c-3.7,0.4-7.2,1-10.4,1.8c-0.4-1.6-0.7-3.2-0.8-4.7c-0.8-6.2,0.2-11.1,2.4-12.4c0.5-0.3,1.1-0.4,1.9-0.4 V4.5l0,0c-1.4,0-2.6,0.3-3.7,0.9c-4.6,2.6-5.6,10.9-3.2,21.2C6.6,29.7,0,34.7,0,40c0,5.3,6.6,10.3,16.8,13.4 c-2.3,10.4-1.3,18.6,3.3,21.3c1.1,0.6,2.3,0.9,3.7,0.9c4.5,0,10.4-3.2,16.3-8.7c5.9,5.5,11.8,8.7,16.3,8.7c1.4,0,2.6-0.3,3.7-0.9 c4.6-2.6,5.6-10.9,3.2-21.2C73.4,50.3,80,45.3,80,40z M58.8,29.1c-0.6,2.1-1.4,4.3-2.2,6.4c-0.7-1.3-1.4-2.6-2.1-3.9 c-0.8-1.3-1.5-2.6-2.3-3.8C54.4,28.2,56.6,28.6,58.8,29.1z M51.3,46.5c-1.3,2.2-2.6,4.3-3.9,6.2c-2.4,0.2-4.9,0.3-7.4,0.3 c-2.5,0-4.9-0.1-7.3-0.3c-1.4-1.9-2.7-4-3.9-6.2c-1.2-2.1-2.4-4.3-3.4-6.5c1-2.2,2.2-4.4,3.4-6.5c1.3-2.2,2.6-4.3,3.9-6.2 c2.4-0.2,4.9-0.3,7.4-0.3c2.5,0,4.9,0.1,7.3,0.3c1.4,1.9,2.7,4,3.9,6.2c1.2,2.1,2.4,4.3,3.4,6.5C53.7,42.2,52.5,44.4,51.3,46.5z M56.6,44.4c0.9,2.2,1.6,4.4,2.3,6.5c-2.1,0.5-4.4,1-6.7,1.3c0.8-1.3,1.6-2.5,2.3-3.9C55.2,47,55.9,45.7,56.6,44.4z M40,61.8 c-1.5-1.6-3-3.3-4.5-5.2c1.5,0.1,3,0.1,4.5,0.1c1.5,0,3,0,4.5-0.1C43.1,58.5,41.5,60.2,40,61.8z M27.9,52.2 c-2.3-0.3-4.5-0.8-6.7-1.3c0.6-2.1,1.4-4.3,2.2-6.4c0.7,1.3,1.4,2.6,2.1,3.9C26.3,49.7,27.1,50.9,27.9,52.2z M40,18.2 c1.5,1.6,3,3.3,4.5,5.2c-1.5-0.1-3-0.1-4.5-0.1c-1.5,0-3,0-4.5,0.1C36.9,21.5,38.5,19.8,40,18.2z M27.9,27.8 c-0.8,1.3-1.6,2.5-2.3,3.9c-0.8,1.3-1.5,2.6-2.1,3.9c-0.9-2.2-1.6-4.4-2.3-6.5C23.3,28.6,25.6,28.2,27.9,27.8z M13.1,48.3 c-5.8-2.5-9.5-5.7-9.5-8.3c0-2.6,3.7-5.8,9.5-8.3c1.4-0.6,2.9-1.1,4.5-1.6c0.9,3.2,2.2,6.5,3.7,9.9c-1.5,3.4-2.7,6.7-3.6,9.9 C16.1,49.4,14.6,48.9,13.1,48.3z M21.9,71.6c-2.2-1.3-3.2-6.1-2.4-12.3c0.2-1.5,0.5-3.1,0.8-4.8c3.2,0.8,6.7,1.4,10.4,1.8 c2.2,3,4.5,5.8,6.8,8.2C32.1,69.3,27.1,72,23.8,72C23,72,22.4,71.8,21.9,71.6z M60.6,59.1c0.8,6.2-0.2,11.1-2.4,12.4 c-0.5,0.3-1.1,0.4-1.9,0.4c-3.4,0-8.4-2.7-13.7-7.6c2.3-2.4,4.6-5.1,6.7-8.1c3.7-0.4,7.2-1,10.4-1.8C60.1,56,60.4,57.6,60.6,59.1z M66.9,48.3c-1.4,0.6-2.9,1.1-4.5,1.6c-0.9-3.2-2.2-6.5-3.7-9.9c1.5-3.4,2.7-6.7,3.6-9.9c1.6,0.5,3.1,1.1,4.6,1.7 c5.8,2.5,9.5,5.7,9.5,8.3C76.4,42.6,72.6,45.8,66.9,48.3z'/%3E %3Cpath class='st0' d='M23.7,4.4L23.7,4.4L23.7,4.4z'/%3E %3Ccircle class='st0' cx='40' cy='40' r='7.5'/%3E %3Cpath class='st0' d='M56.2,4.4L56.2,4.4L56.2,4.4z'/%3E %3C/g%3E %3C/svg%3E" alt="" />
          <div>
            <span>React</span>
            <span class="text-xs text-blue-300 block">Javascript</span>
          </div>
          <div>
            <i class="fa fa-chevron-right opacity-0 group-hover:opacity-100 transform -translate-x-1 group-hover:translate-x-0 block transition"></i>
          </div>
        </div>

        <div class="group flex items-center bg-indigo-900 bg-opacity-40 shadow-xl gap-5 px-6 py-5 rounded-lg ring-2 ring-offset-2 ring-offset-blue-800 ring-cyan-700 mt-5 cursor-pointer hover:bg-blue-900 hover:bg-opacity-100 transition">
          <img class="w-9" src="data:image/svg+xml,%3C?xml version='1.0' encoding='UTF-8'?%3E %3Csvg width='36px' height='30px' viewBox='0 0 36 30' version='1.1' xmlns='http://www.w3.org/2000/svg'%3E %3Ctitle%3EUntitled%3C/title%3E %3Cg id='Page-1' stroke='none' stroke-width='1' fill='none' fill-rule='evenodd'%3E %3Crect id='Rectangle' fill='%231389FD' x='15' y='21' width='21' height='7' rx='3.5'%3E%3C/rect%3E %3Ctext id='BETA' font-family='Roboto-Medium, Roboto' font-size='5' font-weight='400' fill='%23FFFFFF'%3E %3Ctspan x='22' y='26'%3EBETA%3C/tspan%3E %3C/text%3E %3Cg id='vue' fill-rule='nonzero'%3E %3Cg id='Group' transform='translate(18.000000, 15.000000) scale(-1, 1) rotate(-180.000000) translate(-18.000000, -15.000000) translate(-0.000000, -0.000000)'%3E %3Cg transform='translate(0.010406, 0.001744)' fill='%2341B883' id='Path'%3E %3Cpolygon points='20.9853249 29.8255814 17.053785 22.9772093 13.1222451 29.8255814 0.0296569468 29.8255814 17.053785 0.170930233 34.0779131 29.8255814'%3E%3C/polygon%3E %3C/g%3E %3Cg transform='translate(6.774271, 11.862209)' fill='%2334495E' id='Path'%3E %3Cpolygon points='14.2214599 17.9651163 10.28992 11.1167442 6.35838003 17.9651163 0.0754431103 17.9651163 10.28992 0.172674419 20.5043968 17.9651163'%3E%3C/polygon%3E %3C/g%3E %3C/g%3E %3C/g%3E %3C/g%3E %3C/svg%3E" alt="" />
          <div>
            <span>Vue</span>
            <span class="text-xs text-blue-300 block">v3 (beta)</span>
          </div>
          <div>
            <i class="fa fa-chevron-right opacity-0 group-hover:opacity-100 transform -translate-x-1 group-hover:translate-x-0 block transition"></i>
          </div>
        </div>

        <div class="group flex items-center bg-indigo-900 bg-opacity-40 shadow-xl gap-5 px-6 py-5 rounded-lg ring-2 ring-offset-2 ring-offset-blue-800 ring-cyan-700 mt-5 cursor-pointer hover:bg-blue-900 hover:bg-opacity-100 transition">
          <img class="w-9" src="data:image/svg+xml,%3C?xml version='1.0' encoding='utf-8'?%3E %3C!-- Generator: Adobe Illustrator 22.1.0, SVG Export Plug-In . SVG Version: 6.00 Build 0) --%3E %3Csvg version='1.1' id='Ebene_1' xmlns='http://www.w3.org/2000/svg' xmlns:xlink='http://www.w3.org/1999/xlink' x='0px' y='0px' viewBox='0 0 80 80' style='enable-background:new 0 0 80 80;' xml:space='preserve'%3E %3Cstyle type='text/css'%3E .st0%7Bfill:%23FF3E00;%7D .st1%7Bfill:%23FFFFFF;%7D %3C/style%3E %3Cpath class='st0' d='M69,10.6C61.6,0,46.9-3.2,36.3,3.6L17.7,15.4c-5.1,3.2-8.6,8.4-9.7,14.3c-0.9,4.9-0.1,10,2.2,14.5 c-1.6,2.4-2.7,5.1-3.2,8C6,58.2,7.4,64.4,11,69.4c7.5,10.6,22.1,13.8,32.7,7l18.6-11.9c5.1-3.2,8.6-8.4,9.7-14.3 c0.9-4.9,0.1-10-2.2-14.5c1.6-2.4,2.7-5.1,3.2-8C74,21.8,72.6,15.6,69,10.6'/%3E %3Cpath class='st1' d='M34.7,69.6c-5.8,1.5-12-0.8-15.4-5.7c-2.1-2.9-2.9-6.5-2.3-10.1c0.1-0.6,0.2-1.1,0.4-1.7l0.3-1l0.9,0.7 c2.1,1.6,4.5,2.8,7.1,3.5l0.7,0.2l-0.1,0.7c-0.1,1,0.2,1.9,0.7,2.7c1,1.5,2.9,2.2,4.7,1.8c0.4-0.1,0.8-0.3,1.1-0.5l18.1-11.5 c0.9-0.6,1.5-1.5,1.7-2.5c0.2-1.1,0-2.1-0.7-3c-1-1.5-2.9-2.2-4.7-1.7c-0.4,0.1-0.8,0.3-1.1,0.5l-6.9,4.4c-1.1,0.7-2.4,1.3-3.7,1.6 c-5.8,1.5-12-0.8-15.4-5.7c-2.1-2.9-2.9-6.5-2.3-10.1c0.6-3.5,2.7-6.5,5.6-8.4l18.1-11.5c1.1-0.7,2.4-1.3,3.7-1.6 c5.8-1.5,12,0.8,15.4,5.7c2.1,2.9,2.9,6.5,2.3,10.1c-0.1,0.6-0.2,1.1-0.4,1.7l-0.3,1l-0.9-0.7c-2.1-1.6-4.5-2.8-7.1-3.5l-0.7-0.2 l0.1-0.7c0.1-1-0.2-1.9-0.7-2.7c-1-1.5-2.9-2.2-4.7-1.7c-0.4,0.1-0.8,0.3-1.1,0.5L29.1,31.5C28.2,32,27.5,33,27.4,34 c-0.2,1.1,0,2.2,0.7,3c1,1.5,2.9,2.2,4.7,1.7c0.4-0.1,0.8-0.3,1.1-0.5l6.9-4.4c1.1-0.7,2.4-1.3,3.7-1.6c5.8-1.5,12,0.8,15.4,5.7 c2.1,2.9,2.9,6.5,2.3,10.1c-0.6,3.5-2.7,6.5-5.6,8.4L38.4,67.9C37.2,68.7,36,69.2,34.7,69.6'/%3E %3C/svg%3E" alt="" />
          <div>
            <span>Svelte</span>
            <span class="text-xs text-blue-300 block">Javascript</span>
          </div>
          <div>
            <i class="fa fa-chevron-right opacity-0 group-hover:opacity-100 transform -translate-x-1 group-hover:translate-x-0 block transition"></i>
          </div>
        </div>
      </div>
    </div>
  </div>
</div>
How to create a Stackblitz-ish landing page with Tailwind CSS?
Now that we have an understanding of what Tailwind CSS is and why it is useful for building a Stackblitz-ish landing page UI component, let's dive into the steps for creating one.
Step 1: Set up your project
The first step is to set up your project. You can do this by creating a new HTML file and linking to the Tailwind CSS CDN. Here is an example of what your HTML file should look like:
<!DOCTYPE html>
<html>
  <head>
    <title>Stackblitz-ish Landing Page</title>
    <link rel="stylesheet" href="https://cdn.jsdelivr.net/npm/[email protected]/dist/tailwind.min.css">
  </head>
  <body>
    <!-- Your HTML code here -->
  </body>
</html>
Step 2: Create the hero section
The hero section is the first section of the landing page and typically features a large image or video with a call-to-action button. Here is an example of what your hero section HTML code should look like:
<section class="bg-gray-900 text-white py-20">
  <div class="container mx-auto flex flex-col items-center">
    <h1 class="text-5xl font-bold mb-8">Welcome to Stackblitz-ish</h1>
    <p class="text-xl mb-12">The ultimate online code editor for web developers</p>
    <a href="#" class="bg-blue-500 hover:bg-blue-700 text-white font-bold py-4 px-8 rounded">Get Started</a>
  </div>
</section>
Step 3: Create the features section
The features section is the second section of the landing page and typically features a list of features with icons and descriptions. Here is an example of what your features section HTML code should look like:
<section class="bg-white py-20">
  <div class="container mx-auto flex flex-col items-center">
    <h2 class="text-3xl font-bold mb-8">Features</h2>
    <div class="flex flex-wrap justify-center">
      <div class="w-full md:w-1/2 lg:w-1/3 p-4">
        <div class="bg-gray-100 rounded-lg p-8">
          <i class="fas fa-code text-3xl mb-4"></i>
          <h3 class="text-xl font-bold mb-4">Online Code Editor</h3>
          <p class="text-gray-700">Edit your code online with our powerful code editor. No need to download any software.</p>
        </div>
      </div>
      <div class="w-full md:w-1/2 lg:w-1/3 p-4">
        <div class="bg-gray-100 rounded-lg p-8">
          <i class="fas fa-cog text-3xl mb-4"></i>
          <h3 class="text-xl font-bold mb-4">Customizable</h3>
          <p class="text-gray-700">Customize your editor with your favorite themes and plugins. Make it your own.</p>
        </div>
      </div>
      <div class="w-full md:w-1/2 lg:w-1/3 p-4">
        <div class="bg-gray-100 rounded-lg p-8">
          <i class="fas fa-cloud-upload-alt text-3xl mb-4"></i>
          <h3 class="text-xl font-bold mb-4">Cloud Storage</h3>
          <p class="text-gray-700">Store your code in the cloud and access it from anywhere. Never lose your work again.</p>
        </div>
      </div>
    </div>
  </div>
</section>
Step 4: Create the pricing section
The pricing section is the third section of the landing page and typically features pricing plans. Here is an example of what your pricing section HTML code should look like:
<section class="bg-gray-900 text-white py-20">
  <div class="container mx-auto flex flex-col items-center">
    <h2 class="text-3xl font-bold mb-8">Pricing</h2>
    <div class="flex flex-wrap justify-center">
      <div class="w-full md:w-1/2 lg:w-1/3 p-4">
        <div class="bg-gray-800 rounded-lg p-8">
          <h3 class="text-xl font-bold mb-4">Basic Plan</h3>
          <p class="text-gray-500 mb-8">Perfect for beginners</p>
          <h4 class="text-3xl font-bold mb-4">$9.99</h4>
          <p class="text-gray-500 mb-8">Per Month</p>
          <a href="#" class="bg-blue-500 hover:bg-blue-700 text-white font-bold py-4 px-8 rounded">Sign Up</a>
        </div>
      </div>
      <div class="w-full md:w-1/2 lg:w-1/3 p-4">
        <div class="bg-gray-800 rounded-lg p-8">
          <h3 class="text-xl font-bold mb-4">Pro Plan</h3>
          <p class="text-gray-500 mb-8">Perfect for professionals</p>
          <h4 class="text-3xl font-bold mb-4">$19.99</h4>
          <p class="text-gray-500 mb-8">Per Month</p>
          <a href="#" class="bg-blue-500 hover:bg-blue-700 text-white font-bold py-4 px-8 rounded">Sign Up</a>
        </div>
      </div>
      <div class="w-full md:w-1/2 lg:w-1/3 p-4">
        <div class="bg-gray-800 rounded-lg p-8">
          <h3 class="text-xl font-bold mb-4">Enterprise Plan</h3>
          <p class="text-gray-500 mb-8">Perfect for large teams</p>
          <h4 class="text-3xl font-bold mb-4">$49.99</h4>
          <p class="text-gray-500 mb-8">Per Month</p>
          <a href="#" class="bg-blue-500 hover:bg-blue-700 text-white font-bold py-4 px-8 rounded">Sign Up</a>
        </div>
      </div>
    </div>
  </div>
</section>
Step 5: Create the footer section
The footer section is the last section of the landing page and typically features links and social media icons. Here is an example of what your footer section HTML code should look like:
<footer class="bg-gray-800 text-white py-8">
  <div class="container mx-auto flex flex-col md:flex-row items-center justify-between">
    <p class="text-gray-500 mb-2 md:mb-0">© 2021 Stackblitz-ish. All rights reserved.</p>
    <div class="flex items-center">
      <a href="#" class="text-gray-500 hover:text-white ml-6"><i class="fab fa-facebook"></i></a>
      <a href="#" class="text-gray-500 hover:text-white ml-6"><i class="fab fa-twitter"></i></a>
      <a href="#" class="text-gray-500 hover:text-white ml-6"><i class="fab fa-instagram"></i></a>
    </div>
  </div>
</footer>
Step 6: Add custom styles
Finally, you can add your own custom styles to the landing page using Tailwind CSS. Here is an example of how you can style the background color of the hero section:
<section class="bg-gray-900 text-white py-20">
You can change the bg-gray-900 class to any other color class provided by Tailwind CSS.
Conclusion
In this article, we have learned how to use Tailwind CSS to build a Stackblitz-ish landing page UI component. By following these six tips, you can create a professional-looking landing page in no time. With Tailwind CSS, you can focus on building your UI component, rather than spending time writing custom CSS.