- Published on
The Ninja Guide To How To Make A Sidebar With Tailwind CSS Better
- What is Tailwind CSS?
- The description of Sidebar ui component
- Why use Tailwind CSS to create a Sidebar ui component?
- The preview of Sidebar ui component
- The source code of Sidebar ui component
- How to create a Sidebar with Tailwind CSS?
- Conclusion
As a FrontEnd technology blogger, it's important to stay up-to-date with the latest tools and techniques. One of the most popular CSS frameworks today is Tailwind CSS. It's known for its utility-first approach, which allows developers to create complex layouts and designs with ease. In this article, we will explore how to make a Sidebar with Tailwind CSS and make it even better.
What is Tailwind CSS?
Tailwind CSS is a CSS framework that provides a set of pre-defined utility classes that can be used to style HTML elements. It is a utility-first framework, which means that it focuses on providing small, reusable classes that can be combined to create complex styles. Tailwind CSS is designed to be highly customizable, and it allows developers to create unique designs without writing custom CSS.
The description of Sidebar ui component
A Sidebar is a UI component that is used to display additional content or navigation options. It is typically located on the side of the screen and can be toggled open or closed. A Sidebar can be used to display a menu, settings, or additional information about the current page.
Why use Tailwind CSS to create a Sidebar ui component?
Tailwind CSS provides a set of utility classes that can be used to create a Sidebar quickly and easily. The utility classes allow developers to create complex layouts without writing custom CSS. Additionally, Tailwind CSS is highly customizable, which means that you can create a unique design that fits your project's needs.
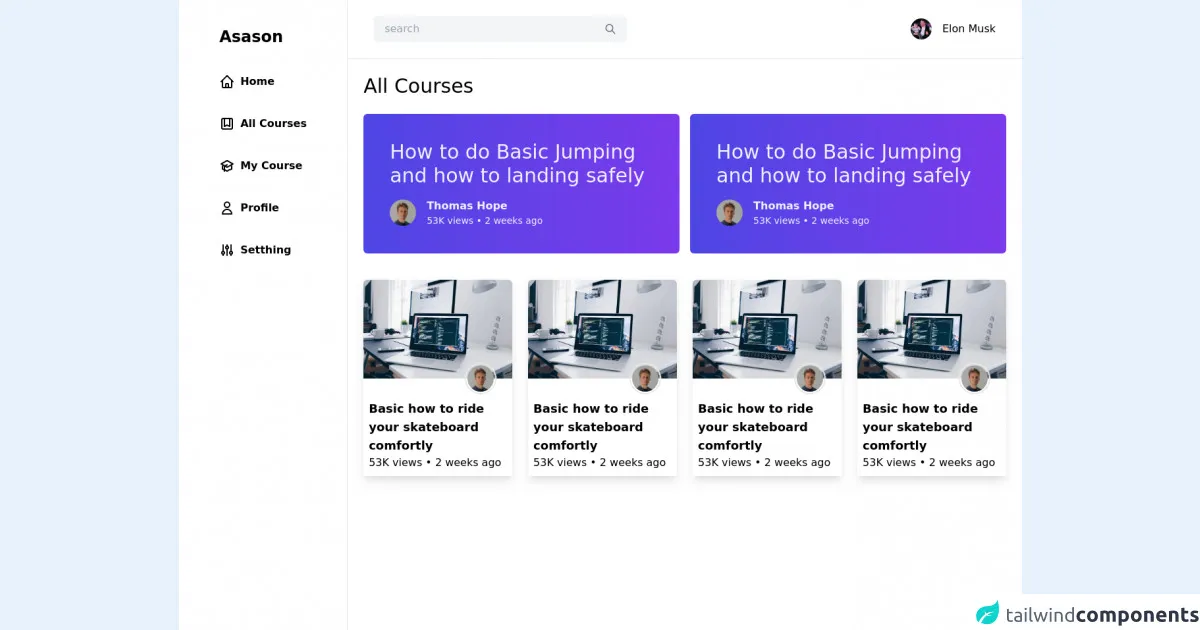
The preview of Sidebar ui component
To create a Sidebar with Tailwind CSS, we will use a combination of utility classes to style the HTML elements. The Sidebar will have a fixed width and will be positioned on the left side of the screen. When the Sidebar is closed, it will be hidden from view, and when it is open, it will slide into view.
Free download of the Sidebar's source code
The source code of Sidebar ui component
To create the Sidebar, we will use HTML and Tailwind CSS classes. The HTML structure will consist of a container element that will hold the Sidebar content and a button that will toggle the Sidebar open and closed. The Tailwind CSS classes will be used to style the HTML elements.
<div class="flex">
<div class="md:flex w-2/5 md:w-1/4 h-screen bg-white border-r hidden">
<div class="mx-auto py-10">
<h1 class="text-2xl font-bold mb-10 cursor-pointer text-[#EC5252] duration-150">Asason</h1>
<ul>
<li class="flex space-x-2 mt-10 cursor-pointer hover:text-[#EC5252] duration-150">
<svg xmlns="http://www.w3.org/2000/svg" class="h-6 w-6" fill="none" viewBox="0 0 24 24"
stroke="currentColor">
<path stroke-linecap="round" stroke-linejoin="round" stroke-width="2"
d="M3 12l2-2m0 0l7-7 7 7M5 10v10a1 1 0 001 1h3m10-11l2 2m-2-2v10a1 1 0 01-1 1h-3m-6 0a1 1 0 001-1v-4a1 1 0 011-1h2a1 1 0 011 1v4a1 1 0 001 1m-6 0h6" />
</svg>
<span class="font-semibold">Home</span>
</li>
<li class="flex space-x-2 mt-10 cursor-pointer hover:text-[#EC5252] duration-150">
<svg xmlns="http://www.w3.org/2000/svg" class="h-6 w-6" fill="none" viewBox="0 0 24 24"
stroke="currentColor">
<path stroke-linecap="round" stroke-linejoin="round" stroke-width="2"
d="M16 4v12l-4-2-4 2V4M6 20h12a2 2 0 002-2V6a2 2 0 00-2-2H6a2 2 0 00-2 2v12a2 2 0 002 2z" />
</svg>
<span class="font-semibold">All Courses</span>
</li>
<li class="flex space-x-2 mt-10 cursor-pointer hover:text-[#EC5252] duration-150">
<svg xmlns="http://www.w3.org/2000/svg" class="h-6 w-6" fill="none" viewBox="0 0 24 24"
stroke="currentColor">
<path d="M12 14l9-5-9-5-9 5 9 5z" />
<path
d="M12 14l6.16-3.422a12.083 12.083 0 01.665 6.479A11.952 11.952 0 0012 20.055a11.952 11.952 0 00-6.824-2.998 12.078 12.078 0 01.665-6.479L12 14z" />
<path stroke-linecap="round" stroke-linejoin="round" stroke-width="2"
d="M12 14l9-5-9-5-9 5 9 5zm0 0l6.16-3.422a12.083 12.083 0 01.665 6.479A11.952 11.952 0 0012 20.055a11.952 11.952 0 00-6.824-2.998 12.078 12.078 0 01.665-6.479L12 14zm-4 6v-7.5l4-2.222" />
</svg>
<span class="font-semibold">My Course</span>
</li>
<li class="flex space-x-2 mt-10 cursor-pointer hover:text-[#EC5252] duration-150">
<svg xmlns="http://www.w3.org/2000/svg" class="h-6 w-6" fill="none" viewBox="0 0 24 24"
stroke="currentColor">
<path stroke-linecap="round" stroke-linejoin="round" stroke-width="2"
d="M16 7a4 4 0 11-8 0 4 4 0 018 0zM12 14a7 7 0 00-7 7h14a7 7 0 00-7-7z" />
</svg>
<span class="font-semibold">Profile</span>
</li>
<li class="flex space-x-2 mt-10 cursor-pointer hover:text-[#EC5252] duration-150">
<svg xmlns="http://www.w3.org/2000/svg" class="h-6 w-6" fill="none" viewBox="0 0 24 24"
stroke="currentColor">
<path stroke-linecap="round" stroke-linejoin="round" stroke-width="2"
d="M12 6V4m0 2a2 2 0 100 4m0-4a2 2 0 110 4m-6 8a2 2 0 100-4m0 4a2 2 0 110-4m0 4v2m0-6V4m6 6v10m6-2a2 2 0 100-4m0 4a2 2 0 110-4m0 4v2m0-6V4" />
</svg>
<span class="font-semibold">Setthing</span>
</li>
<button class="w-full mt-10 bg-[#EC5252] rounded-full py-1.5 text-white">Learn</button>
</ul>
</div>
</div>
<main class="min-h-screen w-full bg-white">
<nav class="flex items-center justify-between px-10 bg-white py-6 border-b">
<div class="flex items-center bg-gray-100 px-4 py-2 rounded-md space-x-3 w-96">
<input type="text" placeholder="search" class="bg-gray-100 outline-none w-full" />
<svg xmlns="http://www.w3.org/2000/svg" class="h-5 w-5 cursor-pointer text-gray-500" fill="none"
viewBox="0 0 24 24" stroke="currentColor">
<path stroke-linecap="round" stroke-linejoin="round" stroke-width="2"
d="M21 21l-6-6m2-5a7 7 0 11-14 0 7 7 0 0114 0z" />
</svg>
</div>
<div class="flex items-center space-x-4">
<img class="w-8 rounded-full" src="https://imagez.tmz.com/image/f7/1by1/2021/12/14/f7703994b69d48ca802df55729a2325c_xl.jpg" alt="Elon Musk" />
<p class="hidden md:block">Elon Musk</p>
</div>
</nav>
<div class="mx-6">
<h1 class="my-6 text-3xl">All Courses</h1>
<div class="md:flex space-y-3 md:space-y-0 md:space-x-4 mt-6">
<div class="h-90 bg-gradient-to-r rounded-md from-indigo-600 to-purple-600 p-10">
<p class="text-3xl font-thin text-indigo-50 cursor-pointer">How to do Basic Jumping and how to
landing safely</p>
<div class="flex items-center mt-4 space-x-4">
<img class="w-10 h-10 rounded-full cursor-pointer" src="https://images.unsplash.com/photo-1570295999919-56ceb5ecca61?ixlib=rb-1.2.1&ixid=MnwxMjA3fDB8MHxwaG90by1wYWdlfHx8fGVufDB8fHx8&auto=format&fit=crop&w=880&q=80" alt="" />
<div>
<h3 class="text-indigo-50 font-semibold cursor-pointer">Thomas Hope</h3>
<p class="text-indigo-50 text-sm font-thin">53K views • 2 weeks ago</p>
</div>
</div>
</div>
</div>
</div>
<div class="mx-6 grid grid-cols-2 gap-6 md:grid-cols-3 lg:grid-cols-4 mt-10">
<div class="shadow-lg rounded-t-md overflow-hidden ">
<div class="">
<img class="w-sm" src="https://images.unsplash.com/photo-1498050108023-c5249f4df085?ixlib=rb-1.2.1&ixid=MnwxMjA3fDB8MHxzZWFyY2h8Mnx8Y29kZXxlbnwwfHwwfHw%3D&auto=format&fit=crop&w=600&q=60" alt="" />
<div class="p-2 relative">
<p class="text-lg mt-6 font-semibold">Basic how to ride your skateboard comfortly</p>
<p>53K views • 2 weeks ago</p>
<img class="h-12 w-12 rounded-full absolute -top-6 p-0.5 border-2 right-6" src="https://images.unsplash.com/photo-1570295999919-56ceb5ecca61?ixlib=rb-1.2.1&ixid=MnwxMjA3fDB8MHxwaG90by1wYWdlfHx8fGVufDB8fHx8&auto=format&fit=crop&w=880&q=80" alt="" />
</div>
</div>
</div>
<div class="shadow-lg rounded-t-md overflow-hidden">
<div class="">
<img class="w-sm" src="https://images.unsplash.com/photo-1498050108023-c5249f4df085?ixlib=rb-1.2.1&ixid=MnwxMjA3fDB8MHxzZWFyY2h8Mnx8Y29kZXxlbnwwfHwwfHw%3D&auto=format&fit=crop&w=600&q=60" alt="" />
<div class="p-2 relative">
<p class="text-lg mt-6 font-semibold">Basic how to ride your skateboard comfortly</p>
<p>53K views • 2 weeks ago</p>
<img class="h-12 w-12 rounded-full absolute -top-6 p-0.5 border-2 right-6" src="https://images.unsplash.com/photo-1570295999919-56ceb5ecca61?ixlib=rb-1.2.1&ixid=MnwxMjA3fDB8MHxwaG90by1wYWdlfHx8fGVufDB8fHx8&auto=format&fit=crop&w=880&q=80" alt="" />
</div>
</div>
</div>
<div class="shadow-lg rounded-t-md overflow-hidden ">
<div class="">
<img class="w-sm" src="https://images.unsplash.com/photo-1498050108023-c5249f4df085?ixlib=rb-1.2.1&ixid=MnwxMjA3fDB8MHxzZWFyY2h8Mnx8Y29kZXxlbnwwfHwwfHw%3D&auto=format&fit=crop&w=600&q=60" alt="" />
<div class="p-2 relative">
<p class="text-lg mt-6 font-semibold">Basic how to ride your skateboard comfortly</p>
<p>53K views • 2 weeks ago</p>
<img class="h-12 w-12 rounded-full absolute -top-6 p-0.5 border-2 right-6" src="https://images.unsplash.com/photo-1570295999919-56ceb5ecca61?ixlib=rb-1.2.1&ixid=MnwxMjA3fDB8MHxwaG90by1wYWdlfHx8fGVufDB8fHx8&auto=format&fit=crop&w=880&q=80" alt="" />
</div>
</div>
</div>
<div class="shadow-lg rounded-t-md overflow-hidden ">
<div class="">
<img class="w-sm" src="https://images.unsplash.com/photo-1498050108023-c5249f4df085?ixlib=rb-1.2.1&ixid=MnwxMjA3fDB8MHxzZWFyY2h8Mnx8Y29kZXxlbnwwfHwwfHw%3D&auto=format&fit=crop&w=600&q=60" alt="" />
<div class="p-2 relative">
<p class="text-lg mt-6 font-semibold">Basic how to ride your skateboard comfortly
</p>
<p>53K views • 2 weeks ago</p>
<img class="h-12 w-12 rounded-full absolute -top-6 p-0.5 border-2 right-6" src="https://images.unsplash.com/photo-1570295999919-56ceb5ecca61?ixlib=rb-1.2.1&ixid=MnwxMjA3fDB8MHxwaG90by1wYWdlfHx8fGVufDB8fHx8&auto=format&fit=crop&w=880&q=80" alt="" />
</div>
</div>
</div>
</div>
</div>
<footer class="text-center py-6 bg-gray-100">
Copyright © 2022 dej45.com Template by Namina
</footer>
</main>
</div>
How to create a Sidebar with Tailwind CSS?
To create a Sidebar with Tailwind CSS, follow these steps:
- Create an HTML container element for the Sidebar content. This element will be positioned to the left of the screen and will have a fixed width.
<div class="fixed left-0 top-0 w-64 h-screen bg-gray-800"></div>
- Add content to the Sidebar container element. This can be navigation links, settings, or any other content that you want to display in the Sidebar.
<div class="fixed left-0 top-0 w-64 h-screen bg-gray-800">
  <ul class="mt-6">
    <li class="px-4 py-2 text-gray-300 hover:bg-gray-700 hover:text-white">Dashboard</li>
    <li class="px-4 py-2 text-gray-300 hover:bg-gray-700 hover:text-white">Projects</li>
    <li class="px-4 py-2 text-gray-300 hover:bg-gray-700 hover:text-white">Team</li>
    <li class="px-4 py-2 text-gray-300 hover:bg-gray-700 hover:text-white">Settings</li>
  </ul>
</div>
- Create a button element that will toggle the Sidebar open and closed. This button can be positioned anywhere on the page.
<button class="fixed right-0 top-0 z-10 block h-10 w-10 rounded-full bg-gray-800 text-white">
  <svg class="h-6 w-6 fill-current" viewBox="0 0 24 24">
    <path v-if="open" fill-rule="evenodd" clip-rule="evenodd" d="M19 12H5v-2h14v2z"></path>
    <path v-else fill-rule="evenodd" clip-rule="evenodd" d="M5 16h14v-2H5v2zm0-6h14V8H5v2z"></path>
  </svg>
</button>
- Add JavaScript code to toggle the Sidebar open and closed when the button is clicked.
const button = document.querySelector('button');
const sidebar = document.querySelector('.sidebar');

button.addEventListener('click', () => {
  sidebar.classList.toggle('hidden');
});
Conclusion
In conclusion, creating a Sidebar with Tailwind CSS is a quick and easy process. The utility classes provided by Tailwind CSS make it easy to style the HTML elements, and the framework's customization options allow you to create a unique design that fits your project's needs. By following the steps outlined in this article, you can create a Sidebar that is both functional and visually appealing.