- Published on
6 Easy Ways To Make A Select with custom list With Tailwind CSS
- What is Tailwind CSS?
- The description of Select with custom list ui component
- Why use Tailwind CSS to create a Select with custom list ui component?
- The preview of Select with custom list ui component
- The source code of Select with custom list ui component
- How to create a Select with custom list with Tailwind CSS?
- Conclusion
As a FrontEnd technology blogger, you must have heard of Tailwind CSS. It is a utility-first CSS framework that provides a set of pre-defined classes to help you quickly build custom user interfaces. In this article, we will explore how to use Tailwind CSS to create a Select with custom list ui component.
What is Tailwind CSS?
Tailwind CSS is a highly customizable, low-level CSS framework that gives you all of the building blocks you need to create custom designs without any annoying opinionated styles you have to fight to override. It is a utility-first framework, which means that instead of providing you with pre-built components, it provides you with a set of utility classes that you can use to build your own custom components.
The description of Select with custom list ui component
A Select with custom list ui component is a user interface element that allows users to select an option from a list of options. The custom list is a list of options that is not provided by default in the Select component. This type of component is often used in forms or search bars.
Why use Tailwind CSS to create a Select with custom list ui component?
Tailwind CSS provides a set of pre-defined classes that can be used to create a Select with custom list ui component quickly. These classes are designed to be easy to use and understand, making it easier for developers to create custom user interfaces without having to write a lot of custom CSS.
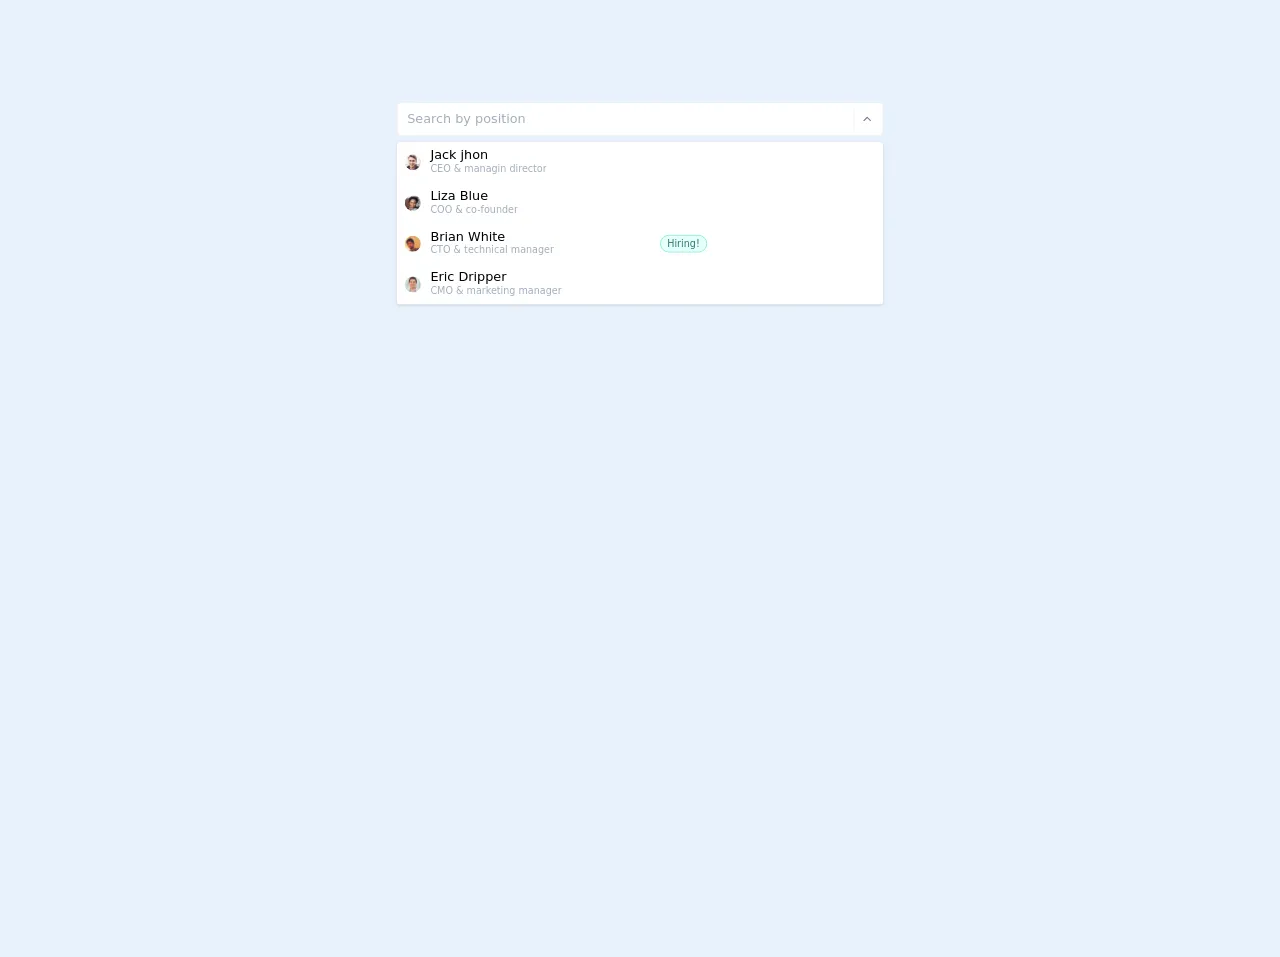
The preview of Select with custom list ui component
To create a Select with custom list ui component, we will use Tailwind CSS classes to style the component. The component will consist of a select element and a custom list of options. The custom list will be displayed when the user clicks on the select element.
Free download of the Select with custom list's source code
The source code of Select with custom list ui component
To create a Select with custom list ui component, we will use HTML and CSS. The HTML will consist of a select element and a custom list of options. The CSS will use Tailwind CSS classes to style the component.
<style>
.top-100 {top: 100%}
.bottom-100 {bottom: 100%}
.max-h-select {
max-height: 300px;
}
</style>
<div class="flex flex-col items-center">
<div class="w-full md:w-1/2 flex flex-col items-center h-64">
<div class="w-full px-4">
<div class="flex flex-col items-center relative">
<div class="w-full">
<div class="my-2 p-1 bg-white flex border border-gray-200 rounded">
<div class="flex flex-auto flex-wrap"></div>
<input placeholder="Search by position" class="p-1 px-2 appearance-none outline-none w-full text-gray-800">
<div class="text-gray-300 w-8 py-1 pl-2 pr-1 border-l flex items-center border-gray-200">
<button class="cursor-pointer w-6 h-6 text-gray-600 outline-none focus:outline-none">
<svg xmlns="http://www.w3.org/2000/svg" width="100%" height="100%" fill="none" viewBox="0 0 24 24" stroke="currentColor" stroke-width="2" stroke-linecap="round" stroke-linejoin="round" class="feather feather-chevron-up w-4 h-4">
<polyline points="18 15 12 9 6 15"></polyline>
</svg>
</button>
</div>
</div>
</div>
<div class="absolute shadow bg-white top-100 z-40 w-full lef-0 rounded max-h-select overflow-y-auto svelte-5uyqqj">
<div class="flex flex-col w-full">
<div class="cursor-pointer w-full border-gray-100 rounded-t border-b hover:bg-teal-100">
<div class="flex w-full items-center p-2 pl-2 border-transparent border-l-2 relative hover:border-teal-100">
<div class="w-6 flex flex-col items-center">
<div class="flex relative w-5 h-5 bg-orange-500 justify-center items-center m-1 mr-2 w-4 h-4 mt-1 rounded-full "><img class="rounded-full" alt="A" src="https://randomuser.me/api/portraits/men/62.jpg"> </div>
</div>
<div class="w-full items-center flex">
<div class="mx-2 -mt-1 ">Jack jhon
<div class="text-xs truncate w-full normal-case font-normal -mt-1 text-gray-500">CEO & managin director</div>
</div>
</div>
</div>
</div>
<div class="cursor-pointer w-full border-gray-100 border-b hover:bg-teal-100">
<div class="flex w-full items-center p-2 pl-2 border-transparent border-l-2 relative hover:border-teal-100">
<div class="w-6 flex flex-col items-center">
<div class="flex relative w-5 h-5 bg-orange-500 justify-center items-center m-1 mr-2 w-4 h-4 mt-1 rounded-full "><img class="rounded-full" alt="A" src="https://randomuser.me/api/portraits/women/62.jpg"> </div>
</div>
<div class="w-full items-center flex">
<div class="mx-2 -mt-1 ">Liza Blue
<div class="text-xs truncate w-full normal-case font-normal -mt-1 text-gray-500">COO & co-founder</div>
</div>
</div>
</div>
</div>
<div class="cursor-pointer w-full border-gray-100 border-b hover:bg-teal-100">
<div class="flex w-full items-center p-2 pl-2 border-transparent border-l-2 relative hover:border-teal-100">
<div class="w-6 flex flex-col items-center">
<div class="flex relative w-5 h-5 bg-orange-500 justify-center items-center m-1 mr-2 w-4 h-4 mt-1 rounded-full "><img class="rounded-full" alt="A" src="https://randomuser.me/api/portraits/men/65.jpg"> </div>
</div>
<div class="w-full items-center flex">
<div class="mx-2 -mt-1 w-1/2 ">Brian White
<div class="text-xs truncate w-full normal-case font-normal -mt-1 text-gray-500">CTO & technical manager</div>
</div>
<div class="w-1/2 flex">
<div class="flex justify-center items-center m-1 font-medium py-1 px-2 bg-white rounded-full text-teal-700 bg-teal-100 border border-teal-300 ">
<div class="text-xs font-normal leading-none max-w-full flex-initial">Hiring!</div>
</div>
</div>
</div>
</div>
</div>
<div class="cursor-pointer w-full border-gray-100 rounded-b hover:bg-teal-100">
<div class="flex w-full items-center p-2 pl-2 border-transparent border-l-2 relative hover:border-teal-100">
<div class="w-6 flex flex-col items-center">
<div class="flex relative w-5 h-5 bg-orange-500 justify-center items-center m-1 mr-2 w-4 h-4 mt-1 rounded-full "><img class="rounded-full" alt="A" src="https://randomuser.me/api/portraits/men/85.jpg"> </div>
</div>
<div class="w-full items-center flex">
<div class="mx-2 -mt-1 ">Eric Dripper
<div class="text-xs truncate w-full normal-case font-normal -mt-1 text-gray-500">CMO & marketing manager</div>
</div>
</div>
</div>
</div>
</div>
</div>
</div>
</div>
</div>
</div>
How to create a Select with custom list with Tailwind CSS?
Here are six easy steps to create a Select with custom list ui component using Tailwind CSS:
- Create a select element in HTML.
<select class="border border-gray-400 rounded-md px-4 py-2 pr-8">
  <option value="1">Option 1</option>
  <option value="2">Option 2</option>
  <option value="3">Option 3</option>
</select>
- Add a custom list of options.
<div class="relative">
  <select class="border border-gray-400 rounded-md px-4 py-2 pr-8">
    <option value="1">Option 1</option>
    <option value="2">Option 2</option>
    <option value="3">Option 3</option>
  </select>
  <div class="absolute inset-y-0 right-0 flex items-center px-2 pointer-events-none">
    <svg class="w-4 h-4 fill-current" viewBox="0 0 20 20">
      <path d="M10 12l-5-5 1.41-1.41L10 9.18l3.59-3.59L15 7l-5 5z"></path>
    </svg>
  </div>
  <div class="absolute mt-1 w-full rounded-md bg-white shadow-lg">
    <ul class="list-none">
      <li class="hover:bg-gray-200 px-4 py-2">Option 1</li>
      <li class="hover:bg-gray-200 px-4 py-2">Option 2</li>
      <li class="hover:bg-gray-200 px-4 py-2">Option 3</li>
    </ul>
  </div>
</div>
- Hide the custom list of options by default.
<div class="relative">
  <select class="border border-gray-400 rounded-md px-4 py-2 pr-8">
    <option value="1">Option 1</option>
    <option value="2">Option 2</option>
    <option value="3">Option 3</option>
  </select>
  <div class="absolute inset-y-0 right-0 flex items-center px-2 pointer-events-none">
    <svg class="w-4 h-4 fill-current" viewBox="0 0 20 20">
      <path d="M10 12l-5-5 1.41-1.41L10 9.18l3.59-3.59L15 7l-5 5z"></path>
    </svg>
  </div>
  <div class="absolute mt-1 w-full rounded-md bg-white shadow-lg hidden">
    <ul class="list-none">
      <li class="hover:bg-gray-200 px-4 py-2">Option 1</li>
      <li class="hover:bg-gray-200 px-4 py-2">Option 2</li>
      <li class="hover:bg-gray-200 px-4 py-2">Option 3</li>
    </ul>
  </div>
</div>
- Show the custom list of options when the select element is clicked.
<div class="relative">
  <select class="border border-gray-400 rounded-md px-4 py-2 pr-8" onclick="toggleList()">
    <option value="1">Option 1</option>
    <option value="2">Option 2</option>
    <option value="3">Option 3</option>
  </select>
  <div class="absolute inset-y-0 right-0 flex items-center px-2 pointer-events-none">
    <svg class="w-4 h-4 fill-current" viewBox="0 0 20 20">
      <path d="M10 12l-5-5 1.41-1.41L10 9.18l3.59-3.59L15 7l-5 5z"></path>
    </svg>
  </div>
  <div class="absolute mt-1 w-full rounded-md bg-white shadow-lg hidden" id="list">
    <ul class="list-none">
      <li class="hover:bg-gray-200 px-4 py-2">Option 1</li>
      <li class="hover:bg-gray-200 px-4 py-2">Option 2</li>
      <li class="hover:bg-gray-200 px-4 py-2">Option 3</li>
    </ul>
  </div>
</div>

<script>
  function toggleList() {
    var list = document.getElementById("list");
    list.classList.toggle("hidden");
  }
</script>
- Style the custom list of options.
<div class="relative">
  <select class="border border-gray-400 rounded-md px-4 py-2 pr-8" onclick="toggleList()">
    <option value="1">Option 1</option>
    <option value="2">Option 2</option>
    <option value="3">Option 3</option>
  </select>
  <div class="absolute inset-y-0 right-0 flex items-center px-2 pointer-events-none">
    <svg class="w-4 h-4 fill-current" viewBox="0 0 20 20">
      <path d="M10 12l-5-5 1.41-1.41L10 9.18l3.59-3.59L15 7l-5 5z"></path>
    </svg>
  </div>
  <div class="absolute mt-1 w-full rounded-md bg-white shadow-lg hidden" id="list">
    <ul class="list-none">
      <li class="hover:bg-gray-200 px-4 py-2">Option 1</li>
      <li class="hover:bg-gray-200 px-4 py-2">Option 2</li>
      <li class="hover:bg-gray-200 px-4 py-2">Option 3</li>
    </ul>
  </div>
</div>

<style>
  #list li:first-child {
    border-top-left-radius: 0.375rem;
    border-top-right-radius: 0.375rem;
  }

  #list li:last-child {
    border-bottom-left-radius: 0.375rem;
    border-bottom-right-radius: 0.375rem;
  }
</style>
- Add some extra styling to make the component look better.
<div class="relative">
  <select class="border border-gray-400 rounded-md px-4 py-2 pr-8 text-gray-600 font-medium hover:border-gray-500 focus:border-gray-500 focus:outline-none focus:shadow-outline-gray" onclick="toggleList()">
    <option value="1">Option 1</option>
    <option value="2">Option 2</option>
    <option value="3">Option 3</option>
  </select>
  <div class="absolute inset-y-0 right-0 flex items-center px-2 pointer-events-none">
    <svg class="w-4 h-4 fill-current" viewBox="0 0 20 20">
      <path d="M10 12l-5-5 1.41-1.41L10 9.18l3.59-3.59L15 7l-5 5z"></path>
    </svg>
  </div>
  <div class="absolute mt-1 w-full rounded-md bg-white shadow-lg hidden" id="list">
    <ul class="list-none">
      <li class="hover:bg-gray-200 px-4 py-2">Option 1</li>
      <li class="hover:bg-gray-200 px-4 py-2">Option 2</li>
      <li class="hover:bg-gray-200 px-4 py-2">Option 3</li>
    </ul>
  </div>
</div>

<style>
  #list li:first-child {
    border-top-left-radius: 0.375rem;
    border-top-right-radius: 0.375rem;
  }

  #list li:last-child {
    border-bottom-left-radius: 0.375rem;
    border-bottom-right-radius: 0.375rem;
  }

  #list li:hover {
    background-color: #edf2f7;
  }
</style>
Conclusion
In this article, we have explored how to use Tailwind CSS to create a Select with custom list ui component. We have seen that Tailwind CSS provides a set of pre-defined classes that can be used to create custom user interfaces quickly and easily. By following the six easy steps outlined in this article, you can create a Select with custom list ui component that looks great and is easy to use.