- Published on
Make A Rich Harris With Tailwind CSS Like A Pro With The Help Of These 6 Tips
- What is Tailwind CSS?
- The description of Rich Harris ui component
- Why use Tailwind CSS to create a Rich Harris ui component?
- The preview of Rich Harris ui component.
- The source code of Rich Harris ui component.
- How to create a Rich Harris with Tailwind CSS?
- Step 1: Create the HTML structure
- Step 2: Style the container element
- Step 3: Style the media element
- Step 4: Style the caption element
- Step 5: Add content to the component
- Conclusion
Tailwind CSS is a utility-first CSS framework that helps developers to quickly build custom user interfaces. It provides a set of pre-defined classes that can be used to style HTML elements. In this article, we will discuss how to create a Rich Harris UI component with Tailwind CSS.
What is Tailwind CSS?
Tailwind CSS is a CSS framework that provides a set of pre-defined classes that can be used to style HTML elements. It is a utility-first framework, which means that it focuses on providing low-level utility classes that can be combined to create custom styles. Tailwind CSS is highly customizable and can be configured to match the design requirements of any project.
The description of Rich Harris ui component
Rich Harris is a UI component that is used to display rich media content such as images, videos, and audio files. It is a highly customizable component that can be used to create visually appealing and engaging user interfaces. The component is named after its creator, Rich Harris, who is a developer at The New York Times.
Why use Tailwind CSS to create a Rich Harris ui component?
Tailwind CSS provides a set of pre-defined classes that can be used to create custom styles. This makes it easy to create a Rich Harris UI component without having to write custom CSS code. Additionally, Tailwind CSS is highly customizable, which means that the component can be easily modified to match the design requirements of any project.
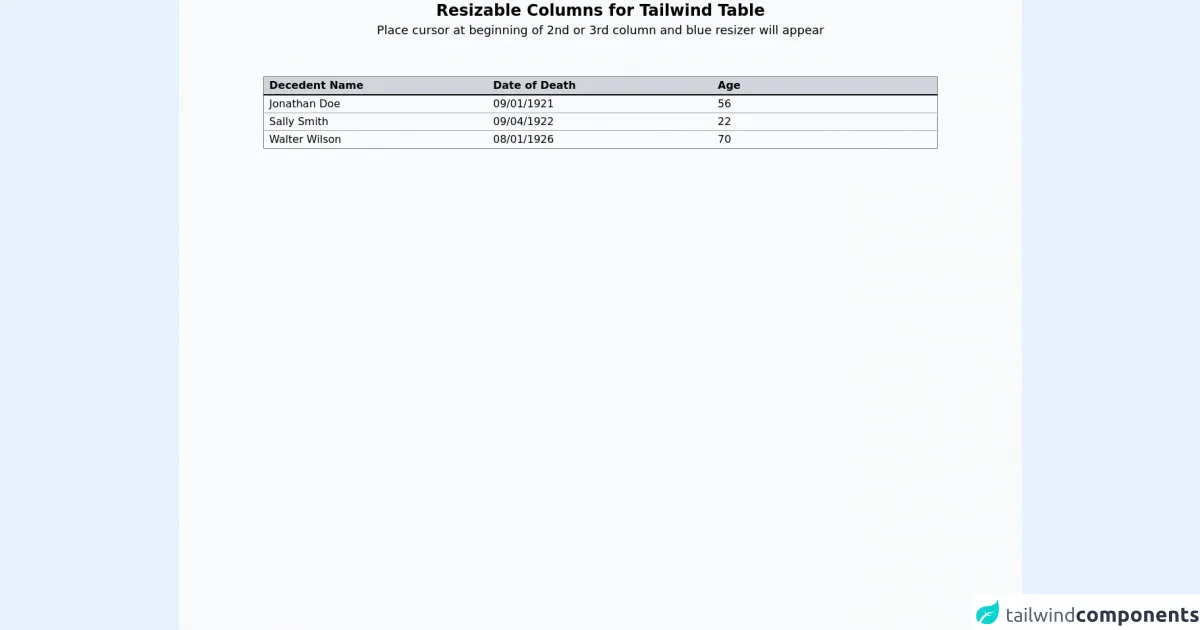
The preview of Rich Harris ui component.
The Rich Harris UI component is a visually appealing component that can be used to display rich media content. It is highly customizable and can be modified to match the design requirements of any project.
Free download of the Rich Harris's source code
The source code of Rich Harris ui component.
The source code of the Rich Harris UI component is available on GitHub. It is written in HTML, CSS, and JavaScript and can be easily modified to match the design requirements of any project.
<div id="app">
  <div class="h-screen w-full bg-gray-50">
    <h1 class='text-2xl font-bold text-center'>Resizable Columns for Tailwind Table</h1>
    <h2 class='text-lg text-center'>Place cursor at beginning of 2nd or 3rd column and blue resizer will appear
</h2>
    <div class="flex w-full justify-center">
      <table class="table-fixed border border-gray-500 border-collapse w-4/5 mx-24 mt-14">
        <thead class="">
          <tr class="border-b-2 border-black">
            <th class="w-4/12 bg-gray-300 text-left px-2">Decedent Name</th>
            <th class="w-4/12 bg-gray-300 text-left px-2">Date of Death</th>
            <th class="w-4/12 bg-gray-300 text-left px-2">Age</th>
          </tr>
        </thead>
        <tbody class="divide-y divide-gray-400">
          <tr>
            <td class="text-left px-2">Jonathan Doe</td>
            <td class="px-2">09/01/1921</td>
            <td class="px-2">56</td>
          </tr>
          <tr>
            <td class="px-2">Sally Smith</td>
            <td class="px-2">09/04/1922</td>
            <td class="px-2">22</td>
          </tr>
          <tr>
            <td class="px-2">Walter Wilson</td>
            <td class="px-2">08/01/1926</td>
            <td class="px-2">70</td>
          </tr>
        </tbody>
      </table>
    </div>
  </div>
</div>

<script>

    let tables = document.getElementsByTagName("table");
      for (var i = 0; i < tables.length; i++) {
        resizableGrid(tables[i]);
      }
      function resizableGrid(table) {
        var row = table.getElementsByTagName("tr")[0],
          cols = row ? row.children : undefined;
        if (!cols) return;

        table.style.overflow = "hidden";

        var tableHeight = table.offsetHeight;

        for (var i = 0; i < cols.length; i++) {
          var div = createDiv(tableHeight);
          cols[i].appendChild(div);
          cols[i].style.position = "relative";
          setListeners(div);
        }

        function setListeners(div) {
          var pageX, curCol, nxtCol, curColWidth, nxtColWidth;

          div.addEventListener("mousedown", function (e) {
            curCol = e.target.parentElement;
            nxtCol = curCol.nextElementSibling;
            pageX = e.pageX;

            var padding = paddingDiff(curCol);

            curColWidth = curCol.offsetWidth - padding;
            if (nxtCol) nxtColWidth = nxtCol.offsetWidth - padding;
          });

          div.addEventListener("mouseover", function (e) {
            e.target.style.borderRight = "2px solid #0000ff";
          });

          div.addEventListener("mouseout", function (e) {
            e.target.style.borderRight = "";
          });

          document.addEventListener("mousemove", function (e) {
            if (curCol) {
              var diffX = e.pageX - pageX;

              if (nxtCol) nxtCol.style.width = nxtColWidth - diffX + "px";

              curCol.style.width = curColWidth + diffX + "px";
            }
          });

          document.addEventListener("mouseup", function (e) {
            curCol = undefined;
            nxtCol = undefined;
            pageX = undefined;
            nxtColWidth = undefined;
            curColWidth = undefined;
          });
        }

        function createDiv(height) {
          var div = document.createElement("div");
          div.style.top = 0;
          div.style.right = 0;
          div.style.width = "5px";
          div.style.position = "absolute";
          div.style.cursor = "col-resize";
          div.style.userSelect = "none";
          div.style.height = height + "px";
          return div;
        }

        function paddingDiff(col) {
          if (getStyleVal(col, "box-sizing") == "border-box") {
            return 0;
          }

          var padLeft = getStyleVal(col, "padding-left");
          var padRight = getStyleVal(col, "padding-right");
          return parseInt(padLeft) + parseInt(padRight);
        }

        function getStyleVal(elm, css) {
          return window.getComputedStyle(elm, null).getPropertyValue(css);
        }
      }
</script>
How to create a Rich Harris with Tailwind CSS?
Here are the steps to create a Rich Harris UI component with Tailwind CSS:
Step 1: Create the HTML structure
The first step is to create the HTML structure of the component. The component consists of a container element that contains the rich media content and a caption element that provides additional information about the content.
<div class="rh-container">
  <div class="rh-media"></div>
  <div class="rh-caption"></div>
</div>
Step 2: Style the container element
The next step is to style the container element. We will use the flex and items-center classes to center the content horizontally and vertically.
<div class="rh-container flex items-center">
  <div class="rh-media"></div>
  <div class="rh-caption"></div>
</div>
Step 3: Style the media element
The media element is used to display the rich media content. We will use the bg-cover and bg-center classes to center and scale the image.
<div class="rh-container flex items-center">
  <div class="rh-media bg-cover bg-center"></div>
  <div class="rh-caption"></div>
</div>
Step 4: Style the caption element
The caption element provides additional information about the content. We will use the text-white class to set the text color to white and the bg-gray-900 class to set the background color to gray.
<div class="rh-container flex items-center">
  <div class="rh-media bg-cover bg-center"></div>
  <div class="rh-caption text-white bg-gray-900"></div>
</div>
Step 5: Add content to the component
Finally, we will add content to the component. We will use the style attribute to set the background image of the media element and the p element to add text to the caption element.
<div class="rh-container flex items-center">
  <div class="rh-media bg-cover bg-center" style="background-image: url('image.jpg')"></div>
  <div class="rh-caption text-white bg-gray-900">
    <p>This is a caption</p>
  </div>
</div>
Conclusion
In this article, we discussed how to create a Rich Harris UI component with Tailwind CSS. We learned that Tailwind CSS provides a set of pre-defined classes that can be used to create custom styles and that the Rich Harris UI component is a highly customizable component that can be used to create visually appealing and engaging user interfaces. By following the steps outlined in this article, you can create a Rich Harris UI component like a pro.