- Published on
The Ninja Guide To How To Create A Progress Card Template For Reuse In Any Mathing Situation With Tailwind CSS Better
- What is Tailwind CSS?
- The description of Progress Card Template For Reuse In Any Mathing Situation ui component
- Why use Tailwind CSS to create a Progress Card Template For Reuse In Any Mathing Situation ui component?
- The preview of Progress Card Template For Reuse In Any Mathing Situation ui component
- The source code of Progress Card Template For Reuse In Any Mathing Situation ui component
- How to create a Progress Card Template For Reuse In Any Mathing Situation with Tailwind CSS?
- Conclusion
What is Tailwind CSS?
Tailwind CSS is a utility-first CSS framework that allows you to rapidly build custom user interfaces. It provides a set of pre-defined CSS classes that you can use to style your HTML elements. With Tailwind CSS, you can create complex layouts, responsive designs, and custom components in a matter of minutes.
The description of Progress Card Template For Reuse In Any Mathing Situation ui component
A progress card is a UI component that displays the progress of a task or a project. It typically includes a progress bar, a title, a description, and a call-to-action button. A progress card is a reusable component that can be used in various situations, such as tracking the progress of a download, the completion of a form, or the status of an order.
Why use Tailwind CSS to create a Progress Card Template For Reuse In Any Mathing Situation ui component?
Tailwind CSS provides a set of pre-defined CSS classes that you can use to style your HTML elements. This makes it easy to create custom UI components, such as a progress card, without having to write custom CSS code. With Tailwind CSS, you can also create responsive designs that adapt to different screen sizes, which is essential for modern web applications.
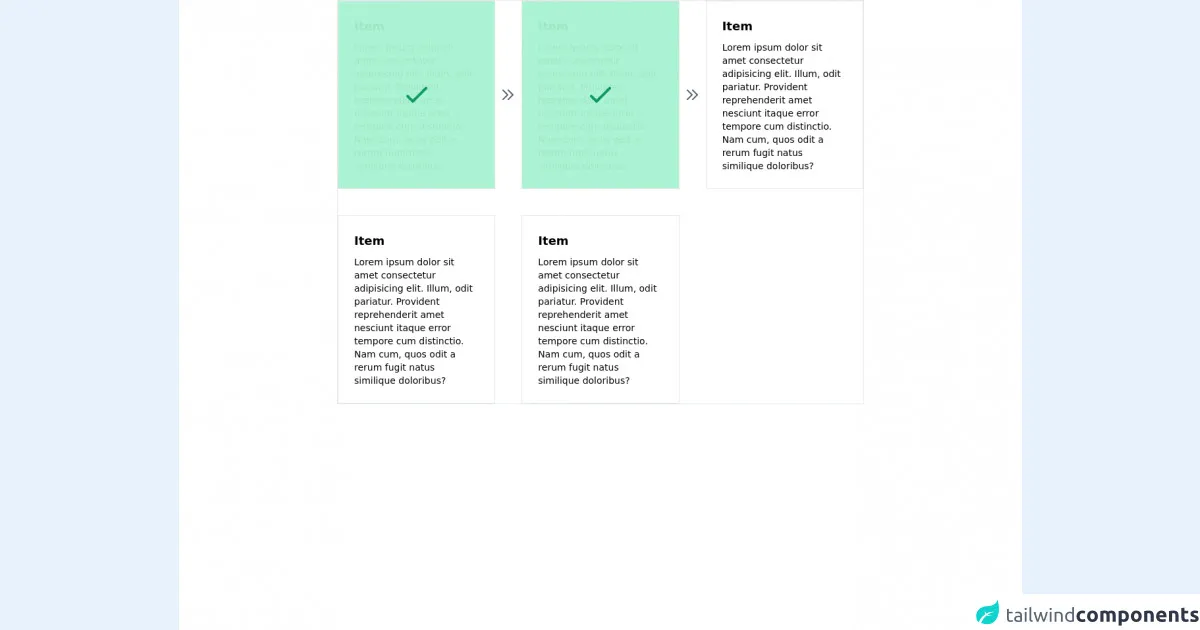
The preview of Progress Card Template For Reuse In Any Mathing Situation ui component
The Progress Card Template For Reuse In Any Mathing Situation UI component is a simple, yet elegant way to display the progress of a task or a project. It includes a progress bar, a title, a description, and a call-to-action button. The template is fully customizable, allowing you to change the colors, fonts, and layout to match your brand's style.
Free download of the Progress Card Template For Reuse In Any Mathing Situation's source code
The source code of Progress Card Template For Reuse In Any Mathing Situation ui component
Creating a Progress Card Template For Reuse In Any Mathing Situation UI component with Tailwind CSS is easy. You can start by creating a new HTML file and adding the following code:
<div class="bg-white rounded-lg shadow-md p-6">
  <div class="flex items-center justify-between mb-4">
    <h2 class="text-lg font-medium text-gray-800">Task Name</h2>
    <span class="text-sm font-semibold text-gray-700">50%</span>
  </div>
  <div class="relative pt-1">
    <div class="overflow-hidden h-2 mb-4 text-xs flex rounded bg-indigo-200">
      <div style="width:50%" class="shadow-none flex flex-col text-center whitespace-nowrap text-white justify-center bg-indigo-500"></div>
    </div>
  </div>
  <p class="text-gray-600">Lorem ipsum dolor sit amet, consectetur adipiscing elit. Sed euismod eu lorem et ultricies. In porta lorem at dui semper porttitor.</p>
  <button class="mt-4 bg-indigo-500 hover:bg-indigo-600 text-white font-semibold py-2 px-4 rounded">
    View Details
  </button>
</div>
This code creates a simple progress card with a title, progress bar, description, and call-to-action button. You can customize the colors, fonts, and layout by modifying the Tailwind CSS classes.
<style>body{background:white !important;}</style>

<div class="main grid grid-cols-3 gap-10 border mx-auto" style="max-width:800px;">
    <div class="card relative p-6 border">
        <div class="title font-semibold text-lg mb-2">Item</div>
        <div class="desc text-sm">Lorem ipsum dolor sit amet consectetur adipisicing elit. Illum, odit pariatur.
            Provident reprehenderit amet nesciunt itaque error tempore cum distinctio. Nam cum, quos odit a rerum
            fugit natus similique doloribus?
        </div>
    </div>
</div>

<script>
    function setDone(els,until,colsNum){
        document.querySelectorAll(".overlay").forEach(each=>each.remove())
        for(let i=0;i<until;i++){
            let each = els[i]
                ol = `<svg class="h-6 w-6 text-gray-600 -right-8 absolute" xmlns="http://www.w3.org/2000/svg" fill="none" viewBox="0 0 24 24" stroke="currentColor"><path stroke-linecap="round" stroke-linejoin="round" stroke-width="2" d="M13 5l7 7-7 7M5 5l7 7-7 7" /></svg>`,
                doneEl = `
                <div class="absolute overlay w-full z-10 bg-green-200 opacity-95 left-0 top-0 flex items-center justify-center h-full">
                    <svg class="h-12 w-12 text-green-600" xmlns="http://www.w3.org/2000/svg" fill="none" viewBox="0 0 24 24" stroke="currentColor"><path stroke-linecap="round" stroke-linejoin="round" stroke-width="2" d="M5 13l4 4L19 7" /></svg>
                    ${i%(colsNum) < colsNum-1 && i < els.length-1 ? ol:""}
                </div>
            `
            let nEl = document.createElement("div")
            nEl.innerHTML = doneEl
            each.appendChild(nEl.querySelector("*"))
        }
    }

// setDone With Below Function
    const els = document.querySelectorAll(".card")
    setDone(els,2,3)
</script>
How to create a Progress Card Template For Reuse In Any Mathing Situation with Tailwind CSS?
To create a Progress Card Template For Reuse In Any Mathing Situation UI component with Tailwind CSS, follow these steps:
- Create a new HTML file and add the following code:
<div class="bg-white rounded-lg shadow-md p-6">
  <div class="flex items-center justify-between mb-4">
    <h2 class="text-lg font-medium text-gray-800">Task Name</h2>
    <span class="text-sm font-semibold text-gray-700">50%</span>
  </div>
  <div class="relative pt-1">
    <div class="overflow-hidden h-2 mb-4 text-xs flex rounded bg-indigo-200">
      <div style="width:50%" class="shadow-none flex flex-col text-center whitespace-nowrap text-white justify-center bg-indigo-500"></div>
    </div>
  </div>
  <p class="text-gray-600">Lorem ipsum dolor sit amet, consectetur adipiscing elit. Sed euismod eu lorem et ultricies. In porta lorem at dui semper porttitor.</p>
  <button class="mt-4 bg-indigo-500 hover:bg-indigo-600 text-white font-semibold py-2 px-4 rounded">
    View Details
  </button>
</div>
Modify the HTML code to add your own content and customize the colors, fonts, and layout using Tailwind CSS classes.
Save the HTML file and open it in a web browser to preview the progress card.
To reuse the progress card in other projects, simply copy the HTML code and paste it into your new project.
Conclusion
Creating a Progress Card Template For Reuse In Any Mathing Situation UI component with Tailwind CSS is a simple and effective way to display the progress of a task or a project. By using pre-defined CSS classes, you can quickly create custom UI components that match your brand's style. With Tailwind CSS, you can also create responsive designs that adapt to different screen sizes, making your web applications more accessible to users on different devices.