- Published on
How to Make A Profile Card With Tailwind CSS?
- What is Tailwind CSS?
- The description of Profile Card ui component
- Why use Tailwind CSS to create a Profile Card ui component?
- The preview of Profile Card ui component
- The source code of Profile Card ui component
- How to create a Profile Card with Tailwind CSS?
- Step 1: Create the HTML structure
- Step 2: Customize the appearance with Tailwind CSS classes
- Step 3: Add the Profile Card to your website
- Conclusion
What is Tailwind CSS?
Tailwind CSS is a utility-first CSS framework that provides a set of pre-defined CSS classes that can be used to style HTML elements. It is designed to make it easy to create complex and responsive UI components without writing custom CSS code.
The description of Profile Card ui component
A Profile Card is a UI component that displays information about a user or a person. It typically includes an image, a name, a job title, and some social media links.
Why use Tailwind CSS to create a Profile Card ui component?
Tailwind CSS provides a set of pre-defined CSS classes that can be used to style HTML elements. This makes it easy to create complex and responsive UI components without writing custom CSS code. Tailwind CSS also provides a set of utility classes that can be used to customize the appearance of UI components.
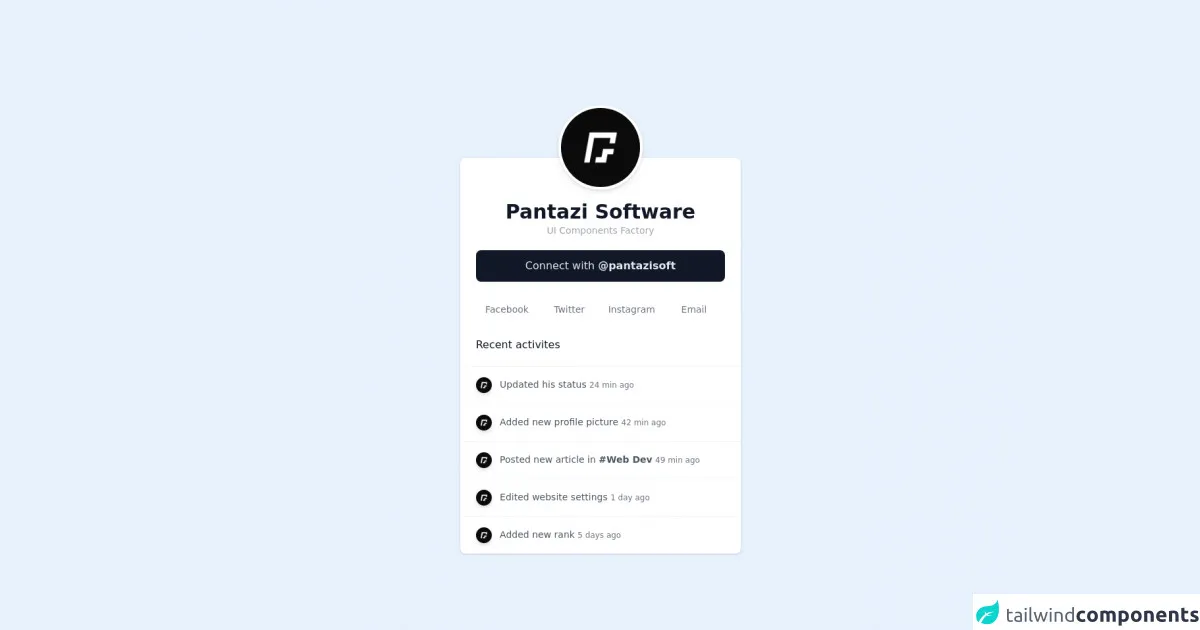
The preview of Profile Card ui component
To create a Profile Card with Tailwind CSS, we will use a combination of HTML and CSS classes. Here is a preview of what the Profile Card will look like:
Free download of the Profile Card's source code
The source code of Profile Card ui component
To create a Profile Card with Tailwind CSS, we will use a combination of HTML and CSS classes. Here is the source code for the Profile Card:
<body class="bg-gray-300 font-sans antialiased">
    <div class="container mx-auto my-60">
        <div>

            <div class="bg-white relative shadow rounded-lg w-5/6 md:w-4/6  lg:w-3/6 xl:w-2/6 mx-auto">
                <div class="flex justify-center">
                        <img src="https://scontent.fotp3-1.fna.fbcdn.net/v/t1.6435-9/175889300_2909358829319917_899035180950984171_n.jpg?_nc_cat=107&ccb=1-5&_nc_sid=09cbfe&_nc_ohc=MaOc2WiX9w0AX_xiqmh&_nc_ht=scontent.fotp3-1.fna&oh=00_AT85mEIpqHX5yThEAWoCZCt2PAnO-SS4M0yKFm9Cjti2zg&oe=628D39CC" alt="" class="rounded-full mx-auto absolute -top-20 w-32 h-32 shadow-md border-4 border-white transition duration-200 transform hover:scale-110">
                </div>

                <div class="mt-16">
                    <h1 class="font-bold text-center text-3xl text-gray-900">Pantazi Software</h1>
                    <p class="text-center text-sm text-gray-400 font-medium">UI Components Factory</p>
                    <p>
                        <span>

                        </span>
                    </p>
                    <div class="my-5 px-6">
                        <a href="#" class="text-gray-200 block rounded-lg text-center font-medium leading-6 px-6 py-3 bg-gray-900 hover:bg-black hover:text-white">Connect with <span class="font-bold">@pantazisoft</span></a>
                    </div>
                    <div class="flex justify-between items-center my-5 px-6">
                        <a href="" class="text-gray-500 hover:text-gray-900 hover:bg-gray-100 rounded transition duration-150 ease-in font-medium text-sm text-center w-full py-3">Facebook</a>
                        <a href="" class="text-gray-500 hover:text-gray-900 hover:bg-gray-100 rounded transition duration-150 ease-in font-medium text-sm text-center w-full py-3">Twitter</a>
                        <a href="" class="text-gray-500 hover:text-gray-900 hover:bg-gray-100 rounded transition duration-150 ease-in font-medium text-sm text-center w-full py-3">Instagram</a>
                        <a href="" class="text-gray-500 hover:text-gray-900 hover:bg-gray-100 rounded transition duration-150 ease-in font-medium text-sm text-center w-full py-3">Email</a>
                    </div>

                    <div class="w-full">
                        <h3 class="font-medium text-gray-900 text-left px-6">Recent activites</h3>
                        <div class="mt-5 w-full flex flex-col items-center overflow-hidden text-sm">
                            <a href="#" class="w-full border-t border-gray-100 text-gray-600 py-4 pl-6 pr-3 w-full block hover:bg-gray-100 transition duration-150">
                                <img src="https://scontent.fotp3-1.fna.fbcdn.net/v/t1.6435-9/175889300_2909358829319917_899035180950984171_n.jpg?_nc_cat=107&ccb=1-5&_nc_sid=09cbfe&_nc_ohc=MaOc2WiX9w0AX_xiqmh&_nc_ht=scontent.fotp3-1.fna&oh=00_AT85mEIpqHX5yThEAWoCZCt2PAnO-SS4M0yKFm9Cjti2zg&oe=628D39CC" alt="" class="rounded-full h-6 shadow-md inline-block mr-2">
                                    Updated his status
                                    <span class="text-gray-500 text-xs">24 min ago</span>
                            </a>

                            <a href="#" class="w-full border-t border-gray-100 text-gray-600 py-4 pl-6 pr-3 w-full block hover:bg-gray-100 transition duration-150">
                                <img src="https://scontent.fotp3-1.fna.fbcdn.net/v/t1.6435-9/175889300_2909358829319917_899035180950984171_n.jpg?_nc_cat=107&ccb=1-5&_nc_sid=09cbfe&_nc_ohc=MaOc2WiX9w0AX_xiqmh&_nc_ht=scontent.fotp3-1.fna&oh=00_AT85mEIpqHX5yThEAWoCZCt2PAnO-SS4M0yKFm9Cjti2zg&oe=628D39CC" alt="" class="rounded-full h-6 shadow-md inline-block mr-2">
                                    Added new profile picture
                                    <span class="text-gray-500 text-xs">42 min ago</span>
                            </a>

                            <a href="#" class="w-full border-t border-gray-100 text-gray-600 py-4 pl-6 pr-3 w-full block hover:bg-gray-100 transition duration-150">
                                <img src="https://scontent.fotp3-1.fna.fbcdn.net/v/t1.6435-9/175889300_2909358829319917_899035180950984171_n.jpg?_nc_cat=107&ccb=1-5&_nc_sid=09cbfe&_nc_ohc=MaOc2WiX9w0AX_xiqmh&_nc_ht=scontent.fotp3-1.fna&oh=00_AT85mEIpqHX5yThEAWoCZCt2PAnO-SS4M0yKFm9Cjti2zg&oe=628D39CC" alt="" class="rounded-full h-6 shadow-md inline-block mr-2">
                                Posted new article in <span class="font-bold">#Web Dev</span>
                                <span class="text-gray-500 text-xs">49 min ago</span>
                            </a>

                            <a href="#" class="w-full border-t border-gray-100 text-gray-600 py-4 pl-6 pr-3 w-full block hover:bg-gray-100 transition duration-150">
                                <img src="https://scontent.fotp3-1.fna.fbcdn.net/v/t1.6435-9/175889300_2909358829319917_899035180950984171_n.jpg?_nc_cat=107&ccb=1-5&_nc_sid=09cbfe&_nc_ohc=MaOc2WiX9w0AX_xiqmh&_nc_ht=scontent.fotp3-1.fna&oh=00_AT85mEIpqHX5yThEAWoCZCt2PAnO-SS4M0yKFm9Cjti2zg&oe=628D39CC" alt="" class="rounded-full h-6 shadow-md inline-block mr-2">
                                Edited website settings
                                <span class="text-gray-500 text-xs">1 day ago</span>
                            </a>

                            <a href="#" class="w-full border-t border-gray-100 text-gray-600 py-4 pl-6 pr-3 w-full block hover:bg-gray-100 transition duration-150 overflow-hidden">
                                <img src="https://scontent.fotp3-1.fna.fbcdn.net/v/t1.6435-9/175889300_2909358829319917_899035180950984171_n.jpg?_nc_cat=107&ccb=1-5&_nc_sid=09cbfe&_nc_ohc=MaOc2WiX9w0AX_xiqmh&_nc_ht=scontent.fotp3-1.fna&oh=00_AT85mEIpqHX5yThEAWoCZCt2PAnO-SS4M0yKFm9Cjti2zg&oe=628D39CC" alt="" class="rounded-full h-6 shadow-md inline-block mr-2">
                                Added new rank
                                <span class="text-gray-500 text-xs">5 days ago</span>
                            </a>

                        </div>
                    </div>
                </div>
            </div>

        </div>
    </div>
</body>
</html>
How to create a Profile Card with Tailwind CSS?
To create a Profile Card with Tailwind CSS, follow these steps:
Step 1: Create the HTML structure
The first step is to create the HTML structure for the Profile Card. Here is an example:
<div class="bg-white rounded-lg overflow-hidden shadow-lg">
  <img class="w-full" src="https://via.placeholder.com/150" alt="Profile picture">
  <div class="p-4">
    <h2 class="text-gray-900 font-bold text-xl mb-2">John Doe</h2>
    <p class="text-gray-600 text-sm">Web Developer</p>
    <div class="mt-4">
      <a href="#" class="text-gray-500 hover:text-gray-600">
        <span class="sr-only">Twitter</span>
        <svg class="h-6 w-6" fill="currentColor" viewBox="0 0 24 24" xmlns="http://www.w3.org/2000/svg">
          <path d="M23.998 4.569c-.885.389-1.83.654-2.82.773a4.013 4.013 0 0 0 1.75-2.213 7.98 7.98 0 0 1-2.54.973 3.993 3.993 0 0 0-6.826 3.65 11.34 11.34 0 0 1-8.236-4.183 3.99 3.99 0 0 0-.54 2.02 3.99 3.99 0 0 0 1.78 3.328 3.98 3.98 0 0 1-1.81-.5v.05a3.992 3.992 0 0 0 3.2 3.918 3.94 3.94 0 0 1-1.8.068 3.992 3.992 0 0 0 3.723 2.766 7.98 7.98 0 0 1-4.944 1.7c-.32 0-.64-.018-.96-.054a11.27 11.27 0 0 0 6.116 1.795c7.32 0 11.33-6.055 11.33-11.33l-.011-.517a7.995 7.995 0 0 0 1.968-2.05z"/>
        </svg>
      </a>
      <a href="#" class="ml-3 text-gray-500 hover:text-gray-600">
        <span class="sr-only">LinkedIn</span>
        <svg class="h-6 w-6" fill="currentColor" viewBox="0 0 24 24" xmlns="http://www.w3.org/2000/svg">
          <path d="M20.25 0h-16.5c-1.24 0-2.25 1.01-2.25 2.25v16.5c0 1.24 1.01 2.25 2.25 2.25h16.5c1.24 0 2.25-1.01 2.25-2.25v-16.5c0-1.24-1.01-2.25-2.25-2.25zm-5.25 17.25h-2.25v-6.75h2.25v6.75zm-1.125-7.875c-.825 0-1.5-.675-1.5-1.5s.675-1.5 1.5-1.5c.825 0 1.5.675 1.5 1.5s-.675 1.5-1.5 1.5zm6.75 7.875h-2.25v-3.375c0-.825-.675-1.5-1.5-1.5s-1.5.675-1.5 1.5v3.375h-2.25v-6.75h2.25v.956c.3-.564.975-.956 1.725-.956 1.5 0 2.625 1.125 2.625 2.625v3.125zm-9-10.5h-2.25v6.75h2.25v-6.75zm-3.375 0h-2.25v6.75h2.25v-6.75z"/>
        </svg>
      </a>
    </div>
  </div>
</div>
In this example, we have used the following Tailwind CSS classes:
bg-white: sets the background color to whiterounded-lg: rounds the corners of the elementoverflow-hidden: hides any content that overflows the elementshadow-lg: adds a shadow to the elementw-full: sets the width of the image to 100%p-4: adds padding to the elementtext-gray-900: sets the text color to gray-900font-bold: sets the font weight to boldtext-xl: sets the font size to extra largemb-2: adds margin bottom to the elementtext-gray-600: sets the text color to gray-600text-sm: sets the font size to smallmt-4: adds margin top to the elementtext-gray-500: sets the text color to gray-500hover:text-gray-600: sets the text color to gray-600 on hoverml-3: adds margin left to the elementsr-only: hides the text from screen readersh-6: sets the height of the element to 6w-6: sets the width of the element to 6fill-current: fills the element with the current color
Step 2: Customize the appearance with Tailwind CSS classes
The next step is to customize the appearance of the Profile Card using Tailwind CSS classes. Here are some examples:
Change the background color
To change the background color of the Profile Card, you can use the bg-* classes. For example, to set the background color to blue, you can use the bg-blue-500 class:
<div class="bg-blue-500 rounded-lg overflow-hidden shadow-lg">
Change the font size
To change the font size of the name and job title, you can use the text-* classes. For example, to set the font size to large, you can use the text-lg class:
<h2 class="text-gray-900 font-bold text-lg mb-2">John Doe</h2>
<p class="text-gray-600 text-sm">Web Developer</p>
Change the social media icons
To change the social media icons, you can use the svg-* classes. For example, to use a different icon for Twitter, you can replace the path element with a different SVG path:
<svg class="h-6 w-6" fill="currentColor" viewBox="0 0 24 24" xmlns="http://www.w3.org/2000/svg">
  <path d="M23.998 4.569c-.885.389-1.83.654-2.82.773a4.013 4.013 0 0 0 1.75-2.213 7.98 7.98 0 0 1-2.54.973 3.993 3.993 0 0 0-6.826 3.65 11.34 11.34 0 0 1-8.236-4.183 3.99 3.99 0 0 0-.54 2.02 3.99 3.99 0 0 0 1.78 3.328 3.98 3.98 0 0 1-1.81-.5v.05a3.992 3.992 0 0 0 3.2 3.918 3.94 3.94 0 0 1-1.8.068 3.992 3.992 0 0 0 3.723 2.766 7.98 7.98 0 0 1-4.944 1.7c-.32 0-.64-.018-.96-.054a11.27 11.27 0 0 0 6.116 1.795c7.32 0 11.33-6.055 11.33-11.33l-.011-.517a7.995 7.995 0 0 0 1.968-2.05z"/>
</svg>
Step 3: Add the Profile Card to your website
The final step is to add the Profile Card to your website. Simply copy the HTML code and paste it into your website where you want the Profile Card to appear.
Conclusion
In this article, we have learned how to create a Profile Card with Tailwind CSS. Tailwind CSS provides a set of pre-defined CSS classes that can be used to style HTML elements. This makes it easy to create complex and responsive UI components without writing custom CSS code. By using Tailwind CSS, we can create beautiful and functional UI components in a fraction of the time it would take to write custom CSS code.