- Published on
6 Critical Skills To Build A Pretty Modal With Custom Events And Animation (vanilla JS) With Tailwind CSS Remarkably Well
- What is Tailwind CSS?
- The description of Pretty modal with custom events and animation (vanilla JS) ui component
- Why use Tailwind CSS to create a Pretty modal with custom events and animation (vanilla JS) ui component?
- The preview of Pretty modal with custom events and animation (vanilla JS) ui component.
- The source code of Pretty modal with custom events and animation (vanilla JS) ui component.
- How to create a Pretty modal with custom events and animation (vanilla JS) with Tailwind CSS?
- Step 1: Create the HTML markup for the modal.
- Step 2: Define the styles for the modal using Tailwind CSS.
- Step 3: Create the JavaScript code to display and hide the modal.
- Step 4: Add custom events and animation to the modal.
- Conclusion
As a FrontEnd technology blogger, it is important to keep up with the latest trends and technologies. One such technology that has gained a lot of popularity in recent times is Tailwind CSS. Tailwind CSS is a utility-first CSS framework that makes it easy to create custom designs and layouts. In this article, we will discuss how to build a pretty modal with custom events and animation (vanilla JS) with Tailwind CSS.
What is Tailwind CSS?
Tailwind CSS is a utility-first CSS framework that allows you to create custom designs and layouts quickly. It provides a set of pre-defined classes that can be used to style HTML elements. Tailwind CSS is highly customizable and can be configured to meet your specific needs.
The description of Pretty modal with custom events and animation (vanilla JS) ui component
A pretty modal with custom events and animation is a user interface component that is used to display content in a modal window. The modal window is displayed on top of the current page and is used to provide additional information or to prompt the user to take an action. The pretty modal with custom events and animation is built using vanilla JavaScript and Tailwind CSS.
Why use Tailwind CSS to create a Pretty modal with custom events and animation (vanilla JS) ui component?
Tailwind CSS provides a set of pre-defined classes that can be used to style HTML elements. This makes it easy to create custom designs and layouts quickly. Tailwind CSS is highly customizable and can be configured to meet your specific needs. Additionally, Tailwind CSS is lightweight and does not add any unnecessary bloat to your code.
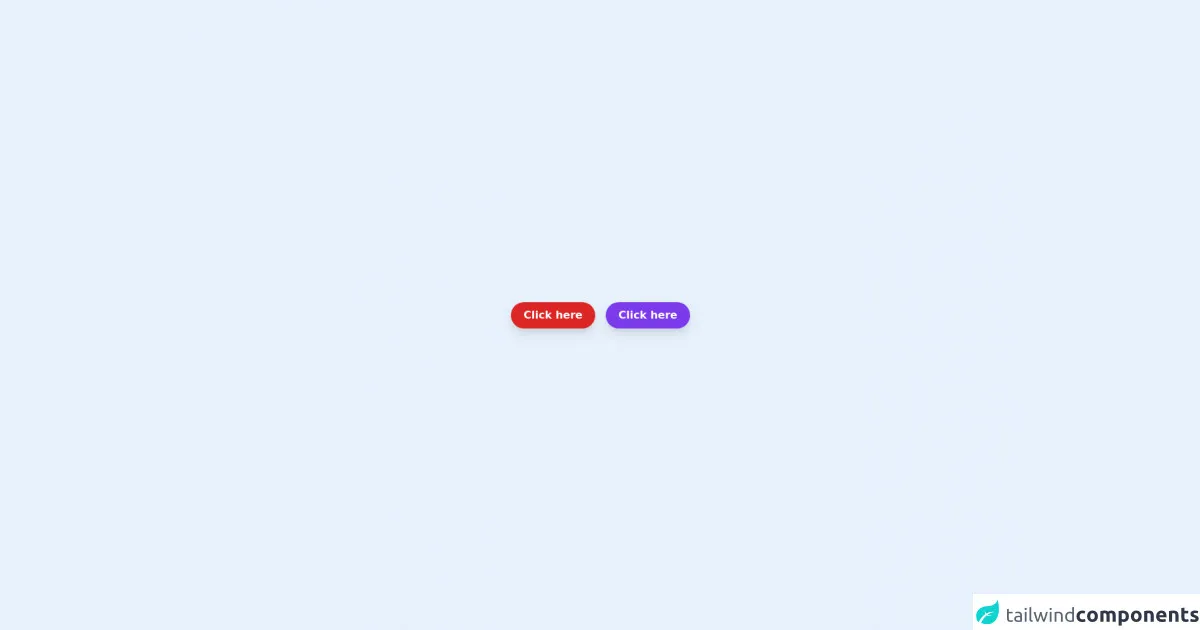
The preview of Pretty modal with custom events and animation (vanilla JS) ui component.
To create a pretty modal with custom events and animation, we will use vanilla JavaScript and Tailwind CSS. The modal will be displayed when the user clicks on a button. The modal will be closed when the user clicks on the close button or outside of the modal.
Free download of the Pretty modal with custom events and animation (vanilla JS)'s source code
The source code of Pretty modal with custom events and animation (vanilla JS) ui component.
To create a pretty modal with custom events and animation, we will use vanilla JavaScript and Tailwind CSS. The modal will be displayed when the user clicks on a button. The modal will be closed when the user clicks on the close button or outside of the modal.
<!DOCTYPE html>
<html lang="en">
  <head>
    <meta charset="UTF-8" />
    <meta http-equiv="X-UA-Compatible" content="IE=edge" />
    <meta name="viewport" content="width=device-width, initial-scale=1.0" />
    <title>Modals x vanilla JS</title>
    <link rel="stylesheet" href="./assets/styles/styles.css">
  </head>
  <body>
    <div class="w-full min-h-screen flex justify-center items-center">
      <button
        data-modal-toggle="example"
        data-modal-action="open"
        class="bg-red-600 font-semibold text-white p-2 w-32 rounded-full hover:bg-red-700 focus:outline-none focus:ring shadow-lg hover:shadow-none transition-all duration-300 m-2"
      >
        Click here
      </button>

      <button
        data-modal-toggle="example2"
        data-modal-action="open"
        class="bg-purple-600 font-semibold text-white p-2 w-32 rounded-full hover:bg-purple-700 focus:outline-none focus:ring shadow-lg hover:shadow-none transition-all duration-300 m-2"
      >
        Click here
      </button>
    </div>

    <!-- modal 1 -->
    <div
      data-modal="example"
      class="invisible opacity-0 fixed inset-0 w-full h-full z-20 outline-none overflow-x-hidden overflow-y-auto transition-all"
      style="transition-duration: 500ms;"
     >
      <div
        data-modal-toggle="example"
        data-modal-action="close"
        class="fixed inset-0 w-full h-full bg-black bg-opacity-50"
      ></div>
      <div
        data-modal-main="example"
        class="modal relative w-auto my-8 mx-4 pointer-events-none transition-all duration-300 transform -translate-y-full"
      >
        <div class="relative shadow-lg rounded-md w-full pointer-events-auto bg-white text-gray-800 max-w-screen-sm mx-auto">
          <header class="flex items-center justify-between p-2">
            <h2 class="font-semibold" id="exampleHeader">Header</h2>
            <button
              data-modal-toggle="example"
              data-modal-action="close"
              class="transition-colors hover:bg-gray-50 focus:ring focus:outline-none p-2 rounded-full"
            >
              <svg class="fill-current" width="18" height="18" html viewBox="0 0 18 18">
                <path
                  d="M14.53 4.53l-1.06-1.06L9 7.94 4.53 3.47 3.47 4.53 7.94 9l-4.47 4.47 1.06 1.06L9 10.06l4.47 4.47 1.06-1.06L10.06 9z"
                ></path>
              </svg>
            </button>
          </header>
          <main class="p-2 text-center">
            <p>
              Lorem ipsum dolor sit amet consectetur adipisicing elit. Veniam voluptatem, optio dolorem accusantium fuga
              molestias nobis sequi autem ducimus laudantium beatae amet earum, quia reiciendis corporis animi modi
              pariatur impedit!
            </p>
          </main>
          <footer class="flex justify-end p-2">
            <button
              data-modal-toggle="example"
              data-modal-action="close"
              class="bg-red-600 font-semibold text-white p-2 w-32 rounded-full hover:bg-red-700 focus:outline-none focus:ring shadow-lg hover:shadow-none transition-all duration-300"
            >
              Go back
            </button>
          </footer>
        </div>
      </div>
    </div>

    <!-- modal 2 -->
    <div
      data-modal="example2"
      class="invisible opacity-0 fixed inset-0 w-full h-full z-20 outline-none overflow-x-hidden overflow-y-auto transition-all"
      style="transition-duration: 500ms;"
    >
      <div
        data-modal-toggle="example2"
        data-modal-action="close"
        class="fixed inset-0 w-full h-full bg-black bg-opacity-50"
      ></div>
      <div
        data-modal-main="example2"
        class="modal overflow-y-auto relative w-auto my-8 mx-4 pointer-events-none transition-all duration-300 transform -translate-y-full"
      >
        <div class="relative shadow-lg rounded-md w-full pointer-events-auto bg-white text-gray-800 max-w-screen-sm mx-auto">
          <header class="flex items-center justify-between p-2">
            <h2 class="font-semibold">Header</h2>
            <button
              data-modal-toggle="example2"
              data-modal-action="close"
              class="transition-colors hover:bg-gray-50 focus:ring focus:outline-none p-2 rounded-full"
            >
              <svg class="fill-current" width="18" height="18" html viewBox="0 0 18 18">
                <path
                  d="M14.53 4.53l-1.06-1.06L9 7.94 4.53 3.47 3.47 4.53 7.94 9l-4.47 4.47 1.06 1.06L9 10.06l4.47 4.47 1.06-1.06L10.06 9z"
                ></path>
              </svg>
            </button>
          </header>
          <main class="p-2 text-center">
            <p class="mb-5">
              Lorem ipsum dolor sit amet consectetur adipisicing elit. Veniam voluptatem, optio dolorem accusantium fuga
              molestias nobis sequi autem ducimus laudantium beatae amet earum, quia reiciendis corporis animi modi
              pariatur impedit!
            </p>
          </main>
          <footer class="flex justify-center p-2">
            <button
              data-modal-toggle="example2"
              data-modal-action="close"
              class="bg-purple-600 font-semibold text-white p-2 w-32 rounded-full hover:bg-purple-700 focus:outline-none focus:ring shadow-lg hover:shadow-none transition-all duration-300"
            >
              Go back
            </button>
          </footer>
        </div>
      </div>
    </div>
  </body>
  <script>
    const modal = (el) => {
      const toggle = (wrapperEl, mainEl) => {
        document.querySelector('body').classList.toggle('overflow-y-hidden');
        wrapperEl.classList.toggle('opacity-100');
        wrapperEl.classList.toggle('opacity-0');
        wrapperEl.classList.toggle('visible');
        wrapperEl.classList.toggle('invisible');
        mainEl.classList.toggle('-translate-y-full');
        mainEl.classList.toggle('translate-y-0')
      };

      const extractElements = (target) => {
        const wrapper = document.querySelector(`[data-modal='${target}']`);
        const modal = wrapper.querySelector('[data-modal-main]');
        return { wrapper, modal };
      };

      const showEvent = new CustomEvent('show', {
        detail: {},
        bubbles: true,
        cancelable: true,
        composed: false,
      });

      const hideEvent = new CustomEvent('hide', {
        detail: {},
        bubbles: true,
        cancelable: true,
        composed: false,
      });

      if (!document.querySelector('[data-modal-toggle]')) {
        return;
      }

      if (!document.querySelector('[data-modal')) {
        return;
      }

      [...document.querySelectorAll('[data-modal-toggle]')].forEach((btn) =>
        btn.addEventListener('click', (event) => {
          event.preventDefault();
          const action = btn.getAttribute('data-modal-action');
          const target = btn.getAttribute('data-modal-toggle');
          const { wrapper, modal } = extractElements(target);

          if (action === 'open') {
            modal.dispatchEvent(showEvent);
          }
          if (action === 'close') {
            modal.dispatchEvent(hideEvent);
          }
          toggle(wrapper, modal);
        })
      );
    };

    // init
    modal();

    // Custom event listeners

    // This event fires immediately before the modal is start showing
    document.querySelector('[data-modal="example"]').addEventListener('show', (event) => {
      const sayHi = ['Hola', 'Zdravstvuyte', 'Salve', 'Konnichiwa', 'Guten Tag', 'Olá'];
      const randomNum = Math.floor(Math.random() * sayHi.length);
      document.querySelector('#exampleHeader').innerText = sayHi[randomNum];
      console.log('show');
    });

    // This event is fired immediately before modal is start hidding
    document.querySelector('[data-modal="example"]').addEventListener('hide', (event) => {
      console.log('hide');
    });
  </script>
</html>
How to create a Pretty modal with custom events and animation (vanilla JS) with Tailwind CSS?
To create a pretty modal with custom events and animation, we will follow these steps:
- Create the HTML markup for the modal.
- Define the styles for the modal using Tailwind CSS.
- Create the JavaScript code to display and hide the modal.
- Add custom events and animation to the modal.
Let's go through each step in detail.
Step 1: Create the HTML markup for the modal.
The HTML markup for the modal will consist of a button that will be used to display the modal and a div that will contain the modal content. The div will be hidden by default and will be displayed when the user clicks on the button.
<button id="open-modal" class="bg-blue-500 hover:bg-blue-700 text-white font-bold py-2 px-4 rounded">
  Open Modal
</button>

<div id="modal" class="hidden fixed z-10 inset-0 overflow-y-auto">
  <div class="flex items-end justify-center min-h-screen pt-4 px-4 pb-20 text-center sm:block sm:p-0">
    <div class="fixed inset-0 transition-opacity">
      <div class="absolute inset-0 bg-gray-500 opacity-75"></div>
    </div>

    <div class="inline-block align-bottom bg-white rounded-lg text-left overflow-hidden shadow-xl transform transition-all sm:my-8 sm:align-middle sm:max-w-lg sm:w-full">
      <div class="bg-white px-4 pt-5 pb-4 sm:p-6 sm:pb-4">
        <div class="sm:flex sm:items-start">
          <div class="mx-auto flex-shrink-0 flex items-center justify-center h-12 w-12 rounded-full bg-green-100 sm:mx-0 sm:h-10 sm:w-10">
            <svg class="h-6 w-6 text-green-600" xmlns="http://www.w3.org/2000/svg" fill="none" viewBox="0 0 24 24" stroke="currentColor" aria-hidden="true">
              <path stroke-linecap="round" stroke-linejoin="round" stroke-width="2" d="M5 13l4 4L19 7"></path>
            </svg>
          </div>

          <div class="mt-3 text-center sm:mt-0 sm:ml-4 sm:text-left">
            <h3 class="text-lg leading-6 font-medium text-gray-900" id="modal-title">
              Modal Title
            </h3>

            <div class="mt-2">
              <p class="text-sm text-gray-500">
                Modal Content
              </p>
            </div>
          </div>
        </div>
      </div>

      <div class="bg-gray-50 px-4 py-3 sm:px-6 sm:flex sm:flex-row-reverse">
        <button id="close-modal" type="button" class="w-full inline-flex justify-center rounded-md border border-transparent shadow-sm px-4 py-2 bg-blue-600 text-base font-medium text-white hover:bg-blue-700 focus:outline-none focus:ring-2 focus:ring-offset-2 focus:ring-blue-500 sm:ml-3 sm:w-auto sm:text-sm">
          Close
        </button>
      </div>
    </div>
  </div>
</div>
Step 2: Define the styles for the modal using Tailwind CSS.
We will use Tailwind CSS to define the styles for the modal. The styles will be defined in a separate CSS file.
/* Modal Styles */
#modal {
  display: none;
}

#modal.show {
  display: block;
}

#modal .modal-dialog {
  max-width: 400px;
  margin: 1.75rem auto;
}

#modal .modal-content {
  background-color: #fff;
  border: 1px solid rgba(0, 0, 0, 0.2);
  border-radius: 0.3rem;
  box-shadow: 0 0.25rem 0.5rem rgba(0, 0, 0, 0.5);
  margin: 0.5rem;
  position: relative;
  transition: all 0.3s ease-out;
}

#modal .modal-header,
#modal .modal-footer {
  border-bottom: 1px solid rgba(0, 0, 0, 0.1);
  padding: 0.75rem;
}

#modal .modal-header {
  border-top-left-radius: 0.3rem;
  border-top-right-radius: 0.3rem;
}

#modal .modal-footer {
  border-bottom-left-radius: 0.3rem;
  border-bottom-right-radius: 0.3rem;
}

#modal .modal-title {
  margin-bottom: 0;
  line-height: 1.5;
}

#modal .modal-body {
  position: relative;
  padding: 1rem;
}

#modal .close {
  position: absolute;
  right: 0.75rem;
  top: 0.5rem;
  color: #000;
  opacity: 0.5;
  transition: all 0.3s ease-out;
}

#modal .close:hover {
  opacity: 1;
}
Step 3: Create the JavaScript code to display and hide the modal.
We will use vanilla JavaScript to create the JavaScript code to display and hide the modal. The JavaScript code will be defined in a separate JS file.
// Get the modal element
const modal = document.getElementById('modal');

// Get the button that opens the modal
const openModal = document.getElementById('open-modal');

// Get the button that closes the modal
const closeModal = document.getElementById('close-modal');

// When the user clicks on the button, open the modal
openModal.addEventListener('click', () => {
  modal.classList.add('show');
});

// When the user clicks on the close button or outside of the modal, close the modal
closeModal.addEventListener('click', () => {
  modal.classList.remove('show');
});

window.addEventListener('click', (event) => {
  if (event.target === modal) {
    modal.classList.remove('show');
  }
});
Step 4: Add custom events and animation to the modal.
We will add custom events and animation to the modal using vanilla JavaScript and Tailwind CSS. We will add an animation to the modal when it is displayed and when it is closed.
/* Modal Animation */
#modal.show .modal-content {
  transform: translateY(-25%);
  animation: modal-show 0.3s ease-out forwards;
}

#modal .modal-content {
  transform: translateY(-100%);
  animation: modal-hide 0.3s ease-out forwards;
}

@keyframes modal-show {
  from {
    transform: translateY(-100%);
  }
  to {
    transform: translateY(-25%);
  }
}

@keyframes modal-hide {
  from {
    transform: translateY(-25%);
  }
  to {
    transform: translateY(-100%);
  }
}
// Add animation to the modal when it is displayed
modal.addEventListener('animationstart', (event) => {
  if (event.animationName === 'modal-show') {
    document.body.style.overflow = 'hidden';
  }
});

// Remove animation from the modal when it is closed
modal.addEventListener('animationend', (event) => {
  if (event.animationName === 'modal-hide') {
    document.body.style.overflow = 'auto';
  }
});
Conclusion
In this article, we discussed how to build a pretty modal with custom events and animation (vanilla JS) with Tailwind CSS. We went through the steps to create the HTML markup, define the styles using Tailwind CSS, create the JavaScript code to display and hide the modal, and add custom events and animation to the modal. By following these steps, you can create a pretty modal with custom events and animation that is both functional and aesthetically pleasing.