- Published on
Learn How To Build A Mini Reciept With Tailwind CSS Like an Expert
- What is Tailwind CSS?
- The Description of Mini Receipt UI Component
- Why Use Tailwind CSS to Create a Mini Receipt UI Component?
- The Preview of Mini Receipt UI Component
- The Source Code of Mini Receipt UI Component
- How to Create a Mini Receipt with Tailwind CSS?
- Step 1: Set up a new HTML file
- Step 2: Add the Mini Receipt HTML
- Step 3: Style the Mini Receipt with Tailwind CSS
- Step 4: Test the Mini Receipt
- Conclusion
In this article, we will learn how to build a mini receipt UI component using Tailwind CSS. We will cover what Tailwind CSS is, why it is useful for building UI components, and how to create a mini receipt using Tailwind CSS.
What is Tailwind CSS?
Tailwind CSS is a utility-first CSS framework that provides a set of pre-defined classes to help you quickly build custom user interfaces. It is designed to be highly customizable and easy to use, allowing you to create complex layouts and designs with minimal CSS code.
Tailwind CSS provides a large number of utility classes that you can use to style your HTML elements. These classes are organized into categories such as colors, typography, spacing, and layout. By combining these classes, you can create complex UI components without writing any custom CSS.
The Description of Mini Receipt UI Component
A mini receipt UI component is a small section of a web page that displays a summary of a purchase or transaction. It typically includes the name of the product, the price, and any applicable taxes or fees. The mini receipt UI component is often used in e-commerce websites to display a summary of the user's shopping cart.
Why Use Tailwind CSS to Create a Mini Receipt UI Component?
Tailwind CSS is an excellent choice for building UI components like the mini receipt. It provides a set of pre-defined classes that can be used to quickly style the different elements of the mini receipt. This saves time and reduces the amount of custom CSS that needs to be written.
Tailwind CSS also provides a responsive design system that allows you to create layouts that adapt to different screen sizes. This is important for the mini receipt UI component, as it needs to be displayed correctly on both desktop and mobile devices.
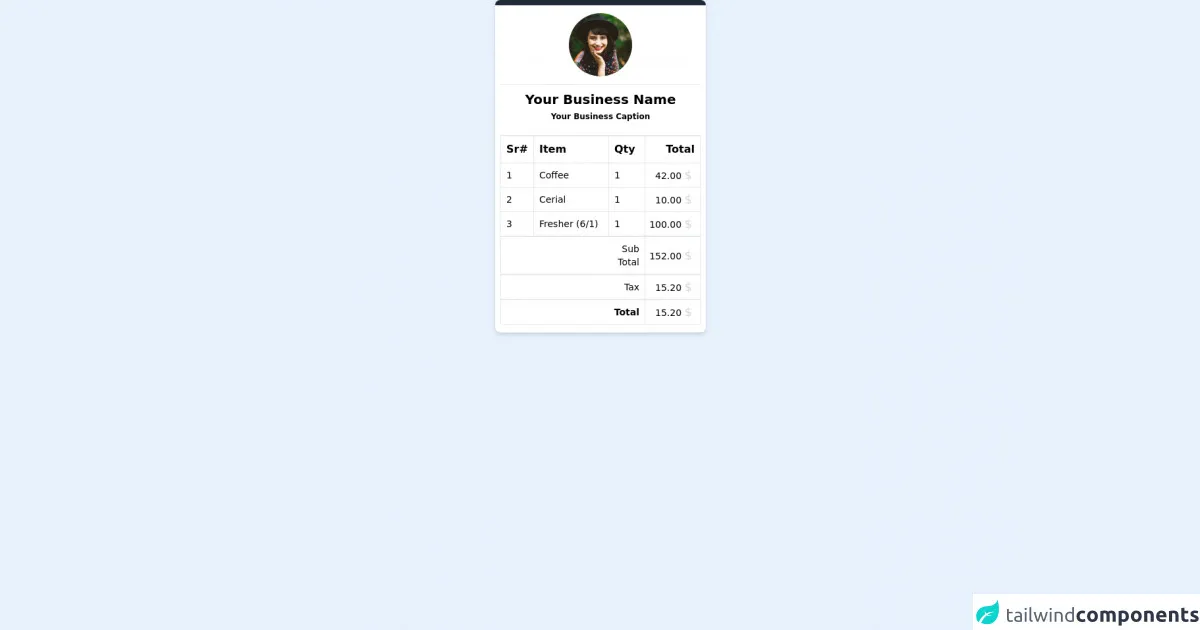
The Preview of Mini Receipt UI Component
To give you an idea of what the mini receipt UI component will look like, here is a preview:
Free download of the Mini Reciept's source code
The Source Code of Mini Receipt UI Component
Here is the source code for the mini receipt UI component:
<!-- This is an example component -->
<div>
    <div class='max-w-xs w-full bg-white shadow-md rounded-lg overflow-hidden mx-auto'>
        <div class='h-2 w-full bg-gray-800'></div>
        <div class='px-2 py-3'>
            <div class='w-full text-center mb-3'>
                <img class='w-24 h-24 inline-block object-cover rounded-full' alt='CompanyIcon' src='https://images.unsplash.com/photo-1477118476589-bff2c5c4cfbb?ixlib=rb-1.2.1&ixid=eyJhcHBfaWQiOjEyMDd9&auto=format&fit=crop&w=200&q=200'>
            </div>
            <div class='w-full text-center border-t mb-1 pb-3'>
                <h1 class="mt-2 text-xl font-bold">Your Business Name</h1>
                <p class="my-1 text-xs font-bold">Your Business Caption</p>
            </div>
            <table class="w-full border">
                <thead>
                    <tr class="border-t-2 font-bold">
                        <td class="p-2 border-r w-1/12">Sr#</td>
                        <td class="p-2 border-r w-6/12">Item</td>
                        <td class="p-2 border-r w-1/12">Qty</td>
                        <td class="p-2 text-right w-4/12">Total</td>
                    </tr>
                </thead>
                <tbody>
                    <tr class="border-t text-sm">
                        <td class="p-1 pl-2 border-r ">1</td>
                        <td class="p-1 pl-2 border-r">Coffee</td>
                        <td class="p-1 pl-2 border-r">1</td>
                        <td class="p-1 text-right">42.00 <small class="font-bolder text-lg pr-2 text-gray-300">$</small></td>
                    </tr>
                    <tr class="border-t text-sm">
                        <td class="p-1 pl-2 border-r">2</td>
                        <td class="p-1 pl-2 border-r">Cerial</td>
                        <td class="p-1 pl-2 border-r">1</td>
                        <td class="p-1 text-right">10.00 <small class="font-bolder text-lg pr-2 text-gray-300">$</small></td>
                    </tr>
                    <tr class="border-t text-sm">
                        <td class="p-1 pl-2 border-r">3</td>
                        <td class="p-1 pl-2 border-r">Fresher (6/1)</td>
                        <td class="p-1 pl-2 border-r">1</td>
                        <td class="p-1 text-right">100.00 <small class="font-bolder text-lg pr-2 text-gray-300">$</small></td>
                    </tr>
                </tbody>
                <thead>
                    <tr class="border-t-2 text-sm">
                        <td class="p-2" colspan="2"></td>
                        <td class="p-2 text-right border-r">Sub Total</td>
                        <td class="p-1 text-right">152.00 <small class="font-bolder text-lg pr-2 text-gray-300">$</small></td>
                    </tr>
                    <tr class="border-t-2 text-sm">
                        <td class="p-2" colspan="2"></td>
                        <td class="p-2 text-right border-r">Tax</td>
                        <td class="p-1 text-right">15.20 <small class="font-bolder text-lg pr-2 text-gray-300">$</small></td>
                    </tr>
                    <tr class="border-t-2 text-sm">
                        <td class="p-2" colspan="2"></td>
                        <td class="p-2 text-right border-r font-bold">Total</td>
                        <td class="p-1 text-right">15.20 <small class="font-bolder text-lg pr-2 text-gray-300">$</small></td>
                    </tr>
                </thead>
            </table>
        </div>
    </div>
</div>
How to Create a Mini Receipt with Tailwind CSS?
Now that we know what Tailwind CSS is and why it is useful for building UI components, let's dive into how to create a mini receipt using Tailwind CSS.
Step 1: Set up a new HTML file
Create a new HTML file and add the following code:
<!DOCTYPE html>
<html lang="en">
  <head>
    <meta charset="UTF-8" />
    <meta name="viewport" content="width=device-width, initial-scale=1.0" />
    <meta http-equiv="X-UA-Compatible" content="ie=edge" />
    <title>Mini Receipt</title>
    <link rel="stylesheet" href="https://cdn.jsdelivr.net/npm/[email protected]/dist/tailwind.min.css" />
  </head>
  <body>
    <div class="container mx-auto p-4">
      <!-- Mini Receipt goes here -->
    </div>
  </body>
</html>
This code sets up a basic HTML file and includes the Tailwind CSS stylesheet.
Step 2: Add the Mini Receipt HTML
Now we can add the HTML for the mini receipt UI component. Here is the code:
<div class="bg-white rounded-lg shadow-lg p-4">
  <h2 class="text-lg font-medium mb-2">Mini Receipt</h2>
  <div class="flex justify-between mb-4">
    <p class="text-gray-600">Product 1</p>
    <p class="text-gray-600">$10.00</p>
  </div>
  <div class="flex justify-between mb-4">
    <p class="text-gray-600">Product 2</p>
    <p class="text-gray-600">$20.00</p>
  </div>
  <div class="flex justify-between mb-4">
    <p class="text-gray-600">Tax</p>
    <p class="text-gray-600">$3.00</p>
  </div>
  <div class="flex justify-between">
    <p class="text-gray-600 font-medium">Total</p>
    <p class="text-gray-600 font-medium">$33.00</p>
  </div>
</div>
This code creates a white box with rounded corners and a shadow, which serves as the background for the mini receipt. Inside the box, we have a heading that says "Mini Receipt" and four rows of text that display the product names, prices, and total.
Step 3: Style the Mini Receipt with Tailwind CSS
Now we can add some custom styles to the mini receipt using Tailwind CSS. Here is the updated HTML code:
<div class="bg-white rounded-lg shadow-lg p-4">
  <h2 class="text-lg font-medium mb-2 text-gray-800">Mini Receipt</h2>
  <div class="flex justify-between mb-4">
    <p class="text-gray-600">Product 1</p>
    <p class="text-gray-600">$10.00</p>
  </div>
  <div class="flex justify-between mb-4">
    <p class="text-gray-600">Product 2</p>
    <p class="text-gray-600">$20.00</p>
  </div>
  <div class="flex justify-between mb-4">
    <p class="text-gray-600">Tax</p>
    <p class="text-gray-600">$3.00</p>
  </div>
  <div class="flex justify-between border-t pt-3">
    <p class="text-gray-600 font-medium">Total</p>
    <p class="text-gray-600 font-medium">$33.00</p>
  </div>
</div>
We have added some custom styles to the mini receipt using Tailwind CSS classes. We changed the color of the heading to gray-800, added a border to the bottom of the last row using the border-t class, and added some padding to the top of the last row using the pt-3 class.
Step 4: Test the Mini Receipt
Save the HTML file and open it in a web browser. You should see the mini receipt UI component displayed on the page.
Conclusion
In this article, we learned how to build a mini receipt UI component using Tailwind CSS. We covered what Tailwind CSS is, why it is useful for building UI components, and how to create a mini receipt using Tailwind CSS. By following these steps, you can create custom UI components quickly and easily using Tailwind CSS.