- Published on
The 5 Really Obvious Ways To Build A Login Page With Tailwind CSS Better That You Ever Did
- What is Tailwind CSS?
- The description of Login Page UI component
- Why use Tailwind CSS to create a Login Page UI component?
- The preview of Login Page UI component
- The source code of Login Page UI component
- How to create a Login Page with Tailwind CSS?
- Step 1: Set up your HTML
- Step 2: Style your UI components with Tailwind CSS
- Step 3: Add custom styles
- Step 4: Preview your Login Page
- Conclusion
As a front-end developer, you know that building a login page is one of the most important parts of any web application. It's the first thing users see when they try to access your site, so it's essential to make it look great and work flawlessly. In this article, we'll show you how to build a login page with Tailwind CSS, a utility-first CSS framework that makes it easy to create beautiful, responsive UI components.
What is Tailwind CSS?
Tailwind CSS is a utility-first CSS framework that makes it easy to create responsive, customizable UI components. It provides a set of pre-defined classes that you can use to style your HTML elements, without having to write any custom CSS. With Tailwind CSS, you can build complex layouts and components quickly and easily, without sacrificing flexibility or maintainability.
The description of Login Page UI component
A login page is a UI component that allows users to log in to your web application. It typically consists of a form with two input fields (one for the username and one for the password) and a submit button. The design of a login page should be simple and intuitive, with clear labels and feedback messages that help users understand what they need to do.
Why use Tailwind CSS to create a Login Page UI component?
Tailwind CSS is an excellent choice for building a login page UI component because it provides a set of pre-defined classes that you can use to style your HTML elements. This means that you don't have to write any custom CSS, which saves you time and makes your code more maintainable. Tailwind CSS also provides a responsive grid system that makes it easy to create layouts that look great on any device.
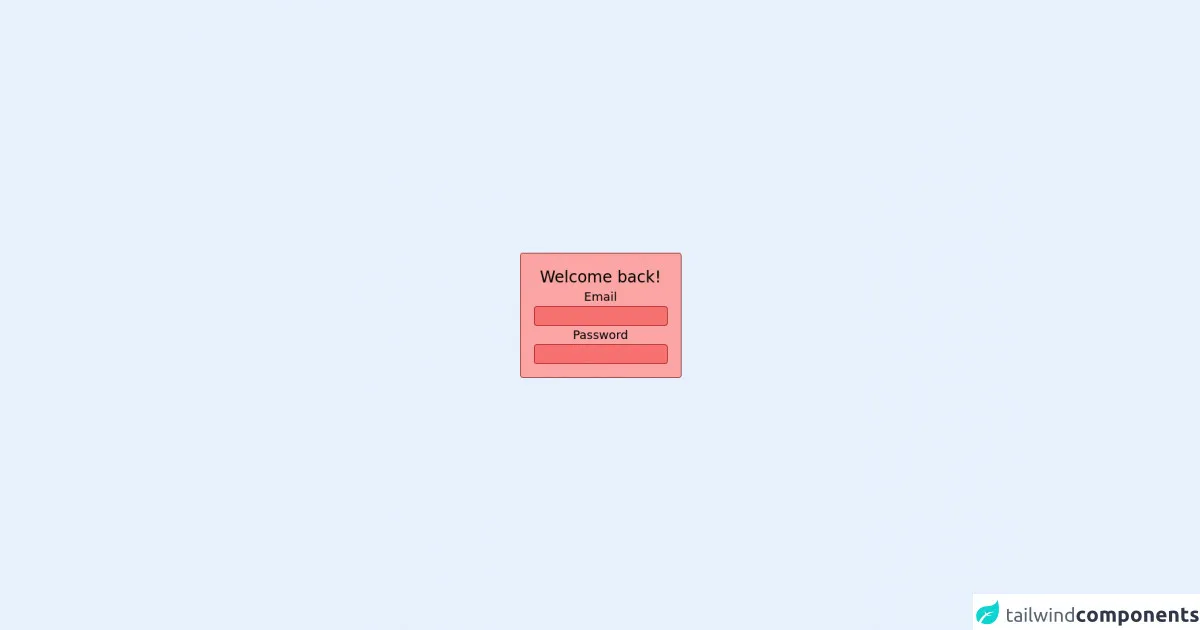
The preview of Login Page UI component
To give you an idea of what a login page built with Tailwind CSS looks like, here's a preview:
Free download of the Login Page's source code
The source code of Login Page UI component
Here's the source code for a basic login page built with Tailwind CSS:
<div class="flex h-screen">
    <div class="m-auto text-center border border-red-900 rounded p-5 bg-red-300">
      <span class="text-2xl block">Welcome back!</span>
      <form action="#">
        <label for="emailaddress" class="block text-lg">Email</label>
        <input type="email" class="block bg-red-400 border border-red-800 rounded p-0.5" name="emailaddress" id="emailaddress">
        <label for="emailaddress" class="block text-lg">Password</label>
        <input type="password" class="block bg-red-400 border border-red-800 rounded p-0.5" name="password" id="password">
      </form>
    </div>
  </div>
How to create a Login Page with Tailwind CSS?
Now that you know why Tailwind CSS is an excellent choice for building a login page UI component, let's walk through how to create one step-by-step.
Step 1: Set up your HTML
The first step is to set up your HTML. Create a new file called login.html and add the following code:
<!DOCTYPE html>
<html lang="en">
<head>
  <meta charset="UTF-8">
  <meta name="viewport" content="width=device-width, initial-scale=1.0">
  <title>Login Page</title>
  <link rel="stylesheet" href="https://cdn.jsdelivr.net/npm/[email protected]/dist/tailwind.min.css">
</head>
<body>
  <div class="min-h-screen bg-gray-100 flex items-center justify-center">
    <div class="max-w-md w-full space-y-8">
      <div>
        <h2 class="mt-6 text-center text-3xl font-extrabold text-gray-900">
          Sign in to your account
        </h2>
      </div>
      <form class="mt-8 space-y-6" action="#" method="POST">
        <input type="hidden" name="remember" value="true">
        <div class="rounded-md shadow-sm -space-y-px">
          <div>
            <label for="username" class="sr-only">Username</label>
            <input id="username" name="username" type="text" autocomplete="username" required class="appearance-none rounded-none relative block w-full px-3 py-2 border border-gray-300 placeholder-gray-500 text-gray-900 rounded-t-md focus:outline-none focus:ring-indigo-500 focus:border-indigo-500 focus:z-10 sm:text-sm" placeholder="Username">
          </div>
          <div>
            <label for="password" class="sr-only">Password</label>
            <input id="password" name="password" type="password" autocomplete="current-password" required class="appearance-none rounded-none relative block w-full px-3 py-2 border border-gray-300 placeholder-gray-500 text-gray-900 rounded-b-md focus:outline-none focus:ring-indigo-500 focus:border-indigo-500 focus:z-10 sm:text-sm" placeholder="Password">
          </div>
        </div>

        <div class="flex items-center justify-between">
          <div class="flex items-center">
            <input id="remember_me" name="remember_me" type="checkbox" class="h-4 w-4 text-indigo-600 focus:ring-indigo-500 border-gray-300 rounded">
            <label for="remember_me" class="ml-2 block text-sm text-gray-900">
              Remember me
            </label>
          </div>

          <div class="text-sm">
            <a href="#" class="font-medium text-indigo-600 hover:text-indigo-500">
              Forgot your password?
            </a>
          </div>
        </div>

        <div>
          <button type="submit" class="group relative w-full flex justify-center py-2 px-4 border border-transparent text-sm font-medium rounded-md text-white bg-indigo-600 hover:bg-indigo-700 focus:outline-none focus:ring-2 focus:ring-offset-2 focus:ring-indigo-500">
            <span class="absolute left-0 inset-y-0 flex items-center pl-3">
              <!-- Heroicon name: solid/lock-closed -->
              <svg class="h-5 w-5 text-indigo-500 group-hover:text-indigo-400" xmlns="http://www.w3.org/2000/svg" viewBox="0 0 20 20" fill="currentColor" aria-hidden="true">
                <path fill-rule="evenodd" d="M10 2a3 3 0 00-3 3v2H4a2 2 0 00-2 2v8a2 2 0 002 2h12a2 2 0 002-2v-8a2 2 0 00-2-2h-3V5a3 3 0 00-3-3zm-1 10a1 1 0 112 0 1 1 0 01-2 0zm3-4H8a1 1 0 000 2h4a1 1 0 000-2z" clip-rule="evenodd" />
              </svg>
            </span>
            Sign in
          </button>
        </div>
      </form>
    </div>
  </div>
</body>
</html>
This HTML code sets up the basic structure of a login page, including the form, input fields, and submit button. It also includes the Tailwind CSS stylesheet, which we'll use to style our UI components.
Step 2: Style your UI components with Tailwind CSS
Now that we have our HTML set up, it's time to style our UI components with Tailwind CSS. We'll use a combination of pre-defined classes and custom styles to create a clean, modern look for our login page.
Here are some of the Tailwind CSS classes we'll use:
bg-gray-100: sets the background color of the page to light grayflex: sets the display property of the parent container to flexitems-center: centers the child elements horizontally and verticallyjustify-center: centers the child elements horizontallymax-w-md: sets the maximum width of the container to mediumw-full: sets the width of the container to 100%mt-6: adds margin to the top of the elementtext-center: centers the text horizontallytext-3xl: sets the font size to 3xl (48px)font-extrabold: sets the font weight to extraboldtext-gray-900: sets the text color to blackmt-8: adds margin to the top of the elementrounded-md: adds rounded corners to the elementshadow-sm: adds a small shadow to the elementspace-y-px: adds vertical spacing between child elementssr-only: hides the label text from screen readersappearance-none: removes default styling from form elementsrounded-none: removes rounded corners from the elementrelative: sets the position property of the element to relativeblock: sets the display property of the element to blockborder: adds a border to the elementplaceholder-gray-500: sets the placeholder text color to graytext-gray-900: sets the text color to blackfocus:outline-none: removes the outline when the element is in focusfocus:ring-indigo-500: adds a ring around the element when it is in focusfocus:border-indigo-500: sets the border color to indigo when the element is in focusfocus:z-10: sets the z-index of the element when it is in focussm:text-sm: sets the font size to sm (14px)rounded-t-md: adds rounded corners to the top of the elementrounded-b-md: adds rounded corners to the bottom of the elementflex: sets the display property of the parent container to flexitems-center: centers the child elements horizontally and verticallyjustify-between: aligns the child elements to the left and right edges of the containerh-4: sets the height of the element to 4pxw-4: sets the width of the element to 4pxtext-indigo-600: sets the text color to indigofocus:ring-indigo-500: adds a ring around the element when it is in focusborder-gray-300: sets the border color to grayrounded: adds rounded corners to the elementml-2: adds margin to the left of the elementblock: sets the display property of the element to blocktext-sm: sets the font size to sm (14px)font-medium: sets the font weight to mediumtext-indigo-600: sets the text color to indigohover:text-indigo-500: sets the text color to indigo when the element is hovered overgroup: sets the position property of the element to relativerelative: sets the position property of the element to relativepy-2: adds padding to the top and bottom of the elementpx-4: adds padding to the left and right of the elementborder: adds a border to the elementborder-transparent: sets the border color to transparenttext-sm: sets the font size to sm (14px)font-medium: sets the font weight to mediumrounded-md: adds rounded corners to the elementtext-white: sets the text color to whitebg-indigo-600: sets the background color to indigohover:bg-indigo-700: sets the background color to indigo when the element is hovered overfocus:outline-none: removes the outline when the element is in focusfocus:ring-2: adds a ring around the element when it is in focusfocus:ring-offset-2: sets the offset of the ring when the element is in focusfocus:ring-indigo-500: sets the color of the ring when the element is in focus
Step 3: Add custom styles
In addition to using pre-defined Tailwind CSS classes, we can also add custom styles to our login page to make it look even better. Here are some custom styles we'll add:
input[type="text"]:focus,
input[type="password"]:focus {
  border-color: #6366f1;
}
This CSS code sets the border color of the input fields to indigo when they are in focus.
Step 4: Preview your Login Page
Now that we've set up our HTML, styled our UI components with Tailwind CSS, and added custom styles, it's time to preview our login page. Open login.html in your web browser, and you should see a beautiful, responsive login page that looks great on any device.
Conclusion
In this article, we've shown you how to build a login page with Tailwind CSS, a utility-first CSS framework that makes it easy to create beautiful, responsive UI components. We've walked through each step of the process, from setting up your HTML to styling your UI components with Tailwind CSS and adding custom styles. By following these steps, you can create a login page that looks great and works flawlessly, without having to write any custom CSS. Happy coding!