- Published on
The Ninja Guide To How To Build A Login Form With Tailwind CSS Better
- What is Tailwind CSS?
- The description of Login Form ui component
- Why use Tailwind CSS to create a Login Form ui component?
- The preview of Login Form ui component
- The source code of Login Form ui component
- How to create a Login Form with Tailwind CSS?
- Step 1: Set up your HTML
- Step 2: Style your form with Tailwind CSS
- Step 3: Add interactivity with JavaScript
- Conclusion
In the world of web development, creating a login form is a common task. However, designing a login form that is both visually appealing and functional can be a challenge. This is where Tailwind CSS comes in. In this article, we will explore how to build a login form with Tailwind CSS, and why it is a great choice for creating UI components.
What is Tailwind CSS?
Tailwind CSS is a utility-first CSS framework that provides pre-defined classes for common CSS properties. It allows developers to quickly create custom designs without having to write custom CSS. With Tailwind CSS, you can easily create responsive designs, and it is highly customizable.
The description of Login Form ui component
A login form is a UI component that allows users to authenticate themselves by entering their username and password. It typically consists of two input fields for the username and password, and a submit button.
Why use Tailwind CSS to create a Login Form ui component?
Tailwind CSS provides a set of pre-defined classes that can be used to create a login form quickly. It also provides responsive design capabilities, which means that the login form will look great on any device. Additionally, Tailwind CSS is highly customizable, so you can easily modify the design to match your branding.
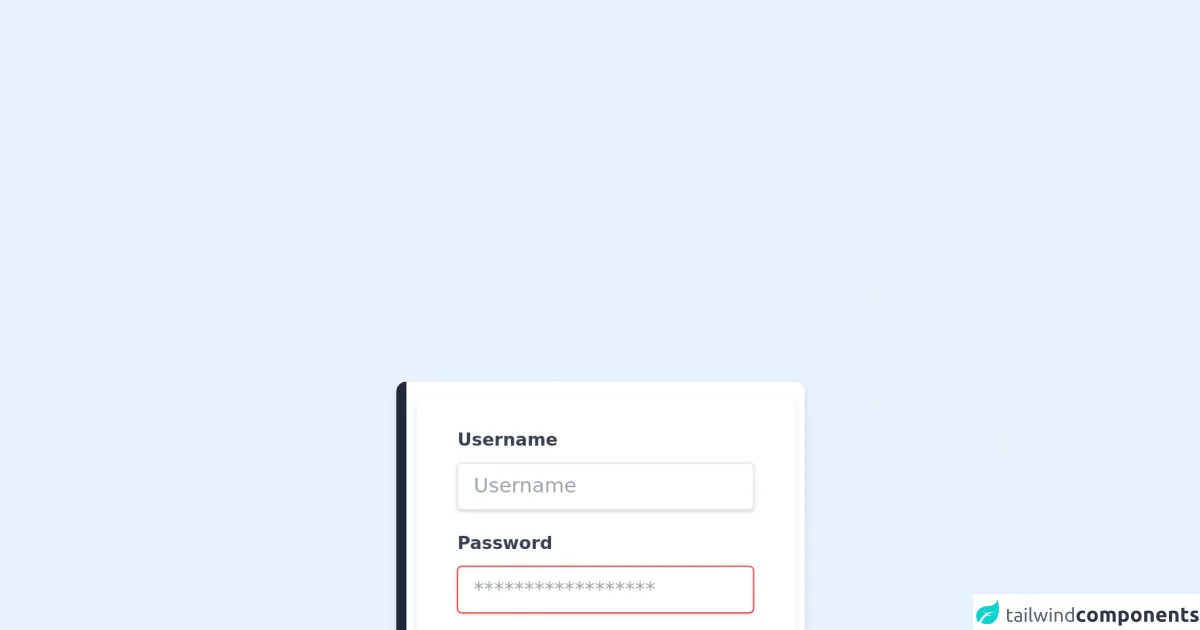
The preview of Login Form ui component
To give you an idea of what a login form created with Tailwind CSS looks like, here is a preview:
Free download of the Login Form's source code
The source code of Login Form ui component
Here is the source code for a basic login form created with Tailwind CSS:
<!-- This is an example component -->
<div>
<div class='flex max-w-sm w-full bg-white shadow-md rounded-lg overflow-hidden mx-auto'>
<div class='w-2 bg-gray-800'></div>
<div class='flex items-center px-2 py-3'>
<div class="w-full max-w-xs">
<form class="bg-white shadow-md rounded px-8 pt-6 pb-8 mb-4">
<div class="mb-4">
<label class="block text-gray-700 text-sm font-bold mb-2" for="username">
Username
</label>
<input class="shadow appearance-none border rounded w-full py-2 px-3 text-gray-700 leading-tight focus:outline-none focus:shadow-outline" id="username" type="text" placeholder="Username">
</div>
<div class="mb-6">
<label class="block text-gray-700 text-sm font-bold mb-2" for="password">
Password
</label>
<input class="shadow appearance-none border border-red-500 rounded w-full py-2 px-3 text-gray-700 mb-3 leading-tight focus:outline-none focus:shadow-outline" id="password" type="password" placeholder="******************">
<p class="text-red-500 text-xs italic">Please choose a password.</p>
</div>
<div class="flex items-center justify-between">
<button class="bg-blue-500 hover:bg-blue-700 text-white font-bold py-2 px-4 rounded focus:outline-none focus:shadow-outline" type="button">
Sign In
</button>
<a class="inline-block align-baseline font-bold text-sm text-blue-500 hover:text-blue-800" href="#">
Forgot Password?
</a>
</div>
</form>
<p class="text-center text-gray-500 text-xs">
©2020 Acme Corp. All rights reserved.
</p>
</div>
</div>
</div>
</div>
How to create a Login Form with Tailwind CSS?
Now that we have covered the benefits of using Tailwind CSS to create a login form, let's dive into how to create one.
Step 1: Set up your HTML
The first step is to set up your HTML. Here is an example:
<form class="bg-white shadow-md rounded px-8 pt-6 pb-8 mb-4">
  <div class="mb-4">
    <label class="block text-gray-700 font-bold mb-2" for="username">
      Username
    </label>
    <input
      class="shadow appearance-none border rounded w-full py-2 px-3 text-gray-700 leading-tight focus:outline-none focus:shadow-outline"
      id="username"
      type="text"
      placeholder="Username"
    />
  </div>
  <div class="mb-6">
    <label class="block text-gray-700 font-bold mb-2" for="password">
      Password
    </label>
    <input
      class="shadow appearance-none border rounded w-full py-2 px-3 text-gray-700 leading-tight focus:outline-none focus:shadow-outline"
      id="password"
      type="password"
      placeholder="******************"
    />
  </div>
  <div class="flex items-center justify-between">
    <button
      class="bg-blue-500 hover:bg-blue-700 text-white font-bold py-2 px-4 rounded focus:outline-none focus:shadow-outline"
      type="button"
    >
      Sign In
    </button>
    <a class="inline-block align-baseline font-bold text-sm text-blue-500 hover:text-blue-800" href="#">
      Forgot Password?
    </a>
  </div>
</form>
In this example, we have used Tailwind CSS classes to style the form and its components.
Step 2: Style your form with Tailwind CSS
Now that we have our HTML set up, we can start styling our form with Tailwind CSS. Here is an example of how to style the form:
<form class="bg-white shadow-md rounded px-8 pt-6 pb-8 mb-4">
  <div class="mb-4">
    <label class="block text-gray-700 font-bold mb-2" for="username">
      Username
    </label>
    <input
      class="shadow appearance-none border rounded w-full py-2 px-3 text-gray-700 leading-tight focus:outline-none focus:shadow-outline"
      id="username"
      type="text"
      placeholder="Username"
    />
  </div>
  <div class="mb-6">
    <label class="block text-gray-700 font-bold mb-2" for="password">
      Password
    </label>
    <input
      class="shadow appearance-none border rounded w-full py-2 px-3 text-gray-700 leading-tight focus:outline-none focus:shadow-outline"
      id="password"
      type="password"
      placeholder="******************"
    />
  </div>
  <div class="flex items-center justify-between">
    <button
      class="bg-blue-500 hover:bg-blue-700 text-white font-bold py-2 px-4 rounded focus:outline-none focus:shadow-outline"
      type="button"
    >
      Sign In
    </button>
    <a class="inline-block align-baseline font-bold text-sm text-blue-500 hover:text-blue-800" href="#">
      Forgot Password?
    </a>
  </div>
</form>
In this example, we have used Tailwind CSS classes to style the form and its components. We have used the bg-white class to set the background color of the form to white, and the shadow-md class to add a shadow effect to the form. We have also used the rounded class to round the corners of the form.
Step 3: Add interactivity with JavaScript
Finally, we can add interactivity to our login form with JavaScript. Here is an example of how to add interactivity:
<form class="bg-white shadow-md rounded px-8 pt-6 pb-8 mb-4">
  <div class="mb-4">
    <label class="block text-gray-700 font-bold mb-2" for="username">
      Username
    </label>
    <input
      class="shadow appearance-none border rounded w-full py-2 px-3 text-gray-700 leading-tight focus:outline-none focus:shadow-outline"
      id="username"
      type="text"
      placeholder="Username"
    />
  </div>
  <div class="mb-6">
    <label class="block text-gray-700 font-bold mb-2" for="password">
      Password
    </label>
    <input
      class="shadow appearance-none border rounded w-full py-2 px-3 text-gray-700 leading-tight focus:outline-none focus:shadow-outline"
      id="password"
      type="password"
      placeholder="******************"
    />
  </div>
  <div class="flex items-center justify-between">
    <button
      class="bg-blue-500 hover:bg-blue-700 text-white font-bold py-2 px-4 rounded focus:outline-none focus:shadow-outline"
      type="button"
      onclick="login()"
    >
      Sign In
    </button>
    <a class="inline-block align-baseline font-bold text-sm text-blue-500 hover:text-blue-800" href="#">
      Forgot Password?
    </a>
  </div>
</form>

<script>
  function login() {
    const username = document.getElementById("username").value;
    const password = document.getElementById("password").value;
    // TODO: Implement login logic
  }
</script>
In this example, we have added a onclick event to the sign-in button that calls a login() function. In the login() function, we have retrieved the values of the username and password fields and implemented the login logic.
Conclusion
In this article, we have explored how to create a login form with Tailwind CSS. We have discussed the benefits of using Tailwind CSS to create UI components, and we have provided a step-by-step guide on how to create a login form with Tailwind CSS. With Tailwind CSS, you can easily create custom designs without having to write custom CSS, and you can create responsive designs that look great on any device.