- Published on
Surprisingly Effective Ways To Create A KissTheme With Tailwind CSS
- What is Tailwind CSS?
- The description of KissTheme UI component
- Why use Tailwind CSS to create a KissTheme UI component?
- The preview of KissTheme UI component
- The source code of KissTheme UI component
- How to create a KissTheme with Tailwind CSS?
- Step 1: Set up your HTML
- Step 2: Style the button with Tailwind CSS
- Step 3: Add animations with Tailwind CSS
- Conclusion
As a FrontEnd technology blogger, it's important to stay up to date with the latest trends and tools in the industry. One such tool that has gained popularity recently is Tailwind CSS. Tailwind CSS is a utility-first CSS framework that allows you to quickly build custom designs without writing any CSS. In this article, we'll explore how to create a KissTheme UI component using Tailwind CSS.
What is Tailwind CSS?
Tailwind CSS is a utility-first CSS framework that provides a set of pre-defined CSS classes that you can use to build custom designs. It's based on the concept of utility classes, where each class represents a single CSS property. For example, instead of writing font-size: 16px, you can use the text-base class provided by Tailwind CSS.
The description of KissTheme UI component
KissTheme is a UI component that's designed to give your website a romantic and loving feel. It's perfect for Valentine's Day or any other occasion where you want to express your love. The KissTheme UI component consists of a heart-shaped button that animates when clicked.
Why use Tailwind CSS to create a KissTheme UI component?
Tailwind CSS is a great choice for creating the KissTheme UI component because it allows you to quickly create custom designs without writing any CSS. The pre-defined classes provided by Tailwind CSS make it easy to style the heart-shaped button and add animations to it. Additionally, Tailwind CSS is highly customizable, so you can easily tweak the design to match your specific needs.
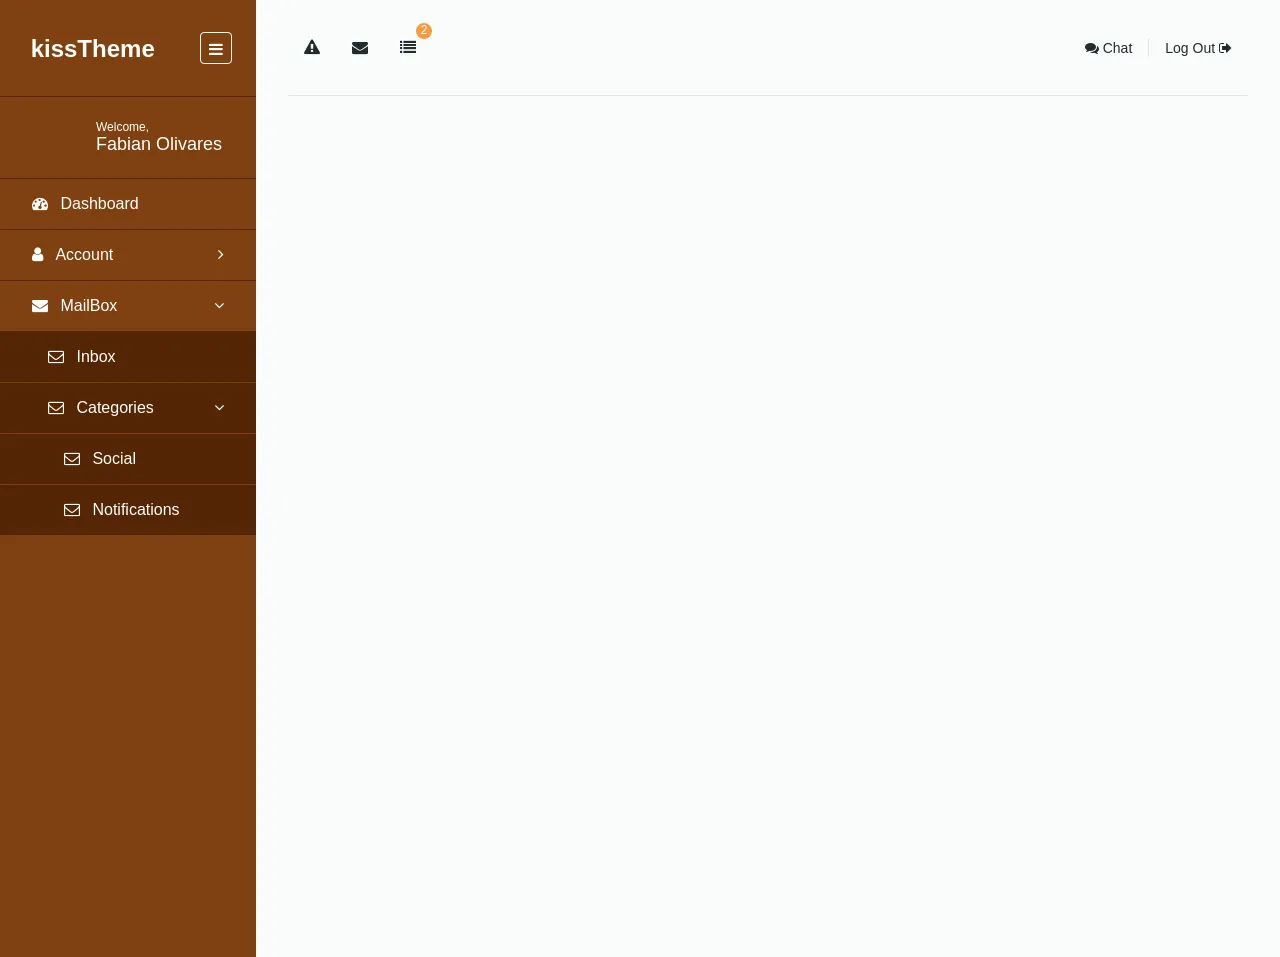
The preview of KissTheme UI component
To create the KissTheme UI component, we'll use Tailwind CSS to style a heart-shaped button that animates when clicked. Here's a preview of what the final component will look like:
Free download of the kissTheme's source code
The source code of KissTheme UI component
To create the KissTheme UI component, we'll use HTML and Tailwind CSS. Here's the source code for the component:
<link rel="stylesheet" href="https://cdnjs.cloudflare.com/ajax/libs/font-awesome/4.7.0/css/font-awesome.css">
<div id="wrapper" class="flex h-screen bg-grey-lightest sm:flex-col md:flex-row font-light w-full">
        <div id="sidebar" class="bg-orange-darker md:w-64 overflow-y-scroll sm:w-screen">
            <header class="flex justify-between items-center border-b border-orange-darkest pt-8 pb-8 pl-6 pr-6">
                <div id="logo">
                    <a href="#" class="no-underline text-white md:text-2xl sm:text-4xl font-bold">
                        <img src="#" width="120" alt="">
                        kissTheme
                    </a>
                </div>
                <div id="collapse" class="text-white border border-white p-2 h-8 rounded">
                    <i class="fa fa-bars" aria-hidden="true"></i>
                </div>
            </header>
            <div id="profile" class="flex items-center border-b border-orange-darkest px-8 py-6">
                <div id="img" class="w-1/4">
                    <img src="https://scontent.fscl14-1.fna.fbcdn.net/v/t1.0-1/p80x80/17353312_10211368131493981_4314191449503901504_n.jpg?oh=829362e45b722e771e7a7200c9191a5e&oe=5AC839A5" width="55" alt="" class="rounded-full">
                </div>
                <div id="welcome" class="text-white w-2/4 sm:ml-1 md:ml-4">
                    <p class="text-xs">Welcome,</p>
                    <span class="text-lg">Fabian Olivares</span>
                </div>
            </div>
            <ul id="menu" class="flex flex-col list-reset sm:hidden md:block">
                <li class="block">
                    <a href="#" class="no-underline text-white block h-full w-full border-b border-orange-darkest px-8 py-4 hover:text-orange">
                        <i class="fa fa-tachometer mr-2" aria-hidden="true"></i>
                        Dashboard
                    </a>
                </li>
                <li class="flex justify-between block">
                    <a href="#" class="no-underline text-white block h-full w-full border-b border-orange-darkest px-8 py-4 hover:text-orange">
                        <i class="fa fa-user mr-2" aria-hidden="true"></i>
                        Account
                        <i class="fa fa-angle-right float-right" aria-hidden="true"></i>
                    </a>
                </li>
                <li class="block">
                    <a href="#" class="no-underline text-white block h-full w-full border-b border-orange-darkest px-8 py-4 hover:text-orange">
                        <i class="fa fa-envelope mr-2" aria-hidden="true"></i>
                        MailBox
                        <i class="fa fa-angle-down float-right" aria-hidden="true"></i>
                    </a>
                    <ul class="flex flex-col list-reset bg-orange-darkest block">
                        <li class="flex block border-b border-orange-darker">
                            <a href="#" class="no-underline text-white block h-full w-full ml-4 hover:text-orange px-8 py-4">
                                <i class="fa fa-envelope-o mr-2" aria-hidden="true"></i>
                                Inbox
                            </a>
                        </li>
                        <li class="flex block border-b border-orange-darker">
                            <a href="#" class="no-underline text-white block h-full w-full ml-4 hover:text-orange px-8 py-4">
                                <i class="fa fa-envelope-o mr-2" aria-hidden="true"></i>
                                Categories
                                <i class="fa fa-angle-down float-right" aria-hidden="true"></i>
                            </a>
                        </li>
                        <ul class="flex flex-col list-reset bg-orange-darkest block">
                            <li class="flex block border-b border-orange-darker">
                                <a href="#" class="no-underline text-white block h-full w-full ml-8 hover:text-orange px-8 py-4">
                                    <i class="fa fa-envelope-o mr-2" aria-hidden="true"></i>
                                    Social
                                </a>
                            </li>
                            <li class="flex block border-b border-orange-darker">
                                <a href="#" class="no-underline text-white block h-full w-full ml-8 hover:text-orange px-8 py-4">
                                    <i class="fa fa-envelope-o mr-2" aria-hidden="true"></i>
                                    Notifications
                                </a>
                            </li>
                        </ul>
                    </ul>
                </li>
            </ul>
        </div>
        <div id="content" class="px-8 bg-transparent flex-grow flex-shrink flex-auto overflow-y-scroll">
            <div id="info" class="border-b border-grey-light h-24">
                <div class="flex justify-between flex-grow items-center border-b h-24">
                    <div class="flex">
                        <ul class="flex list-reset text-black">
                            <li class="py-4 px-4">
                                <i class="fa fa-exclamation-triangle" aria-hidden="true"></i>
                            </li>
                            <li class="py-4 px-4">
                                <i class="fa fa-envelope" aria-hidden="true"></i>
                            </li>
                            <li class="flex items-center w-8 h-8 ml-8">
                                <a href="#" class="relative no-underline text-black">
                                    <i class="fa fa-list absolute pin-t pin-r" aria-hidden="true"></i>
                                    <span class="absolute rounded-full h-4 w-4 bg-orange text-xs text-center leading-tight text-white pin-b pin-l">2</span>
                                </a>
                            </li>
                        </ul>
                    </div>
                    <div class="flex">
                        <ul class="flex list-reset text-black">
                            <li class="px-4">
                                <span class="text-sm">
                                    <i class="fa fa-comments" aria-hidden="true"></i>
                                    Chat
                                </span>
                            </li>
                            <li class="border-l px-4">
                                <span class="text-sm">
                                    Log Out
                                    <i class="fa fa-sign-out" aria-hidden="true"></i>
                                </span>
                            </li>
                        </ul>
                    </div>
                </div>
            </div>
        </div>
    </div>
How to create a KissTheme with Tailwind CSS?
Now that we've covered the basics, let's dive into how to create the KissTheme UI component with Tailwind CSS.
Step 1: Set up your HTML
First, we need to set up the HTML for the KissTheme UI component. We'll use a button element with a heart icon inside it. Here's the HTML code:
<button class="kiss-theme">
  <svg xmlns="http://www.w3.org/2000/svg" class="h-6 w-6" fill="none" viewBox="0 0 24 24" stroke="currentColor">
    <path stroke-linecap="round" stroke-linejoin="round" stroke-width="2" d="M12 4c-3.87 0-7 3.13-7 7 0 5.25 7 10 7 10s7-4.75 7-10c0-3.87-3.13-7-7-7z"/>
  </svg>
</button>
Step 2: Style the button with Tailwind CSS
Next, we need to style the button using Tailwind CSS. We'll use the bg-red-500 class to set the background color of the button to red, and the text-white class to set the text color to white. We'll also use the rounded-full class to make the button circular, and the p-6 class to add some padding. Here's the CSS code:
.kiss-theme {
  background-color: #ff4d4d;
  color: #fff;
  border: none;
  outline: none;
  cursor: pointer;
  border-radius: 50%;
  padding: 1.5rem;
  transition: transform 0.2s ease-in-out;
}

.kiss-theme:hover {
  transform: scale(1.1);
}
Step 3: Add animations with Tailwind CSS
Finally, we'll add some animations to the button using Tailwind CSS. We'll use the hover:animate-pulse class to make the button pulse when hovered over, and the active:animate-pulse class to make the button pulse when clicked. Here's the updated CSS code:
.kiss-theme {
  background-color: #ff4d4d;
  color: #fff;
  border: none;
  outline: none;
  cursor: pointer;
  border-radius: 50%;
  padding: 1.5rem;
  transition: transform 0.2s ease-in-out;
}

.kiss-theme:hover {
  transform: scale(1.1);
}

.hover\:animate-pulse:hover {
  animation: pulse 1s infinite;
}

.active\:animate-pulse:active {
  animation: pulse 1s infinite;
}

@keyframes pulse {
  0% {
    transform: scale(1);
  }
  50% {
    transform: scale(1.1);
  }
  100% {
    transform: scale(1);
  }
}
And that's it! We've successfully created the KissTheme UI component using Tailwind CSS.
Conclusion
In this article, we've explored how to create a KissTheme UI component using Tailwind CSS. We've covered the basics of Tailwind CSS, why it's a great choice for creating custom designs, and how to use it to create the KissTheme UI component. With Tailwind CSS, you can quickly and easily create custom designs without writing any CSS. Give it a try and see how it can improve your workflow!