- Published on
The Ninja Guide To How To Build A Intercom Chat UI With Tailwind CSS Better
- What is Tailwind CSS?
- The description of Intercom Chat UI ui component
- Why use Tailwind CSS to create a Intercom Chat UI ui component?
- The preview of Intercom Chat UI ui component.
- The source code of Intercom Chat UI ui component.
- How to create a Intercom Chat UI with Tailwind CSS?
- Step 1: Create a new HTML file and include the necessary CSS and JavaScript files.
- Step 2: Create the HTML structure for the Intercom Chat UI component.
- Step 3: Use Tailwind CSS classes to style the HTML elements.
- Step 4: Add JavaScript functionality to the Intercom Chat UI component.
- Conclusion
Are you looking for a way to create a beautiful and functional Intercom Chat UI for your website or application? Look no further than Tailwind CSS! In this article, we will explore how to build an Intercom Chat UI using Tailwind CSS and why it is the perfect tool for the job.
What is Tailwind CSS?
Tailwind CSS is a utility-first CSS framework that allows you to quickly and easily create custom designs without the need for writing custom CSS. It provides a set of pre-defined classes that you can use to style your HTML elements. Tailwind CSS is highly customizable, allowing you to create a unique design that fits your needs.
The description of Intercom Chat UI ui component
Intercom Chat UI is a popular messaging platform that allows businesses to communicate with their customers in real-time. The Intercom Chat UI component is a user interface that allows customers to chat with businesses and receive support.
Why use Tailwind CSS to create a Intercom Chat UI ui component?
Tailwind CSS is the perfect tool for creating an Intercom Chat UI component because it allows you to quickly and easily style your HTML elements. With Tailwind CSS, you can create custom designs without the need for writing custom CSS. This saves you time and allows you to focus on creating a functional and beautiful user interface.
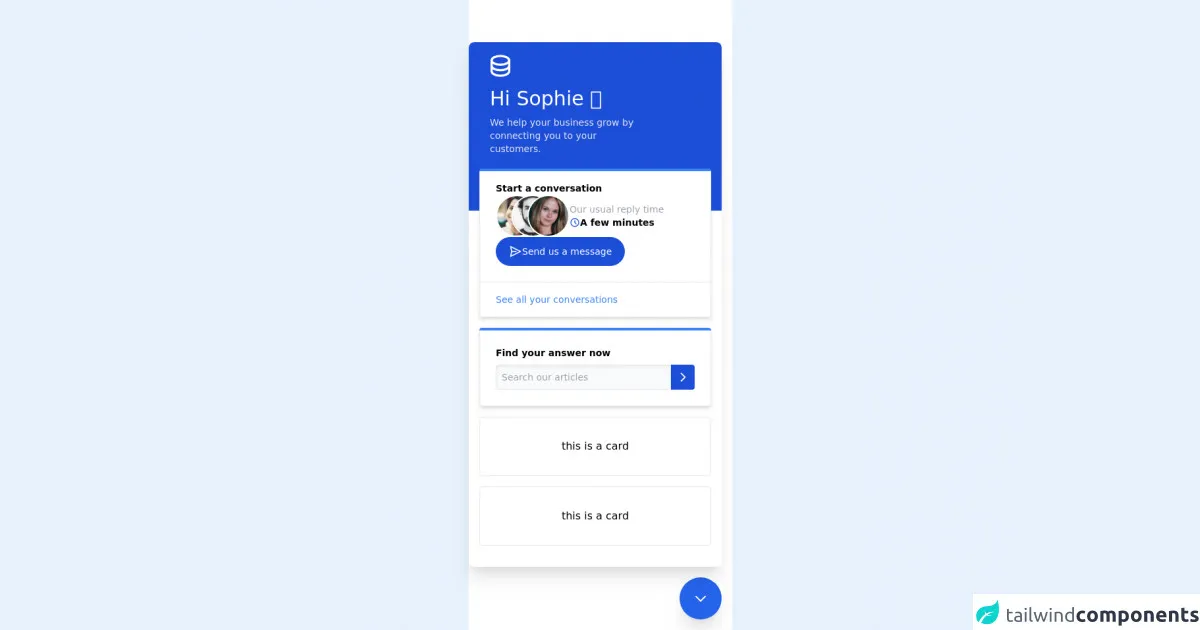
The preview of Intercom Chat UI ui component.
To create an Intercom Chat UI component using Tailwind CSS, we will need to use a combination of HTML and CSS. Here is a preview of what the final product will look like:
Free download of the Intercom Chat UI's source code
The source code of Intercom Chat UI ui component.
To create the Intercom Chat UI component, we will need to use a combination of HTML and CSS. Here is the source code for the Intercom Chat UI component:
<div class="bg-white h-screen flex flex-col items-end">
  <div class="flex-1 mt-16 mr-4 w-96 bg-white shadow-xl rounded-lg relative overflow-hidden">
    <div class="bg-blue-700 h-64 rounded-t-lg absolute w-full z-0"></div>
    <div class="flex flex-col overflow-y-auto h-full p-4 space-y-4">
      <div class="flex flex-col z-10 ml-4 text-white">
        <svg class="w-10 h-10 mb-3 -ml-1" fill="none" stroke="currentColor" viewBox="0 0 24 24" xmlns="http://www.w3.org/2000/svg"><path stroke-linecap="round" stroke-linejoin="round" stroke-width="2" d="M4 7v10c0 2.21 3.582 4 8 4s8-1.79 8-4V7M4 7c0 2.21 3.582 4 8 4s8-1.79 8-4M4 7c0-2.21 3.582-4 8-4s8 1.79 8 4m0 5c0 2.21-3.582 4-8 4s-8-1.79-8-4"></path></svg>
        <div class="text-3xl mb-2">Hi Sophie 👋</div>
        <div class="w-60 text-gray-200 text-sm mb-1">We help your business grow by connecting you to your customers.</div>
      </div>
      <div class="border-0 border-t-4 border-blue-500 rounded z-10 shadow-md text-sm">
        <div class="bg-white border border-t-0 rounded-t-none rounded-b flex flex-col space-y-2">
          <div class="px-6 py-4 flex flex-col items-start gap-3">
            <div class="font-semibold ">Start a conversation</div>
            <div class="flex flex-row gap-3">
              <div class="flex flex-row -space-x-10">
                <img class="w-16 h-16 rounded-full border-2 border-white" src="https://images.unsplash.com/photo-1544725176-7c40e5a71c5e?ixlib=rb-1.2.1&ixid=MXwxMjA3fDB8MHxwaG90by1wYWdlfHx8fGVufDB8fHw%3D&auto=format&fit=facearea&w=256&h=256&facepad=2" />
                <img class="w-16 h-16 rounded-full border-2 border-white" src="https://images.unsplash.com/flagged/photo-1570612861542-284f4c12e75f?ixlib=rb-1.2.1&ixid=MXwxMjA3fDB8MHxwaG90by1wYWdlfHx8fGVufDB8fHw%3D&auto=format&fit=facearea&w=256&h=256&facepad=2" />
                <img class="w-16 h-16 rounded-full border-2 border-white" src="https://images.unsplash.com/photo-1499952127939-9bbf5af6c51c?ixlib=rb-1.2.1&ixid=MXwxMjA3fDB8MHxwaG90by1wYWdlfHx8fGVufDB8fHw%3D&auto=format&fit=facearea&w=256&h=256&facepad=2" />
              </div>
              <div class="flex flex-col justify-center">
                <div class="text-gray-400">Our usual reply time</div>
                <div class="flex flex-row items-center gap-1 font-semibold">
                  <svg class="w-4 h-4 text-blue-700" fill="none" stroke="currentColor" viewBox="0 0 24 24" xmlns="http://www.w3.org/2000/svg"><path stroke-linecap="round" stroke-linejoin="round" stroke-width="2" d="M12 8v4l3 3m6-3a9 9 0 11-18 0 9 9 0 0118 0z"></path></svg>
                  A few minutes
                </div>
              </div>
            </div>
            <button type="button" class="bg-blue-700 rounded-full text-white flex flex-row gap-2 py-3 px-5">
              <svg class="w-5 h-5 transform rotate-90" fill="none" stroke="currentColor" viewBox="0 0 24 24" xmlns="http://www.w3.org/2000/svg"><path stroke-linecap="round" stroke-linejoin="round" stroke-width="2" d="M12 19l9 2-9-18-9 18 9-2zm0 0v-8"></path></svg>
              Send us a message
            </button>
          </div>
          <div class="border-t px-6 py-4">
            <a href="#" class="text-sm text-blue-500 hover:text-blue-300">See all your conversations</a>
          </div>
        </div>
      </div>
      <div class="border-0 border-t-4 border-blue-500 rounded z-10 shadow-md">
        <div class="bg-white border border-t-0 rounded-t-none rounded-b p-6 flex flex-col space-y-2">
          <div class="font-semibold text-sm">Find your answer now</div>
          <div class="flex flex-row">
            <input type="text" placeholder="Search our articles" class="border flex-1 rounded-l p-2 text-sm shadow-inner outline-none bg-gray-50 focus:bg-white">
            <button type="button" class="bg-blue-700 p-2 rounded-r">
              <svg class="w-5 h-5 text-white" fill="none" stroke="currentColor" viewBox="0 0 24 24" xmlns="http://www.w3.org/2000/svg"><path stroke-linecap="round" stroke-linejoin="round" stroke-width="2" d="M9 5l7 7-7 7"></path></svg>
            </button>
          </div>
        </div>
      </div>
      <div class="bg-white border rounded flex items-center justify-center p-8 z-10">
        this is a card
      </div>
      <div class="bg-white border rounded flex items-center justify-center p-8 z-10">
        this is a card
      </div>
    </div>

  </div>
  <div class="bg-blue-600 rounded-full w-16 h-16 m-4 flex items-center justify-center cursor-pointer shadow-xl">
    <svg class="w-6 h-6 text-white" fill="none" stroke="currentColor" viewBox="0 0 24 24" xmlns="http://www.w3.org/2000/svg"><path stroke-linecap="round" stroke-linejoin="round" stroke-width="2" d="M19 9l-7 7-7-7"></path></svg>
  </div>
</div>
How to create a Intercom Chat UI with Tailwind CSS?
To create an Intercom Chat UI with Tailwind CSS, follow these steps:
- Create a new HTML file and include the necessary CSS and JavaScript files.
- Create the HTML structure for the Intercom Chat UI component.
- Use Tailwind CSS classes to style the HTML elements.
- Add JavaScript functionality to the Intercom Chat UI component.
Let's break down each step in more detail.
Step 1: Create a new HTML file and include the necessary CSS and JavaScript files.
To get started, create a new HTML file and include the necessary CSS and JavaScript files. You can use a CDN or download the files and include them locally.
<!DOCTYPE html>
<html lang="en">
<head>
  <meta charset="UTF-8">
  <meta name="viewport" content="width=device-width, initial-scale=1.0">
  <title>Intercom Chat UI</title>
  <link rel="stylesheet" href="https://cdn.jsdelivr.net/npm/[email protected]/dist/tailwind.min.css">
  <script src="https://code.jquery.com/jquery-3.6.0.min.js"></script>
  <script src="https://unpkg.com/@popperjs/[email protected]/dist/umd/popper.min.js"></script>
  <script src="https://unpkg.com/[email protected]/dist/tippy-bundle.umd.min.js"></script>
</head>
<body>
  <!-- Intercom Chat UI component goes here -->
</body>
</html>
Step 2: Create the HTML structure for the Intercom Chat UI component.
Next, create the HTML structure for the Intercom Chat UI component. This will include a chat window, a message input field, and a send button.
<div class="fixed bottom-0 right-0 mb-4 mr-4">
  <div class="bg-white rounded-lg shadow-lg w-80">
    <div class="border-b-2 border-gray-100 p-4">
      <h3 class="text-lg font-semibold">Chat with us</h3>
      <p class="text-gray-500">We're here to help!</p>
    </div>
    <div class="p-4 h-60 overflow-y-auto">
      <!-- Chat messages go here -->
    </div>
    <div class="p-4 border-t-2 border-gray-100">
      <div class="flex">
        <input type="text" placeholder="Type a message" class="flex-1 border-2 border-gray-200 rounded-lg p-2 mr-2">
        <button class="bg-blue-500 hover:bg-blue-600 text-white rounded-lg px-4 py-2">Send</button>
      </div>
    </div>
  </div>
</div>
Step 3: Use Tailwind CSS classes to style the HTML elements.
Now that we have the HTML structure in place, we can use Tailwind CSS classes to style the HTML elements. Here is the CSS code:
/* Chat window */
.bg-white {
  background-color: #fff;
}

.rounded-lg {
  border-radius: 0.5rem;
}

.shadow-lg {
  box-shadow: 0 10px 15px -3px rgba(0, 0, 0, 0.1), 0 4px 6px -2px rgba(0, 0, 0, 0.05);
}

.w-80 {
  width: 20rem;
}

.border-b-2 {
  border-bottom-width: 0.25rem;
}

.border-gray-100 {
  border-color: #f7fafc;
}

.p-4 {
  padding: 1rem;
}

.text-lg {
  font-size: 1.125rem;
  line-height: 1.75rem;
}

.font-semibold {
  font-weight: 600;
}

.text-gray-500 {
  color: #a0aec0;
}

/* Chat messages */
.h-60 {
  height: 15rem;
}

.overflow-y-auto {
  overflow-y: auto;
}

/* Message input field */
.border-2 {
  border-width: 0.125rem;
}

.border-gray-200 {
  border-color: #edf2f7;
}

.rounded-lg {
  border-radius: 0.5rem;
}

.p-2 {
  padding: 0.5rem;
}

.mr-2 {
  margin-right: 0.5rem;
}

/* Send button */
.bg-blue-500 {
  background-color: #3b82f6;
}

.hover\:bg-blue-600:hover {
  background-color: #2563eb;
}

.text-white {
  color: #fff;
}

.px-4 {
  padding-left: 1rem;
  padding-right: 1rem;
}

.py-2 {
  padding-top: 0.5rem;
  padding-bottom: 0.5rem;
}

.rounded-lg {
  border-radius: 0.5rem;
}
Step 4: Add JavaScript functionality to the Intercom Chat UI component.
Finally, we can add JavaScript functionality to the Intercom Chat UI component. This will include sending and receiving messages.
$(function() {
  // Send message
  $('button').on('click', function() {
    var message = $('input').val();
    if (message.trim() !== '') {
      var html = '<div class="flex justify-end mb-2"><div class="bg-blue-500 text-white rounded-lg px-4 py-2">' + message + '</div></div>';
      $('.overflow-y-auto').append(html);
      $('input').val('');
    }
  });

  // Receive message
  setTimeout(function() {
    var html = '<div class="flex justify-start mb-2"><div class="bg-gray-200 rounded-lg px-4 py-2">Hi there! How can I help you today?</div></div>';
    $('.overflow-y-auto').append(html);
  }, 1000);
});
Conclusion
In conclusion, Tailwind CSS is a powerful tool for creating beautiful and functional user interfaces. With its pre-defined classes and customization options, you can quickly and easily create an Intercom Chat UI component that fits your needs. By following the steps outlined in this article, you can create an Intercom Chat UI component using Tailwind CSS in no time!