- Published on
How to Create A Full Calendar With Tailwind CSS?
- What is Tailwind CSS?
- The description of Full calendar ui component
- Why use Tailwind CSS to create a Full calendar ui component?
- The preview of Full calendar ui component
- The source code of Full calendar ui component
- How to create a Full calendar with Tailwind CSS?
- Step 1: Set up the HTML structure
- Step 2: Style the calendar elements
- Step 3: Add events to the calendar
- Conclusion
What is Tailwind CSS?
Tailwind CSS is a utility-first CSS framework that provides a set of pre-defined CSS classes to help developers create responsive and customizable user interfaces quickly. It is gaining popularity among developers due to its simplicity and flexibility.
The description of Full calendar ui component
A full calendar is a UI component that displays events or tasks in a calendar format. It is widely used in applications such as scheduling, booking, and project management.
Why use Tailwind CSS to create a Full calendar ui component?
Tailwind CSS provides a set of pre-defined utility classes that can be used to create a full calendar with ease. It also allows developers to customize the design of the calendar by modifying the pre-defined classes or creating new ones.
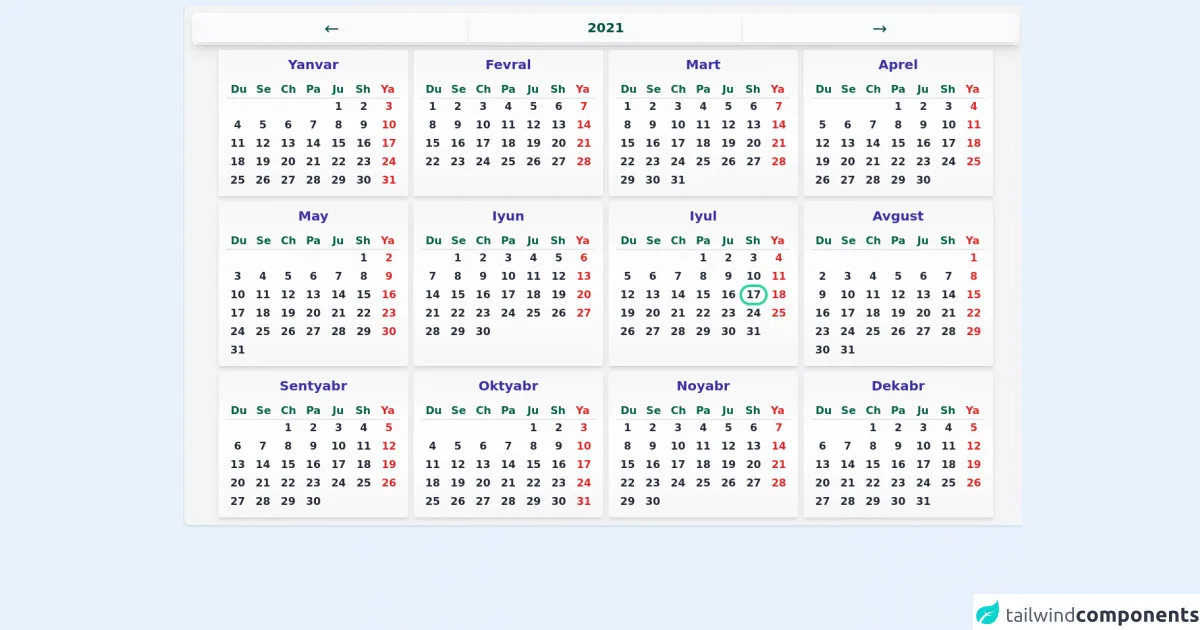
The preview of Full calendar ui component
To create a full calendar with Tailwind CSS, we can use a combination of pre-defined classes to style the calendar elements. Here is a preview of what the final calendar will look like:
Free download of the Full calendar's source code
The source code of Full calendar ui component
To create the full calendar, we will use HTML and CSS code. The HTML code will define the structure of the calendar, while the CSS code will style it using Tailwind CSS classes. Here is the source code for the full calendar:
<link href="https://unpkg.com/tailwindcss@^2/dist/tailwind.min.css" rel="stylesheet">
<script defer src="https://unpkg.com/[email protected]/dist/cdn.min.js"></script>
<div class="w-full p-2 m-2 bg-gray-100 rounded-lg shadow">
<div class = "flex flex-wrap justify-center" x-data = "genCalendar()" x-init="hozirgivaqt()" x-cloak >
    <div class = "flex flex-wrap w-full h-12 p-1 m-1 text-xl font-bold bg-white rounded-lg shadow-lg">
        <p class ="w-1/3 p-1 text-center text-green-900 shadow-md cursor-pointer hover:text-green-600 hover:shadow-inner bg-gray-50 rounded-l-md" @click = "year-=1 "><svg xmlns="http://www.w3.org/2000/svg" class="block w-6 h-8 m-auto" fill="none" viewBox="0 0 24 24" stroke="currentColor">
            <path stroke-linecap="round" stroke-linejoin="round" stroke-width="2" d="M7 16l-4-4m0 0l4-4m-4 4h18" />
          </svg></p>
        <p class ="w-1/3 p-1 text-center text-green-900 shadow-md cursor-pointer hover:text-green-600 hover:shadow-inner bg-gray-50"   x-text ="year"></p>
        <p class ="w-1/3 p-1 text-center text-green-900 shadow-md cursor-pointer hover:text-green-600 hover:shadow-inner bg-gray-50 rounded-r-md" @click = "year+=1 "><svg xmlns="http://www.w3.org/2000/svg" class="block w-6 h-8 m-auto" fill="none" viewBox="0 0 24 24" stroke="currentColor">
            <path stroke-linecap="round" stroke-linejoin="round" stroke-width="2" d="M17 8l4 4m0 0l-4 4m4-4H3" />
          </svg></p>
    </div>
 <template x-for ="(month,index) in month_names">
    <div class="p-1 m-1 font-sans bg-white rounded shadow-md lg:w-72 w-80 bg-blend-luminosity bg-gradient-to-b from-green-50 via-white to-green-50">
        <p class="p-1 text-xl font-semibold text-center text-indigo-800" x-text = "month"></p>
        <div class="p-1 m-1">
            <div class="grid grid-cols-7 font-semibold text-green-800 border-b-2">
               <template x-for = "days in day_names">
                    <div class="grid place-items-center" :class ="{'text-red-600': days == 'Ya'}">
                        <p x-text = "days"></p>
                    </div>
               </template>
            </div>
            <!-- calendar raqamlari bloki-->
              <div class="grid grid-cols-7 gap-1 font-semibold text-center text-gray-800 ">
                           <template x-for = "kun in daysgenerater()[index]">
                                <div :class="{' ring-green-400 ring-4 rounded-full': isbugun(kun,index) == true, 'text-red-600': isyakshanba(kun,index) == true , ' hover:bg-green-100': isbugun(kun,index) == false }" >
                                  <p x-text="kun"></p>
                                </div>
                            </template>
                         </div>
            <!-- calendar raqamlari bloki oxiri-->
        </div>
    </div>
 </template>
</div>
</div>
<script>

function genCalendar(){

   return {
        month_names : ['Yanvar','Fevral','Mart','Aprel','May','Iyun','Iyul','Avgust','Sentyabr','Oktyabr','Noyabr','Dekabr'],
        day_names : ['Du','Se','Ch','Pa','Ju','Sh','Ya'],
        year : '',
        days_of_month(){
            kabisa = (yearin) => {return (yearin % 4 === 0 && yearin % 100 !== 0 && yearin % 400 !== 0) || (yearin % 100 === 0 && yearin % 400 ===0)};
            fevral = (yearin) => {return kabisa(yearin) ? 29 : 28};
            return [31, fevral(this.year), 31, 30, 31, 30, 31, 31, 30, 31, 30, 31];
        },
        hafta(sol,ma) { let haftakuni =  new Date(sol,ma).getDay();
           switch (haftakuni) { // hafta kuni Dushanbadan boshlangani uchun hak)
                   case 0:
                   haftakuni = 6;
                   break;
                   case 1:
                   haftakuni = 0;
                   break;
                   case 2:
                   haftakuni = 1;
                   break;
                   case 3:
                   haftakuni = 2;
                   break;
                   case 4:
                   haftakuni = 3;
                   break;
                   case 5:
                   haftakuni = 4;
                   break;
                   case 6:
                   haftakuni = 5;
                   break;
               default:
                   haftakuni =  new Date(sol,ma).getDay()
                   break;
             }
             return haftakuni;
         },
        daysgenerater() {
           let days = [];
          for (let k = 0; k < this.days_of_month().length; k++) {
           days.push([]);
           for (let i = 1; i <= this.days_of_month()[k]; i++) {
            if(days[k].length < this.hafta(this.year,k)) {
                 i-=i;
                 days[k].push('');
                 continue; };
             days[k].push(i);
                         } }
           return days;
        },
        hozirgivaqt() {
                      let today = new Date();
                      this.year = today.getFullYear();
                  },
        isbugun(kun,oy) {
                      const today = new Date();
                      const dayintable = new Date(this.year,oy,kun);
                       return today.toDateString() === dayintable.toDateString() ? true : false;
                  },
        isyakshanba(kun,oy) {
                       const dayintable = new Date(this.year,oy,kun);
                       return dayintable.getDay() == 0 ? true : false;
           }

         }
}
</script>
How to create a Full calendar with Tailwind CSS?
To create a full calendar with Tailwind CSS, follow these steps:
Step 1: Set up the HTML structure
The first step is to set up the HTML structure of the calendar. We will use a table element to create the calendar grid. Here is the HTML code for the calendar structure:
<table class="table-auto">
  <thead>
    <tr>
      <th class="px-4 py-2">Sunday</th>
      <th class="px-4 py-2">Monday</th>
      <th class="px-4 py-2">Tuesday</th>
      <th class="px-4 py-2">Wednesday</th>
      <th class="px-4 py-2">Thursday</th>
      <th class="px-4 py-2">Friday</th>
      <th class="px-4 py-2">Saturday</th>
    </tr>
  </thead>
  <tbody>
    <tr>
      <td class="border px-4 py-2"></td>
      <td class="border px-4 py-2"></td>
      <td class="border px-4 py-2"></td>
      <td class="border px-4 py-2"></td>
      <td class="border px-4 py-2"></td>
      <td class="border px-4 py-2"></td>
      <td class="border px-4 py-2"></td>
    </tr>
    <!-- More rows here -->
  </tbody>
</table>
In this code, we have defined a table with a header row and a body row. The header row contains the day names, while the body row contains the calendar cells.
Step 2: Style the calendar elements
Now that we have set up the HTML structure, we can start styling the calendar elements using Tailwind CSS classes. Here is the CSS code for the calendar:
table {
  width: 100%;
}

th,
td {
  text-align: center;
}

th {
  border-bottom: 2px solid #ddd;
}

td {
  height: 100px;
  border: 1px solid #ddd;
}

td:hover {
  background-color: #f5f5f5;
}

td.today {
  background-color: #4caf50;
  color: #fff;
}

td.event {
  background-color: #2196f3;
  color: #fff;
}

td.event:hover {
  background-color: #1565c0;
}
In this code, we have defined styles for the table, header, and body elements. We have also defined styles for the calendar cells, including the hover effect, today's date, and events.
Step 3: Add events to the calendar
To add events to the calendar, we can simply add a class to the corresponding calendar cells. Here is an example of how to add an event to the calendar:
<td class="border px-4 py-2 event">Event Name</td>
In this code, we have added the "event" class to the calendar cell to indicate that it contains an event.
Conclusion
In this article, we have learned how to create a full calendar with Tailwind CSS. We have seen how Tailwind CSS can be used to style the calendar elements and how events can be added to the calendar. With its simplicity and flexibility, Tailwind CSS is a great choice for creating user interfaces quickly and efficiently.