- Published on
The 5 Really Obvious Ways To Create A Free Tailwind CSS Checkouts Component With Tailwind CSS Better That You Ever Did
- What is Tailwind CSS?
- The description of Free Tailwind CSS Checkouts Component ui component
- Why use Tailwind CSS to create a Free Tailwind CSS Checkouts Component ui component?
- The preview of Free Tailwind CSS Checkouts Component ui component.
- The source code of Free Tailwind CSS Checkouts Component ui component.
- How to create a Free Tailwind CSS Checkouts Component with Tailwind CSS?
- Step 1: Set up your development environment
- Step 2: Create a new HTML file
- Step 3: Add the Free Tailwind CSS Checkouts Component
- Step 4: Customize the component
- Conclusion
What is Tailwind CSS?
Tailwind CSS is a utility-first CSS framework that provides a set of pre-defined CSS classes that can be used to build custom user interfaces. It is designed to make it easy to create responsive and scalable designs by providing a set of pre-defined CSS classes that can be combined to create complex layouts.
The description of Free Tailwind CSS Checkouts Component ui component
A checkouts component is an essential part of any e-commerce website. It allows users to review their order before making a purchase. The Free Tailwind CSS Checkouts Component is a pre-designed user interface component that can be used to create a checkout page for an e-commerce website. It is designed to be easy to use and customize, and it is built using Tailwind CSS.
Why use Tailwind CSS to create a Free Tailwind CSS Checkouts Component ui component?
Tailwind CSS is a popular CSS framework that provides a set of pre-defined CSS classes that can be used to build custom user interfaces. It is designed to make it easy to create responsive and scalable designs by providing a set of pre-defined CSS classes that can be combined to create complex layouts.
Using Tailwind CSS to create a Free Tailwind CSS Checkouts Component ui component has several advantages. First, it allows you to create a custom user interface quickly and easily. Second, it provides a set of pre-defined CSS classes that can be used to create responsive and scalable designs. Finally, it is designed to be easy to use and customize.
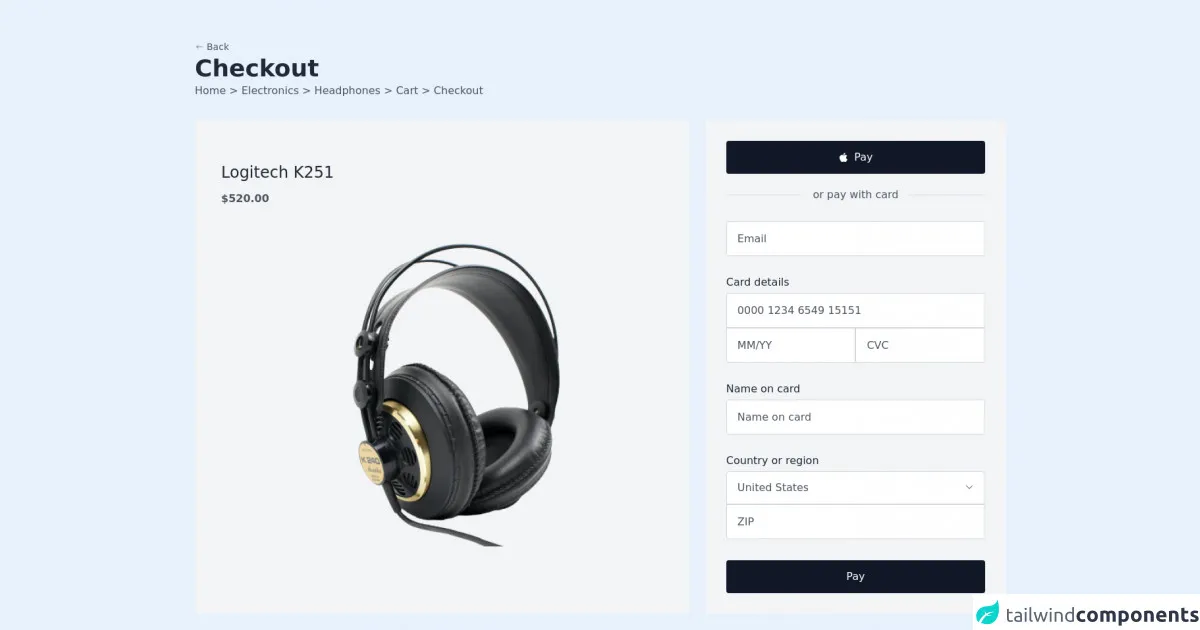
The preview of Free Tailwind CSS Checkouts Component ui component.
The Free Tailwind CSS Checkouts Component ui component is a pre-designed user interface component that can be used to create a checkout page for an e-commerce website. It is designed to be easy to use and customize, and it is built using Tailwind CSS.
Free download of the Free Tailwind CSS Checkouts Component's source code
The source code of Free Tailwind CSS Checkouts Component ui component.
The source code for the Free Tailwind CSS Checkouts Component ui component is available on GitHub. It is built using HTML, CSS, and Tailwind CSS.
<div>
        <div class="py-16 px-4 md:px-6 2xl:px-0 flex justify-center items-center 2xl:mx-auto 2xl:container">
<!--- more free and premium Tailwind CSS components at https://tailwinduikit.com/ --->
            <div class="flex flex-col justify-start items-start w-full space-y-9">
                <div class="flex justify-start flex-col items-start space-y-2">
                    <button class="flex flex-row items-center text-gray-600 dark:text-white hover:text-gray-500 space-x-1">
                        <svg class="fill-stroke" width="14" height="14" viewBox="0 0 14 14" fill="none" xmlns="http://www.w3.org/2000/svg">
                            <path d="M2.91681 7H11.0835" stroke="currentColor" stroke-width="0.666667" stroke-linecap="round" stroke-linejoin="round" />
                            <path d="M2.91681 7L5.25014 9.33333" stroke="currentColor" stroke-width="0.666667" stroke-linecap="round" stroke-linejoin="round" />
                            <path d="M2.91681 7.00002L5.25014 4.66669" stroke="currentColor" stroke-width="0.666667" stroke-linecap="round" stroke-linejoin="round" />
                        </svg>
                        <p class="text-sm leading-none">Back</p>
                    </button>
                    <p class="text-3xl lg:text-4xl font-semibold leading-7 lg:leading-9 text-gray-800 dark:text-gray-50">Checkout</p>
                    <p class="text-base leading-normal sm:leading-4 text-gray-600 dark:text-white">Home > Electronics > Headphones > Cart > Checkout</p>
                </div>

                <div class="flex flex-col xl:flex-row justify-center xl:justify-between space-y-6 xl:space-y-0 xl:space-x-6 w-full">
                    <div class="xl:w-3/5 flex flex-col sm:flex-row xl:flex-col justify-center items-center bg-gray-100 dark:bg-gray-800 py-7 sm:py-0 xl:py-10 px-10 xl:w-full">
                        <div class="flex flex-col justify-start items-start w-full space-y-4">
                            <p class="text-xl md:text-2xl leading-normal text-gray-800 dark:text-gray-50">Logitech K251</p>
                            <p class="text-base font-semibold leading-none text-gray-600 dark:text-white">$520.00</p>
                        </div>
                        <div class="mt-6 sm:mt-0 xl:my-10 xl:px-20 w-52 sm:w-96 xl:w-auto">
                            <img src="https://i.ibb.co/0GFzTP4/Rectangle-131.png" alt="headphones" />
                        </div>
                    </div>

                    <div class="p-8 bg-gray-100 dark:bg-gray-800 flex flex-col lg:w-full xl:w-3/5">
                        <button class="border border-transparent hover:border-gray-300 bg-gray-900 dark:bg-white dark:hover:bg-gray-900 dark:hover:border-gray-900 dark:text-gray-900 dark:hover:text-white hover:bg-white text-white hover:text-gray-900 flex flex-row justify-center items-center space-x-2 py-4 rounded w-full">
                            <div>
                                <svg class="fill-current" width="16" height="16" viewBox="0 0 16 16" fill="none" xmlns="http://www.w3.org/2000/svg">
                                    <path
                                        d="M10.9099 4.27692C9.6499 4.27692 9.1174 4.87817 8.2399 4.87817C7.34021 4.87817 6.65396 4.28129 5.56208 4.28129C4.49333 4.28129 3.35365 4.93379 2.6299 6.04535C1.61365 7.61285 1.78615 10.565 3.43208 13.08C4.02083 13.9804 4.80708 14.99 5.83833 15.001H5.85708C6.75333 15.001 7.01958 14.4141 8.25302 14.4072H8.27177C9.48677 14.4072 9.73052 14.9975 10.623 14.9975H10.6418C11.673 14.9866 12.5015 13.8679 13.0902 12.971C13.514 12.326 13.6715 12.0022 13.9965 11.2725C11.6155 10.3688 11.233 6.99348 13.5877 5.69942C12.869 4.79942 11.859 4.27817 10.9068 4.27817L10.9099 4.27692Z"
                                        fill="currentColor"
                                    />
                                    <path d="M10.6338 1C9.88379 1.05094 9.00879 1.52844 8.49629 2.15188C8.03129 2.71688 7.64879 3.555 7.79879 4.36781H7.85879C8.65754 4.36781 9.47504 3.88688 9.95254 3.27063C10.4125 2.68406 10.7613 1.85281 10.6338 1V1Z" fill="currentColor" />
                                </svg>
                            </div>
                            <div>
                                <p class="text-base leading-4">Pay</p>
                            </div>
                        </button>

                        <div class="flex flex-row justify-center items-center mt-6">
                            <hr class="border w-full" />
                            <p class="flex flex-shrink-0 px-4 text-base leading-4 text-gray-600 dark:text-white">or pay with card</p>
                            <hr class="border w-full" />
                        </div>

                        <div class="mt-8">
                            <input class="border border-gray-300 p-4 rounded w-full text-base leading-4 placeholder-gray-600 text-gray-600" type="email" name="" id="" placeholder="Email" />
                        </div>

                        <label class="mt-8 text-base leading-4 text-gray-800 dark:text-gray-50">Card details</label>
                        <div class="mt-2 flex-col">
                            <div>
                                <input class="border rounded-tl rounded-tr border-gray-300 p-4 w-full text-base leading-4 placeholder-gray-600 text-gray-600" type="email" name="" id="" placeholder="0000 1234 6549 15151" />
                            </div>
                            <div class="flex-row flex">
                                <input class="border rounded-bl border-gray-300 p-4 w-full text-base leading-4 placeholder-gray-600 text-gray-600" type="email" name="" id="" placeholder="MM/YY" />
                                <input class="border rounded-br border-gray-300 p-4 w-full text-base leading-4 placeholder-gray-600 text-gray-600" type="email" name="" id="" placeholder="CVC" />
                            </div>
                        </div>

                        <label class="mt-8 text-base leading-4 text-gray-800 dark:text-gray-50">Name on card</label>
                        <div class="mt-2 flex-col">
                            <div>
                                <input class="border rounded border-gray-300 p-4 w-full text-base leading-4 placeholder-gray-600 text-gray-600" type="email" name="" id="" placeholder="Name on card" />
                            </div>
                        </div>

                        <label class="mt-8 text-base leading-4 text-gray-800 dark:text-gray-50">Country or region</label>
                        <div class="mt-2 flex-col">
                            <div class="relative">
                                <button id="changetext" class="text-left border rounded-tr rounded-tl border-gray-300 p-4 w-full text-base leading-4 placeholder-gray-600 text-gray-600 bg-white" type="email" name="" id="">United States</button>
                                <svg onclick="showMenu(true)" id="closeIcon" class="cursor-pointer absolute top-4 right-4" width="16" height="16" viewBox="0 0 16 16" fill="none" xmlns="http://www.w3.org/2000/svg">
                                    <path d="M3.5 5.75L8 10.25L12.5 5.75" stroke="#27272A" stroke-linecap="round" stroke-linejoin="round" />
                                </svg>
                                <svg onclick="showMenu(true)" id="openIcon" class="cursor-pointer hidden transform rotate-180 absolute top-4 right-4" width="16" height="16" viewBox="0 0 16 16" fill="none" xmlns="http://www.w3.org/2000/svg">
                                    <path d="M3.5 5.75L8 10.25L12.5 5.75" stroke="#27272A" stroke-linecap="round" stroke-linejoin="round" />
                                </svg>
                                <div id="dropdown" class="mt-1 hidden absolute z-10 w-full flex bg-gray-50 justify-start flex-col text-gray-600">
                                    <div onclick="changeText('China')" class="cursor-pointer hover:bg-gray-800 hover:text-white px-4 py-2">China</div>
                                    <div onclick="changeText('Russia')" class="cursor-pointer hover:bg-gray-800 hover:text-white px-4 py-2">Russia</div>
                                    <div onclick="changeText('UK')" class="cursor-pointer hover:bg-gray-800 hover:text-white px-4 py-2">UK</div>
                                </div>
                            </div>
                            <input class="border rounded-bl rounded-br border-gray-300 p-4 w-full text-base leading-4 placeholder-gray-600 text-gray-600" type="text" name="" id="" placeholder="ZIP" />
                        </div>

                        <button class="mt-8 border border-transparent hover:border-gray-300 dark:bg-white dark:hover:bg-gray-900 dark:text-gray-900 dark:hover:text-white dark:border-transparent bg-gray-900 hover:bg-white text-white hover:text-gray-900 flex justify-center items-center py-4 rounded w-full">
                            <div>
                                <p class="text-base leading-4">Pay </p>
                            </div>
                        </button>
                    </div>
                </div>
            </div>
        </div>
    </div>
    <script>let closeIcon = document.getElementById("closeIcon");
let openIcon = document.getElementById("openIcon");
let dropdown = document.getElementById("dropdown");
let text = document.getElementById("changetext");
// more free and premium Tailwind CSS components at https://tailwinduikit.com/
const showMenu = (flag) => {
  if (flag) {
    closeIcon.classList.toggle("hidden");
    openIcon.classList.toggle("hidden");
    dropdown.classList.toggle("hidden");
  } else {
    closeIcon.classList.toggle("hidden");
    openIcon.classList.toggle("hidden");
    dropdown.classList.toggle("hidden");
  }
};

const changeText = (country) => {
  text.innerHTML = country;
  closeIcon.classList.toggle("hidden");
  openIcon.classList.toggle("hidden");
  dropdown.classList.toggle("hidden");
};
</script>
How to create a Free Tailwind CSS Checkouts Component with Tailwind CSS?
Creating a Free Tailwind CSS Checkouts Component with Tailwind CSS is easy. Here are the steps:
Step 1: Set up your development environment
To get started, you will need to set up your development environment. You will need a text editor, a web browser, and a local web server.
Step 2: Create a new HTML file
Next, create a new HTML file and add the basic structure of an HTML document. You will also need to link to the Tailwind CSS stylesheet.
<!DOCTYPE html>
<html lang="en">
<head>
    <meta charset="UTF-8">
    <title>Free Tailwind CSS Checkouts Component</title>
    <link rel="stylesheet" href="https://cdn.jsdelivr.net/npm/[email protected]/dist/tailwind.min.css">
</head>
<body>

</body>
</html>
Step 3: Add the Free Tailwind CSS Checkouts Component
Next, add the Free Tailwind CSS Checkouts Component to your HTML file. You can copy and paste the code from the GitHub repository.
<div class="bg-white shadow-md rounded px-8 pt-6 pb-8 mb-4 flex flex-col my-2">
    <div class="-mx-3 md:flex mb-6">
        <div class="md:w-1/2 px-3 mb-6 md:mb-0">
            <label class="block uppercase tracking-wide text-gray-700 text-xs font-bold mb-2" for="grid-first-name">
                First Name
            </label>
            <input class="appearance-none block w-full bg-gray-200 text-gray-700 border border-gray-200 rounded py-3 px-4 mb-3 leading-tight focus:outline-none focus:bg-white" id="grid-first-name" type="text" placeholder="Jane">
        </div>
        <div class="md:w-1/2 px-3">
            <label class="block uppercase tracking-wide text-gray-700 text-xs font-bold mb-2" for="grid-last-name">
                Last Name
            </label>
            <input class="appearance-none block w-full bg-gray-200 text-gray-700 border border-gray-200 rounded py-3 px-4 leading-tight focus:outline-none focus:bg-white focus:border-gray-500" id="grid-last-name" type="text" placeholder="Doe">
        </div>
    </div>
    <div class="-mx-3 md:flex mb-6">
        <div class="md:w-full px-3">
            <label class="block uppercase tracking-wide text-gray-700 text-xs font-bold mb-2" for="grid-password">
                Password
            </label>
            <input class="appearance-none block w-full bg-gray-200 text-gray-700 border border-gray-200 rounded py-3 px-4 mb-3 leading-tight focus:outline-none focus:bg-white focus:border-gray-500" id="grid-password" type="password" placeholder="******************">
            <p class="text-gray-600 text-xs italic">Make it as long and as crazy as you'd like</p>
        </div>
    </div>
    <div class="-mx-3 md:flex mb-6">
        <div class="md:w-full px-3">
            <label class="block uppercase tracking-wide text-gray-700 text-xs font-bold mb-2" for="grid-password">
                Confirm Password
            </label>
            <input class="appearance-none block w-full bg-gray-200 text-gray-700 border border-gray-200 rounded py-3 px-4 mb-3 leading-tight focus:outline-none focus:bg-white focus:border-gray-500" id="grid-password" type="password" placeholder="******************">
        </div>
    </div>
    <div class="-mx-3 md:flex mb-6">
        <div class="md:w-full px-3">
            <label class="block uppercase tracking-wide text-gray-700 text-xs font-bold mb-2" for="grid-password">
                Email
            </label>
            <input class="appearance-none block w-full bg-gray-200 text-gray-700 border border-gray-200 rounded py-3 px-4 mb-3 leading-tight focus:outline-none focus:bg-white focus:border-gray-500" id="grid-password" type="email" placeholder="[email protected]">
        </div>
    </div>
    <div class="-mx-3 md:flex mb-6">
        <div class="md:w-full px-3">
            <label class="block uppercase tracking-wide text-gray-700 text-xs font-bold mb-2" for="grid-password">
                Phone Number
            </label>
            <input class="appearance-none block w-full bg-gray-200 text-gray-700 border border-gray-200 rounded py-3 px-4 mb-3 leading-tight focus:outline-none focus:bg-white focus:border-gray-500" id="grid-password" type="tel" placeholder="(123) 456-7890">
        </div>
    </div>
    <div class="-mx-3 md:flex mb-2">
        <div class="md:w-full px-3">
            <button class="bg-blue-500 hover:bg-blue-700 text-white font-bold py-2 px-4 rounded focus:outline-none focus:shadow-outline" type="button">
                Sign Up
            </button>
        </div>
    </div>
</div>
Step 4: Customize the component
Finally, customize the component to match your website's design. You can change the colors, fonts, and layout using Tailwind CSS classes.
Conclusion
Creating a Free Tailwind CSS Checkouts Component with Tailwind CSS is an easy and effective way to create a custom user interface for an e-commerce website. By using pre-defined CSS classes, you can create responsive and scalable designs quickly and easily. With the Free Tailwind CSS Checkouts Component, you can create a checkout page that is easy to use and customize.