- Published on
Best Ways To Build A Form With Tailwind CSS
- What is Tailwind CSS?
- The description of form UI component
- Why use Tailwind CSS to create a form UI component?
- The preview of form UI component
- The source code of form UI component
- How to create a form with Tailwind CSS?
- Conclusion
As a FrontEnd technology blogger, it is important to keep up with the latest trends in web development. One of the most popular CSS frameworks today is Tailwind CSS. It is a utility-first CSS framework that allows developers to easily create responsive and customizable UI components. In this article, we will discuss the best ways to build a form with Tailwind CSS.
What is Tailwind CSS?
Tailwind CSS is a popular CSS framework that allows developers to easily create responsive and customizable UI components. It is a utility-first CSS framework, which means that it provides a set of pre-defined CSS classes that can be used to style HTML elements. These classes can be combined to create complex styles without having to write custom CSS.
The description of form UI component
A form UI component is an essential part of any website or web application. It allows users to input information and interact with the website. A form usually consists of input fields, labels, buttons, and other UI elements. Creating a form UI component can be a challenging task, especially if you want it to be responsive and customizable.
Why use Tailwind CSS to create a form UI component?
Tailwind CSS provides a set of pre-defined CSS classes that can be used to create a form UI component quickly and easily. These classes are designed to be responsive and customizable, which means that you can create a form that looks great on any device and can be customized to match your website's design.
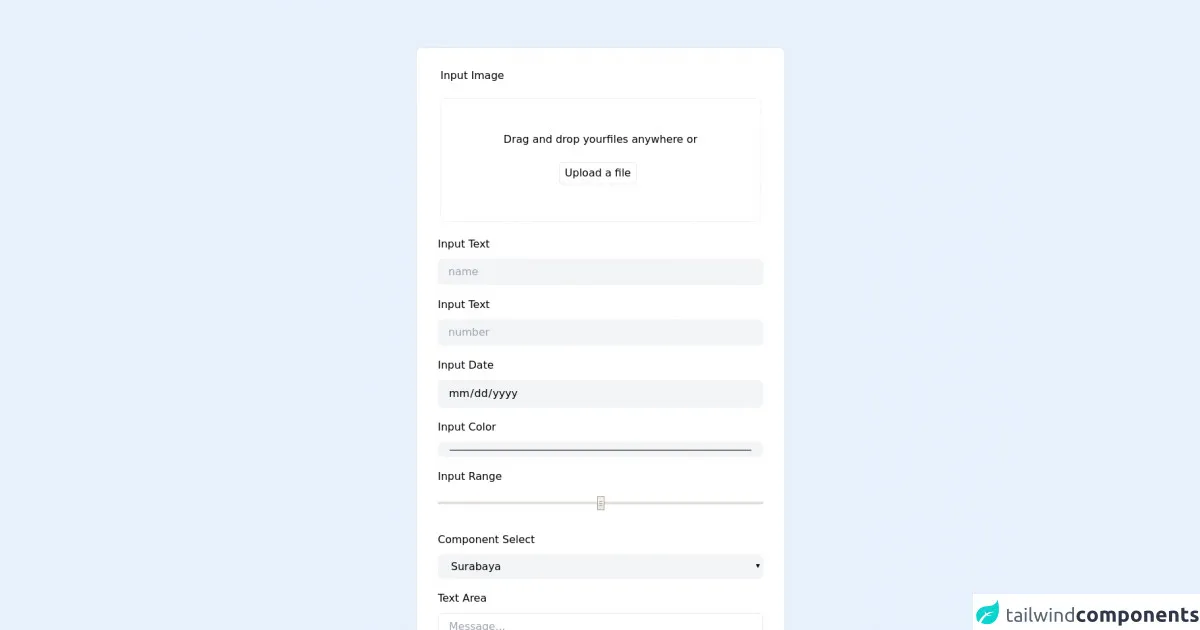
The preview of form UI component
To create a form UI component with Tailwind CSS, we can use the following classes:
form: This class is used to create a container for the form.form-group: This class is used to create a group of form elements.form-label: This class is used to create a label for the form element.form-input: This class is used to create an input field for the form element.form-textarea: This class is used to create a textarea for the form element.form-select: This class is used to create a select field for the form element.form-checkbox: This class is used to create a checkbox for the form element.form-radio: This class is used to create a radio button for the form element.form-button: This class is used to create a button for the form element.
Free download of the form's source code
The source code of form UI component
To create a form UI component with Tailwind CSS, we can use the following HTML code:
<div class="container items-center px-5 py-12 lg:px-20">
  <form class="flex flex-col w-full p-10 px-8 pt-6 mx-auto my-6 mb-4 transition duration-500 ease-in-out transform bg-white border rounded-lg lg:w-1/2 ">
    <section class="flex flex-col w-full h-full p-1 overflow-auto">
      <label for="name" class="text-base leading-7 text-blueGray-500 mb-5">Input Image</label>
      <header class="flex flex-col items-center justify-center py-12 text-base text-blueGray-500 transition duration-500 ease-in-out transform bg-white border border-dashed rounded-lg focus:border-blue-500 focus:outline-none focus:shadow-outline focus:ring-2 ring-offset-current ring-offset-2">
        <p class="flex flex-wrap justify-center mb-3 text-base leading-7 text-blueGray-500">
          <span>Drag and drop your</span> <span>files anywhere or</span>
        </p>
        <button class="w-auto px-2 py-1 my-2 mr-2 text-blueGray-500 transition duration-500 ease-in-out transform border rounded-md hover:text-blueGray-600 text-md focus:shadow-outline focus:outline-none focus:ring-2 ring-offset-current ring-offset-2 hover:bg-gray-100"> Upload a file </button>
      </header>
    </section>
    <div class="relative pt-4">
      <label for="name" class="text-base leading-7 text-blueGray-500">Input Text</label>
      <input type="text" id="name" name="name" placeholder="name" class="w-full px-4 py-2 mt-2 mr-4 text-base text-black transition duration-500 ease-in-out transform rounded-lg bg-gray-100 focus:border-blueGray-500 focus:bg-white focus:outline-none focus:shadow-outline focus:ring-2 ring-offset-current ring-offset-2">
    </div>
    <div class="relative pt-4">
      <label for="name" class="text-base leading-7 text-blueGray-500">Input Text</label>
      <input type="number" id="number" name="number" placeholder="number" class="w-full px-4 py-2 mt-2 mr-4 text-base text-black transition duration-500 ease-in-out transform rounded-lg bg-gray-100 focus:border-blueGray-500 focus:bg-white focus:outline-none focus:shadow-outline focus:ring-2 ring-offset-current ring-offset-2">
    </div>
    <div class="relative pt-4">
      <label for="name" class="text-base leading-7 text-blueGray-500">Input Date</label>
      <input type="date" id="date" name="date" placeholder="name" class="w-full px-4 py-2 mt-2 mr-4 text-base text-black transition duration-500 ease-in-out transform rounded-lg bg-gray-100 focus:border-blueGray-500 focus:bg-white focus:outline-none focus:shadow-outline focus:ring-2 ring-offset-current ring-offset-2">
    </div>
    <div class="relative pt-4">
      <label for="name" class="text-base leading-7 text-blueGray-500">Input Color</label>
      <input type="color" id="color" name="color" placeholder="name" class="w-full px-4 py-2 mt-2 mr-4 text-base text-black transition duration-500 ease-in-out transform rounded-lg bg-gray-100 focus:border-blueGray-500 focus:bg-white focus:outline-none focus:shadow-outline focus:ring-2 ring-offset-current ring-offset-2">
    </div>
    <div class="relative pt-4">
      <label for="name" class="text-base leading-7 text-blueGray-500">Input Range</label>
      <input type="range" id="range" name="range" placeholder="name" class="w-full px-0 py-2 mt-2 mr-4 text-base text-black transition duration-500 ease-in-out transform rounded-lg bg-gray-100 focus:border-blueGray-500 focus:bg-white focus:outline-none focus:shadow-outline focus:ring-2 ring-offset-current ring-offset-2">
    </div>
    <div class="relative mt-4">
      <label for="name" class="text-base leading-7 text-blueGray-500">Component Select</label>
      <select class="w-full px-4 py-2 mt-2 text-base text-black transition duration-500 ease-in-out transform rounded-lg bg-gray-100 focus:border-blueGray-500 focus:bg-white focus:outline-none focus:shadow-outline focus:ring-2 ring-offset-current ring-offset-2">
        <option>Surabaya</option>
        <option>Bandung</option>
        <option>jakarta</option>
      </select>
    </div>
    <div class="flex flex-wrap mt-4 mb-6 -mx-3">
      <div class="w-full px-3">
        <label class="text-base leading-7 text-blueGray-500" for="description">Text Area </label>
        <textarea class="w-full h-32 px-4 py-2 mt-2 text-base text-blueGray-500 transition duration-500 ease-in-out transform bg-white border rounded-lg focus:border-blue-500 focus:outline-none focus:shadow-outline focus:ring-2 ring-offset-current ring-offset-2 apearance-none autoexpand" id="description" type="text" name="description" placeholder="Message..." required=""></textarea>
      </div>
    </div>
    <div class="flex">
      <label class="flex items-center">
        <input type="checkbox" class="form-checkbox ">
        <span class="ml-2 text-blueGray-500">checkbox </span>
      </label>
    </div>
    <div class="flex items-center w-full pt-4 mb-4">
      <button class="w-full py-3 text-base text-white transition duration-500 ease-in-out transform bg-blue-600 border-blue-600 rounded-md focus:shadow-outline focus:outline-none focus:ring-2 ring-offset-current ring-offset-2 hover:bg-blue-800 "> Button </button>
    </div>
    <hr class="my-4 border-gray-200">
    <span class="px-4 py-1 mx-auto -mt-8 text-xs text-black transition duration-500 ease-in-out transform bg-gray-200 rounded-lg">Or continue with </span>
    <div class="inline-flex items-center justify-between w-full pt-8 ">
      <button class="w-auto px-8 py-2 mr-2 text-base text-black transition duration-500 ease-in-out transform rounded-lg bg-gray-100 hover:bg-blueGray-200 focus:shadow-outline focus:outline-none focus:ring-2 ring-offset-current ring-offset-2 focus:border-blueGray-700 focus:bg-blueGray-800 ">
        <svg xmlns="http://www.w3.org/2000/svg" class="icon icon-tabler icon-tabler-brand-github" width="20" height="20" viewBox="0 0 24 24" stroke-width="1.5" stroke="currentColor" fill="none" stroke-linecap="round" stroke-linejoin="round">
          <path stroke="none" d="M0 0h24v24H0z" fill="none"></path>
          <path d="M9 19c-4.3 1.4 -4.3 -2.5 -6 -3m12 5v-3.5c0 -1 .1 -1.4 -.5 -2c2.8 -.3 5.5 -1.4 5.5 -6a4.6 4.6 0 0 0 -1.3 -3.2a4.2 4.2 0 0 0 -.1 -3.2s-1.1 -.3 -3.5 1.3a12.3 12.3 0 0 0 -6.2 0c-2.4 -1.6 -3.5 -1.3 -3.5 -1.3a4.2 4.2 0 0 0 -.1 3.2a4.6 4.6 0 0 0 -1.3 3.2c0 4.6 2.7 5.7 5.5 6c-.6 .6 -.6 1.2 -.5 2v3.5"></path>
        </svg>
      </button>
      <button class="w-auto px-8 py-2 mr-2 text-base text-black transition duration-500 ease-in-out transform rounded-lg bg-gray-100 hover:bg-blueGray-200 focus:shadow-outline focus:outline-none focus:ring-2 ring-offset-current ring-offset-2 focus:border-blueGray-700 focus:bg-blueGray-800 ">
        <svg xmlns="http://www.w3.org/2000/svg" class="icon icon-tabler icon-tabler-brand-gitlab" width="20" height="20" viewBox="0 0 24 24" stroke-width="1.5" stroke="currentColor" fill="none" stroke-linecap="round" stroke-linejoin="round">
          <path stroke="none" d="M0 0h24v24H0z" fill="none"></path>
          <path d="M21 14l-9 7l-9 -7l3 -11l3 7h6l3 -7z"></path>
        </svg>
      </button>
      <button class="w-auto px-8 py-2 mr-2 text-base text-black transition duration-500 ease-in-out transform rounded-lg bg-gray-100 hover:bg-blueGray-200 focus:shadow-outline focus:outline-none focus:ring-2 ring-offset-current ring-offset-2 focus:border-blueGray-700 focus:bg-blueGray-800 ">
        <svg xmlns="http://www.w3.org/2000/svg" class="icon icon-tabler icon-tabler-brand-twitter" width="20" height="20" viewBox="0 0 24 24" stroke-width="1.5" stroke="currentColor" fill="none" stroke-linecap="round" stroke-linejoin="round">
          <path stroke="none" d="M0 0h24v24H0z" fill="none"></path>
          <path d="M22 4.01c-1 .49 -1.98 .689 -3 .99c-1.121 -1.265 -2.783 -1.335 -4.38 -.737s-2.643 2.06 -2.62 3.737v1c-3.245 .083 -6.135 -1.395 -8 -4c0 0 -4.182 7.433 4 11c-1.872 1.247 -3.739 2.088 -6 2c3.308 1.803 6.913 2.423 10.034 1.517c3.58 -1.04 6.522 -3.723 7.651 -7.742a13.84 13.84 0 0 0 .497 -3.753c-.002 -.249 1.51 -2.772 1.818 -4.013z"></path>
        </svg>
      </button>
    </div>
  </form>
</div>
How to create a form with Tailwind CSS?
To create a form with Tailwind CSS, we can follow these steps:
- Create a container for the form using the
formclass. - Create a group of form elements using the
form-groupclass. - Create a label for each form element using the
form-labelclass. - Create an input field, textarea, select field, checkbox, or radio button for each form element using the appropriate class (
form-input,form-textarea,form-select,form-checkbox, orform-radio). - Create a button for the form using the
form-buttonclass.
Here's an example of a simple form created with Tailwind CSS:
<form class="max-w-lg mx-auto">
  <div class="form-group">
    <label class="form-label" for="name">Name</label>
    <input class="form-input" type="text" id="name" name="name" placeholder="John Doe">
  </div>
  <div class="form-group">
    <label class="form-label" for="email">Email</label>
    <input class="form-input" type="email" id="email" name="email" placeholder="[email protected]">
  </div>
  <div class="form-group">
    <label class="form-label" for="message">Message</label>
    <textarea class="form-textarea" id="message" name="message" rows="5" placeholder="Enter your message"></textarea>
  </div>
  <div class="form-group">
    <label class="form-label" for="gender">Gender</label>
    <select class="form-select" id="gender" name="gender">
      <option value="male">Male</option>
      <option value="female">Female</option>
      <option value="other">Other</option>
    </select>
  </div>
  <div class="form-group">
    <div class="form-checkbox">
      <input type="checkbox" id="subscribe" name="subscribe">
      <label for="subscribe">Subscribe to our newsletter</label>
    </div>
  </div>
  <div class="form-group">
    <div class="form-radio">
      <input type="radio" id="option1" name="option" value="1">
      <label for="option1">Option 1</label>
    </div>
    <div class="form-radio">
      <input type="radio" id="option2" name="option" value="2">
      <label for="option2">Option 2</label>
    </div>
  </div>
  <div class="form-group">
    <button class="form-button bg-blue-500 hover:bg-blue-700 text-white font-bold py-2 px-4 rounded">
      Submit
    </button>
  </div>
</form>
Conclusion
In conclusion, Tailwind CSS is a great choice for creating a form UI component. It provides a set of pre-defined CSS classes that can be used to create a responsive and customizable form quickly and easily. By following the steps outlined in this article, you can create a form that looks great on any device and can be customized to match your website's design.