- Published on
The 5 Really Obvious Ways To Create A Footer With Tailwind CSS Better That You Ever Did
- What is Tailwind CSS?
- The description of Footer UI component
- Why use Tailwind CSS to create a Footer UI component?
- The preview of Footer UI component
- The source code of Footer UI component
- How to create a Footer with Tailwind CSS?
- Step 1: Add the necessary HTML code
- Step 2: Add the necessary CSS classes
- Step 3: Customize the footer
- Conclusion
If you're a front-end developer, you're probably familiar with Tailwind CSS. It's a utility-first CSS framework that makes it easy to create beautiful, responsive web designs. In this article, we'll show you how to use Tailwind CSS to create a footer UI component that looks great and is easy to implement.
What is Tailwind CSS?
Tailwind CSS is a utility-first CSS framework that makes it easy to create beautiful, responsive web designs. It provides a set of pre-defined CSS classes that you can use to style your HTML elements. Instead of writing custom CSS, you can use these classes to quickly style your elements.
The description of Footer UI component
The footer is an important UI component of any website. It's the section that appears at the bottom of the page and usually contains information about the website, copyright information, and links to other pages. A well-designed footer can make your website look more professional and improve the user experience.
Why use Tailwind CSS to create a Footer UI component?
Tailwind CSS makes it easy to create a footer UI component that looks great and is easy to implement. With Tailwind CSS, you can use pre-defined CSS classes to style your footer elements, which saves you time and effort. You don't have to write custom CSS, which can be time-consuming and error-prone.
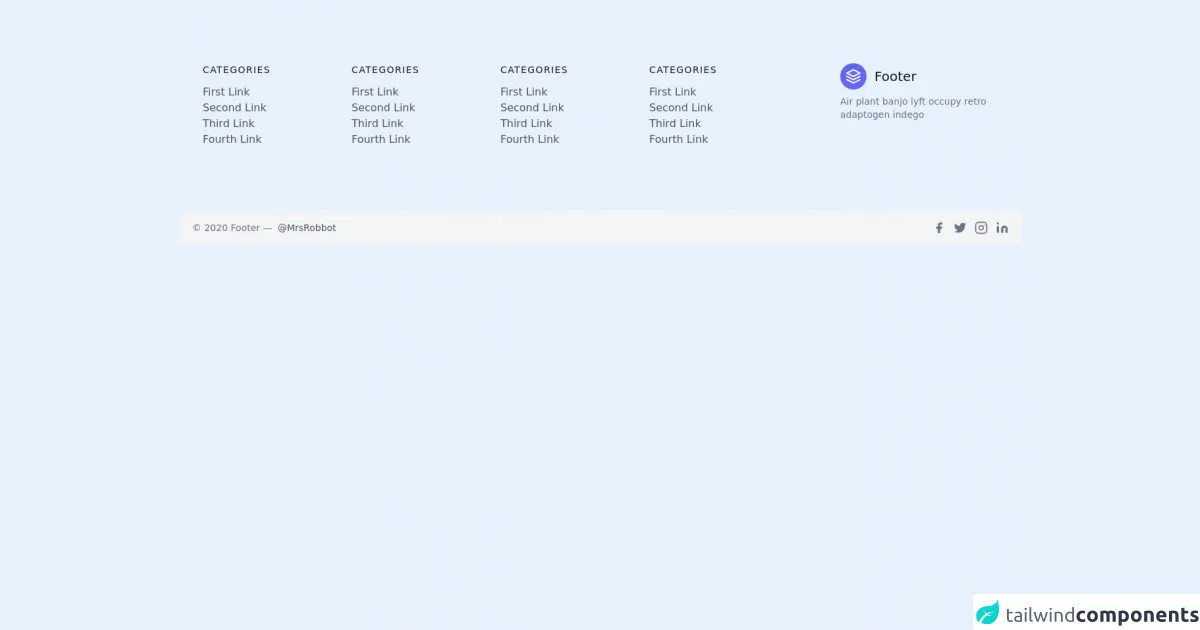
The preview of Footer UI component
To create a footer UI component with Tailwind CSS, you can use the following HTML code:
<footer class="bg-gray-800 py-4">
<div class="container mx-auto flex justify-between items-center px-4">
<div class="text-gray-400">© 2021 My Website</div>
<div>
<a href="#" class="text-gray-400 hover:text-white px-3">Home</a>
<a href="#" class="text-gray-400 hover:text-white px-3">About</a>
<a href="#" class="text-gray-400 hover:text-white px-3">Contact</a>
</div>
</div>
</footer>
Free download of the Footer's source code
The source code of Footer UI component
To create a footer UI component with Tailwind CSS, you can use the following HTML and CSS code:
<footer class="bg-gray-800 py-4">
<div class="container mx-auto flex justify-between items-center px-4">
<div class="text-gray-400">© 2021 My Website</div>
<div>
<a href="#" class="text-gray-400 hover:text-white px-3">Home</a>
<a href="#" class="text-gray-400 hover:text-white px-3">About</a>
<a href="#" class="text-gray-400 hover:text-white px-3">Contact</a>
</div>
</div>
</footer>
<footer class="text-gray-600 body-font">
  <div class="container px-5 py-24 mx-auto flex md:items-center lg:items-start md:flex-row md:flex-nowrap flex-wrap flex-col">
    <div class="w-64 flex-shrink-0 md:mx-0 mx-auto text-center md:text-left md:mt-0 mt-10">
      <a class="flex title-font font-medium items-center md:justify-start justify-center text-gray-900">
        <svg xmlns="http://www.w3.org/2000/svg" fill="none" stroke="currentColor" stroke-linecap="round" stroke-linejoin="round" stroke-width="2" class="w-10 h-10 text-white p-2 bg-indigo-500 rounded-full" viewBox="0 0 24 24">
          <path d="M12 2L2 7l10 5 10-5-10-5zM2 17l10 5 10-5M2 12l10 5 10-5"></path>
        </svg>
        <span class="ml-3 text-xl">Footer</span>
      </a>
      <p class="mt-2 text-sm text-gray-500">Air plant banjo lyft occupy retro adaptogen indego</p>
    </div>
    <div class="flex-grow flex flex-wrap md:pr-20 -mb-10 md:text-left text-center order-first">
      <div class="lg:w-1/4 md:w-1/2 w-full px-4">
        <h2 class="title-font font-medium text-gray-900 tracking-widest text-sm mb-3">CATEGORIES</h2>
        <nav class="list-none mb-10">
          <li>
            <a class="text-gray-600 hover:text-gray-800">First Link</a>
          </li>
          <li>
            <a class="text-gray-600 hover:text-gray-800">Second Link</a>
          </li>
          <li>
            <a class="text-gray-600 hover:text-gray-800">Third Link</a>
          </li>
          <li>
            <a class="text-gray-600 hover:text-gray-800">Fourth Link</a>
          </li>
        </nav>
      </div>
    </div>
  </div>
  <div class="bg-gray-100">
    <div class="container mx-auto py-4 px-5 flex flex-wrap flex-col sm:flex-row">
      <p class="text-gray-500 text-sm text-center sm:text-left">© 2020 Footer —
        <a href="https://twitter.com/knyttneve" rel="noopener noreferrer" class="text-gray-600 ml-1" target="_blank">@MrsRobbot</a>
      </p>
      <span class="inline-flex sm:ml-auto sm:mt-0 mt-2 justify-center sm:justify-start">
        <a class="text-gray-500">
          <svg fill="currentColor" stroke-linecap="round" stroke-linejoin="round" stroke-width="2" class="w-5 h-5" viewBox="0 0 24 24">
            <path d="M18 2h-3a5 5 0 00-5 5v3H7v4h3v8h4v-8h3l1-4h-4V7a1 1 0 011-1h3z"></path>
          </svg>
        </a>
        <a class="ml-3 text-gray-500">
          <svg fill="currentColor" stroke-linecap="round" stroke-linejoin="round" stroke-width="2" class="w-5 h-5" viewBox="0 0 24 24">
            <path d="M23 3a10.9 10.9 0 01-3.14 1.53 4.48 4.48 0 00-7.86 3v1A10.66 10.66 0 013 4s-4 9 5 13a11.64 11.64 0 01-7 2c9 5 20 0 20-11.5a4.5 4.5 0 00-.08-.83A7.72 7.72 0 0023 3z"></path>
          </svg>
        </a>
        <a class="ml-3 text-gray-500">
          <svg fill="none" stroke="currentColor" stroke-linecap="round" stroke-linejoin="round" stroke-width="2" class="w-5 h-5" viewBox="0 0 24 24">
            <rect width="20" height="20" x="2" y="2" rx="5" ry="5"></rect>
            <path d="M16 11.37A4 4 0 1112.63 8 4 4 0 0116 11.37zm1.5-4.87h.01"></path>
          </svg>
        </a>
        <a class="ml-3 text-gray-500">
          <svg fill="currentColor" stroke="currentColor" stroke-linecap="round" stroke-linejoin="round" stroke-width="0" class="w-5 h-5" viewBox="0 0 24 24">
            <path stroke="none" d="M16 8a6 6 0 016 6v7h-4v-7a2 2 0 00-2-2 2 2 0 00-2 2v7h-4v-7a6 6 0 016-6zM2 9h4v12H2z"></path>
            <circle cx="4" cy="4" r="2" stroke="none"></circle>
          </svg>
        </a>
      </span>
    </div>
  </div>
</footer>
How to create a Footer with Tailwind CSS?
To create a footer with Tailwind CSS, you can follow these steps:
- Start by creating a new HTML file and adding the necessary HTML code for the footer.
- Add the necessary CSS classes to the HTML elements to style them using Tailwind CSS.
- Customize the footer to match the design of your website.
Let's take a closer look at each of these steps.
Step 1: Add the necessary HTML code
To create a footer with Tailwind CSS, you need to add the necessary HTML code to your web page. Here's an example of what the HTML code for a footer might look like:
<footer class="bg-gray-800 py-4">
<div class="container mx-auto flex justify-between items-center px-4">
<div class="text-gray-400">© 2021 My Website</div>
<div>
<a href="#" class="text-gray-400 hover:text-white px-3">Home</a>
<a href="#" class="text-gray-400 hover:text-white px-3">About</a>
<a href="#" class="text-gray-400 hover:text-white px-3">Contact</a>
</div>
</div>
</footer>
In this example, we've added a footer element with a dark gray background color (bg-gray-800) and a padding of 4 (py-4). Inside the footer, we've added a container element with a maximum width of mx-auto, a flex display, and justify-between and items-center classes to align the elements inside it. The container contains two div elements: one with the copyright information and another with links to other pages.
Step 2: Add the necessary CSS classes
Once you've added the necessary HTML code, you can start adding the necessary CSS classes to style the elements using Tailwind CSS. Here's an example of what the CSS code for a footer might look like:
.footer {
  background-color: #1a202c;
  padding: 1.5rem;
}

.footer-container {
  max-width: 1140px;
  margin: 0 auto;
  display: flex;
  justify-content: space-between;
  align-items: center;
}

.footer-links {
  display: flex;
  align-items: center;
}

.footer-links a {
  color: #a0aec0;
  margin-right: 1.5rem;
  transition: color 0.2s ease-in-out;
}

.footer-links a:hover {
  color: #fff;
}
In this example, we've added classes to the footer, container, and div elements to style them using Tailwind CSS. We've also added classes to the links to style them when the user hovers over them.
Step 3: Customize the footer
Finally, you can customize the footer to match the design of your website. You can change the background color, font size, font family, and other properties to match the design of your website.
Conclusion
In this article, we've shown you how to use Tailwind CSS to create a footer UI component that looks great and is easy to implement. With Tailwind CSS, you can use pre-defined CSS classes to style your footer elements, which saves you time and effort. You don't have to write custom CSS, which can be time-consuming and error-prone. By following the steps we've outlined, you can create a footer that matches the design of your website and improves the user experience.