- Published on
The 5 Really Obvious Ways To Create A Folder Options With Tailwind CSS Better That You Ever Did
- What is Tailwind CSS?
- The description of Folder Options UI component
- Why use Tailwind CSS to create a Folder Options UI component?
- The preview of Folder Options UI component
- The source code of Folder Options UI component
- How to create a Folder Options with Tailwind CSS?
- Step 1: Create the HTML structure
- Step 2: Style the HTML elements using Tailwind CSS
- Step 3: Add interactivity using JavaScript
- Conclusion
As a FrontEnd technology blogger, I am always looking for ways to improve my UI design skills. Recently, I discovered the power of Tailwind CSS and how it can help me create beautiful and functional UI components quickly and easily. In this article, I will show you how to create a Folder Options UI component using Tailwind CSS.
What is Tailwind CSS?
Tailwind CSS is a utility-first CSS framework that allows you to rapidly build custom user interfaces. It provides a set of pre-defined classes that you can use to style your HTML elements. With Tailwind CSS, you can create complex layouts and components without writing any custom CSS.
The description of Folder Options UI component
The Folder Options UI component is a common UI element that allows users to perform various actions on a folder. It typically includes options such as "Rename," "Delete," "Move," and "Copy." The Folder Options UI component is a crucial part of any file management system, and it should be easy to use and visually appealing.
Why use Tailwind CSS to create a Folder Options UI component?
Tailwind CSS provides a set of pre-defined classes that can help you create a Folder Options UI component quickly and easily. With Tailwind CSS, you can customize the appearance of your UI components without writing any custom CSS. This saves you time and effort, allowing you to focus on creating a functional and visually appealing UI component.
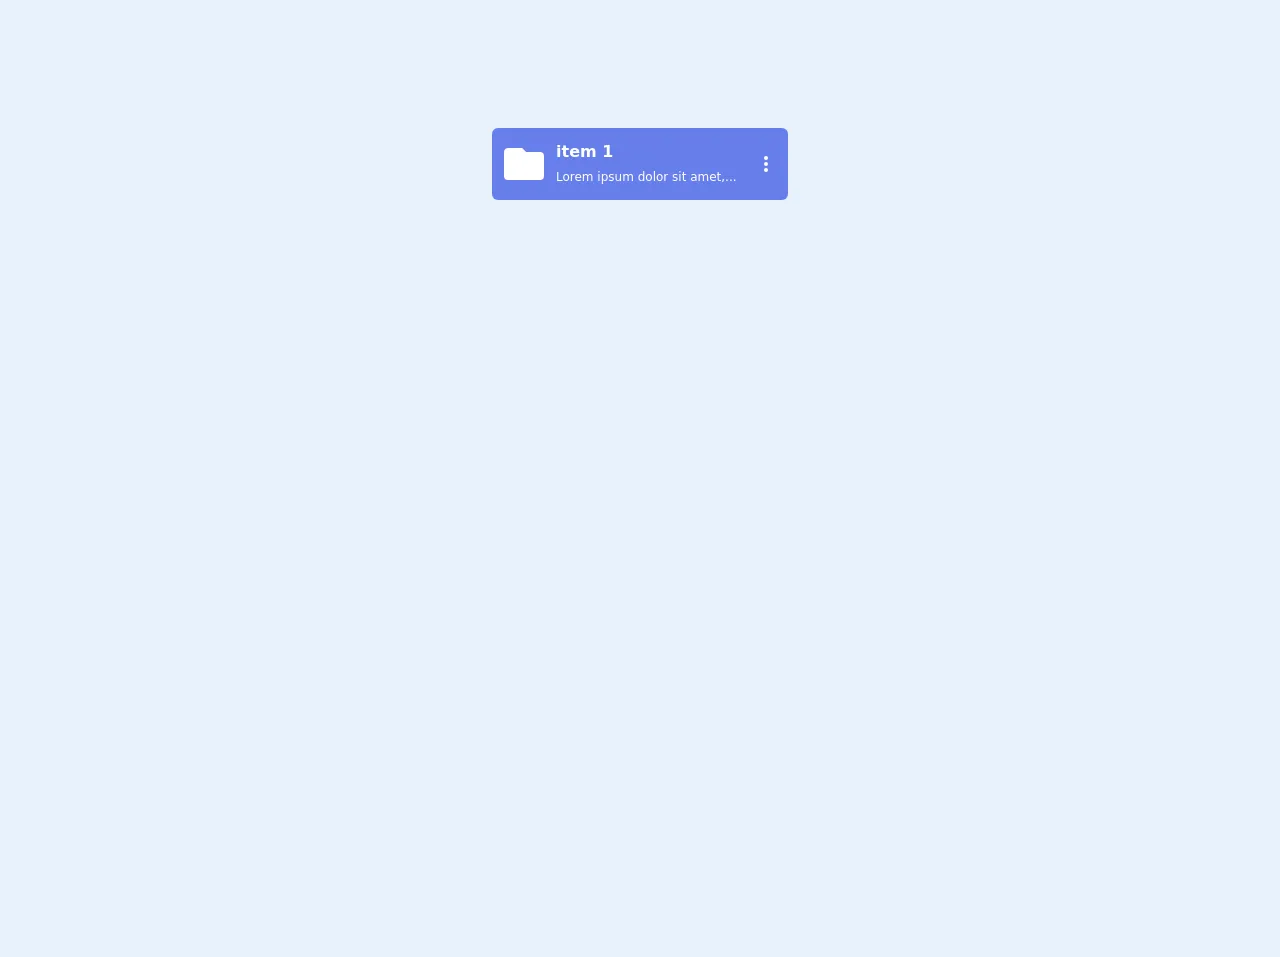
The preview of Folder Options UI component
The Folder Options UI component typically appears as a dropdown menu that appears when the user clicks on a folder. It includes options such as "Rename," "Delete," "Move," and "Copy." Here is a preview of what the Folder Options UI component looks like:
Free download of the Folder Options's source code
The source code of Folder Options UI component
To create a Folder Options UI component with Tailwind CSS, you will need to write some HTML and CSS code. Here is an example of what the code might look like:
<div class="my-16 py-16 h-screen">
  <script src="https://cdn.jsdelivr.net/gh/alpinejs/[email protected]/dist/alpine-ie11.min.js" defer></script>
    <div class="mx-auto  w-full md:w-1/2 lg:w-1/4 px-3 pb-3" x-data="{ open: false, color: false }" @keydown.escape="open = false" @click.away="open = false">
                    <div class="flex items-center bg-indigo-500 rounded-md p-3 text-white cursor-pointer transition duration-500 ease-in-out hover:shadow hover:bg-indigo-600">
                        <div>
                             <svg fill="currentColor" class="w-10 h-10" style="" xmlns="http://www.w3.org/2000/svg" viewBox="0 0 20 20"><path d="M0 4c0-1.1.9-2 2-2h7l2 2h7a2 2 0 0 1 2 2v10a2 2 0 0 1-2 2H2a2 2 0 0 1-2-2V4z"></path></svg>

                        </div>
                        <div class="px-3 mr-auto">
                            <h4 class="font-bold">item 1</h4>
                            <small class="text-xs">Lorem ipsum dolor sit amet,...</small>
                        </div>
                        <div class="relative">
                            <a href="javascript:;" @click="open = !open">
                                 <svg fill="currentColor" class="w-5 h-5" style="" xmlns="http://www.w3.org/2000/svg" viewBox="0 0 20 20"><path d="M10 12a2 2 0 1 1 0-4 2 2 0 0 1 0 4zm0-6a2 2 0 1 1 0-4 2 2 0 0 1 0 4zm0 12a2 2 0 1 1 0-4 2 2 0 0 1 0 4z"></path></svg>

                            </a>

                            <div x-show="open" x-transition:enter="transition ease-out duration-100" x-transition:enter-start="transform opacity-0 scale-95" x-transition:enter-end="transform opacity-100 scale-100" x-transition:leave="transition ease-in duration-75" x-transition:leave-start="transform opacity-100 scale-100" x-transition:leave-end="transform opacity-0 scale-95" class="options absolute bg-white text-gray-600 origin-top-right right-0 mt-2 w-56 rounded-md shadow-lg overflow-hidden">
                                <a href="javascript:;" class="flex py-3 px-2 text-sm font-bold hover:bg-gray-100 ">
                                    <span class="mr-auto">Edit</span>
                                     <svg viewBox="0 0 20 20" fill="currentColor" class="w-5 h-5" style="">
  <path d="M13.586 3.586a2 2 0 112.828 2.828l-.793.793-2.828-2.828.793-.793zM11.379 5.793L3 14.172V17h2.828l8.38-8.379-2.83-2.828z"></path>
</svg>

                                </a>
                                <a href="javascript:;" class="flex py-3 px-2 text-sm font-bold hover:bg-gray-100">
                                    <span class="mr-auto">Download</span>
                                     <svg viewBox="0 0 20 20" fill="currentColor" class="w-5 h-5" style="">
  <path fill-rule="evenodd" d="M3 17a1 1 0 011-1h12a1 1 0 110 2H4a1 1 0 01-1-1zm3.293-7.707a1 1 0 011.414 0L9 10.586V3a1 1 0 112 0v7.586l1.293-1.293a1 1 0 111.414 1.414l-3 3a1 1 0 01-1.414 0l-3-3a1 1 0 010-1.414z" clip-rule="evenodd"></path>
</svg>

                                </a>
                                <a href="javascript:;" class="flex py-3 px-2 text-sm font-bold hover:bg-gray-100" @click="color = !color">
                                    <span class="mr-auto">Change Color</span>
                                     <svg viewBox="0 0 20 20" fill="currentColor" class="w-5 h-5" style="">
  <path fill-rule="evenodd" d="M4 2a2 2 0 00-2 2v11a3 3 0 106 0V4a2 2 0 00-2-2H4zm1 14a1 1 0 100-2 1 1 0 000 2zm5-1.757l4.9-4.9a2 2 0 000-2.828L13.485 5.1a2 2 0 00-2.828 0L10 5.757v8.486zM16 18H9.071l6-6H16a2 2 0 012 2v2a2 2 0 01-2 2z" clip-rule="evenodd"></path>
</svg>

                                </a>
                                <div x-show="color" class="flex flex-wrap p-2" style="display: none;">
                                    <div class="w-1/5 h-8 hover:bg-gray-700 bg-gray-500"></div>
                                    <div class="w-1/5 h-8 hover:bg-blue-700 bg-blue-500"></div>
                                    <div class="w-1/5 h-8 hover:bg-red-700 bg-red-500"></div>
                                    <div class="w-1/5 h-8 hover:bg-orange-700 bg-orange-500"></div>
                                    <div class="w-1/5 h-8 hover:bg-yellow-700 bg-yellow-500"></div>
                                    <div class="w-1/5 h-8 hover:bg-green-700 bg-green-500"></div>
                                    <div class="w-1/5 h-8 hover:bg-teal-700 bg-teal-500"></div>
                                    <div class="w-1/5 h-8 hover:bg-indigo-700 bg-indigo-500"></div>
                                    <div class="w-1/5 h-8 hover:bg-purple-700 bg-purple-500"></div>
                                    <div class="w-1/5 h-8 hover:bg-pink-700 bg-pink-500"></div>
                                </div>
                                <a href="javascript:;" class="flex py-3 px-2 text-sm font-bold bg-red-400 text-white">
                                    <span class="mr-auto">Delete</span>
                                     <svg viewBox="0 0 20 20" fill="currentColor" class="w-5 h-5" style="">
  <path fill-rule="evenodd" d="M9 2a1 1 0 00-.894.553L7.382 4H4a1 1 0 000 2v10a2 2 0 002 2h8a2 2 0 002-2V6a1 1 0 100-2h-3.382l-.724-1.447A1 1 0 0011 2H9zM7 8a1 1 0 012 0v6a1 1 0 11-2 0V8zm5-1a1 1 0 00-1 1v6a1 1 0 102 0V8a1 1 0 00-1-1z" clip-rule="evenodd"></path>
</svg>

                                </a>
                            </div>
                        </div>
                    </div>
                </div>
</div>
How to create a Folder Options with Tailwind CSS?
Now that you understand the benefits of using Tailwind CSS to create a Folder Options UI component let's dive into the steps to create one.
Step 1: Create the HTML structure
The first step is to create the HTML structure for the Folder Options UI component. You can use a div element to create the container for the dropdown menu. Inside the container, you can create a list of options using ul and li elements.
<div class="relative">
  <button class="flex items-center">
    <svg class="w-4 h-4" viewBox="0 0 24 24">
      <path fill="currentColor" d="M6 6h12v2H6zm0 4h12v2H6zm0 4h12v2H6z" />
    </svg>
  </button>
  <ul class="absolute right-0 w-48 py-2 bg-white border rounded shadow-lg">
    <li class="px-4 py-2 hover:bg-gray-100">Rename</li>
    <li class="px-4 py-2 hover:bg-gray-100">Delete</li>
    <li class="px-4 py-2 hover:bg-gray-100">Move</li>
    <li class="px-4 py-2 hover:bg-gray-100">Copy</li>
  </ul>
</div>
In this example, we have created a container using the div element with the relative class. Inside the container, we have added a button with an SVG icon using the button element. We have also created a list of options using the ul and li elements.
Step 2: Style the HTML elements using Tailwind CSS
The next step is to style the HTML elements using Tailwind CSS. We can use pre-defined classes such as bg-white, border, rounded, shadow-lg, hover:bg-gray-100, px-4, and py-2 to style the container, list of options, and individual options.
<div class="relative">
  <button class="flex items-center">
    <svg class="w-4 h-4" viewBox="0 0 24 24">
      <path fill="currentColor" d="M6 6h12v2H6zm0 4h12v2H6zm0 4h12v2H6z" />
    </svg>
  </button>
  <ul class="absolute right-0 w-48 py-2 bg-white border rounded shadow-lg">
    <li class="px-4 py-2 hover:bg-gray-100">Rename</li>
    <li class="px-4 py-2 hover:bg-gray-100">Delete</li>
    <li class="px-4 py-2 hover:bg-gray-100">Move</li>
    <li class="px-4 py-2 hover:bg-gray-100">Copy</li>
  </ul>
</div>
In this example, we have added the bg-white, border, rounded, and shadow-lg classes to the container to give it a white background, a border, rounded corners, and a shadow effect. We have also added the hover:bg-gray-100, px-4, and py-2 classes to the list of options to give them a gray background on hover and some padding.
Step 3: Add interactivity using JavaScript
The final step is to add interactivity to the Folder Options UI component using JavaScript. We can use the click event to toggle the visibility of the dropdown menu.
<div class="relative">
  <button class="flex items-center">
    <svg class="w-4 h-4" viewBox="0 0 24 24">
      <path fill="currentColor" d="M6 6h12v2H6zm0 4h12v2H6zm0 4h12v2H6z" />
    </svg>
  </button>
  <ul class="absolute right-0 w-48 py-2 bg-white border rounded shadow-lg hidden">
    <li class="px-4 py-2 hover:bg-gray-100">Rename</li>
    <li class="px-4 py-2 hover:bg-gray-100">Delete</li>
    <li class="px-4 py-2 hover:bg-gray-100">Move</li>
    <li class="px-4 py-2 hover:bg-gray-100">Copy</li>
  </ul>
</div>
<script>
  const button = document.querySelector('button');
  const menu = document.querySelector('ul');
  button.addEventListener('click', () => {
    menu.classList.toggle('hidden');
  });
</script>
In this example, we have added the hidden class to the list of options to hide it by default. We have also added a JavaScript event listener to the button to toggle the visibility of the dropdown menu when the button is clicked.
Conclusion
In conclusion, Tailwind CSS is a powerful tool that can help you create beautiful and functional UI components quickly and easily. By following the steps outlined in this article, you can create a Folder Options UI component using Tailwind CSS that is easy to use and visually appealing. I hope this article has been helpful, and I encourage you to explore the many other possibilities that Tailwind CSS has to offer.