- Published on
6 Easy Ways To Create A Features Section With Tailwind CSS
- What is Tailwind CSS?
- The description of Features section UI component
- Why use Tailwind CSS to create a Features section UI component?
- The preview of Features section UI component
- The source code of Features section UI component
- How to create a Features section with Tailwind CSS?
- Step 1: Set up your HTML structure
- Step 2: Style the cards
- Step 3: Style the icon
- Step 4: Style the heading
- Step 5: Style the description
- Conclusion
As a FrontEnd technology blogger, you must have heard of Tailwind CSS. It's a utility-first CSS framework that helps you quickly build custom designs without writing any CSS. In this article, we'll explore how to create a Features section with Tailwind CSS.
What is Tailwind CSS?
Tailwind CSS is a utility-first CSS framework that provides a set of pre-defined CSS classes to help you quickly build custom designs without writing any CSS. It's different from other CSS frameworks like Bootstrap or Foundation, which provide pre-built components that you can use to build your website.
With Tailwind CSS, you can create your own components by combining pre-defined CSS classes. This approach gives you more control over the design of your website and helps you avoid the bloat that comes with pre-built components.
The description of Features section UI component
A Features section is a UI component that showcases the key features of your product or service. It's usually placed on the homepage of your website and is one of the first things that visitors see.
A typical Features section consists of a set of cards or boxes, each containing an icon, a heading, and a description of the feature. The section is usually styled with a background color or image to make it stand out.
Why use Tailwind CSS to create a Features section UI component?
Tailwind CSS is an excellent choice for creating a Features section UI component because it provides a set of pre-defined CSS classes that you can use to style each card or box in the section. This approach saves you time and makes it easy to create a consistent design across all the cards.
Additionally, Tailwind CSS provides a set of responsive utility classes that allow you to create a responsive design that looks great on all devices.
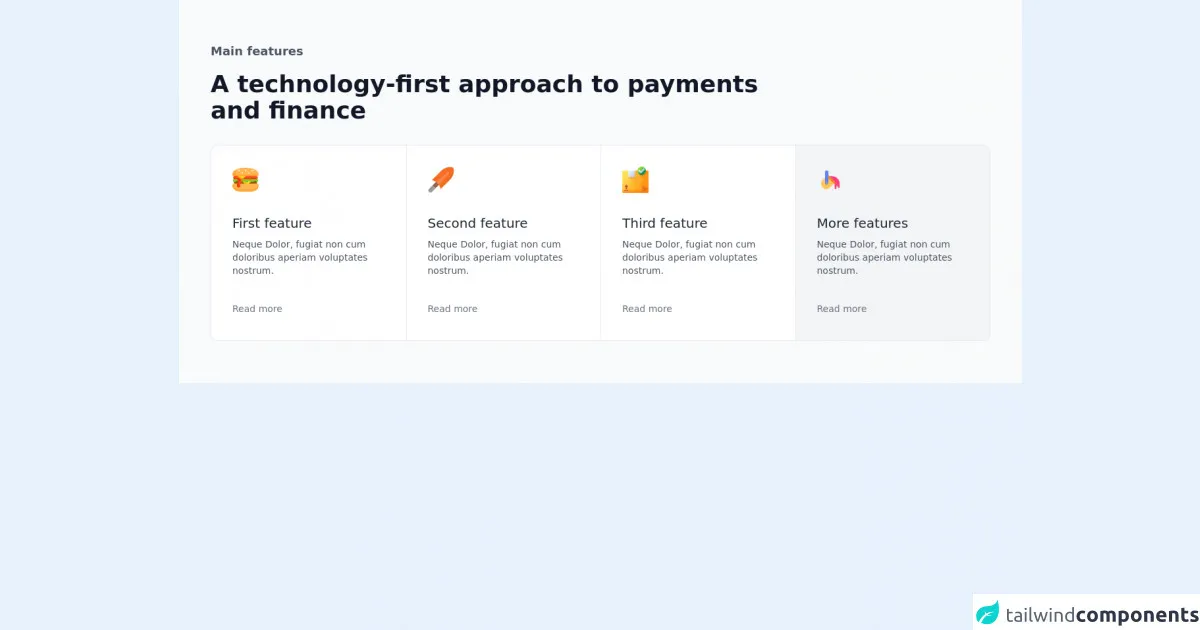
The preview of Features section UI component
To give you an idea of what a Features section looks like, here's a preview:
Free download of the Features section's source code
The source code of Features section UI component
Here's the HTML and CSS code for a simple Features section:
<div class="py-16 bg-gray-50 overflow-hidden">
<div class="container m-auto px-6 space-y-8 text-gray-500 md:px-12">
<div>
<span class="text-gray-600 text-lg font-semibold">Main features</span>
<h2 class="mt-4 text-2xl text-gray-900 font-bold md:text-4xl">A technology-first approach to payments <br class="lg:block" hidden> and finance</h2>
</div>
<div class="mt-16 grid border divide-x divide-y rounded-xl overflow-hidden sm:grid-cols-2 lg:divide-y-0 lg:grid-cols-3 xl:grid-cols-4">
<div class="relative group bg-white transition hover:z-[1] hover:shadow-2xl">
<div class="relative p-8 space-y-8">
<img src="https://tailus.io/sources/blocks/stacked/preview/images/avatars/burger.png" class="w-10" width="512" height="512" alt="burger illustration">
<div class="space-y-2">
<h5 class="text-xl text-gray-800 font-medium transition group-hover:text-yellow-600">First feature</h5>
<p class="text-sm text-gray-600">Neque Dolor, fugiat non cum doloribus aperiam voluptates nostrum.</p>
</div>
<a href="#" class="flex justify-between items-center group-hover:text-yellow-600">
<span class="text-sm">Read more</span>
<span class="-translate-x-4 opacity-0 text-2xl transition duration-300 group-hover:opacity-100 group-hover:translate-x-0">→</span>
</a>
</div>
</div>
<div class="relative group bg-white transition hover:z-[1] hover:shadow-2xl">
<div class="relative p-8 space-y-8">
<img src="https://tailus.io/sources/blocks/stacked/preview/images/avatars/trowel.png" class="w-10" width="512" height="512" alt="burger illustration">
<div class="space-y-2">
<h5 class="text-xl text-gray-800 font-medium transition group-hover:text-yellow-600">Second feature</h5>
<p class="text-sm text-gray-600">Neque Dolor, fugiat non cum doloribus aperiam voluptates nostrum.</p>
</div>
<a href="#" class="flex justify-between items-center group-hover:text-yellow-600">
<span class="text-sm">Read more</span>
<span class="-translate-x-4 opacity-0 text-2xl transition duration-300 group-hover:opacity-100 group-hover:translate-x-0">→</span>
</a>
</div>
</div>
<div class="relative group bg-white transition hover:z-[1] hover:shadow-2xl">
<div class="relative p-8 space-y-8">
<img src="https://tailus.io/sources/blocks/stacked/preview/images/avatars/package-delivery.png" class="w-10" width="512" height="512" alt="burger illustration">
<div class="space-y-2">
<h5 class="text-xl text-gray-800 font-medium transition group-hover:text-yellow-600">Third feature</h5>
<p class="text-sm text-gray-600">Neque Dolor, fugiat non cum doloribus aperiam voluptates nostrum.</p>
</div>
<a href="#" class="flex justify-between items-center group-hover:text-yellow-600">
<span class="text-sm">Read more</span>
<span class="-translate-x-4 opacity-0 text-2xl transition duration-300 group-hover:opacity-100 group-hover:translate-x-0">→</span>
</a>
</div>
</div>
<div class="relative group bg-gray-100 transition hover:z-[1] hover:shadow-2xl lg:hidden xl:block">
<div class="relative p-8 space-y-8 border-dashed rounded-lg transition duration-300 group-hover:bg-white group-hover:border group-hover:scale-90">
<img src="https://tailus.io/sources/blocks/stacked/preview/images/avatars/metal.png" class="w-10" width="512" height="512" alt="burger illustration">
<div class="space-y-2">
<h5 class="text-xl text-gray-800 font-medium transition group-hover:text-yellow-600">More features</h5>
<p class="text-sm text-gray-600">Neque Dolor, fugiat non cum doloribus aperiam voluptates nostrum.</p>
</div>
<a href="#" class="flex justify-between items-center group-hover:text-yellow-600">
<span class="text-sm">Read more</span>
<span class="-translate-x-4 opacity-0 text-2xl transition duration-300 group-hover:opacity-100 group-hover:translate-x-0">→</span>
</a>
</div>
</div>
</div>
</div>
</div>
How to create a Features section with Tailwind CSS?
Now that you understand what a Features section is and why Tailwind CSS is an excellent choice for creating it, let's dive into how to create a Features section with Tailwind CSS.
Step 1: Set up your HTML structure
The first step is to set up your HTML structure. You'll need to create a container element for the section and a set of card elements to display each feature.
Here's an example HTML structure:
<section class="bg-gray-100 py-8">
  <div class="container mx-auto px-2">
    <h2 class="text-2xl font-bold mb-8">Our Features</h2>
    <div class="flex flex-wrap -mx-2">
      <div class="w-full md:w-1/3 px-2 mb-4">
        <div class="bg-white rounded-lg shadow-lg p-4">
          <div class="text-center">
            <i class="fas fa-check-circle text-3xl text-green-500"></i>
          </div>
          <h3 class="text-xl font-bold mb-2">Feature 1</h3>
          <p class="text-gray-700">Lorem ipsum dolor sit amet, consectetur adipiscing elit. Sed euismod, velit euismod.</p>
        </div>
      </div>
      <div class="w-full md:w-1/3 px-2 mb-4">
        <div class="bg-white rounded-lg shadow-lg p-4">
          <div class="text-center">
            <i class="fas fa-check-circle text-3xl text-green-500"></i>
          </div>
          <h3 class="text-xl font-bold mb-2">Feature 2</h3>
          <p class="text-gray-700">Lorem ipsum dolor sit amet, consectetur adipiscing elit. Sed euismod, velit euismod.</p>
        </div>
      </div>
      <div class="w-full md:w-1/3 px-2 mb-4">
        <div class="bg-white rounded-lg shadow-lg p-4">
          <div class="text-center">
            <i class="fas fa-check-circle text-3xl text-green-500"></i>
          </div>
          <h3 class="text-xl font-bold mb-2">Feature 3</h3>
          <p class="text-gray-700">Lorem ipsum dolor sit amet, consectetur adipiscing elit. Sed euismod, velit euismod.</p>
        </div>
      </div>
    </div>
  </div>
</section>
In this example, we've created a section element with a gray background and added a container element to center the content. We've also added a heading element and a set of card elements, each containing an icon, a heading, and a description.
Step 2: Style the cards
The next step is to style the cards. We'll use Tailwind CSS to add a background color, a box shadow, and some padding to each card.
.bg-white {
  background-color: #fff;
}

.rounded-lg {
  border-radius: 0.5rem;
}

.shadow-lg {
  box-shadow: 0 10px 15px -3px rgba(0, 0, 0, 0.1), 0 4px 6px -2px rgba(0, 0, 0, 0.05);
}

.p-4 {
  padding: 1rem;
}
In this example, we've added four CSS classes to style the cards. We've set the background color to white, added a rounded border, added a box shadow, and added some padding.
Step 3: Style the icon
The next step is to style the icon. We'll use Font Awesome to add an icon to each card and use Tailwind CSS to style the icon.
<i class="fas fa-check-circle text-3xl text-green-500"></i>
.text-3xl {
  font-size: 1.875rem;
}

.text-green-500 {
  --text-opacity: 1;
  color: #10b981;
  color: rgba(16, 185, 129, var(--text-opacity));
}
In this example, we've added an icon to each card using Font Awesome. We've also added two CSS classes to style the icon. We've set the font size to 1.875rem and set the color to green.
Step 4: Style the heading
The next step is to style the heading. We'll use Tailwind CSS to add some margin and font weight to the heading.
.text-xl {
  font-size: 1.25rem;
}

.font-bold {
  font-weight: 700;
}

.mb-2 {
  margin-bottom: 0.5rem;
}
In this example, we've added three CSS classes to style the heading. We've set the font size to 1.25rem, set the font weight to 700, and added some margin to the bottom.
Step 5: Style the description
The final step is to style the description. We'll use Tailwind CSS to set the font size and color of the description.
.text-gray-700 {
  --text-opacity: 1;
  color: #4b5563;
  color: rgba(75, 85, 99, var(--text-opacity));
}

.text-base {
  font-size: 1rem;
}
In this example, we've added two CSS classes to style the description. We've set the font size to 1rem and set the color to gray.
Conclusion
In conclusion, Tailwind CSS is an excellent choice for creating a Features section UI component. With its pre-defined CSS classes and responsive utility classes, you can quickly create a custom design that looks great on all devices.
By following the steps outlined in this article, you can create a Features section with Tailwind CSS in no time. So why not give it a try and see how easy it is to create a custom design with Tailwind CSS?