- Published on
3 Things You Must Know To Build A DigitalOcean Tutorials Page With Tailwind CSS
- What is Tailwind CSS?
- The description of DigitalOcean Tutorials Page UI component
- Why use Tailwind CSS to create a DigitalOcean Tutorials Page UI component?
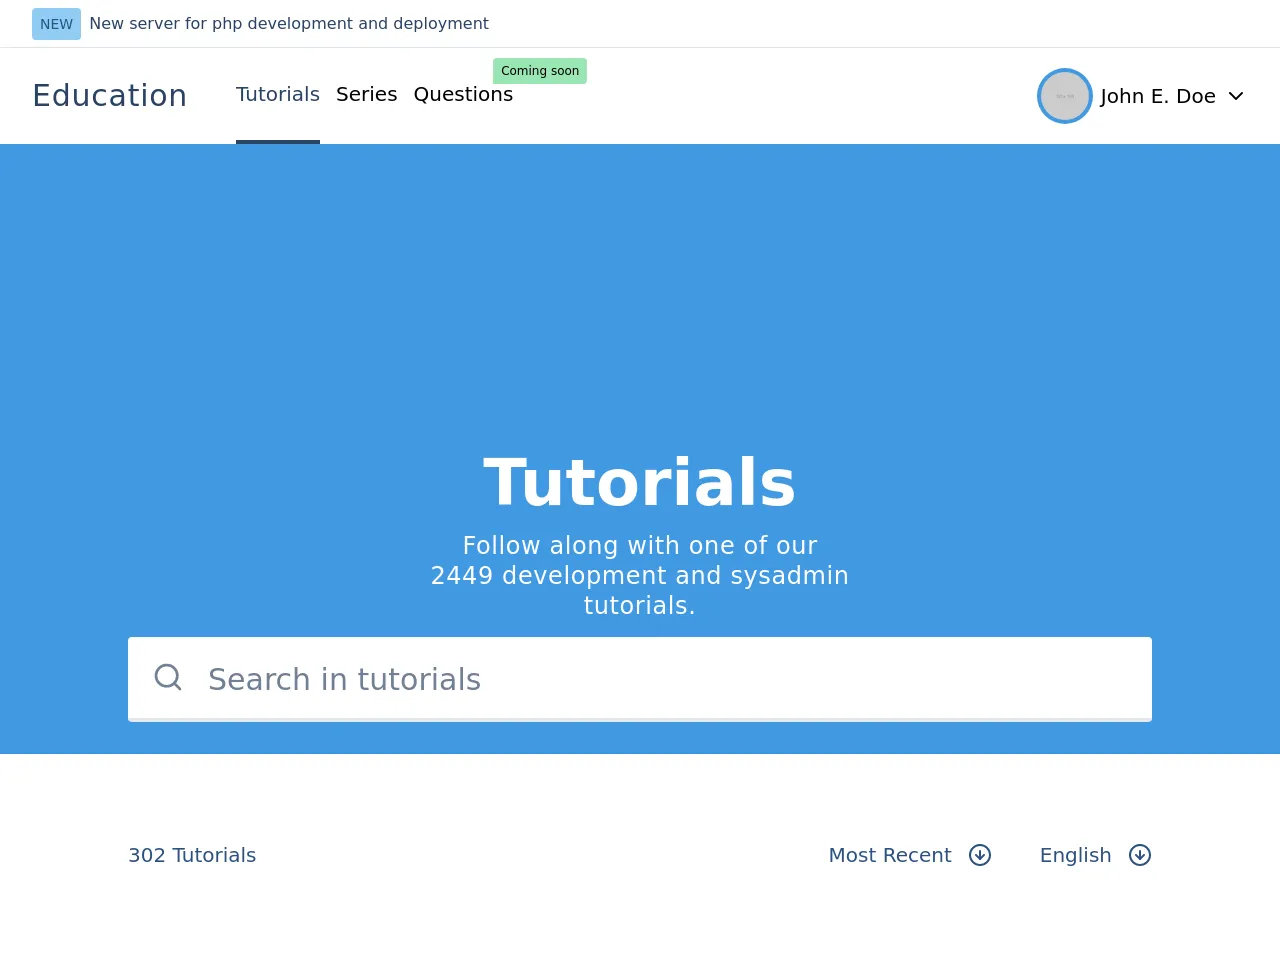
- The preview of DigitalOcean Tutorials Page UI component
- The source code of DigitalOcean Tutorials Page UI component
- How to create a DigitalOcean Tutorials Page with Tailwind CSS?
- Step 1: Set up your development environment
- Step 2: Create a new HTML file
- Step 3: Add Tailwind CSS to your project
- Step 4: Create a new CSS file
- Step 5: Configure Tailwind CSS
- Step 6: Add the Tailwind CSS classes to your HTML
- Conclusion
If you are looking to create a DigitalOcean Tutorials Page, then you are in the right place. In this article, we will discuss how to create a DigitalOcean Tutorials Page using Tailwind CSS. We will cover the basics of Tailwind CSS, the description of the DigitalOcean Tutorials Page UI component, why use Tailwind CSS to create a DigitalOcean Tutorials Page UI component, the preview of the DigitalOcean Tutorials Page UI component, the source code of the DigitalOcean Tutorials Page UI component, and how to create a DigitalOcean Tutorials Page with Tailwind CSS.
What is Tailwind CSS?
Tailwind CSS is a utility-first CSS framework that provides you with a set of pre-defined classes to use in your HTML. It is designed to help you build responsive and scalable user interfaces quickly. Tailwind CSS is different from other CSS frameworks because it does not have pre-built components. Instead, it provides you with a set of utility classes that you can use to create your own custom components.
The description of DigitalOcean Tutorials Page UI component
The DigitalOcean Tutorials Page UI component is a web page that displays a list of tutorials. The page has a header with a search bar, a navigation menu, and a hero section. The hero section has a background image and a call-to-action button. The page also has a list of tutorials with a thumbnail image, title, and description.
Why use Tailwind CSS to create a DigitalOcean Tutorials Page UI component?
Tailwind CSS is an excellent choice for creating a DigitalOcean Tutorials Page UI component because it provides you with a set of pre-defined classes that you can use to style your HTML. This means that you do not have to write CSS from scratch, which can save you a lot of time. Additionally, Tailwind CSS is highly customizable, which means that you can easily modify the styles to match your design requirements.
The preview of DigitalOcean Tutorials Page UI component
Free download of the DigitalOcean Tutorials Page's source code
The source code of DigitalOcean Tutorials Page UI component
<style>
    .h-without-header {
      height: calc(100vh - 9rem);
    }
    .h-1\/4 {
      height: 25%;
    }
    .h-2\/4 {
      height: 50%;
    }
    .h-3\/4 {
      height: 75%;
    }
  </style>
<div>
        <!-- Top Bar started -->
        <div class="h-12 w-full">
            <div class="h-full bg-white px-8 flex items-center justify-between border-b">
                <div class="flex items-center">
                    <div class="py-1 px-2 bg-blue-300 rounded text-blue-800">
                        <span class="text-sm">NEW</span>
                    </div>
                    <div class="font-medium px-2">
                        <a href="" class="text-blue-900 hover:text-black">New server for php development and deployment</a>
                    </div>
                </div>
            </div>
        </div>
        <!-- Top Bar end -->
        <!-- Header start -->
        <div class="h-24 w-full z-10 shadow-lg">
            <div class="h-full bg-white px-8 flex items-center justify-between ">
                <div class="flex items-center h-full">
                    <div class="text-3xl font-medium tracking-wide leading-none text-blue-900">
                        Education
                    </div>
                    <div class="flex items-center ml-8 h-full">
                        <a class="text-xl font-medium ml-4 h-full flex items-center border-b-4 border-blue-900 text-blue-900" href="">Tutorials</a>
                        <a class="text-xl font-medium ml-4 h-full flex items-center border-b-4 border-white" href="">Series</a>
                        <a class="text-xl font-medium ml-4 relative h-full flex items-center border-b-4 border-white" href="">
                            Questions <span class="text-xs bg-green-300 font-light py-1 px-2 absolute rounded-r rounded-tl" style="right:-74px;top:10px">Coming soon</span>
                        </a>
                    </div>
                </div>
                <div class="flex items-center">
                    <div class="rounded-full p-1 bg-blue-500">
                        <img class="rounded-full w-12" src="https://via.placeholder.com/150" alt="">
                    </div>
                    <div class="ml-2 text-xl font-medium">
                        <a class="flex items-center" href="#profile">
                            John E. Doe
                            <svg class="ml-2" xmlns="http://www.w3.org/2000/svg" width="24" height="24" viewBox="0 0 24 24" fill="none" stroke="currentColor"
                                 stroke-width="2" stroke-linecap="round" stroke-linejoin="round">
                                <polyline points="6 9 12 15 18 9"></polyline>
                            </svg>
                        </a>
                    </div>
                </div>
            </div>
        </div>
        <!-- Header end -->
        <!-- Hero start -->
        <div class="h-without-header w-full z-0">
            <div class="bg-blue-500 flex flex-col items-center text-center justify-end h-3/4">
                <div class="w-1/3">
                    <h1 class="text-6xl text-white font-bold leading-none mb-4">Tutorials</h1>
                    <p class="text-2xl text-white leading-tight tracking-wide">Follow along with one of our 2449
                        development and sysadmin tutorials.</p>
                </div>
                <div class="w-4/5 mt-4 mb-8">
                    <div class="relative">
                        <svg class="absolute top-0 mt-6 ml-6 w-8 h-8 text-gray-600" xmlns="http://www.w3.org/2000/svg" width="24" height="24" viewBox="0 0 24 24" fill="none" stroke="currentColor"
                             stroke-width="2" stroke-linecap="round" stroke-linejoin="round">
                            <circle cx="11" cy="11" r="8"></circle>
                            <line x1="21" y1="21" x2="16.65" y2="16.65"></line>
                        </svg>
                        <input class="text-3xl placeholder-gray-600 text-gray-800 pb-4 pt-5 pl-20 pr-4 rounded w-full border-b-4 focus:outline-none focus:border-blue-800" type="text" placeholder="Search in tutorials">
                    </div>
                </div>
            </div>
            <div class="h-1/4 bg-white w-full flex justify-center">
                <div class="h-full flex items-center justify-between w-4/5">
                    <div class="text-xl text-blue-800 font-medium">
                        302 Tutorials
                    </div>
                    <div class="flex items-center justify-end">
                        <div class="text-xl text-blue-800 font-medium flex items-center mr-12">
                            Most Recent
                            <svg class="ml-4" xmlns="http://www.w3.org/2000/svg" width="24" height="24" viewBox="0 0 24 24" fill="none" stroke="currentColor"
                                 stroke-width="2" stroke-linecap="round" stroke-linejoin="round">
                                <circle cx="12" cy="12" r="10"></circle>
                                <polyline points="8 12 12 16 16 12"></polyline>
                                <line x1="12" y1="8" x2="12" y2="16"></line>
                            </svg>
                        </div>
                        <div class="text-xl text-blue-800 font-medium flex items-center">
                            English
                            <svg class="ml-4" xmlns="http://www.w3.org/2000/svg" width="24" height="24" viewBox="0 0 24 24" fill="none" stroke="currentColor"
                                 stroke-width="2" stroke-linecap="round" stroke-linejoin="round">
                                <circle cx="12" cy="12" r="10"></circle>
                                <polyline points="8 12 12 16 16 12"></polyline>
                                <line x1="12" y1="8" x2="12" y2="16"></line>
                            </svg>
                        </div>
                    </div>
                </div>
            </div>
        </div>
        <!-- Hero end -->
        <!-- Tutorials start -->
        <div class="w-full flex justify-center">
            <div class="h-1/4 bg-white w-full border-b flex justify-center">
                <div class="h-full flex flex-col items-center justify-between w-4/5">
                    <div class="w-full mb-16">
                        <div class="text-lg text-blue-500 uppercase">
                            Tutorials
                        </div>
                        <div class="text-3xl font-bold text-blue-800 my-3">
                            How To Add Advanced Photo Uploads in Node and Express
                        </div>
                        <div class="text-xl text-blue-800 leading-tight my-1">
                            In this tutorial, we will see how to upload a photo to an Express app and manipulate it (resize, crop, greyscale, etc) before writing it to storage.
                        </div>
                        <div class="text-lg text-blue-800 leading-tight mt-2 flex items-center">
                            <div>
                                <span>3 months ago </span> • <span>By Glad Chinda</span>
                            </div>
                            <div class="ml-2">
                                <span class="py-1 px-2 mx-2 bg-gray-300 text-blue-800 rounded">Ubuntu 18.04</span>
                                <span class="py-1 px-2 mx-2 bg-gray-300 text-blue-800 rounded">Flask</span>
                            </div>
                        </div>
                    </div>
                </div>
            </div>
        </div>
        <!-- Tutorials end -->

    </div>
How to create a DigitalOcean Tutorials Page with Tailwind CSS?
To create a DigitalOcean Tutorials Page with Tailwind CSS, you need to follow these steps:
Step 1: Set up your development environment
The first step is to set up your development environment. You need to have Node.js and npm installed on your computer. You can download Node.js from the official website and install it on your computer. Once you have installed Node.js, you can use npm to install Tailwind CSS.
Step 2: Create a new HTML file
The next step is to create a new HTML file. You can use any text editor to create an HTML file. In this example, we will use Visual Studio Code. Open Visual Studio Code and create a new file. Save the file with the name index.html.
Step 3: Add Tailwind CSS to your project
The next step is to add Tailwind CSS to your project. You can use npm to install Tailwind CSS. Open a terminal window and navigate to your project directory. Run the following command to install Tailwind CSS:
npm install tailwindcss
Step 4: Create a new CSS file
The next step is to create a new CSS file. You can use any text editor to create a CSS file. In this example, we will use Visual Studio Code. Open Visual Studio Code and create a new file. Save the file with the name style.css.
Step 5: Configure Tailwind CSS
The next step is to configure Tailwind CSS. You need to create a configuration file for Tailwind CSS. Run the following command to create a configuration file:
npx tailwindcss init
This command will create a configuration file named tailwind.config.js in your project directory.
Step 6: Add the Tailwind CSS classes to your HTML
The final step is to add the Tailwind CSS classes to your HTML. You can use the pre-defined classes provided by Tailwind CSS to style your HTML. Here is an example of how to use Tailwind CSS classes to create a DigitalOcean Tutorials Page:
<!DOCTYPE html>
<html>
<head>
	<title>DigitalOcean Tutorials Page</title>
	<link rel="stylesheet" href="style.css">
	<link rel="stylesheet" href="node_modules/tailwindcss/dist/tailwind.min.css">
</head>
<body>
	<header class="bg-blue-900 text-white p-4">
		<div class="container mx-auto flex justify-between items-center">
			<h1 class="text-2xl font-bold">DigitalOcean Tutorials</h1>
			<form class="flex">
				<input class="rounded-l-lg p-2 border-t mr-0 border-b border-l text-gray-800 border-gray-200 bg-white" placeholder="Search...">
				<button class="px-4 rounded-r-lg bg-blue-500 text-white font-bold p-2 uppercase border-blue-700 border-t border-b border-r">Search</button>
			</form>
		</div>
	</header>
	<nav class="bg-blue-500 text-white p-4">
		<div class="container mx-auto flex justify-between items-center">
			<ul class="flex">
				<li class="mr-6"><a href="#">Home</a></li>
				<li class="mr-6"><a href="#">Tutorials</a></li>
				<li class="mr-6"><a href="#">About</a></li>
				<li class="mr-6"><a href="#">Contact</a></li>
			</ul>
			<button class="px-4 rounded-lg bg-blue-700 text-white font-bold p-2 uppercase border-blue-700 border-t border-b border-r">Sign In</button>
		</div>
	</nav>
	<section class="bg-gray-100 py-8">
		<div class="container mx-auto">
			<div class="flex flex-wrap -mx-4">
				<div class="w-full md:w-1/2 lg:w-1/3 px-4">
					<div class="bg-white rounded-lg shadow-lg overflow-hidden">
						<img class="w-full h-48 object-cover" src="https://via.placeholder.com/640x360.png?text=Thumbnail">
						<div class="p-4">
							<h2 class="text-lg font-bold mb-2">How to Install WordPress on DigitalOcean</h2>
							<p class="text-gray-700 text-base">Learn how to install WordPress on DigitalOcean with this step-by-step tutorial.</p>
						</div>
					</div>
				</div>
				<div class="w-full md:w-1/2 lg:w-1/3 px-4">
					<div class="bg-white rounded-lg shadow-lg overflow-hidden">
						<img class="w-full h-48 object-cover" src="https://via.placeholder.com/640x360.png?text=Thumbnail">
						<div class="p-4">
							<h2 class="text-lg font-bold mb-2">How to Create a Droplet on DigitalOcean</h2>
							<p class="text-gray-700 text-base">Learn how to create a droplet on DigitalOcean with this step-by-step tutorial.</p>
						</div>
					</div>
				</div>
				<div class="w-full md:w-1/2 lg:w-1/3 px-4">
					<div class="bg-white rounded-lg shadow-lg overflow-hidden">
						<img class="w-full h-48 object-cover" src="https://via.placeholder.com/640x360.png?text=Thumbnail">
						<div class="p-4">
							<h2 class="text-lg font-bold mb-2">How to Install Nginx on DigitalOcean</h2>
							<p class="text-gray-700 text-base">Learn how to install Nginx on DigitalOcean with this step-by-step tutorial.</p>
						</div>
					</div>
				</div>
			</div>
		</div>
	</section>
	<section class="bg-blue-900 text-white py-8">
		<div class="container mx-auto flex justify-center items-center">
			<h2 class="text-3xl font-bold mr-4">Get started with DigitalOcean today</h2>
			<button class="px-4 rounded-lg bg-blue-500 text-white font-bold p-2 uppercase border-blue-700 border-t border-b border-r">Sign Up</button>
		</div>
	</section>
</body>
</html>
Conclusion
In conclusion, creating a DigitalOcean Tutorials Page with Tailwind CSS is easy and straightforward. Tailwind CSS provides you with a set of pre-defined classes that you can use to style your HTML. Additionally, Tailwind CSS is highly customizable, which means that you can easily modify the styles to match your design requirements. We hope that this article has helped you understand how to create a DigitalOcean Tutorials Page with Tailwind CSS.