- Published on
How To Build A Create Portfolio (Not Yet) I Will To Change It Again With Tailwind CSS In 6 Easy Steps?
- What is Tailwind CSS?
- The description of Create Portfolio (Not Yet) I Will to change it again UI component
- Why use Tailwind CSS to create a Create Portfolio (Not Yet) I Will to change it again UI component?
- The preview of Create Portfolio (Not Yet) I Will to change it again UI component
- The source code of Create Portfolio (Not Yet) I Will to change it again UI component
- How to create a Create Portfolio (Not Yet) I Will to change it again with Tailwind CSS?
- Step 1: Set up your project
- Step 2: Create the HTML structure
- Step 3: Style the form
- Step 4: Add Tailwind CSS classes
- Step 5: Add JavaScript code
- Step 6: Test your UI component
- Conclusion
As a FrontEnd technology blogger, I always look for ways to improve my skills and create better UI components. In this article, I will share with you how to build a Create Portfolio (Not Yet) I Will to change it again UI component using Tailwind CSS in 6 easy steps.
What is Tailwind CSS?
Tailwind CSS is a utility-first CSS framework that provides a set of pre-defined CSS classes to help you build responsive and customizable UI components. It allows you to create complex layouts and styles without writing custom CSS code.
The description of Create Portfolio (Not Yet) I Will to change it again UI component
The Create Portfolio (Not Yet) I Will to change it again UI component is a simple form that allows users to create a new portfolio. It consists of several input fields such as name, description, and image upload. The UI component also includes a preview section that displays the user's portfolio as they fill in the form.
Why use Tailwind CSS to create a Create Portfolio (Not Yet) I Will to change it again UI component?
Tailwind CSS provides a set of pre-defined CSS classes that can help you build responsive and customizable UI components quickly. It also allows you to create complex layouts and styles without writing custom CSS code. Using Tailwind CSS can save you time and effort when building UI components.
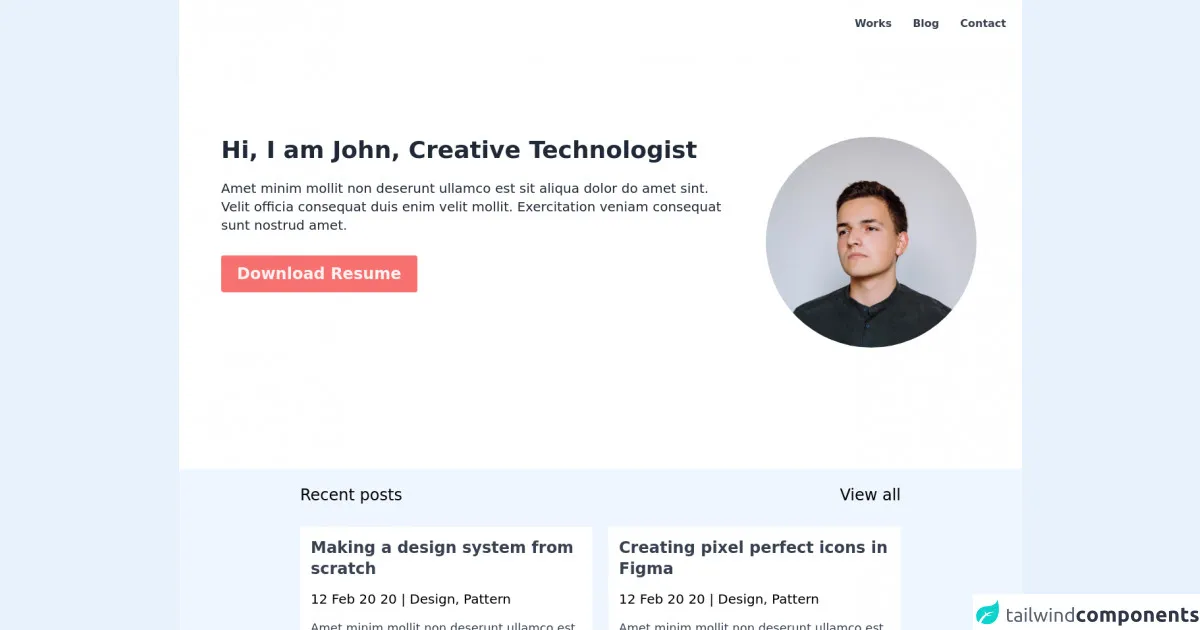
The preview of Create Portfolio (Not Yet) I Will to change it again UI component
Free download of the Create Portfolio (Not Yet) I Will to change it again's source code
The source code of Create Portfolio (Not Yet) I Will to change it again UI component
<!-- Creaet Blog Portfolio By Joker Banny -->
<header class="max-h-full bg-white p-6 grid">
  <!-- Navbar Menu -->
  <nav class="w-full grid justify-end">
    <ul class="hidden md:flex space-x-8 font-bold text-gray-700">
      <li><a href="#">Works</a></li>
      <li><a href="#">Blog</a></li>
      <li><a href="#">Contact</a></li>
    </ul>
    <div class="md:hidden">
      <svg xmlns="http://www.w3.org/2000/svg" class="h-10 w-10 text-gray-700 cursor-pointer" fill="none" viewBox="0 0 24 24" stroke="currentColor">
        <path stroke-linecap="round" stroke-linejoin="round" stroke-width="2" d="M4 6h16M4 12h16M4 18h16" />
      </svg>
    </div>
  </nav>

  <!-- Section Hero  -->
  <div class="container mx-auto mt-8 md:mt-0 md:space-x-10 md:grid grid-cols-3 justify-center md:py-40">
    <div class="grid justify-center items-center order-1 col-span-1">
      <img class="lg:h-80 md:h-64 h-40 rounded-full" src="https://images.unsplash.com/photo-1535713875002-d1d0cf377fde" alt="" />
    </div>
    <div class="mt-8 md:mt-0 lg:justify-end col-span-2">
      <h1 class="text-4xl text-gray-800 text-center md:text-left font-bold mb-6">Hi, I am John, Creative Technologist</h1>
      <p class="text-xl text-gray-800 text-center md:text-left">Amet minim mollit non deserunt ullamco est sit aliqua dolor do amet sint. Velit officia consequat duis enim velit mollit. Exercitation veniam consequat sunt nostrud amet.</p>
      <button class="block mt-8 mx-auto md:mx-0 text-2xl py-3 px-6 text-red-50 font-semibold rounded bg-red-400">Download Resume</button>
    </div>
  </div>
</header>

<!-- Main -->
<div class="md:gap-4 p-6 bg-blue-50 md:grid">
  <div class="grid grid-cols-2 justify-between lg:px-40 md:mb-4">
    <h1 class="justify-start md:text-left text-2xl">Recent posts</h1>
    <p class="hidden md:block text-right text-2xl">View all</p>
  </div>
  <div class="md:grid grid-cols-2 gap-6 lg:px-40">
    <div>
      <div class="bg-white p-4">
        <div>
          <div class="mb-4">
            <h1 class="text-2xl font-bold text-gray-700">Making a design system from scratch</h1>
          </div>

          <div class="">
            <span class="block mb-4 text-xl">12 Feb 20 20 | Design, Pattern</span>
            <p class="text-lg text-gray-700">Amet minim mollit non deserunt ullamco est sit aliqua dolor do amet sint. Velit officia consequat duis enim velit mollit. Exercitation veniam consequat sunt nostrud amet.</p>
          </div>
        </div>
      </div>
    </div>

    <div class="bg-white p-4 md:mt-0 mt-6">
      <div>
        <div class="mb-4">
          <h1 class="text-2xl font-bold text-gray-700">Creating pixel perfect icons in Figma</h1>
          <p class="hidden">View all</p>
        </div>

        <div class="">
          <span class="block mb-4 text-xl">12 Feb 20 20 | Design, Pattern</span>
          <p class="text-lg text-gray-700">Amet minim mollit non deserunt ullamco est sit aliqua dolor do amet sint. Velit officia consequat duis enim velit mollit. Exercitation veniam consequat sunt nostrud amet.</p>
        </div>
      </div>
    </div>
  </div>

  <div class="mt-6 p-4 bg-white px-6">
    <div class="border-b pb-6">
      <h1 class="mt-2 mb-6 text-center text-xl">Featured works</h1>
      <div class="md:grid grid-cols-2 gap-6">
        <div>
          <img class="md:h-full object-cover" src="https://images.unsplash.com/photo-1602992708529-c9fdb12905c9" alt="" />
        </div>
        <div>
          <h1 class="my-6 text-2xl font-bold text-gray-700">Designing Dashboards</h1>
          <span class="text-lg mr-4 py-1 px-4 rounded-full bg-gray-800 text-white">2020</span>
          <spnan class="text-lg">Dashboard</spnan>
          <p class="mt-6 text-lg text-gray-700">Amet minim mollit non deserunt ullamco est sit aliqua dolor do amet sint. Velit officia consequat duis enim velit mollit. Exercitation veniam consequat sunt nostrud amet.</p>
        </div>
      </div>
    </div>
  </div>
</div>
<footer class="bg-white">
  <div class="flex mt-20 px-10 items-center justify-around max-md">
    <span>
      <svg xmlns="http://www.w3.org/2000/svg" class="h-10 text-gray-800 w-10" fill="none" viewBox="0 0 24 24" stroke="currentColor">
        <path stroke-linecap="round" stroke-linejoin="round" stroke-width="2" d="M17 8h2a2 2 0 012 2v6a2 2 0 01-2 2h-2v4l-4-4H9a1.994 1.994 0 01-1.414-.586m0 0L11 14h4a2 2 0 002-2V6a2 2 0 00-2-2H5a2 2 0 00-2 2v6a2 2 0 002 2h2v4l.586-.586z" />
      </svg>
    </span>
    <span>
      <svg xmlns="http://www.w3.org/2000/svg" class="h-10 textgray-800e w-10" fill="none" viewBox="0 0 24 24" stroke="currentColor">
        <path stroke-linecap="round" stroke-linejoin="round" stroke-width="2" d="M16 8l2-2m0 0l2-2m-2 2l-2-2m2 2l2 2M5 3a2 2 0 00-2 2v1c0 8.284 6.716 15 15 15h1a2 2 0 002-2v-3.28a1 1 0 00-.684-.948l-4.493-1.498a1 1 0 00-1.21.502l-1.13 2.257a11.042 11.042 0 01-5.516-5.517l2.257-1.128a1 1 0 00.502-1.21L9.228 3.683A1 1 0 008.279 3H5z" />
      </svg>
    </span>
    <span>
      <svg xmlns="http://www.w3.org/2000/svg" class="h-10 text-gray-800 w-10" fill="none" viewBox="0 0 24 24" stroke="currentColor">
        <path stroke-linecap="round" stroke-linejoin="round" stroke-width="2" d="M9.663 17h4.673M12 3v1m6.364 1.636l-.707.707M21 12h-1M4 12H3m3.343-5.657l-.707-.707m2.828 9.9a5 5 0 117.072 0l-.548.547A3.374 3.374 0 0014 18.469V19a2 2 0 11-4 0v-.531c0-.895-.356-1.754-.988-2.386l-.548-.547z" />
      </svg>
    </span>
    <span>
      <svg xmlns="http://www.w3.org/2000/svg" class="h-10 text-gray-800 w-10" fill="none" viewBox="0 0 24 24" stroke="currentColor">
        <path stroke-linecap="round" stroke-linejoin="round" stroke-width="2" d="M3.055 11H5a2 2 0 012 2v1a2 2 0 002 2 2 2 0 012 2v2.945M8 3.935V5.5A2.5 2.5 0 0010.5 8h.5a2 2 0 012 2 2 2 0 104 0 2 2 0 012-2h1.064M15 20.488V18a2 2 0 012-2h3.064M21 12a9 9 0 11-18 0 9 9 0 0118 0z" />
      </svg>
    </span>
  </div>
  <p class="text-center my-10 text-lg">Copyright ©2020 All rights reserved</p>
</footer>
How to create a Create Portfolio (Not Yet) I Will to change it again with Tailwind CSS?
Step 1: Set up your project
To get started, you need to set up your project. You can create a new HTML file and include the Tailwind CSS CDN link in the head section of your HTML file.
<!DOCTYPE html>
<html lang="en">
  <head>
    <meta charset="UTF-8" />
    <meta name="viewport" content="width=device-width, initial-scale=1.0" />
    <title>Create Portfolio (Not Yet) I Will to change it again</title>
    <link
      rel="stylesheet"
      href="https://cdn.tailwindcss.com/dist/tailwind.min.css"
    />
  </head>
  <body>
    <!-- Your HTML code goes here -->
  </body>
</html>
Step 2: Create the HTML structure
Next, you need to create the HTML structure for the Create Portfolio (Not Yet) I Will to change it again UI component. You can use the following HTML code as a starting point:
<div class="container mx-auto py-8">
  <h1 class="text-2xl font-bold mb-4">Create Portfolio (Not Yet) I Will to change it again</h1>
  <form>
    <div class="mb-4">
      <label class="block text-gray-700 font-bold mb-2" for="name">
        Name
      </label>
      <input
        class="shadow appearance-none border rounded w-full py-2 px-3 text-gray-700 leading-tight focus:outline-none focus:shadow-outline"
        id="name"
        type="text"
        placeholder="Enter your name"
      />
    </div>
    <div class="mb-4">
      <label class="block text-gray-700 font-bold mb-2" for="description">
        Description
      </label>
      <textarea
        class="shadow appearance-none border rounded w-full py-2 px-3 text-gray-700 leading-tight focus:outline-none focus:shadow-outline"
        id="description"
        placeholder="Enter your description"
      ></textarea>
    </div>
    <div class="mb-4">
      <label class="block text-gray-700 font-bold mb-2" for="image">
        Image
      </label>
      <input
        class="shadow appearance-none border rounded w-full py-2 px-3 text-gray-700 leading-tight focus:outline-none focus:shadow-outline"
        id="image"
        type="file"
      />
    </div>
    <div class="mb-4">
      <button
        class="bg-blue-500 hover:bg-blue-700 text-white font-bold py-2 px-4 rounded focus:outline-none focus:shadow-outline"
        type="submit"
      >
        Create
      </button>
    </div>
  </form>
  <div class="mt-8">
    <h2 class="text-lg font-bold mb-4">Preview</h2>
    <div class="border rounded p-4">
      <div class="flex items-center">
        <div class="w-16 h-16 rounded-full overflow-hidden mr-4">
          <img
            src="https://via.placeholder.com/150"
            alt="Placeholder"
            class="w-full h-full object-cover"
          />
        </div>
        <div>
          <h3 class="text-xl font-bold">Portfolio name</h3>
          <p class="text-gray-700">Portfolio description</p>
        </div>
      </div>
    </div>
  </div>
</div>
This HTML code creates the basic structure of the Create Portfolio (Not Yet) I Will to change it again UI component. It includes a form with input fields for name, description, and image upload. It also includes a preview section that displays the user's portfolio as they fill in the form.
Step 3: Style the form
Now that you have the HTML structure in place, you can start styling the form using Tailwind CSS classes. You can use the following CSS code to style the form:
input[type="text"],
textarea,
input[type="file"] {
  border: 1px solid #d2d6dc;
  padding: 0.5rem;
  font-size: 1rem;
}

input[type="text"]:focus,
textarea:focus,
input[type="file"]:focus {
  outline: none;
  border-color: #4a5568;
  box-shadow: 0 0 0 3px rgba(66, 153, 225, 0.5);
}

button[type="submit"] {
  background-color: #4299e1;
  color: #fff;
  padding: 0.5rem 1rem;
  border-radius: 0.25rem;
  font-size: 1rem;
}

button[type="submit"]:hover {
  background-color: #3182ce;
}

.preview {
  border: 1px solid #d2d6dc;
  border-radius: 0.25rem;
  padding: 1rem;
}
This CSS code adds some basic styles to the form and preview section. It also adds some custom styles for the input fields, submit button, and preview section.
Step 4: Add Tailwind CSS classes
Tailwind CSS provides a set of pre-defined CSS classes that you can use to style your UI components. You can use the following Tailwind CSS classes to style the Create Portfolio (Not Yet) I Will to change it again UI component:
<div class="container mx-auto py-8">
  <h1 class="text-2xl font-bold mb-4">Create Portfolio (Not Yet) I Will to change it again</h1>
  <form>
    <div class="mb-4">
      <label class="block text-gray-700 font-bold mb-2" for="name">
        Name
      </label>
      <input
        class="shadow appearance-none border rounded w-full py-2 px-3 text-gray-700 leading-tight focus:outline-none focus:shadow-outline"
        id="name"
        type="text"
        placeholder="Enter your name"
      />
    </div>
    <div class="mb-4">
      <label class="block text-gray-700 font-bold mb-2" for="description">
        Description
      </label>
      <textarea
        class="shadow appearance-none border rounded w-full py-2 px-3 text-gray-700 leading-tight focus:outline-none focus:shadow-outline"
        id="description"
        placeholder="Enter your description"
      ></textarea>
    </div>
    <div class="mb-4">
      <label class="block text-gray-700 font-bold mb-2" for="image">
        Image
      </label>
      <input
        class="shadow appearance-none border rounded w-full py-2 px-3 text-gray-700 leading-tight focus:outline-none focus:shadow-outline"
        id="image"
        type="file"
      />
    </div>
    <div class="mb-4">
      <button
        class="bg-blue-500 hover:bg-blue-700 text-white font-bold py-2 px-4 rounded focus:outline-none focus:shadow-outline"
        type="submit"
      >
        Create
      </button>
    </div>
  </form>
  <div class="mt-8">
    <h2 class="text-lg font-bold mb-4">Preview</h2>
    <div class="border rounded p-4">
      <div class="flex items-center">
        <div class="w-16 h-16 rounded-full overflow-hidden mr-4">
          <img
            src="https://via.placeholder.com/150"
            alt="Placeholder"
            class="w-full h-full object-cover"
          />
        </div>
        <div>
          <h3 class="text-xl font-bold">Portfolio name</h3>
          <p class="text-gray-700">Portfolio description</p>
        </div>
      </div>
    </div>
  </div>
</div>
This HTML code adds Tailwind CSS classes to the form and preview section. It uses classes such as container, mx-auto, py-8, text-2xl, font-bold, mb-4, shadow, appearance-none, border, rounded, w-full, py-2, px-3, text-gray-700, leading-tight, focus:outline-none, focus:shadow-outline, bg-blue-500, hover:bg-blue-700, text-white, font-bold, py-2, px-4, rounded, mt-8, text-lg, border, p-4, flex, items-center, w-16, h-16, overflow-hidden, mr-4, object-cover, text-xl, and text-gray-700.
Step 5: Add JavaScript code
To make the preview section dynamic, you need to add some JavaScript code. You can use the following JavaScript code to update the preview section as the user fills in the form:
const nameInput = document.getElementById("name");
const descriptionInput = document.getElementById("description");
const imageInput = document.getElementById("image");
const previewImage = document.getElementById("preview-image");
const previewName = document.getElementById("preview-name");
const previewDescription = document.getElementById("preview-description");

nameInput.addEventListener("input", () => {
  previewName.textContent = nameInput.value;
});

descriptionInput.addEventListener("input", () => {
  previewDescription.textContent = descriptionInput.value;
});

imageInput.addEventListener("change", () => {
  const file = imageInput.files[0];
  const reader = new FileReader();
  reader.readAsDataURL(file);
  reader.onload = () => {
    previewImage.src = reader.result;
  };
});
This JavaScript code adds event listeners to the input fields and updates the preview section as the user fills in the form. It also updates the preview section when the user uploads an image.
Step 6: Test your UI component
Finally, you need to test your Create Portfolio (Not Yet) I Will to change it again UI component to make sure it works as expected. You can fill in the form and see the preview section update in real-time.
Conclusion
In this article, we have learned how to build a Create Portfolio (Not Yet) I Will to change it again UI component using Tailwind CSS in 6 easy steps. We have seen how Tailwind CSS can help us build responsive and customizable UI components quickly. We have also seen how to add JavaScript code to make our UI component dynamic. I hope this article has been helpful to you and that you can use these techniques to build your own UI components.