- Published on
6 Steps To Make A Create With Tailwind CSS Like A Pro In Under An Hour
- What is Tailwind CSS?
- The description of Create UI component
- Why use Tailwind CSS to create a Create UI component?
- The preview of Create UI component
- The source code of Create UI component
- How to create a Create UI component with Tailwind CSS?
- Step 1: Set up your project
- Step 2: Create the HTML structure
- Step 3: Style the form elements
- Step 4: Style the buttons
- Step 5: Add interactivity
- Step 6: Customize the styles
- Conclusion
If you are a front-end developer, you might have heard of Tailwind CSS. It is a utility-first CSS framework that helps you rapidly build custom user interfaces. In this article, we will show you how to create a Create UI component with Tailwind CSS in under an hour.
What is Tailwind CSS?
Tailwind CSS is a CSS framework that provides a set of pre-defined CSS classes that you can use to style your HTML elements. It is different from other CSS frameworks like Bootstrap or Foundation because it does not come with pre-built components. Instead, it provides a set of utility classes that you can use to build your own custom components.
The description of Create UI component
The Create UI component is a common component that you can find in many web applications. It usually consists of a form with input fields and buttons that allow users to create a new item. In this tutorial, we will create a simple Create UI component that allows users to create a new task.
Why use Tailwind CSS to create a Create UI component?
Tailwind CSS provides a set of utility classes that make it easy to style HTML elements. You don't need to write custom CSS for every element, which saves you a lot of time. Additionally, Tailwind CSS is highly customizable, which means you can easily change the look and feel of your UI components.
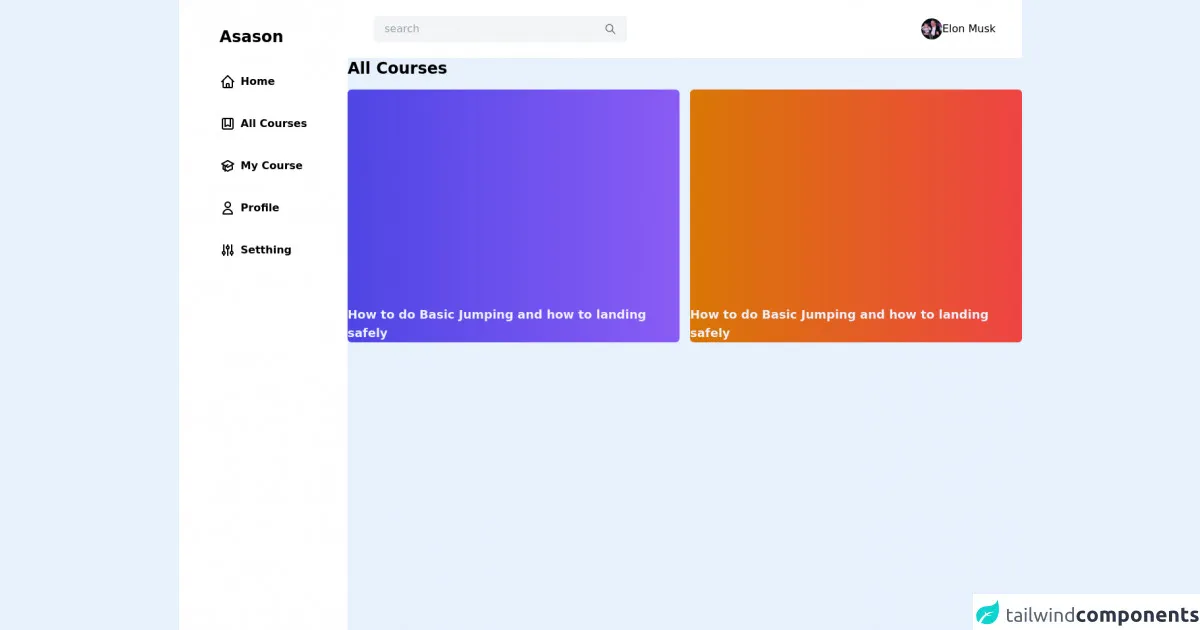
The preview of Create UI component
To give you an idea of what we will be creating, here is a preview of the Create UI component:
Free download of the Create's source code
The source code of Create UI component
Here is the source code of the Create UI component:
<div class="flex">
  <div class="flex w-2/5 md:w-1/4 h-screen bg-white">
    <div class="mx-auto py-10">
      <h1 class="text-2xl font-bold mb-10 cursor-pointer text-[#EC5252] duration-150">Asason</h1>
      <ul>
        <li class="flex space-x-2 mt-10 cursor-pointer hover:text-[#EC5252] duration-150">
          <svg xmlns="http://www.w3.org/2000/svg" class="h-6 w-6" fill="none" viewBox="0 0 24 24" stroke="currentColor">
            <path stroke-linecap="round" stroke-linejoin="round" stroke-width="2" d="M3 12l2-2m0 0l7-7 7 7M5 10v10a1 1 0 001 1h3m10-11l2 2m-2-2v10a1 1 0 01-1 1h-3m-6 0a1 1 0 001-1v-4a1 1 0 011-1h2a1 1 0 011 1v4a1 1 0 001 1m-6 0h6" />
          </svg>
          <span class="font-semibold">Home</span>
        </li>
        <li class="flex space-x-2 mt-10 cursor-pointer hover:text-[#EC5252] duration-150">
          <svg xmlns="http://www.w3.org/2000/svg" class="h-6 w-6" fill="none" viewBox="0 0 24 24" stroke="currentColor">
            <path stroke-linecap="round" stroke-linejoin="round" stroke-width="2" d="M16 4v12l-4-2-4 2V4M6 20h12a2 2 0 002-2V6a2 2 0 00-2-2H6a2 2 0 00-2 2v12a2 2 0 002 2z" />
          </svg>
          <span class="font-semibold">All Courses</span>
        </li>
        <li class="flex space-x-2 mt-10 cursor-pointer hover:text-[#EC5252] duration-150">
          <svg xmlns="http://www.w3.org/2000/svg" class="h-6 w-6" fill="none" viewBox="0 0 24 24" stroke="currentColor">
            <path d="M12 14l9-5-9-5-9 5 9 5z" />
            <path d="M12 14l6.16-3.422a12.083 12.083 0 01.665 6.479A11.952 11.952 0 0012 20.055a11.952 11.952 0 00-6.824-2.998 12.078 12.078 0 01.665-6.479L12 14z" />
            <path stroke-linecap="round" stroke-linejoin="round" stroke-width="2" d="M12 14l9-5-9-5-9 5 9 5zm0 0l6.16-3.422a12.083 12.083 0 01.665 6.479A11.952 11.952 0 0012 20.055a11.952 11.952 0 00-6.824-2.998 12.078 12.078 0 01.665-6.479L12 14zm-4 6v-7.5l4-2.222" />
          </svg>
          <span class="font-semibold">My Course</span>
        </li>
        <li class="flex space-x-2 mt-10 cursor-pointer hover:text-[#EC5252] duration-150">
          <svg xmlns="http://www.w3.org/2000/svg" class="h-6 w-6" fill="none" viewBox="0 0 24 24" stroke="currentColor">
            <path stroke-linecap="round" stroke-linejoin="round" stroke-width="2" d="M16 7a4 4 0 11-8 0 4 4 0 018 0zM12 14a7 7 0 00-7 7h14a7 7 0 00-7-7z" />
          </svg>
          <span class="font-semibold">Profile</span>
        </li>
        <li class="flex space-x-2 mt-10 cursor-pointer hover:text-[#EC5252] duration-150">
          <svg xmlns="http://www.w3.org/2000/svg" class="h-6 w-6" fill="none" viewBox="0 0 24 24" stroke="currentColor">
            <path stroke-linecap="round" stroke-linejoin="round" stroke-width="2" d="M12 6V4m0 2a2 2 0 100 4m0-4a2 2 0 110 4m-6 8a2 2 0 100-4m0 4a2 2 0 110-4m0 4v2m0-6V4m6 6v10m6-2a2 2 0 100-4m0 4a2 2 0 110-4m0 4v2m0-6V4" />
          </svg>
          <span class="font-semibold">Setthing</span>
        </li>
        <button class="w-full mt-10 bg-[#EC5252] rounded-full py-1.5 text-white">Learn</button>
      </ul>
    </div>
  </div>
  <main class=" min-h-screen w-full">
    <nav class="flex justify-between px-10 bg-white py-6">
      <div class="flex items-center bg-gray-100 px-4 py-2 rounded-md space-x-3 w-96">
        <input type="text" placeholder="search" class="bg-gray-100 outline-none w-full" />
        <svg xmlns="http://www.w3.org/2000/svg" class="h-5 w-5 cursor-pointer text-gray-500" fill="none" viewBox="0 0 24 24" stroke="currentColor">
          <path stroke-linecap="round" stroke-linejoin="round" stroke-width="2" d="M21 21l-6-6m2-5a7 7 0 11-14 0 7 7 0 0114 0z" />
        </svg>
      </div>
      <div class="flex items-center">
        <img class="w-8 rounded-full" src="https://imagez.tmz.com/image/f7/1by1/2021/12/14/f7703994b69d48ca802df55729a2325c_xl.jpg" alt="Elon Musk" />
        <p>Elon Musk</p>
      </div>
    </nav>
    <div class="w-full ">
      <h class="text-2xl font-semibold">All Courses</h1>
      <div class="md:flex mt-4 space-x-4  justify-center">
        <div class="h-96 bg-gradient-to-r from-indigo-600 to-purple-500 flex items-end rounded-md">
          <p class="text-lg text-indigo-50">How to do Basic Jumping and how to landing safely</p>
        </div>
        <div class="h-96 bg-gradient-to-r from-yellow-600 to-red-500 flex items-end rounded-md">
          <p class="text-lg text-indigo-50">How to do Basic Jumping and how to landing safely</p>
        </div>

      </div>
    </div>
  </main>
</div>
How to create a Create UI component with Tailwind CSS?
Now that you have seen the preview and source code of the Create UI component, let's dive into the steps to create it with Tailwind CSS.
Step 1: Set up your project
To use Tailwind CSS, you need to install it in your project. You can install it using npm or yarn. Here is the command to install it using npm:
npm install tailwindcss
After installing Tailwind CSS, you need to create a configuration file for it. You can create a configuration file using the following command:
npx tailwindcss init
This will create a tailwind.config.js file in your project.
Step 2: Create the HTML structure
The first step in creating the Create UI component is to create the HTML structure. You can use the HTML code from the source code section above as a starting point.
Step 3: Style the form elements
To style the form elements, you can use the pre-defined utility classes provided by Tailwind CSS. For example, you can use the mb-4 class to add margin-bottom to the form elements. You can also use the shadow class to add a shadow effect to the input fields.
Step 4: Style the buttons
To style the buttons, you can use the pre-defined utility classes provided by Tailwind CSS. For example, you can use the bg-blue-500 class to set the background color of the Create button to blue. You can also use the hover:bg-blue-700 class to change the background color of the Create button when the user hovers over it.
Step 5: Add interactivity
To make the Create UI component interactive, you need to add some JavaScript code. You can use JavaScript to handle form submission and button clicks. For example, you can use JavaScript to send a request to the server to create a new task when the user clicks the Create button.
Step 6: Customize the styles
Tailwind CSS is highly customizable, which means you can easily change the look and feel of your UI components. You can customize the colors, fonts, and spacing by editing the tailwind.config.js file. For example, you can change the background color of the Create button to red by adding the following code to the tailwind.config.js file:
module.exports = {
  theme: {
    extend: {
      colors: {
        red: '#ff0000',
      },
    },
  },
  variants: {},
  plugins: [],
}
Conclusion
In this article, we showed you how to create a Create UI component with Tailwind CSS in under an hour. We hope this tutorial has helped you understand the benefits of using Tailwind CSS and how to use it to create custom UI components. With Tailwind CSS, you can save a lot of time and create beautiful user interfaces.