- Published on
6 Easy Ways To Make A Contact List With Tailwind CSS
- What is Tailwind CSS?
- The description of Contact List ui component
- Why use Tailwind CSS to create a Contact List ui component?
- The preview of Contact List ui component.
- The source code of Contact List ui component.
- How to create a Contact List with Tailwind CSS?
- Step 1: Set up your HTML
- Step 2: Add Tailwind CSS to your project
- Step 3: Style the container
- Step 4: Style the contact divs
- Step 5: Style the headings
- Step 6: Style the paragraphs
- Conclusion
What is Tailwind CSS?
Tailwind CSS is a utility-first CSS framework that allows developers to quickly build custom user interfaces. It provides a set of pre-defined classes that can be used to style HTML elements. Tailwind CSS is highly customizable and can be configured to fit any design style.
The description of Contact List ui component
A contact list is a user interface component that displays a list of contacts. It typically includes a name, phone number, email address, and other relevant information. Contact lists are commonly used in web and mobile applications to help users manage their contacts.
Why use Tailwind CSS to create a Contact List ui component?
Tailwind CSS provides a set of pre-defined classes that can be used to style HTML elements. This makes it easy to create a custom contact list without having to write a lot of custom CSS. Tailwind CSS also provides a responsive grid system that makes it easy to create a contact list that looks great on any device.
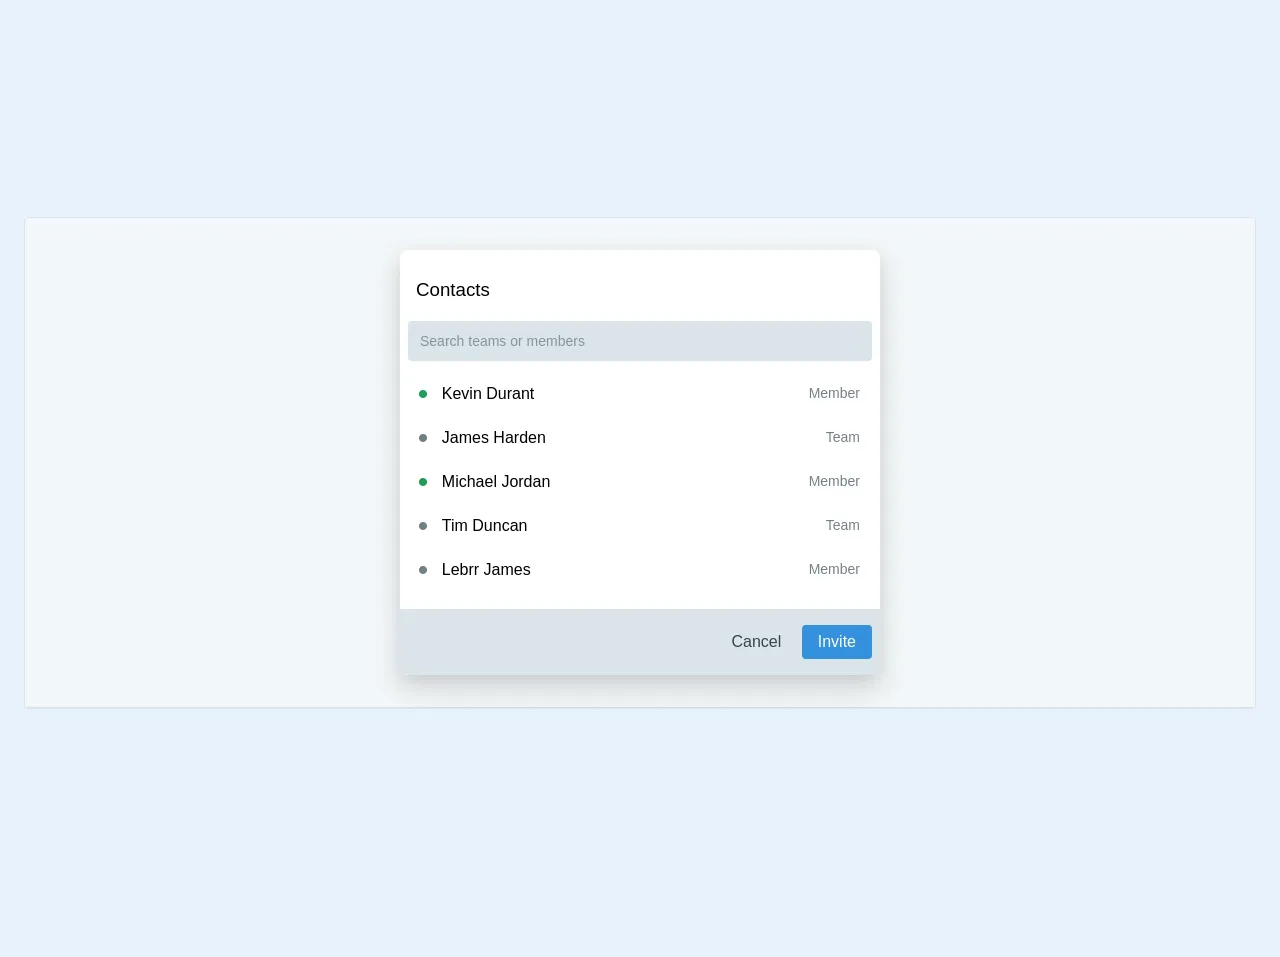
The preview of Contact List ui component.
To create a contact list with Tailwind CSS, we will use a combination of HTML and CSS. The HTML will define the structure of the contact list, and the CSS will style it using Tailwind CSS classes.
Free download of the Contact List's source code
The source code of Contact List ui component.
To create a contact list with Tailwind CSS, we will use the following HTML and CSS code:
<div class="w-full max-w-screen-xl mx-auto p-6">
<div class="relative rounded overflow-hidden border border-grey-light mb-8 bg-white">
<div class="border-b border-grey-light p-4 bg-grey-lighter py-8">
<div class="bg-white mx-auto max-w-sm shadow-lg rounded-lg overflow-hidden">
<div class="sm:flex sm:items-center px-2 py-4">
<div class="flex-grow">
<h3 class="font-normal px-2 py-3 leading-tight">Contacts</h3>
<input type="text" placeholder="Search teams or members"
class="my-2 w-full text-sm bg-grey-light text-grey-darkest rounded h-10 p-3 focus:outline-none" />
<div class="w-full">
<div class="flex cursor-pointer my-1 hover:bg-blue-lightest rounded">
<div class="w-8 h-10 text-center py-1">
<p class="text-3xl p-0 text-green-dark">•</p>
</div>
<div class="w-4/5 h-10 py-3 px-1">
<p class="hover:text-blue-dark">Kevin Durant</p>
</div>
<div class="w-1/5 h-10 text-right p-3">
<p class="text-sm text-grey-dark">Member</p>
</div>
</div>
<div class="flex cursor-pointer my-1 hover:bg-blue-lightest rounded">
<div class="w-8 h-10 text-center py-1">
<p class="text-3xl p-0 text-grey-dark">•</p>
</div>
<div class="w-4/5 h-10 py-3 px-1">
<p class="hover:text-blue-dark">James Harden</p>
</div>
<div class="w-1/5 h-10 text-right p-3">
<p class="text-sm text-grey-dark">Team</p>
</div>
</div>
<div class="flex cursor-pointer my-1 hover:bg-blue-lightest rounded">
<div class="w-8 h-10 text-center py-1">
<p class="text-3xl p-0 text-green-dark">•</p>
</div>
<div class="w-4/5 h-10 py-3 px-1">
<p class="hover:text-blue-dark">Michael Jordan</p>
</div>
<div class="w-1/5 h-10 text-right p-3">
<p class="text-sm text-grey-dark">Member</p>
</div>
</div>
<div class="flex cursor-pointer my-1 hover:bg-blue-lightest rounded">
<div class="w-8 h-10 text-center py-1">
<p class="text-3xl p-0 text-grey-dark">•</p>
</div>
<div class="w-4/5 h-10 py-3 px-1">
<p class="hover:text-blue-dark">Tim Duncan</p>
</div>
<div class="w-1/5 h-10 text-right p-3">
<p class="text-sm text-grey-dark">Team</p>
</div>
</div>
<div class="flex my-1 cursor-pointer hover:bg-blue-lightest rounded">
<div class="w-8 h-10 text-center py-1">
<p class="text-3xl p-0 text-grey-dark">•</p>
</div>
<div class="w-4/5 h-10 py-3 px-1">
<p class="hover:text-blue-dark">Lebrr James</p>
</div>
<div class="w-1/5 h-10 text-right p-3">
<p class="text-sm text-grey-dark">Member</p>
</div>
</div>
</div>
</div>
</div>
<div class="sm:flex bg-grey-light sm:items-center px-2 py-4">
<div class="flex-grow text-right">
<button class="text-grey-darkest hover:text-grey-dark py-2 px-4 rounded">
Cancel
</button>
<button class="bg-blue hover:bg-blue-dark text-white py-2 px-4 rounded">
Invite
</button>
</div>
</div>
</div>
</div>
</div>
</div>
How to create a Contact List with Tailwind CSS?
Here are six easy steps to create a contact list with Tailwind CSS:
Step 1: Set up your HTML
The first step is to set up your HTML. You will need to create a container div and a list of contacts. Each contact should be wrapped in a div with a class of "contact".
<div class="container">
  <div class="contact">
    <h2>John Doe</h2>
    <p>555-555-5555</p>
    <p>[email protected]</p>
  </div>
  <div class="contact">
    <h2>Jane Doe</h2>
    <p>555-555-5555</p>
    <p>[email protected]</p>
  </div>
</div>
Step 2: Add Tailwind CSS to your project
Next, you will need to add Tailwind CSS to your project. You can do this by including the Tailwind CSS stylesheet in your HTML file.
<link rel="stylesheet" href="https://cdn.jsdelivr.net/npm/[email protected]/dist/tailwind.min.css">
Step 3: Style the container
To style the container, you can use the "mx-auto" class to center it on the page. You can also use the "max-w-lg" class to set a maximum width for the container.
<div class="container mx-auto max-w-lg">
  ...
</div>
Step 4: Style the contact divs
To style the contact divs, you can use the "bg-white" class to set the background color to white. You can also use the "p-4" class to add padding to the divs.
<div class="contact bg-white p-4">
  ...
</div>
Step 5: Style the headings
To style the headings, you can use the "text-lg" class to set the font size to large. You can also use the "font-bold" class to make the text bold.
<h2 class="text-lg font-bold">John Doe</h2>
Step 6: Style the paragraphs
To style the paragraphs, you can use the "text-gray-500" class to set the text color to gray. You can also use the "mt-2" class to add margin to the top of the paragraphs.
<p class="text-gray-500 mt-2">555-555-5555</p>
Conclusion
In conclusion, creating a contact list with Tailwind CSS is a simple and straightforward process. By using pre-defined classes, you can quickly style your contact list without having to write a lot of custom CSS. With Tailwind CSS, you can create a contact list that looks great on any device.