- Published on
Ways To Make A Contact Form With Tailwind CSS In 60 Minutes
- What is Tailwind CSS?
- The description of Contact Form ui component
- Why use Tailwind CSS to create a Contact Form ui component?
- The preview of Contact Form ui component.
- The source code of Contact Form ui component.
- How to create a Contact Form with Tailwind CSS?
- Conclusion
As a FrontEnd technology blogger, you may have heard of Tailwind CSS, a utility-first CSS framework that allows you to quickly create beautiful and responsive user interfaces. In this article, we will explore how to create a contact form with Tailwind CSS in just 60 minutes.
What is Tailwind CSS?
Tailwind CSS is a utility-first CSS framework that allows you to quickly create beautiful and responsive user interfaces. It provides a set of pre-defined classes that you can use to style your HTML elements, such as buttons, forms, and typography. With Tailwind CSS, you can create complex layouts and designs without writing custom CSS code.
The description of Contact Form ui component
A contact form is a UI component that allows users to send a message to the website owner or administrator. It typically includes fields for the user's name, email address, subject, and message. Contact forms are an essential part of any website that wants to provide a way for users to get in touch with the website owner or administrator.
Why use Tailwind CSS to create a Contact Form ui component?
Tailwind CSS provides a set of pre-defined classes that you can use to style your HTML elements. This makes it easy to create a contact form without writing custom CSS code. Additionally, Tailwind CSS is a responsive CSS framework, which means that your contact form will look great on any device, whether it's a desktop computer, tablet, or smartphone.
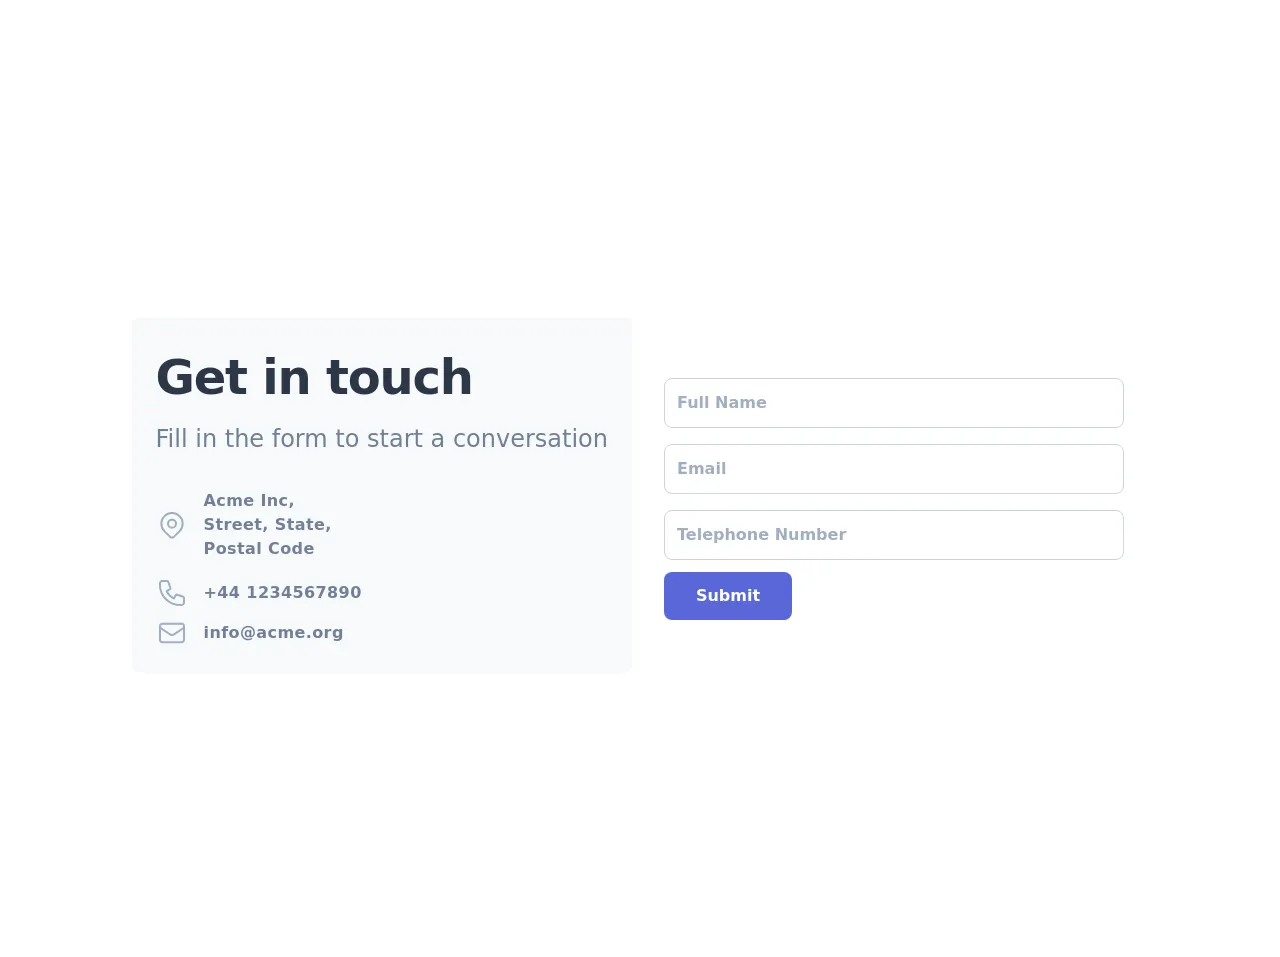
The preview of Contact Form ui component.
To create a contact form with Tailwind CSS, we will use a set of pre-defined classes to style our HTML elements. Here is a preview of what our contact form will look like:
Free download of the Contact Form's source code
The source code of Contact Form ui component.
To create our contact form, we will use HTML and Tailwind CSS classes. Here is the source code for our contact form:
<div class="relative flex items-top justify-center min-h-screen bg-white dark:bg-gray-900 sm:items-center sm:pt-0">
        <div class="max-w-6xl mx-auto sm:px-6 lg:px-8">
            <div class="mt-8 overflow-hidden">
                <div class="grid grid-cols-1 md:grid-cols-2">
                    <div class="p-6 mr-2 bg-gray-100 dark:bg-gray-800 sm:rounded-lg">
                        <h1 class="text-4xl sm:text-5xl text-gray-800 dark:text-white font-extrabold tracking-tight">
                            Get in touch
                        </h1>
                        <p class="text-normal text-lg sm:text-2xl font-medium text-gray-600 dark:text-gray-400 mt-2">
                            Fill in the form to start a conversation
                        </p>

                        <div class="flex items-center mt-8 text-gray-600 dark:text-gray-400">
                            <svg fill="none" stroke="currentColor" stroke-linecap="round" stroke-linejoin="round" stroke-width="1.5" viewBox="0 0 24 24" class="w-8 h-8 text-gray-500">
                                <path stroke-linecap="round" stroke-linejoin="round" stroke-width="1.5" d="M17.657 16.657L13.414 20.9a1.998 1.998 0 01-2.827 0l-4.244-4.243a8 8 0 1111.314 0z"/>
                                <path stroke-linecap="round" stroke-linejoin="round" stroke-width="1.5" d="M15 11a3 3 0 11-6 0 3 3 0 016 0z"/>
                            </svg>
                            <div class="ml-4 text-md tracking-wide font-semibold w-40">
                                Acme Inc, Street, State,
                                Postal Code
                            </div>
                        </div>

                        <div class="flex items-center mt-4 text-gray-600 dark:text-gray-400">
                            <svg fill="none" stroke="currentColor" stroke-linecap="round" stroke-linejoin="round" stroke-width="1.5" viewBox="0 0 24 24" class="w-8 h-8 text-gray-500">
                                <path stroke-linecap="round" stroke-linejoin="round" stroke-width="1.5" d="M3 5a2 2 0 012-2h3.28a1 1 0 01.948.684l1.498 4.493a1 1 0 01-.502 1.21l-2.257 1.13a11.042 11.042 0 005.516 5.516l1.13-2.257a1 1 0 011.21-.502l4.493 1.498a1 1 0 01.684.949V19a2 2 0 01-2 2h-1C9.716 21 3 14.284 3 6V5z"/>
                            </svg>
                            <div class="ml-4 text-md tracking-wide font-semibold w-40">
                                +44 1234567890
                            </div>
                        </div>

                        <div class="flex items-center mt-2 text-gray-600 dark:text-gray-400">
                            <svg fill="none" stroke="currentColor" stroke-linecap="round" stroke-linejoin="round" stroke-width="1.5" viewBox="0 0 24 24" class="w-8 h-8 text-gray-500">
                                <path stroke-linecap="round" stroke-linejoin="round" stroke-width="1.5" d="M3 8l7.89 5.26a2 2 0 002.22 0L21 8M5 19h14a2 2 0 002-2V7a2 2 0 00-2-2H5a2 2 0 00-2 2v10a2 2 0 002 2z"/>
                            </svg>
                            <div class="ml-4 text-md tracking-wide font-semibold w-40">
                                [email protected]
                            </div>
                        </div>
                    </div>

                    <form class="p-6 flex flex-col justify-center">
                        <div class="flex flex-col">
                            <label for="name" class="hidden">Full Name</label>
                            <input type="name" name="name" id="name" placeholder="Full Name" class="w-100 mt-2 py-3 px-3 rounded-lg bg-white dark:bg-gray-800 border border-gray-400 dark:border-gray-700 text-gray-800 font-semibold focus:border-indigo-500 focus:outline-none">
                        </div>

                        <div class="flex flex-col mt-2">
                            <label for="email" class="hidden">Email</label>
                            <input type="email" name="email" id="email" placeholder="Email" class="w-100 mt-2 py-3 px-3 rounded-lg bg-white dark:bg-gray-800 border border-gray-400 dark:border-gray-700 text-gray-800 font-semibold focus:border-indigo-500 focus:outline-none">
                        </div>

                        <div class="flex flex-col mt-2">
                            <label for="tel" class="hidden">Number</label>
                            <input type="tel" name="tel" id="tel" placeholder="Telephone Number" class="w-100 mt-2 py-3 px-3 rounded-lg bg-white dark:bg-gray-800 border border-gray-400 dark:border-gray-700 text-gray-800 font-semibold focus:border-indigo-500 focus:outline-none">
                        </div>

                        <button type="submit" class="md:w-32 bg-indigo-600 hover:bg-blue-dark text-white font-bold py-3 px-6 rounded-lg mt-3 hover:bg-indigo-500 transition ease-in-out duration-300">
                            Submit
                        </button>
                    </form>
                </div>
            </div>
        </div>
    </div>
How to create a Contact Form with Tailwind CSS?
Now that we have seen a preview of what our contact form will look like and the source code for our contact form, let's dive into how to create a contact form with Tailwind CSS.
Step 1: Create the HTML structure
The first step is to create the HTML structure for our contact form. Here is the HTML code for our contact form:
<form class="bg-white shadow-md rounded px-8 pt-6 pb-8 mb-4">
  <div class="mb-4">
    <label class="block text-gray-700 font-bold mb-2" for="name">
      Name
    </label>
    <input class="shadow appearance-none border rounded w-full py-2 px-3 text-gray-700 leading-tight focus:outline-none focus:shadow-outline" id="name" type="text" placeholder="Enter your name">
  </div>
  <div class="mb-4">
    <label class="block text-gray-700 font-bold mb-2" for="email">
      Email
    </label>
    <input class="shadow appearance-none border rounded w-full py-2 px-3 text-gray-700 leading-tight focus:outline-none focus:shadow-outline" id="email" type="email" placeholder="Enter your email">
  </div>
  <div class="mb-4">
    <label class="block text-gray-700 font-bold mb-2" for="subject">
      Subject
    </label>
    <input class="shadow appearance-none border rounded w-full py-2 px-3 text-gray-700 leading-tight focus:outline-none focus:shadow-outline" id="subject" type="text" placeholder="Enter the subject">
  </div>
  <div class="mb-4">
    <label class="block text-gray-700 font-bold mb-2" for="message">
      Message
    </label>
    <textarea class="shadow appearance-none border rounded w-full py-2 px-3 text-gray-700 leading-tight focus:outline-none focus:shadow-outline" id="message" placeholder="Enter your message"></textarea>
  </div>
  <div class="flex items-center justify-between">
    <button class="bg-blue-500 hover:bg-blue-700 text-white font-bold py-2 px-4 rounded focus:outline-none focus:shadow-outline" type="button">
      Send
    </button>
  </div>
</form>
In this code, we have created a form element with a set of pre-defined classes that we will use to style our contact form.
Step 2: Style the contact form with Tailwind CSS
The next step is to style our contact form with Tailwind CSS. We will use a set of pre-defined classes to style our HTML elements. Here is the CSS code for our contact form:
/* Set the width of the form container */
form {
  max-width: 600px;
}

/* Style the input fields */
input[type="text"],
input[type="email"],
textarea {
  border: 1px solid #ccc;
  padding: 10px;
  width: 100%;
  margin-bottom: 10px;
}

/* Style the button */
button {
  background-color: #3498db;
  color: #fff;
  padding: 10px 20px;
  border: none;
  border-radius: 4px;
  cursor: pointer;
}

/* Style the button on hover */
button:hover {
  background-color: #2980b9;
}
In this code, we have used a set of pre-defined classes to style our HTML elements. We have also defined a set of custom styles for our button element.
Step 3: Add JavaScript functionality
The final step is to add JavaScript functionality to our contact form. We will use JavaScript to validate the form fields and submit the form data to a server. Here is the JavaScript code for our contact form:
// Get the form element
const form = document.querySelector('form');

// Add an event listener to the form
form.addEventListener('submit', (event) => {
  // Prevent the form from submitting
  event.preventDefault();

  // Get the form data
  const formData = new FormData(form);

  // Validate the form data
  if (!formData.get('name') || !formData.get('email') || !formData.get('subject') || !formData.get('message')) {
    alert('Please fill out all the fields.');
    return;
  }

  // Submit the form data to a server
  fetch('/api/contact', {
    method: 'POST',
    body: formData
  })
  .then(response => response.json())
  .then(data => {
    alert('Your message has been sent.');
    form.reset();
  })
  .catch(error => {
    alert('An error occurred while sending your message.');
  });
});
In this code, we have added an event listener to the form element that listens for a submit event. When the form is submitted, we prevent the default form submission behavior and validate the form data. If the form data is valid, we submit the form data to a server using the fetch API.
Conclusion
In this article, we have explored how to create a contact form with Tailwind CSS in just 60 minutes. We have seen how Tailwind CSS provides a set of pre-defined classes that you can use to style your HTML elements, and how to use JavaScript to validate the form fields and submit the form data to a server. By following these steps, you can create a beautiful and responsive contact form for your website in no time.