- Published on
6 Easy Ways To Build A Comments With Tailwind CSS Without Even Thinking About It
- What is Tailwind CSS?
- The description of comments ui component
- Why use Tailwind CSS to create a comments ui component?
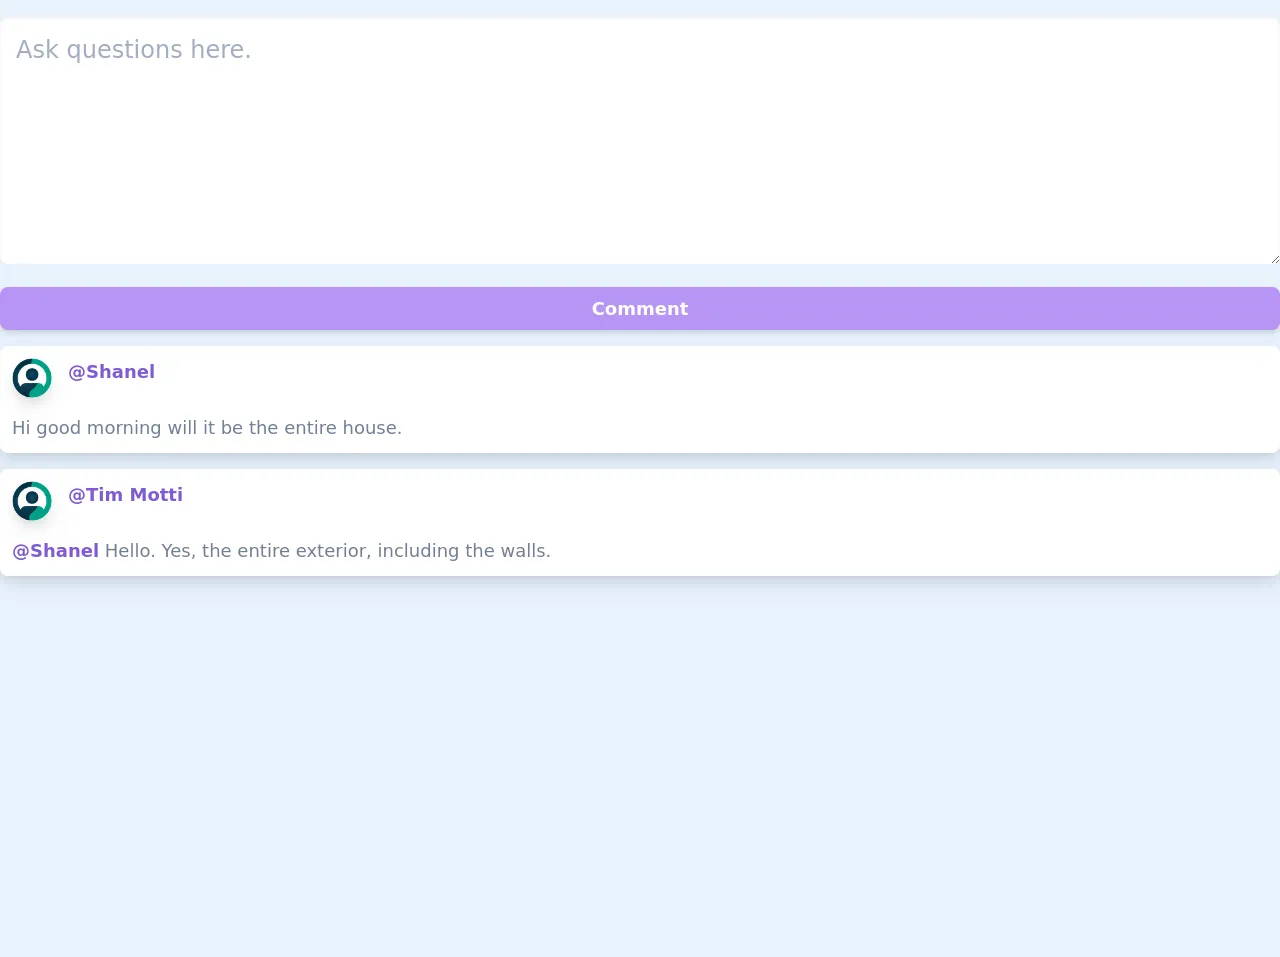
- The preview of comments ui component.
- The source code of comments ui component.
- How to create a comments with Tailwind CSS?
- Conclusion
As a FrontEnd technology blogger, I know how important it is to create a user-friendly interface for your website. One of the most important components of any website is the comments section. In this article, I will show you how to create a comments section using Tailwind CSS without even thinking about it.
What is Tailwind CSS?
Tailwind CSS is a utility-first CSS framework that helps you quickly design and build user interfaces. It provides a set of pre-defined classes that you can use to style your HTML elements. With Tailwind CSS, you can create beautiful and responsive designs without writing any custom CSS.
The description of comments ui component
The comments section is an essential part of any website that allows users to interact with the content and share their thoughts. A comments section usually consists of a form where users can enter their name, email, and comment. The comments are then displayed in a list format, with the most recent comments at the top.
Why use Tailwind CSS to create a comments ui component?
Tailwind CSS provides a set of pre-defined classes that you can use to style your HTML elements. This makes it easy to create a comments section without writing any custom CSS. Tailwind CSS also provides responsive classes that allow you to create a responsive design that looks great on any device.
The preview of comments ui component.
To create a comments section using Tailwind CSS, you can use the following classes:
bg-white: Sets the background color of the comments section to white.p-4: Adds padding to the comments section.border: Adds a border around the comments section.rounded-lg: Rounds the corners of the comments section.shadow-md: Adds a shadow to the comments section.text-gray-700: Sets the text color of the comments section to gray.
Free download of the comments's source code
The source code of comments ui component.
To create the comments section, you can use the following HTML code:
<div class="bg-white p-4 border rounded-lg shadow-md">
  <form>
    <div class="mb-4">
      <label class="block text-gray-700 font-bold mb-2" for="name">
        Name
      </label>
      <input
        class="shadow appearance-none border rounded w-full py-2 px-3 text-gray-700 leading-tight focus:outline-none focus:shadow-outline"
        id="name"
        type="text"
        placeholder="Enter your name"
      />
    </div>
    <div class="mb-4">
      <label class="block text-gray-700 font-bold mb-2" for="email">
        Email
      </label>
      <input
        class="shadow appearance-none border rounded w-full py-2 px-3 text-gray-700 leading-tight focus:outline-none focus:shadow-outline"
        id="email"
        type="email"
        placeholder="Enter your email"
      />
    </div>
    <div class="mb-4">
      <label class="block text-gray-700 font-bold mb-2" for="comment">
        Comment
      </label>
      <textarea
        class="shadow appearance-none border rounded w-full py-2 px-3 text-gray-700 leading-tight focus:outline-none focus:shadow-outline"
        id="comment"
        placeholder="Enter your comment"
      ></textarea>
    </div>
    <button
      class="bg-blue-500 hover:bg-blue-700 text-white font-bold py-2 px-4 rounded focus:outline-none focus:shadow-outline"
      type="button"
    >
      Post Comment
    </button>
  </form>
  <div class="mt-4">
    <div class="bg-gray-100 p-4 rounded-lg shadow-md">
      <div class="flex items-center">
        <div class="flex-shrink-0">
          <img
            class="h-10 w-10 rounded-full"
            src="https://via.placeholder.com/150"
            alt=""
          />
        </div>
        <div class="ml-4">
          <div class="text-sm font-medium text-gray-900">
            John Doe
          </div>
          <div class="text-sm text-gray-500">
            Lorem ipsum dolor sit amet, consectetur adipiscing elit.
          </div>
        </div>
      </div>
    </div>
    <div class="bg-gray-100 p-4 mt-4 rounded-lg shadow-md">
      <div class="flex items-center">
        <div class="flex-shrink-0">
          <img
            class="h-10 w-10 rounded-full"
            src="https://via.placeholder.com/150"
            alt=""
          />
        </div>
        <div class="ml-4">
          <div class="text-sm font-medium text-gray-900">
            Jane Doe
          </div>
          <div class="text-sm text-gray-500">
            Lorem ipsum dolor sit amet, consectetur adipiscing elit.
          </div>
        </div>
      </div>
    </div>
  </div>
</div>
<div>

    <section class="rounded-b-lg  mt-4 ">


<form action="/" accept-charset="UTF-8" method="post"><input type="hidden" >
  <textarea class="w-full shadow-inner p-4 border-0 mb-4 rounded-lg focus:shadow-outline text-2xl" placeholder="Ask questions here." cols="6" rows="6" id="comment_content" spellcheck="false"></textarea>
  <button class="font-bold py-2 px-4 w-full bg-purple-400 text-lg text-white shadow-md rounded-lg ">Comment </button>
</form>

      <div id="task-comments" class="pt-4">
        <!--     comment-->
<div class="bg-white rounded-lg p-3  flex flex-col justify-center items-center md:items-start shadow-lg mb-4">
  <div class="flex flex-row justify-center mr-2">
    <img alt="avatar" width="48" height="48" class="rounded-full w-10 h-10 mr-4 shadow-lg mb-4" src="https://cdn1.iconfinder.com/data/icons/technology-devices-2/100/Profile-512.png">
    <h3 class="text-purple-600 font-semibold text-lg text-center md:text-left ">@Shanel</h3>
  </div>


    <p style="width: 90%" class="text-gray-600 text-lg text-center md:text-left ">Hi good morning will it be the entire house. </p>

</div>
<!--  comment end--><!--     comment-->
<div class="bg-white rounded-lg p-3  flex flex-col justify-center items-center md:items-start shadow-lg mb-4">
  <div class="flex flex-row justify-center mr-2">
    <img alt="avatar" width="48" height="48" class="rounded-full w-10 h-10 mr-4 shadow-lg mb-4" src="https://cdn1.iconfinder.com/data/icons/technology-devices-2/100/Profile-512.png">
    <h3 class="text-purple-600 font-semibold text-lg text-center md:text-left ">@Tim Motti</h3>
  </div>


    <p style="width: 90%" class="text-gray-600 text-lg text-center md:text-left "><span class="text-purple-600 font-semibold">@Shanel</span> Hello. Yes, the entire exterior, including the walls. </p>

</div>
<!--  comment end-->
      </div>
    </section>

  </div>
How to create a comments with Tailwind CSS?
To create a comments section using Tailwind CSS, you can follow these easy steps:
- Add the necessary HTML code for the comments section.
- Add the necessary Tailwind CSS classes to the HTML elements.
- Customize the comments section to match your website's design.
Here's an example of how you can customize the comments section:
<div class="bg-white p-4 border rounded-lg shadow-md">
  <form>
    <!-- Form fields -->
    <button
      class="bg-blue-500 hover:bg-blue-700 text-white font-bold py-2 px-4 rounded focus:outline-none focus:shadow-outline"
      type="button"
    >
      Post Comment
    </button>
  </form>
  <div class="mt-4">
    <!-- Comment list -->
  </div>
</div>
You can customize the comments section by changing the background color, border, and shadow. You can also change the color of the submit button and the font size of the comments.
Conclusion
Creating a comments section using Tailwind CSS is easy and requires minimal effort. With Tailwind CSS, you can create a beautiful and responsive comments section without writing any custom CSS. By following the steps outlined in this article, you can create a comments section that matches your website's design and provides a great user experience.