- Published on
Ways To Create A Comment Form With Tailwind CSS In 60 Minutes
- What is Tailwind CSS?
- The description of Comment form ui component
- Why use Tailwind CSS to create a Comment form ui component?
- The preview of Comment form ui component
- The source code of Comment form ui component
- How to create a Comment form with Tailwind CSS?
- Step 1: Create an HTML form
- Step 2: Add Tailwind CSS classes
- Step 3: Customize the design
- Conclusion
As a FrontEnd technology blogger, you must be aware of the importance of creating a user-friendly comment form. A comment form is an essential part of any website that allows users to share their thoughts and opinions. In this article, we will discuss how to create a comment form with Tailwind CSS in just 60 minutes.
What is Tailwind CSS?
Tailwind CSS is a utility-first CSS framework that allows you to create custom designs quickly. It provides a set of pre-defined classes that you can use to style your HTML elements. Tailwind CSS is easy to learn and use, making it a popular choice among developers.
The description of Comment form ui component
A comment form is a user interface component that allows users to submit comments on a website. It typically includes fields for the user's name, email address, website, and comment. A comment form should be easy to use and visually appealing to encourage users to leave comments.
Why use Tailwind CSS to create a Comment form ui component?
Tailwind CSS provides a set of pre-defined classes that you can use to style your comment form quickly. It also allows you to customize your design by creating your own utility classes. Tailwind CSS is easy to learn and use, making it an excellent choice for creating a comment form.
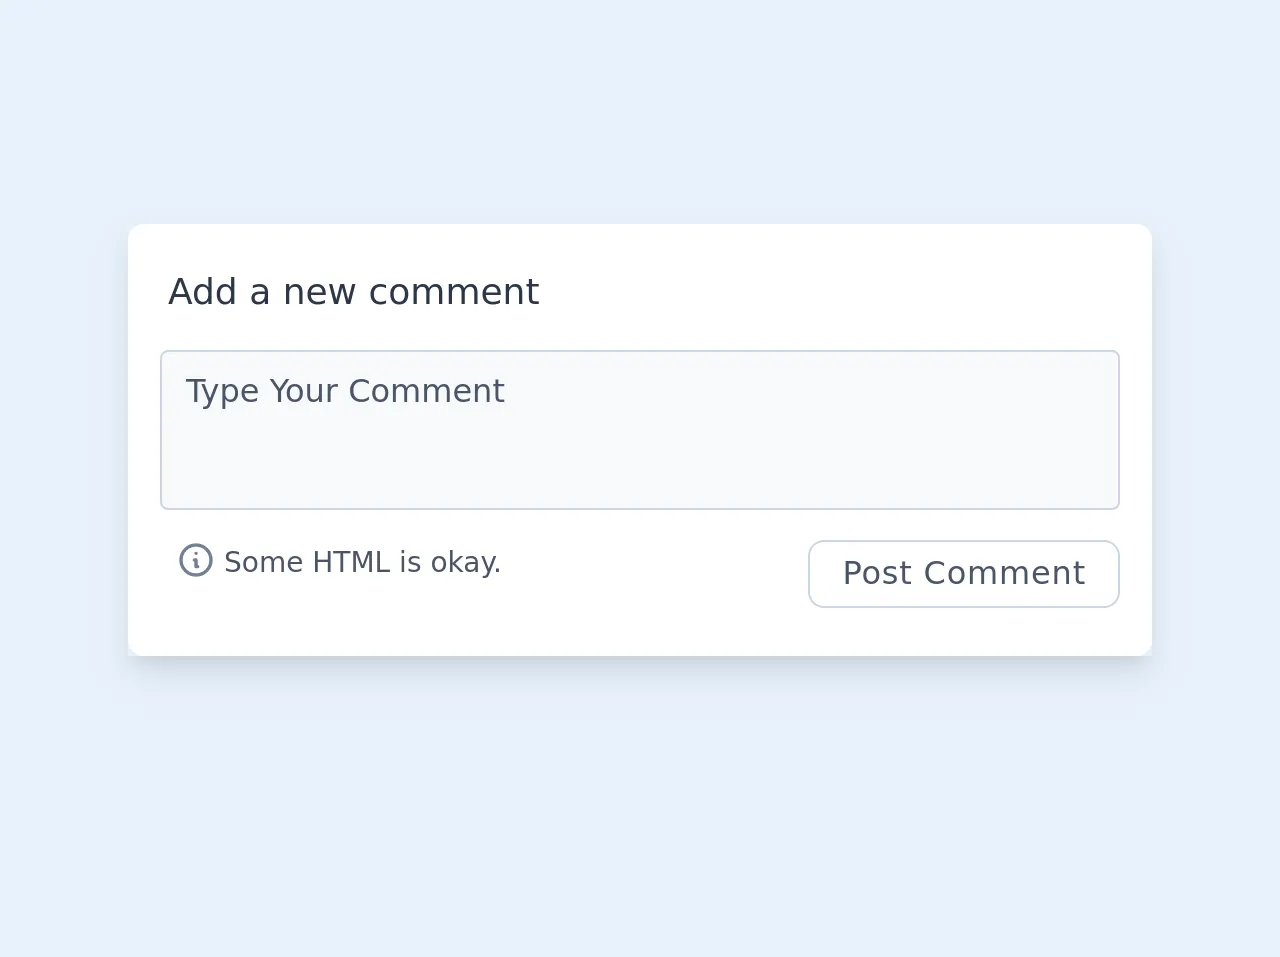
The preview of Comment form ui component
To create a comment form with Tailwind CSS, we will use a simple HTML form. The form will include fields for the user's name, email address, website, and comment. We will use Tailwind CSS classes to style the form and make it visually appealing.
Free download of the Comment form's source code
The source code of Comment form ui component
To create a comment form with Tailwind CSS, we will use the following HTML code. We will add Tailwind CSS classes to style the form and make it visually appealing.
<!-- comment form -->
<div class="flex mx-auto items-center justify-center shadow-lg mt-56 mx-8 mb-4 max-w-lg">
   <form class="w-full max-w-xl bg-white rounded-lg px-4 pt-2">
      <div class="flex flex-wrap -mx-3 mb-6">
         <h2 class="px-4 pt-3 pb-2 text-gray-800 text-lg">Add a new comment</h2>
         <div class="w-full md:w-full px-3 mb-2 mt-2">
            <textarea class="bg-gray-100 rounded border border-gray-400 leading-normal resize-none w-full h-20 py-2 px-3 font-medium placeholder-gray-700 focus:outline-none focus:bg-white" name="body" placeholder='Type Your Comment' required></textarea>
         </div>
         <div class="w-full md:w-full flex items-start md:w-full px-3">
            <div class="flex items-start w-1/2 text-gray-700 px-2 mr-auto">
               <svg fill="none" class="w-5 h-5 text-gray-600 mr-1" viewBox="0 0 24 24" stroke="currentColor">
                  <path stroke-linecap="round" stroke-linejoin="round" stroke-width="2" d="M13 16h-1v-4h-1m1-4h.01M21 12a9 9 0 11-18 0 9 9 0 0118 0z"/>
               </svg>
               <p class="text-xs md:text-sm pt-px">Some HTML is okay.</p>
            </div>
            <div class="-mr-1">
               <input type='submit' class="bg-white text-gray-700 font-medium py-1 px-4 border border-gray-400 rounded-lg tracking-wide mr-1 hover:bg-gray-100" value='Post Comment'>
            </div>
         </div>
      </form>
   </div>
</div>
How to create a Comment form with Tailwind CSS?
To create a comment form with Tailwind CSS, follow these steps:
Step 1: Create an HTML form
The first step is to create an HTML form that includes fields for the user's name, email address, website, and comment. Here's an example of what the HTML code might look like:
<form>
  <div class="mb-4">
    <label class="block text-gray-700 text-sm font-bold mb-2" for="name">
      Name
    </label>
    <input
      class="shadow appearance-none border rounded w-full py-2 px-3 text-gray-700 leading-tight focus:outline-none focus:shadow-outline"
      id="name"
      type="text"
      placeholder="Enter your name"
    />
  </div>
  <div class="mb-4">
    <label class="block text-gray-700 text-sm font-bold mb-2" for="email">
      Email
    </label>
    <input
      class="shadow appearance-none border rounded w-full py-2 px-3 text-gray-700 leading-tight focus:outline-none focus:shadow-outline"
      id="email"
      type="email"
      placeholder="Enter your email"
    />
  </div>
  <div class="mb-4">
    <label class="block text-gray-700 text-sm font-bold mb-2" for="website">
      Website
    </label>
    <input
      class="shadow appearance-none border rounded w-full py-2 px-3 text-gray-700 leading-tight focus:outline-none focus:shadow-outline"
      id="website"
      type="text"
      placeholder="Enter your website"
    />
  </div>
  <div class="mb-4">
    <label class="block text-gray-700 text-sm font-bold mb-2" for="comment">
      Comment
    </label>
    <textarea
      class="shadow appearance-none border rounded w-full py-2 px-3 text-gray-700 leading-tight focus:outline-none focus:shadow-outline"
      id="comment"
      placeholder="Enter your comment"
    ></textarea>
  </div>
  <div class="flex items-center justify-between">
    <button
      class="bg-blue-500 hover:bg-blue-700 text-white font-bold py-2 px-4 rounded focus:outline-none focus:shadow-outline"
      type="button"
    >
      Submit
    </button>
  </div>
</form>
Step 2: Add Tailwind CSS classes
The next step is to add Tailwind CSS classes to the HTML form to style it. We will use classes like mb-4, block, text-gray-700, font-bold, shadow, appearance-none, border, rounded, w-full, py-2, px-3, leading-tight, focus:outline-none, focus:shadow-outline, bg-blue-500, hover:bg-blue-700, text-white, and font-bold. Here's an example of what the HTML code might look like with Tailwind CSS classes added:
<form>
  <div class="mb-4">
    <label class="block text-gray-700 text-sm font-bold mb-2" for="name">
      Name
    </label>
    <input
      class="shadow appearance-none border rounded w-full py-2 px-3 text-gray-700 leading-tight focus:outline-none focus:shadow-outline"
      id="name"
      type="text"
      placeholder="Enter your name"
    />
  </div>
  <div class="mb-4">
    <label class="block text-gray-700 text-sm font-bold mb-2" for="email">
      Email
    </label>
    <input
      class="shadow appearance-none border rounded w-full py-2 px-3 text-gray-700 leading-tight focus:outline-none focus:shadow-outline"
      id="email"
      type="email"
      placeholder="Enter your email"
    />
  </div>
  <div class="mb-4">
    <label class="block text-gray-700 text-sm font-bold mb-2" for="website">
      Website
    </label>
    <input
      class="shadow appearance-none border rounded w-full py-2 px-3 text-gray-700 leading-tight focus:outline-none focus:shadow-outline"
      id="website"
      type="text"
      placeholder="Enter your website"
    />
  </div>
  <div class="mb-4">
    <label class="block text-gray-700 text-sm font-bold mb-2" for="comment">
      Comment
    </label>
    <textarea
      class="shadow appearance-none border rounded w-full py-2 px-3 text-gray-700 leading-tight focus:outline-none focus:shadow-outline"
      id="comment"
      placeholder="Enter your comment"
    ></textarea>
  </div>
  <div class="flex items-center justify-between">
    <button
      class="bg-blue-500 hover:bg-blue-700 text-white font-bold py-2 px-4 rounded focus:outline-none focus:shadow-outline"
      type="button"
    >
      Submit
    </button>
  </div>
</form>
Step 3: Customize the design
The final step is to customize the design of the comment form. You can do this by creating your own utility classes or by modifying the existing Tailwind CSS classes. For example, you could change the background color of the submit button by adding the bg-red-500 class. Here's an example of what the HTML code might look like with a customized design:
<form>
  <div class="mb-4">
    <label class="block text-gray-700 text-sm font-bold mb-2" for="name">
      Name
    </label>
    <input
      class="shadow appearance-none border rounded w-full py-2 px-3 text-gray-700 leading-tight focus:outline-none focus:shadow-outline"
      id="name"
      type="text"
      placeholder="Enter your name"
    />
  </div>
  <div class="mb-4">
    <label class="block text-gray-700 text-sm font-bold mb-2" for="email">
      Email
    </label>
    <input
      class="shadow appearance-none border rounded w-full py-2 px-3 text-gray-700 leading-tight focus:outline-none focus:shadow-outline"
      id="email"
      type="email"
      placeholder="Enter your email"
    />
  </div>
  <div class="mb-4">
    <label class="block text-gray-700 text-sm font-bold mb-2" for="website">
      Website
    </label>
    <input
      class="shadow appearance-none border rounded w-full py-2 px-3 text-gray-700 leading-tight focus:outline-none focus:shadow-outline"
      id="website"
      type="text"
      placeholder="Enter your website"
    />
  </div>
  <div class="mb-4">
    <label class="block text-gray-700 text-sm font-bold mb-2" for="comment">
      Comment
    </label>
    <textarea
      class="shadow appearance-none border rounded w-full py-2 px-3 text-gray-700 leading-tight focus:outline-none focus:shadow-outline"
      id="comment"
      placeholder="Enter your comment"
    ></textarea>
  </div>
  <div class="flex items-center justify-between">
    <button
      class="bg-red-500 hover:bg-red-700 text-white font-bold py-2 px-4 rounded focus:outline-none focus:shadow-outline"
      type="button"
    >
      Submit
    </button>
  </div>
</form>
Conclusion
Creating a comment form with Tailwind CSS is easy and straightforward. By following the steps outlined in this article, you can create a user-friendly and visually appealing comment form in just 60 minutes. Tailwind CSS provides a set of pre-defined classes that you can use to style your HTML elements quickly. It also allows you to customize your design by creating your own utility classes. So, start creating your comment form with Tailwind CSS today!