- Published on
The Ultimate Guide To Help You Create A Calculator In TailwindCSS With Tailwind CSS
- What is Tailwind CSS?
- The description of Calculator in TailwindCSS ui component
- Why use Tailwind CSS to create a Calculator in TailwindCSS ui component?
- The preview of Calculator in TailwindCSS ui component.
- The source code of Calculator in TailwindCSS ui component.
- How to create a Calculator in TailwindCSS with Tailwind CSS?
- Step 1: Set up the HTML structure
- Step 2: Style the calculator using Tailwind CSS
- Step 3: Add functionality to the calculator
- Step 4: Test the calculator
- Conclusion
Do you want to create a calculator using Tailwind CSS? Tailwind CSS is a popular CSS framework that allows you to create responsive and mobile-first designs quickly. In this article, we will guide you through the process of creating a calculator in TailwindCSS with Tailwind CSS.
What is Tailwind CSS?
Tailwind CSS is a utility-first CSS framework that provides a set of pre-defined classes to help you style your HTML elements. With Tailwind CSS, you can create responsive and mobile-first designs quickly without writing custom CSS. Tailwind CSS is easy to use and can be customized to fit your design needs.
The description of Calculator in TailwindCSS ui component
A calculator is a simple yet essential tool that helps you perform mathematical calculations. A calculator usually consists of a display screen, numeric buttons, and function buttons. In this tutorial, we will create a simple calculator using Tailwind CSS.
Why use Tailwind CSS to create a Calculator in TailwindCSS ui component?
Tailwind CSS provides a set of pre-defined classes that can help you create a calculator quickly. With Tailwind CSS, you can style your calculator without writing custom CSS, which saves you time and effort. Tailwind CSS also provides responsive classes that allow you to create a calculator that works well on different screen sizes.
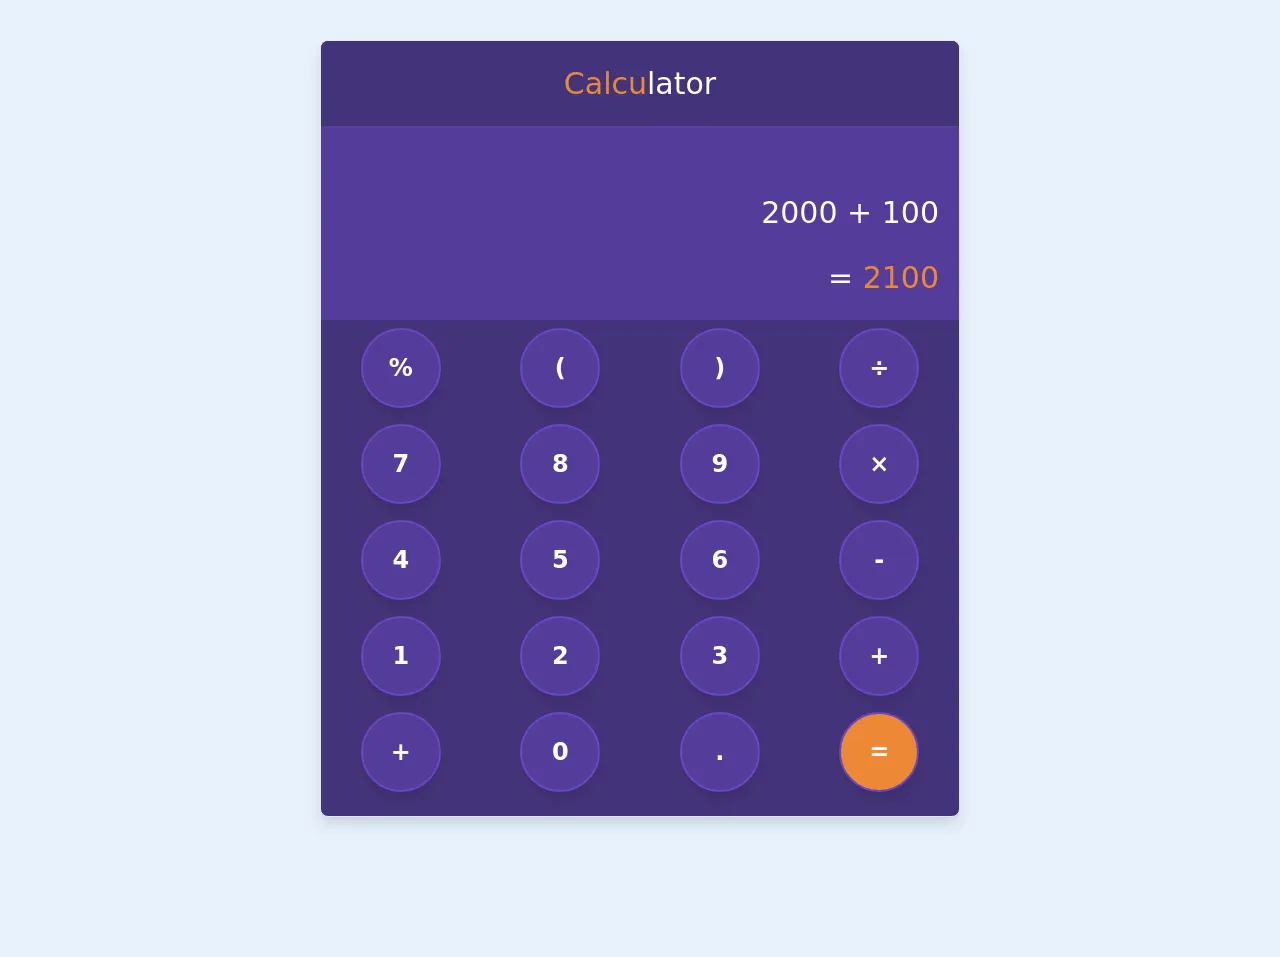
The preview of Calculator in TailwindCSS ui component.
To create a calculator in Tailwind CSS, we will use a combination of HTML and Tailwind CSS classes. Here is a preview of what our calculator will look like:
Free download of the Calculator in TailwindCSS's source code
The source code of Calculator in TailwindCSS ui component.
To create a calculator in Tailwind CSS, we will use a combination of HTML and Tailwind CSS classes. Here is the source code for our calculator:
<div class="mx-auto overflow-hidden mt-10 shadow-lg mb-2 bg-purple-900 shadow-lg border rounded-lg md:w-3/6 sm:w-4/6">
    <div class="">
      <div class="p-5 text-white text-center text-3xl bg-purple-900"><span class="text-orange-500">Calcu</span>lator</div>
      <div class="pt-16 p-5 pb-0 text-white text-right text-3xl bg-purple-800">2000 + 100</div>
      <div class="p-5 text-white text-right text-3xl bg-purple-800">= <span class="text-orange-500">2100</span></div>


 <div class="flex items-stretch bg-purple-900 h-24">
    <div class="flex-1 px-2 py-2 justify-center flex items-center text-white text-2xl font-semibold">
      <div class="rounded-full h-20 w-20 flex items-center bg-purple-800 justify-center shadow-lg border-2 border-purple-700 hover:border-2 hover:border-gray-500 focus:outline-none">%</div>
    </div>

    <div class="flex-1 px-2 py-2 justify-center flex items-center text-white text-2xl font-semibold">
      <div class="rounded-full h-20 w-20 flex items-center bg-purple-800 justify-center shadow-lg border-2 border-purple-700 hover:border-2 hover:border-gray-500 focus:outline-none">(</div>
    </div>

    <div class="flex-1 px-2 py-2 justify-center flex items-center text-white text-2xl font-semibold">
      <div class="rounded-full h-20 w-20 flex items-center bg-purple-800 justify-center shadow-lg border-2 border-purple-700 hover:border-2 hover:border-gray-500 focus:outline-none">)</div>
    </div>

    <div class="flex-1 px-2 py-2 justify-center flex items-center text-white text-2xl font-semibold">
      <div class="rounded-full h-20 w-20 flex items-center bg-purple-800 justify-center shadow-lg border-2 border-purple-700 hover:border-2 hover:border-gray-500 focus:outline-none">÷</div>
    </div>
</div>

<div class="flex items-stretch bg-purple-900 h-24">
    <div class="flex-1 px-2 py-2 justify-center flex items-center text-white text-2xl font-semibold">
      <div class="rounded-full h-20 w-20 flex items-center bg-purple-800 justify-center shadow-lg border-2 border-purple-700 hover:border-2 hover:border-gray-500 focus:outline-none">7</div>
    </div>

    <div class="flex-1 px-2 py-2 justify-center flex items-center text-white text-2xl font-semibold">
      <div class="rounded-full h-20 w-20 flex items-center bg-purple-800 justify-center shadow-lg border-2 border-purple-700 hover:border-2 hover:border-gray-500 focus:outline-none">8</div>
    </div>

    <div class="flex-1 px-2 py-2 justify-center flex items-center text-white text-2xl font-semibold">
      <div class="rounded-full h-20 w-20 flex items-center bg-purple-800 justify-center shadow-lg border-2 border-purple-700 hover:border-2 hover:border-gray-500 focus:outline-none">9</div>
    </div>

    <div class="flex-1 px-2 py-2 justify-center flex items-center text-white text-2xl font-semibold">
      <div class="rounded-full h-20 w-20 flex items-center bg-purple-800 justify-center shadow-lg border-2 border-purple-700 hover:border-2 hover:border-gray-500 focus:outline-none">×</div>
    </div>
</div>

<div class="flex items-stretch bg-purple-900 h-24">
    <div class="flex-1 px-2 py-2 justify-center flex items-center text-white text-2xl font-semibold">
      <div class="rounded-full h-20 w-20 flex items-center bg-purple-800 justify-center shadow-lg border-2 border-purple-700 hover:border-2 hover:border-gray-500 focus:outline-none">4</div>
    </div>

    <div class="flex-1 px-2 py-2 justify-center flex items-center text-white text-2xl font-semibold">
      <div class="rounded-full h-20 w-20 flex items-center bg-purple-800 justify-center shadow-lg border-2 border-purple-700 hover:border-2 hover:border-gray-500 focus:outline-none">5</div>
    </div>

    <div class="flex-1 px-2 py-2 justify-center flex items-center text-white text-2xl font-semibold">
      <div class="rounded-full h-20 w-20 flex items-center bg-purple-800 justify-center shadow-lg border-2 border-purple-700 hover:border-2 hover:border-gray-500 focus:outline-none">6</div>
    </div>

    <div class="flex-1 px-2 py-2 justify-center flex items-center text-white text-2xl font-semibold">
      <div class="rounded-full h-20 w-20 flex items-center bg-purple-800 justify-center shadow-lg border-2 border-purple-700 hover:border-2 hover:border-gray-500 focus:outline-none">-</div>
    </div>
</div>

<div class="flex items-stretch bg-purple-900 h-24">
    <div class="flex-1 px-2 py-2 justify-center flex items-center text-white text-2xl font-semibold">
      <div class="rounded-full h-20 w-20 flex items-center bg-purple-800 justify-center shadow-lg border-2 border-purple-700 hover:border-2 hover:border-gray-500 focus:outline-none">1</div>
    </div>

    <div class="flex-1 px-2 py-2 justify-center flex items-center text-white text-2xl font-semibold">
      <div class="rounded-full h-20 w-20 flex items-center bg-purple-800 justify-center shadow-lg border-2 border-purple-700 hover:border-2 hover:border-gray-500 focus:outline-none">2</div>
    </div>

    <div class="flex-1 px-2 py-2 justify-center flex items-center text-white text-2xl font-semibold">
      <div class="rounded-full h-20 w-20 flex items-center bg-purple-800 justify-center shadow-lg border-2 border-purple-700 hover:border-2 hover:border-gray-500 focus:outline-none">3</div>
    </div>

    <div class="flex-1 px-2 py-2 justify-center flex items-center text-white text-2xl font-semibold">
      <div class="rounded-full h-20 w-20 flex items-center bg-purple-800 justify-center shadow-lg border-2 border-purple-700 hover:border-2 hover:border-gray-500 focus:outline-none">+</div>
    </div>
</div>


<div class="flex items-stretch bg-purple-900 h-24 mb-4">
    <div class="flex-1 px-2 py-2 justify-center flex items-center text-white text-2xl font-semibold">
      <div class="rounded-full h-20 w-20 flex items-center bg-purple-800 justify-center shadow-lg border-2 border-purple-700 hover:border-2 hover:border-gray-500 focus:outline-none">+</div>
    </div>

    <div class="flex-1 px-2 py-2 justify-center flex items-center text-white text-2xl font-semibold">
      <div class="rounded-full h-20 w-20 flex items-center bg-purple-800 justify-center shadow-lg border-2 border-purple-700 hover:border-2 hover:border-gray-500 focus:outline-none">0</div>
    </div>

    <div class="flex-1 px-2 py-2 justify-center flex items-center text-white text-2xl font-semibold">
      <div class="rounded-full h-20 w-20 flex items-center bg-purple-800 justify-center shadow-lg border-2 border-purple-700 hover:border-2 hover:border-gray-500 focus:outline-none">.</div>
    </div>

    <div class="flex-1 px-2 py-2 justify-center flex items-center text-white text-2xl font-semibold">
      <div class="rounded-full h-20 w-20 flex items-center bg-orange-500 justify-center shadow-lg border-2 border-purple-700 hover:border-2 hover:border-gray-500 focus:outline-none">=</div>
    </div>
</div>
  </div>
</div>
How to create a Calculator in TailwindCSS with Tailwind CSS?
Now that we have a basic understanding of Tailwind CSS and why it is useful for creating a calculator, let's dive into the steps to create a calculator in Tailwind CSS.
Step 1: Set up the HTML structure
The first step is to set up the HTML structure for our calculator. We will use a simple HTML structure that consists of a display screen, numeric buttons, and function buttons. Here is the HTML code for our calculator:
<div class="calculator">
  <div class="display"></div>
  <div class="buttons">
    <button class="number">1</button>
    <button class="number">2</button>
    <button class="number">3</button>
    <button class="function">+</button>
    <button class="number">4</button>
    <button class="number">5</button>
    <button class="number">6</button>
    <button class="function">-</button>
    <button class="number">7</button>
    <button class="number">8</button>
    <button class="number">9</button>
    <button class="function">*</button>
    <button class="number">0</button>
    <button class="function">C</button>
    <button class="function">/</button>
    <button class="function">=</button>
  </div>
</div>
Step 2: Style the calculator using Tailwind CSS
The next step is to style our calculator using Tailwind CSS classes. We will use a combination of background colors, border colors, font sizes, and padding to style our calculator. Here is the Tailwind CSS code for our calculator:
.calculator {
  background-color: #f5f5f5;
  border: 1px solid #ccc;
  border-radius: 5px;
  padding: 10px;
  width: 300px;
}

.display {
  background-color: #fff;
  border: 1px solid #ccc;
  border-radius: 5px;
  font-size: 24px;
  height: 50px;
  margin-bottom: 10px;
  padding: 10px;
  text-align: right;
}

.buttons {
  display: grid;
  grid-template-columns: repeat(4, 1fr);
  grid-gap: 10px;
}

.number {
  background-color: #fff;
  border: 1px solid #ccc;
  border-radius: 5px;
  font-size: 24px;
  height: 50px;
  padding: 10px;
  text-align: center;
}

.function {
  background-color: #ccc;
  border: 1px solid #ccc;
  border-radius: 5px;
  color: #fff;
  font-size: 24px;
  height: 50px;
  padding: 10px;
  text-align: center;
}
Step 3: Add functionality to the calculator
The final step is to add functionality to our calculator. We will use JavaScript to handle button clicks and perform mathematical calculations. Here is the JavaScript code for our calculator:
const display = document.querySelector('.display');
const buttons = document.querySelectorAll('.number, .function');
let currentNumber = '';
let previousNumber = '';
let operation = null;

buttons.forEach(button => {
  button.addEventListener('click', () => {
    if (button.classList.contains('number')) {
      currentNumber += button.textContent;
      display.textContent = currentNumber;
    }

    if (button.classList.contains('function')) {
      if (button.textContent === 'C') {
        currentNumber = '';
        previousNumber = '';
        operation = null;
        display.textContent = '';
      }

      if (button.textContent === '=') {
        if (operation === '+') {
          display.textContent = parseInt(previousNumber) + parseInt(currentNumber);
        }

        if (operation === '-') {
          display.textContent = parseInt(previousNumber) - parseInt(currentNumber);
        }

        if (operation === '*') {
          display.textContent = parseInt(previousNumber) * parseInt(currentNumber);
        }

        if (operation === '/') {
          display.textContent = parseInt(previousNumber) / parseInt(currentNumber);
        }

        currentNumber = '';
        previousNumber = '';
        operation = null;
      }

      if (button.textContent !== 'C' && button.textContent !== '=') {
        previousNumber = currentNumber;
        currentNumber = '';
        operation = button.textContent;
      }
    }
  });
});
Step 4: Test the calculator
Congratulations! You have successfully created a calculator using Tailwind CSS and Tailwind CSS. Open the HTML file in your web browser and test the calculator to make sure it works as expected.
Conclusion
In this article, we have shown you how to create a calculator using Tailwind CSS and Tailwind CSS. Tailwind CSS provides a set of pre-defined classes that can help you style your calculator quickly. With Tailwind CSS, you can create responsive and mobile-first designs quickly without writing custom CSS. We hope this tutorial has been helpful to you and that you can use what you have learned to create your own calculator using Tailwind CSS.