- Published on
Ways To Create A Borderless List With Tailwind CSS In 60 Minutes
- What is Tailwind CSS?
- The description of Borderless list ui component
- Why use Tailwind CSS to create a Borderless list ui component?
- The preview of Borderless list ui component.
- The source code of Borderless list ui component.
- How to create a Borderless list with Tailwind CSS?
- Conclusion
What is Tailwind CSS?
Tailwind CSS is a utility-first CSS framework that allows developers to create custom designs without writing any CSS. It provides a wide range of pre-built classes that can be used to style HTML elements. With Tailwind CSS, developers can create responsive and mobile-first designs quickly and easily.
The description of Borderless list ui component
A borderless list is a UI component that displays a list of items without any borders or separators between them. This type of list is often used in modern web design to create a clean and minimalist look. A borderless list can be used to display a variety of content, such as navigation menus, product lists, and more.
Why use Tailwind CSS to create a Borderless list ui component?
Tailwind CSS provides a simple and efficient way to create a borderless list UI component. With its utility-first approach, developers can easily add and remove styles from their HTML elements without writing any custom CSS. This saves time and reduces the amount of code needed to create a borderless list.
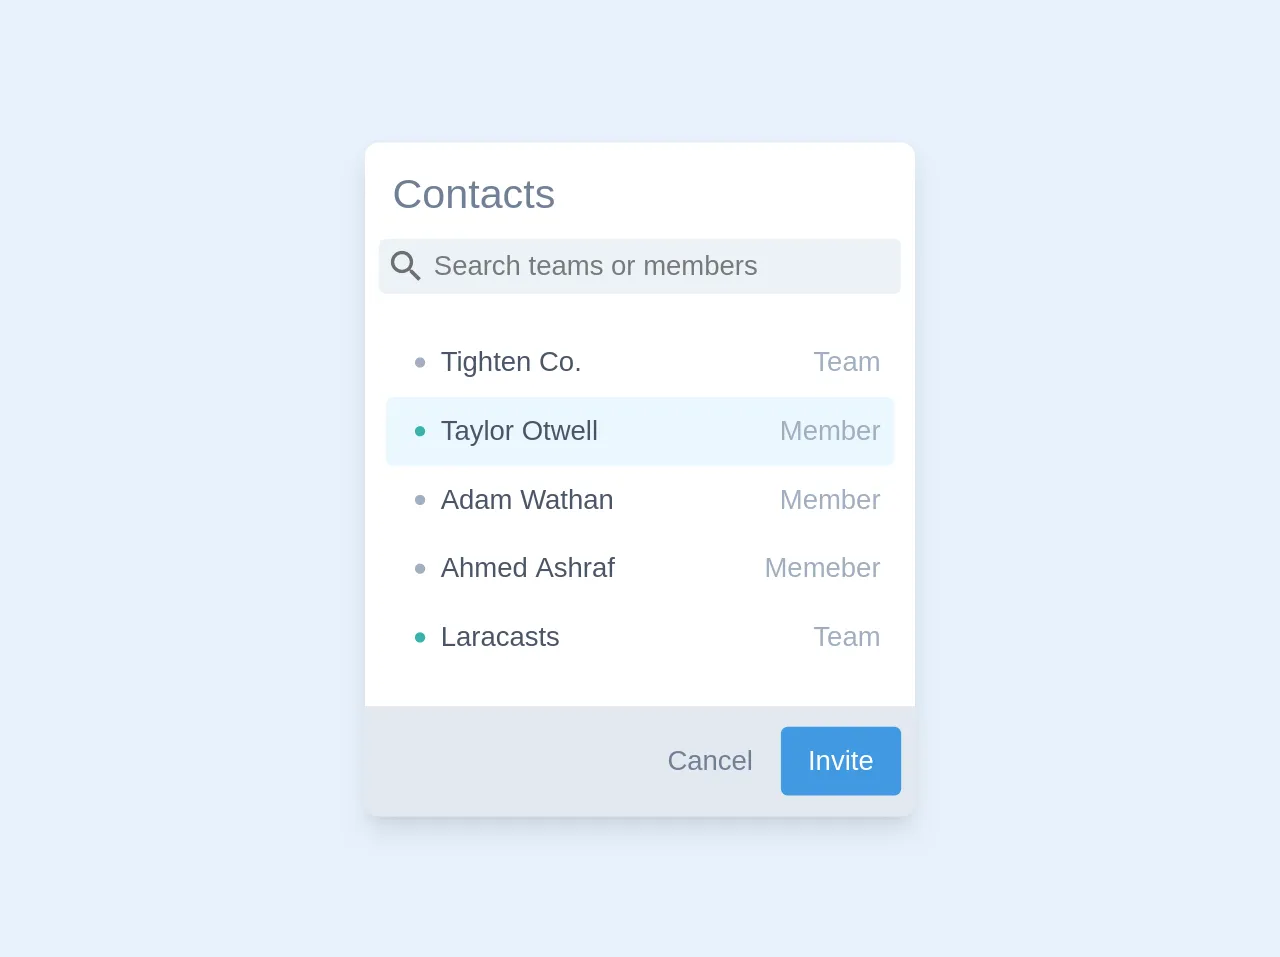
The preview of Borderless list ui component.
To create a borderless list UI component with Tailwind CSS, we will use the following HTML code:
<ul class="borderless-list">
  <li>Item 1</li>
  <li>Item 2</li>
  <li>Item 3</li>
</ul>
Free download of the Borderless list's source code
The source code of Borderless list ui component.
To create a borderless list UI component with Tailwind CSS, we will use the following CSS code:
.borderless-list {
  list-style: none;
  margin: 0;
  padding: 0;
}

.borderless-list li {
  padding: 0.5rem 0;
  border-bottom: 1px solid #e2e8f0;
}

.borderless-list li:last-child {
  border-bottom: none;
}
<div class="rounded-lg overflow-hidden shadow-lg bg-white min-h-64 lg:w-1/4 sm:w-1/2 md:w-1/3">
  <p class="px-2 text-gray-600 mb-2 text-2xl font-thin px-4 pt-3">Contacts</p>
  <div class="px-2">
    <svg class="absolute z-50 m-1 text-blue-400" width="24" height="24" viewBox="0 0 24 24" fill="currentColor"
         xmlns="http://www.w3.org/2000/svg">
      <path
            d="M14.71 14H15.5L20.49 19L19 20.49L14 15.5V14.71L13.73 14.43C12.59 15.41 11.11 16 9.5 16C5.90997 16 3 13.09 3 9.5C3 5.90997 5.90997 3 9.5 3C13.09 3 16 5.90997 16 9.5C16 11.11 15.41 12.59 14.43 13.73L14.71 14ZM5 9.5C5 11.99 7.01001 14 9.5 14C11.99 14 14 11.99 14 9.5C14 7.01001 11.99 5 9.5 5C7.01001 5 5 7.01001 5 9.5Z"
            fill="black" fill-opacity="0.54" />
    </svg>
    <input type="text" class="pl-8 p-1 bg-gray-200 w-full rounded relative" placeholder="Search teams or members">
  </div>
  <div class="py-5 px-3">
    <div class="flex justify-between px-2 py-2">
      <p class="flex text-gray-700">
        <svg class="w-2 text-gray-500 mx-2" viewBox="0 0 8 8" fill="currentColor">
          <circle cx="4" cy="4" r="3" />
        </svg>
        Tighten Co.
      </p>
      <p class="text-gray-500 font-thin">Team</p>
    </div>
    <div class="flex justify-between px-2 py-2 bg-blue-100 rounded">
      <p class="flex text-gray-700">
        <svg class="h2 w-2 text-teal-500 mx-2" viewBox="0 0 8 8" fill="currentColor">
          <circle cx="4" cy="4" r="3" />
        </svg>
        Taylor Otwell
      </p>
      <p class="text-gray-500 font-thin">Member</p>
    </div>
    <div class="flex justify-between px-2 py-2">
      <p class="flex text-gray-700">
        <svg class="h2 w-2 text-gray-500 mx-2" viewBox="0 0 8 8" fill="currentColor">
          <circle cx="4" cy="4" r="3" />
        </svg>
        Adam Wathan
      </p>
      <p class="text-gray-500 font-thin">Member</p>
    </div>
    <div class="flex justify-between px-2 py-2">
      <p class="flex text-gray-700">
        <svg class="h2 w-2 text-gray-500 mx-2" viewBox="0 0 8 8" fill="currentColor">
          <circle cx="4" cy="4" r="3" />
        </svg>
        Ahmed Ashraf
      </p>
      <p class="text-gray-500 font-thin">Member</p>
    </div>
    <div class="flex justify-between px-2 py-2">
      <p class="flex text-gray-700">
        <svg class="h2 w-2 text-teal-500 mx-2" viewBox="0 0 8 8" fill="currentColor">
          <circle cx="4" cy="4" r="3" />
        </svg>
        Laracasts
      </p>
      <p class="text-gray-500 font-thin">Team</p>
    </div>
  </div>
  <div class="bg-gray-300 flex flex-row-reverse px-2 py-3">
    <button class="bg-blue-500 py-2 px-4 rounded text-white">Invite</button>
    <button class="py-2 px-4 rounded text-gray-600">Cancel</button>
  </div>
</div>
How to create a Borderless list with Tailwind CSS?
To create a borderless list with Tailwind CSS, follow these steps:
- Create an unordered list (
<ul>) element in your HTML code. - Add the
borderless-listclass to the<ul>element. - Add list items (
<li>) to the<ul>element. - Apply the following styles to the
borderless-listclass:
borderless-list {
  list-style: none;
  margin: 0;
  padding: 0;
}
This will remove the default bullet points and margins from the list.
- Apply the following styles to the
borderless-list liselector:
.borderless-list li {
  padding: 0.5rem 0;
  border-bottom: 1px solid #e2e8f0;
}
This will add padding to the list items and a border to the bottom of each item.
- Apply the following styles to the
borderless-list li:last-childselector:
.borderless-list li:last-child {
  border-bottom: none;
}
This will remove the border from the last list item.
- Save your changes and preview the borderless list UI component.
Conclusion
Creating a borderless list UI component with Tailwind CSS is a quick and easy process that can be completed in just 60 minutes. By using Tailwind CSS, developers can save time and reduce the amount of custom CSS needed to create a borderless list. With its utility-first approach, Tailwind CSS provides a flexible and efficient way to create custom designs for modern web applications.