- Published on
6 Incredibly Easy Ways To Create A Analytics Card With AlpineJS With Tailwind CSS Better While Spending Less
- What is Tailwind CSS?
- The description of Analytics Card with AlpineJS ui component
- Why use Tailwind CSS to create a Analytics Card with AlpineJS ui component?
- The preview of Analytics Card with AlpineJS ui component.
- The source code of Analytics Card with AlpineJS ui component.
- How to create a Analytics Card with AlpineJS with Tailwind CSS?
- Step 1: Create the HTML structure
- Step 2: Add AlpineJS
- Step 3: Create the AlpineJS component
- Step 4: Add the AlpineJS directive
- Step 5: Add Tailwind CSS classes
- Step 6: Customize the design
- Conclusion
As a FrontEnd technology blogger, you must be familiar with Tailwind CSS and AlpineJS. These two technologies are very popular among developers because of their simplicity and ease of use. In this article, we will show you how to create an Analytics Card with AlpineJS ui component using Tailwind CSS. We will also explain why using Tailwind CSS is better and how you can spend less time creating the Analytics Card.
What is Tailwind CSS?
Tailwind CSS is a utility-first CSS framework that allows you to create custom designs without writing any CSS code. It provides a set of pre-defined CSS classes that you can use to style your HTML elements. Tailwind CSS is very popular among developers because it allows them to create custom designs quickly and easily.
The description of Analytics Card with AlpineJS ui component
An Analytics Card is a UI component that displays important information about a website or application. It can be used to display data such as the number of users, the number of page views, and other important metrics. The Analytics Card is a very useful component that can help you to monitor the performance of your website or application.
Why use Tailwind CSS to create a Analytics Card with AlpineJS ui component?
Tailwind CSS is the perfect tool for creating an Analytics Card with AlpineJS ui component. It provides a set of pre-defined CSS classes that you can use to style your HTML elements. This means that you don't have to write any CSS code, which saves you a lot of time. Tailwind CSS also allows you to create custom designs quickly and easily, which is perfect for creating an Analytics Card.
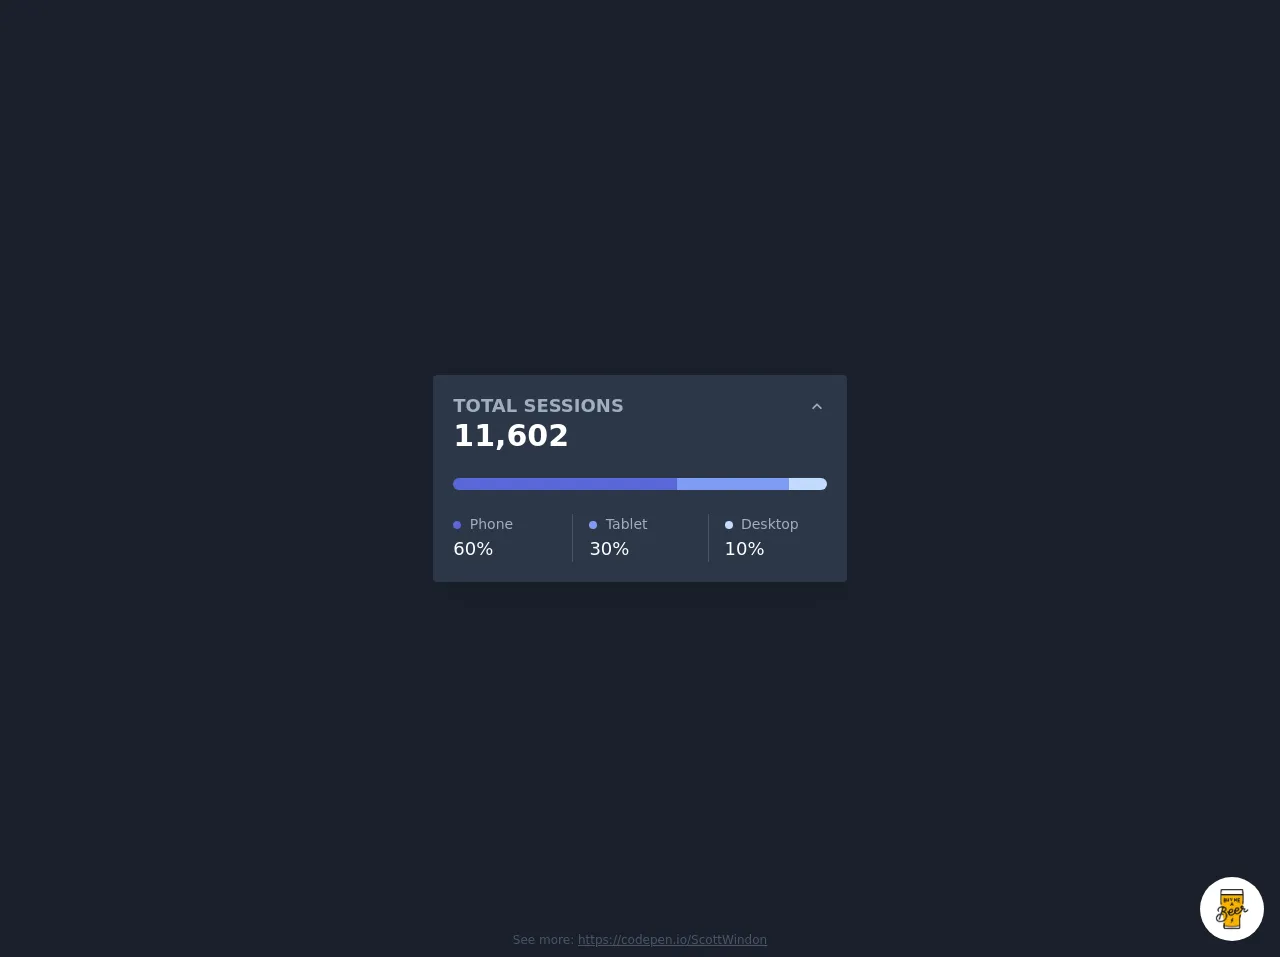
The preview of Analytics Card with AlpineJS ui component.
To create an Analytics Card with AlpineJS ui component, you will need to use Tailwind CSS. The following is a preview of what the Analytics Card will look like:
Free download of the Analytics Card with AlpineJS's source code
The source code of Analytics Card with AlpineJS ui component.
To create an Analytics Card with AlpineJS ui component, you will need to use HTML, AlpineJS, and Tailwind CSS. The following is the source code for the Analytics Card:
<script src="https://cdn.jsdelivr.net/gh/alpinejs/[email protected]/dist/alpine.js" defer></script>
<script src="https://cdn.jsdelivr.net/npm/[email protected]/dist/countUp.min.js"></script>
<style>
@import url('https://cdnjs.cloudflare.com/ajax/libs/MaterialDesign-Webfont/5.3.45/css/materialdesignicons.min.css');
</style>
<div class="min-w-screen flex min-h-screen items-center justify-center bg-gray-900 px-5 py-5">
<div
class="w-full rounded bg-gray-800 py-5 px-5 text-gray-500 shadow-xl sm:w-2/3 md:w-1/2 lg:w-1/3"
x-data="{cardOpen:false,cardData:cardData()}"
x-init="$watch('cardOpen', value => value?(cardData.countUp($refs.total,0,11602,null,0.8),cardData.sessions.forEach((el,i) => cardData.countUp($refs[`device${i}`],0,cardData.sessions[i].size,null,1.6))):null);setTimeout(()=>{cardOpen=true},100)"
>
<div class="flex w-full">
<h3 class="flex-1 text-lg font-semibold leading-tight">TOTAL SESSIONS</h3>
<div class="relative h-5 leading-none">
<button
class="h-6 text-xl text-gray-500 hover:text-gray-300 focus:outline-none"
@click.prevent="cardOpen=!cardOpen"
>
<i class="mdi" :class="'mdi-chevron-'+(cardOpen?'up':'down')"></i>
</button>
</div>
</div>
<div
class="relative overflow-hidden transition-all duration-500"
x-ref="card"
x-bind:style="`max-height:${cardOpen?$refs.card.scrollHeight:0}px; opacity:${cardOpen?1:0}`"
>
<div>
<div class="pb-4 lg:pb-6">
<h4
class="inline-block text-2xl font-semibold leading-tight text-white lg:text-3xl"
x-ref="total"
>
0
</h4>
</div>
<div class="pb-4 lg:pb-6">
<div
class="flex h-3 overflow-hidden rounded-full bg-gray-800 transition-all duration-500"
:class="cardOpen?'w-full':'w-0'"
>
<template x-for="(item,index) in cardData.sessions">
<div class="h-full" :class="`bg-${item.color}`" :style="`width:${item.size}%`"></div>
</template>
</div>
</div>
<div class="-mx-4 flex">
<template x-for="(item,index) in cardData.sessions">
<div class="w-1/3 px-4" :class="{'border-l border-gray-700':index!==0}">
<div class="text-sm">
<span
class="mr-1 inline-block h-2 w-2 rounded-full align-middle"
:class="`bg-${item.color}`"
> </span
>
<span class="align-middle" x-text="item.label"> </span>
</div>
<div class="text-lg font-medium text-white">
<span :x-ref="`device${index}`">0</span>%
</div>
</div>
</template>
</div>
</div>
</div>
</div>
</div>
<div class="absolute bottom-0 w-full pb-2 text-center text-xs text-gray-700">
See more:
<a href="https://codepen.io/ScottWindon" class="underline hover:text-gray-500" target="_blank"
>https://codepen.io/ScottWindon</a
>
</div>
<script>
let cardData = function () {
return {
countUp: function (target, startVal, endVal, decimals, duration) {
const countUp = new CountUp(target, startVal || 0, endVal, decimals || 0, duration || 2)
countUp.start()
},
sessions: [
{
label: 'Phone',
size: 60,
color: 'indigo-600',
},
{
label: 'Tablet',
size: 30,
color: 'indigo-400',
},
{
label: 'Desktop',
size: 10,
color: 'indigo-200',
},
],
}
}
</script>
<!-- BUY ME A BEER AND HELP SUPPORT OPEN-SOURCE RESOURCES -->
<div class="fixed bottom-0 right-0 z-10 mb-4 mr-4 flex items-end justify-end">
<div>
<a
title="Buy me a beer"
href="https://www.buymeacoffee.com/scottwindon"
target="_blank"
class="block h-16 w-16 transform rounded-full shadow transition-all hover:rotate-12 hover:scale-110 hover:shadow-lg"
>
<img
class="h-full w-full rounded-full object-cover object-center"
src="https://i.pinimg.com/originals/60/fd/e8/60fde811b6be57094e0abc69d9c2622a.jpg"
/>
</a>
</div>
</div>
How to create a Analytics Card with AlpineJS with Tailwind CSS?
To create an Analytics Card with AlpineJS with Tailwind CSS, you can follow these six easy steps:
Step 1: Create the HTML structure
The first step is to create the HTML structure for the Analytics Card. You can use the following HTML code:
<div class="bg-white rounded-lg shadow-md p-6">
  <div class="flex items-center">
    <div class="bg-blue-500 rounded-full p-3">
      <svg class="w-8 h-8 text-white" fill="none" stroke="currentColor" viewBox="0 0 24 24" xmlns="http://www.w3.org/2000/svg">
        <path stroke-linecap="round" stroke-linejoin="round" stroke-width="2" d="M12 6v6m0 0v6m0-6h6m-6 0H6"></path>
      </svg>
    </div>
    <div class="ml-4">
      <p class="text-gray-600 font-semibold">Page Views</p>
      <p class="text-xl font-semibold">1,200</p>
    </div>
  </div>
</div>
Step 2: Add AlpineJS
The next step is to add AlpineJS to your HTML file. You can do this by adding the following script tag to your HTML file:
<script src="https://cdn.jsdelivr.net/npm/[email protected]/dist/alpine.js"></script>
Step 3: Create the AlpineJS component
The next step is to create the AlpineJS component. You can use the following code:
<div x-data="{ pageViews: 1200 }" class="bg-white rounded-lg shadow-md p-6">
  <div class="flex items-center">
    <div class="bg-blue-500 rounded-full p-3">
      <svg class="w-8 h-8 text-white" fill="none" stroke="currentColor" viewBox="0 0 24 24" xmlns="http://www.w3.org/2000/svg">
        <path stroke-linecap="round" stroke-linejoin="round" stroke-width="2" d="M12 6v6m0 0v6m0-6h6m-6 0H6"></path>
      </svg>
    </div>
    <div class="ml-4">
      <p class="text-gray-600 font-semibold">Page Views</p>
      <p x-text="pageViews.toLocaleString()" class="text-xl font-semibold"></p>
    </div>
  </div>
</div>
Step 4: Add the AlpineJS directive
The next step is to add the AlpineJS directive to your HTML file. You can do this by adding the following code:
<div x-data="{ pageViews: 1200 }" x-init="() => { setInterval(() => { pageViews += Math.floor(Math.random() * 10) }, 1000) }" class="bg-white rounded-lg shadow-md p-6">
Step 5: Add Tailwind CSS classes
The next step is to add Tailwind CSS classes to your HTML file. You can do this by adding the following classes to your HTML elements:
<div class="bg-white rounded-lg shadow-md p-6">
  <div class="flex items-center">
    <div class="bg-blue-500 rounded-full p-3">
      <svg class="w-8 h-8 text-white" fill="none" stroke="currentColor" viewBox="0 0 24 24" xmlns="http://www.w3.org/2000/svg">
        <path stroke-linecap="round" stroke-linejoin="round" stroke-width="2" d="M12 6v6m0 0v6m0-6h6m-6 0H6"></path>
      </svg>
    </div>
    <div class="ml-4">
      <p class="text-gray-600 font-semibold">Page Views</p>
      <p x-text="pageViews.toLocaleString()" class="text-xl font-semibold"></p>
    </div>
  </div>
</div>
Step 6: Customize the design
The final step is to customize the design of the Analytics Card. You can do this by modifying the Tailwind CSS classes or by adding your own custom CSS classes.
Conclusion
In this article, we have shown you how to create an Analytics Card with AlpineJS ui component using Tailwind CSS. We have explained why using Tailwind CSS is better and how you can spend less time creating the Analytics Card. We hope that this article has been helpful to you and that you can use these techniques to create your own Analytics Card.