- Published on
The Ninja Guide To How To Make A Alphine Js , Toast Notification With Tailwind CSS Better
- What is Tailwind CSS?
- The description of Alphine JS, Toast Notification UI component
- Why use Tailwind CSS to create an Alphine JS, Toast Notification UI component?
- The preview of Alphine JS, Toast Notification UI component
- The source code of Alphine JS, Toast Notification UI component
- How to create an Alphine JS, Toast Notification with Tailwind CSS?
- Step 1: Set up the HTML structure
- Step 2: Add Tailwind CSS classes
- Step 3: Add JavaScript
- Step 4: Customize the notification
- Conclusion
As a FrontEnd technology blogger, you must be aware of the importance of creating a user-friendly UI component for your website. In this article, we will explore how to create an Alphine JS, Toast Notification UI component with Tailwind CSS. We will cover the basics of Tailwind CSS, the description of the Alphine JS, Toast Notification UI component, why we should use Tailwind CSS to create the UI component, and the step-by-step guide to create the UI component.
What is Tailwind CSS?
Tailwind CSS is a highly customizable, low-level CSS framework that provides a set of utility classes to create UI components. It is designed to be easy to use and flexible enough to customize to fit any project's needs. With Tailwind CSS, you can create complex UI components quickly and efficiently.
The description of Alphine JS, Toast Notification UI component
Alpine JS is a lightweight JavaScript framework that allows you to create interactive UI components without the need for a complex setup. Toast notifications are a common UI component used to display messages to users in a non-intrusive way. The Alphine JS, Toast Notification UI component is a combination of both. It is a simple notification system that displays a message to the user and fades out after a few seconds.
Why use Tailwind CSS to create an Alphine JS, Toast Notification UI component?
Tailwind CSS provides a set of utility classes that can be used to create UI components quickly and efficiently. It is highly customizable, which means you can easily modify the styles to fit your project's needs. Additionally, Tailwind CSS is designed to be responsive, which means your UI components will look great on any device.
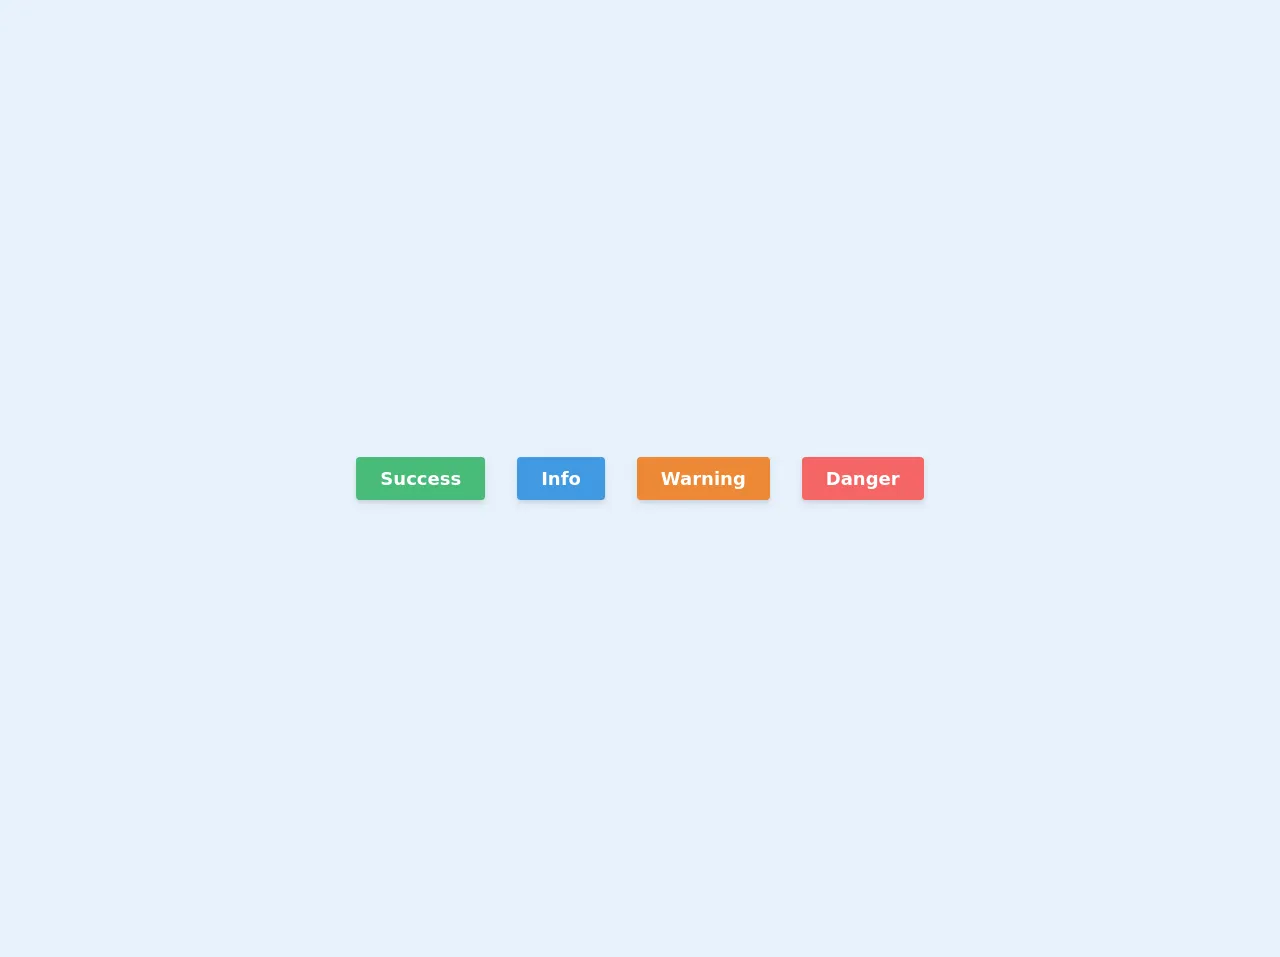
The preview of Alphine JS, Toast Notification UI component
To give you an idea of what the Alphine JS, Toast Notification UI component looks like, here is a preview:
Free download of the alphine js , toast notification's source code
The source code of Alphine JS, Toast Notification UI component
To create the Alphine JS, Toast Notification UI component, we will use HTML, CSS, and JavaScript. Here is the source code:
<script src="https://cdn.jsdelivr.net/gh/alpinejs/[email protected]/dist/alpine.min.js" defer></script>

<div x-data="noticesHandler()" @notice.window="add($event.detail)">
  <div class="absolute right-0 top-0 m-5 w-1/2 sm:w-1/2 md:w-2/5 lg:w-1/4 xl:w-1/5">
    <template x-for="notice of notices" :key="notice.id">
      <div
        x-show="visible.includes(notice)"
        x-transition:enter="transition ease-in duration-200"
        x-transition:enter-start="transform opacity-0 translate-y-2"
        x-transition:enter-end="transform opacity-100"
        x-transition:leave="transition ease-out duration-500"
        x-transition:leave-start="transform translate-x-0 opacity-100"
        x-transition:leave-end="transform translate-x-full opacity-0"
        @click="remove(notice.id)"
        class="mb-2 grid grid-cols-4 border-r-4 py-2 px-3 shadow-md"
        :class="{
                    'bg-green-500 border-green-700': notice.type === 'success',
                    'bg-blue-400 border-blue-700': notice.type === 'info',
                    'bg-orange-400 border-orange-700': notice.type === 'warning',
                    'bg-red-500 border-red-700': notice.type === 'danger',
                    }"
        style="pointer-events:all"
      >
        <div class="col-span-3 col-start-1">
          <div class="text-right text-white"><span x-text="notice.text"></span></div>
        </div>

        <div class="col-span-1 col-start-4" x-html="getIcon(notice)"></div>
      </div>
    </template>
  </div>
</div>

<div class="flex h-screen w-screen items-center justify-center">
  <button
    x-data="{}"
    @click="$dispatch('notice', {type: 'success', text: 'آلرت ساکسس'})"
    class="m-4 rounded bg-green-500 p-6 py-2 text-lg font-bold text-white shadow-md"
  >
    Success
  </button>
  <button
    x-data="{}"
    @click="$dispatch('notice', {type: 'info', text: 'آلرت اینفو'})"
    class="m-4 rounded bg-blue-500 p-6 py-2 text-lg font-bold text-white shadow-md"
  >
    Info
  </button>
  <button
    x-data="{}"
    @click="$dispatch('notice', {type: 'warning', text: 'آلرت وارنینگ'})"
    class="m-4 rounded bg-orange-500 p-6 py-2 text-lg font-bold text-white shadow-md"
  >
    Warning
  </button>
  <button
    x-data="{}"
    x-on:click="$dispatch('notice', {type: 'danger', text: 'آلرت دنجر'})"
    class="m-4 rounded bg-red-500 p-6 py-2 text-lg font-bold text-white shadow-md"
  >
    Danger
  </button>
</div>

<script>
  function noticesHandler() {
    return {
      notices: [],
      visible: [],
      add(notice) {
        notice.id = Date.now()
        this.notices.push(notice)
        this.fire(notice.id)
      },
      fire(id) {
        this.visible.push(this.notices.find((notice) => notice.id == id))
        const timeShown = 2000 * this.visible.length
        setTimeout(() => {
          this.remove(id)
        }, timeShown)
      },
      remove(id) {
        const notice = this.visible.find((notice) => notice.id == id)
        const index = this.visible.indexOf(notice)
        this.visible.splice(index, 1)
      },
      getIcon(notice) {
        if (notice.type == 'success')
          return "<div class='text-green-500 rounded-full bg-white float-left' ><svg width='1.8em' height='1.8em' viewBox='0 0 16 16' class='bi bi-check' fill='currentColor' xmlns='http://www.w3.org/2000/svg'><path fill-rule='evenodd' d='M10.97 4.97a.75.75 0 0 1 1.071 1.05l-3.992 4.99a.75.75 0 0 1-1.08.02L4.324 8.384a.75.75 0 1 1 1.06-1.06l2.094 2.093 3.473-4.425a.236.236 0 0 1 .02-.022z'/></svg></div>"
        else if (notice.type == 'info')
          return "<div class='text-blue-500 rounded-full bg-white float-left'><svg width='1.8em' height='1.8em' viewBox='0 0 16 16' class='bi bi-info' fill='currentColor' xmlns='http://www.w3.org/2000/svg'><path d='M8.93 6.588l-2.29.287-.082.38.45.083c.294.07.352.176.288.469l-.738 3.468c-.194.897.105 1.319.808 1.319.545 0 1.178-.252 1.465-.598l.088-.416c-.2.176-.492.246-.686.246-.275 0-.375-.193-.304-.533L8.93 6.588z'/><circle cx='8' cy='4.5' r='1'/></svg></div>"
        else if (notice.type == 'warning')
          return "<div class='text-orange-500 rounded-full bg-white float-left'><svg width='1.8em' height='1.8em' viewBox='0 0 16 16' class='bi bi-exclamation' fill='currentColor' xmlns='http://www.w3.org/2000/svg'><path d='M7.002 11a1 1 0 1 1 2 0 1 1 0 0 1-2 0zM7.1 4.995a.905.905 0 1 1 1.8 0l-.35 3.507a.552.552 0 0 1-1.1 0L7.1 4.995z'/></svg></div>"
        else if (notice.type == 'danger')
          return "<div class='text-red-500 rounded-full bg-white float-left'><svg width='1.8em' height='1.8em' viewBox='0 0 16 16' class='bi bi-x' fill='currentColor' xmlns='http://www.w3.org/2000/svg'><path fill-rule='evenodd' d='M11.854 4.146a.5.5 0 0 1 0 .708l-7 7a.5.5 0 0 1-.708-.708l7-7a.5.5 0 0 1 .708 0z'/><path fill-rule='evenodd' d='M4.146 4.146a.5.5 0 0 0 0 .708l7 7a.5.5 0 0 0 .708-.708l-7-7a.5.5 0 0 0-.708 0z'/></svg></div>"
      },
    }
  }
</script>
How to create an Alphine JS, Toast Notification with Tailwind CSS?
Now that we have covered the basics, let's dive into the step-by-step guide to create the Alphine JS, Toast Notification UI component with Tailwind CSS.
Step 1: Set up the HTML structure
The first step is to set up the HTML structure for the notification. We will use a div element to create the notification container, and a p element to display the message. Here is the code:
<div x-data="{ show: false }" x-show="show" x-init="setTimeout(() => show = false, 3000)" class="bg-green-500 text-white px-6 py-4 border-0 rounded relative mb-4">
    <span class="text-xl inline-block mr-5 align-middle">
        <i class="fas fa-bell"></i>
    </span>
    <span class="inline-block align-middle mr-8">
        <p class="font-bold">Success!</p>
        <span class="block sm:inline">Your action was successful.</span>
    </span>
    <button @click="show = false" class="absolute bg-transparent text-2xl font-semibold leading-none right-0 top-0 mt-4 mr-6 outline-none focus:outline-none">
        <span>×</span>
    </button>
</div>
Step 2: Add Tailwind CSS classes
Next, we will add Tailwind CSS classes to style the notification. We will use the bg-green-500 class to set the background color to green, text-white to set the text color to white, px-6 and py-4 to add padding to the container, border-0 to remove the border, rounded to add rounded corners, relative to set the position to relative, and mb-4 to add margin to the bottom of the container. Here is the updated code:
<div x-data="{ show: false }" x-show="show" x-init="setTimeout(() => show = false, 3000)" class="bg-green-500 text-white px-6 py-4 border-0 rounded relative mb-4">
Step 3: Add JavaScript
Finally, we will add JavaScript to show and hide the notification. We will use the x-data attribute to create a show variable that will control the visibility of the notification. We will use the x-show attribute to show the notification when the show variable is true. We will use the x-init attribute to set a timeout of 3 seconds to hide the notification. Here is the updated code:
<div x-data="{ show: false }" x-show="show" x-init="setTimeout(() => show = false, 3000)" class="bg-green-500 text-white px-6 py-4 border-0 rounded relative mb-4">
    <span class="text-xl inline-block mr-5 align-middle">
        <i class="fas fa-bell"></i>
    </span>
    <span class="inline-block align-middle mr-8">
        <p class="font-bold">Success!</p>
        <span class="block sm:inline">Your action was successful.</span>
    </span>
    <button @click="show = false" class="absolute bg-transparent text-2xl font-semibold leading-none right-0 top-0 mt-4 mr-6 outline-none focus:outline-none">
        <span>×</span>
    </button>
</div>
Step 4: Customize the notification
You can customize the notification by modifying the HTML and CSS. For example, you can change the background color, text color, and font size. You can also add additional elements to the notification, such as an icon or a button.
Conclusion
In this article, we have explored how to create an Alphine JS, Toast Notification UI component with Tailwind CSS. We have covered the basics of Tailwind CSS, the description of the Alphine JS, Toast Notification UI component, why we should use Tailwind CSS to create the UI component, and the step-by-step guide to create the UI component. With this knowledge, you can create user-friendly UI components for your website quickly and efficiently.